
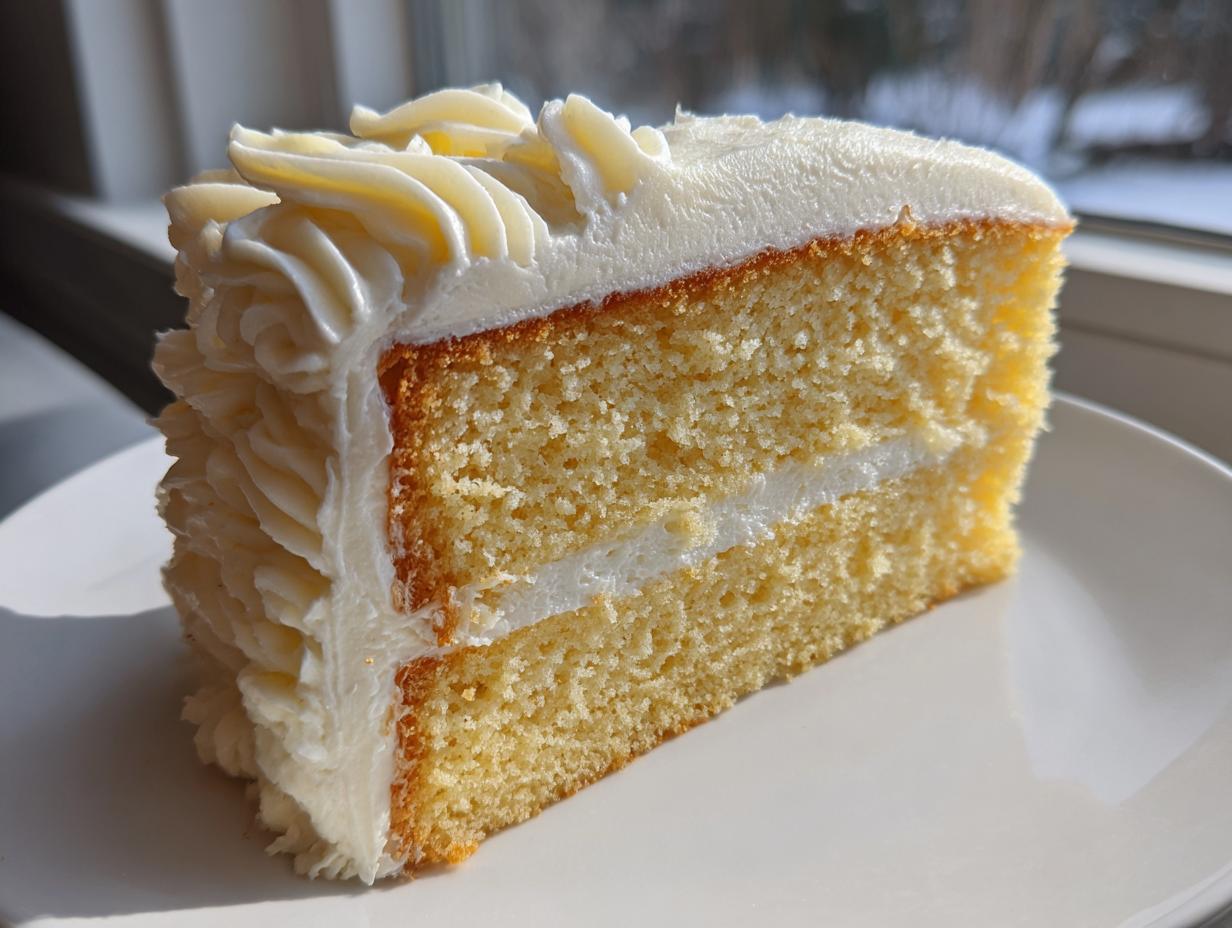
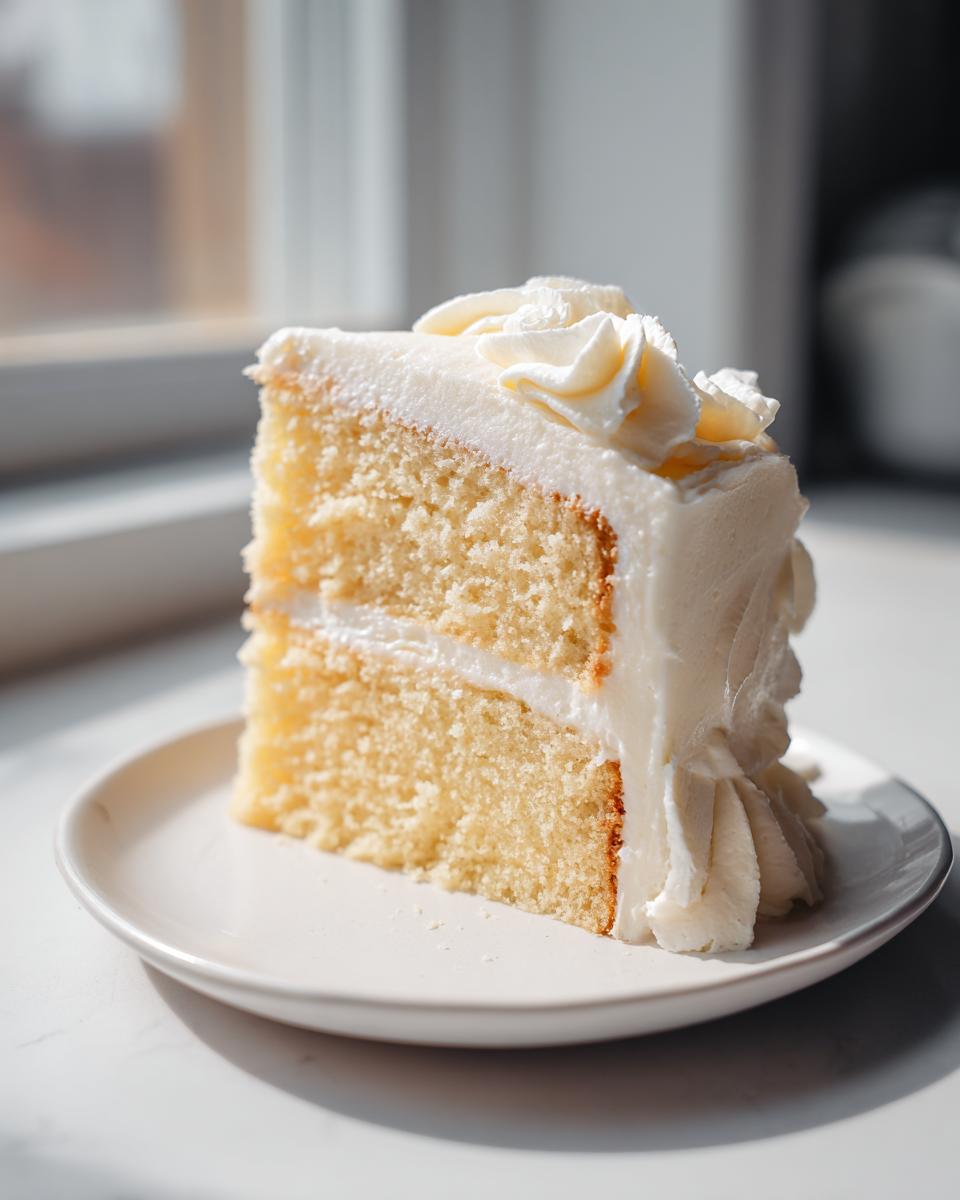
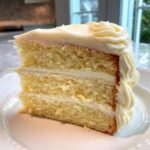
If you’re looking for that show-stopping, special occasion dessert that never fails to get compliments, stop scrolling right now. Forget those dry disappointments! I’m handing over my absolute favorite vanilla cake recipe: the Moist Classic Vanilla Layer Cake with Silky Vanilla Buttercream. This is the homemade vanilla cake that I developed right here in my kitchen, following the Devour Dish philosophy that truly memorable meals should be simple and made with genuine care. You get layers that stay soft and fluffy for days, topped with the creamiest frosting you can imagine. It’s truly a beginner-friendly cake that delivers professional results every single time. It’s exactly what I learned to cherish growing up, something I share more about on my About page.
- Why This Moist Vanilla Cake Recipe is Your New Go-To
- Ingredients for the Moist Classic Vanilla Layer Cake Recipe
- Ingredients for the Silky Vanilla Buttercream Frosting
- How to Prepare Your Easy Vanilla Cake Recipe
- Crafting the Silky Vanilla Buttercream Frosting
- Assembling Your Classic Birthday Cake Vanilla
- Tips for the Best Vanilla Cake Recipe Success
- Storing and Serving Your Tender Vanilla Cake
- Frequently Asked Questions About This Vanilla Cake Recipe
- Estimated Nutritional Data for This Vanilla Cake Recipe
- Share Your Homemade Vanilla Cake Creations
Why This Moist Vanilla Cake Recipe is Your New Go-To
Honestly, I bake this cake more than any other, and it’s because it checks every single box you could possibly have for a perfect dessert. This isn’t just another recipe; it’s my reliable Tender Vanilla Cake that I trust for birthdays and last-minute guests. It delivers unbeatable moisture along with that airy, fluffy texture we all chase.
Achieving Ultimate Fluffiness and Tenderness
The secret weapon here, besides using everything at room temperature—and please, listen to me—is the sour cream. It seriously guarantees that incredibly soft crumb structure. It reacts with the baking powder just right, making this a true Fluffy Vanilla Layer Cake that won’t collapse on you. That little bit of acid helps tenderize the flour, trust me!
The Easy Vanilla Cake Method
You don’t need fancy equipment or three days to complete this project. This is designed to be a Beginner Friendly Cake Recipe. We’re using a straightforward creaming method that gets you a beautiful Vanilla Cake from Scratch without any intimidating extra steps. It’s fast, but it tastes like you spent all day fussing over it, which is the best kind of baking, right?
Ingredients for the Moist Classic Vanilla Layer Cake Recipe
Gathering your ingredients is the first fun part! For this Moist Vanilla Cake Recipe, you want to make sure your butter, eggs, and milk are all sitting out softening up. Using room temperature items makes such a difference in how the batter comes together. Here’s what you’ll need for those two beautiful layers:
- 1 3/4 cups all-purpose flour
- 1 3/4 cups granulated sugar
- 1 tablespoon baking powder
- 1/2 teaspoon salt
- 1/2 cup unsalted butter, softened
- 2 large eggs
- 1 cup whole milk
- 2 teaspoons pure vanilla extract
- 1/2 cup sour cream (this is key for moisture!)
Ingredients for the Silky Vanilla Buttercream Frosting
Okay, now for the fluffy cloud that goes on top—the Vanilla Buttercream Frosting! This is what takes the cake from great to truly spectacular, and it’s so easy to get that silky perfection. Make sure your butter is truly soft, but not melted, and I cannot stress this enough: sift that powdered sugar! It’s the only way to avoid those tiny, sneaky lumps, which ruin the smooth finish we’re going for. If you love silky sauces, you should definitely check out my recipe for easy silky homemade chocolate sauce for another texture win!
- 1 cup unsalted butter, softened (for frosting)
- 4 cups powdered sugar, sifted (seriously, sift it!)
- 1 teaspoon pure vanilla extract
- 1/4 cup heavy cream or milk
- Pinch of salt
How to Prepare Your Easy Vanilla Cake Recipe
Alright, let’s get this vanilla cake recipe into the oven! First things first, get your oven warming up to 350°F (175°C). I remember the absolute first time I tried this recipe—I rushed the preheat, and the edges baked funny! Don’t be like me; give it the full five minutes to heat up properly. Grease and flour those two 8-inch pans, or line them with parchment circles if you’re nervous about sticking. I love using parchment for peace of mind, just like I do when tackling my artisan bread.
Mixing the Fluffy Vanilla Layer Cake Batter
We start with our dry team: whisk the flour, sugar, baking powder, and salt together in a big bowl. Then, we make a well and drop in the soft butter, eggs, milk, and vanilla. Mix this on medium speed for exactly two minutes until it looks perfectly smooth—it binds everything up beautifully. The very last thing you do is gently fold in that glorious sour cream. Stop mixing right when it disappears! If you overmix after that, you’ll lose all that tender fluffiness we worked so hard for.
Baking and Cooling the Vanilla Cake from Scratch
Divide that perfect batter evenly between your pans and pop them in the preheated oven for about 30 to 35 minutes. Start checking around the 30-minute mark—stick a toothpick in the center. If it comes out clean, you’re golden! If it has wet batter, give it five more minutes. It’s so important to let them cool in the pan for about ten minutes before turning them out onto a wire rack to get completely cold. Trust me, frosting a warm cake is asking for a meltdown drama that you do not need! For more tips on making sure your layer cake turns out perfectly, I always refer back to trusted sources like this one for reference.
Crafting the Silky Vanilla Buttercream Frosting
Now we pivot to the real star—the frosting! This recipe gives you that creamy/silky vanilla buttercream frosting that you see in bakeries, and it’s honestly addicting. You need your butter nice and soft again, then beat it until it’s totally smooth and light.
Next, we tackle the powdered sugar. You have to add it slowly, one cup at a time, mixing in between additions until it’s fully incorporated. If you dump it all in at once, you’re going to end up wearing most of it! Once the sugar is mostly mixed in, drizzle in that heavy cream and your vanilla. Beat it until it’s gorgeous and fluffy.
If you find your frosting is a little too stiff for spreading, just add another teaspoon of cream until it loosens up just right. If it gets too loose? Add another tablespoon of that sifted sugar! It’s so forgiving. This exact process, using quality vanilla, is how I get the perfect topping for my butter cookies too!
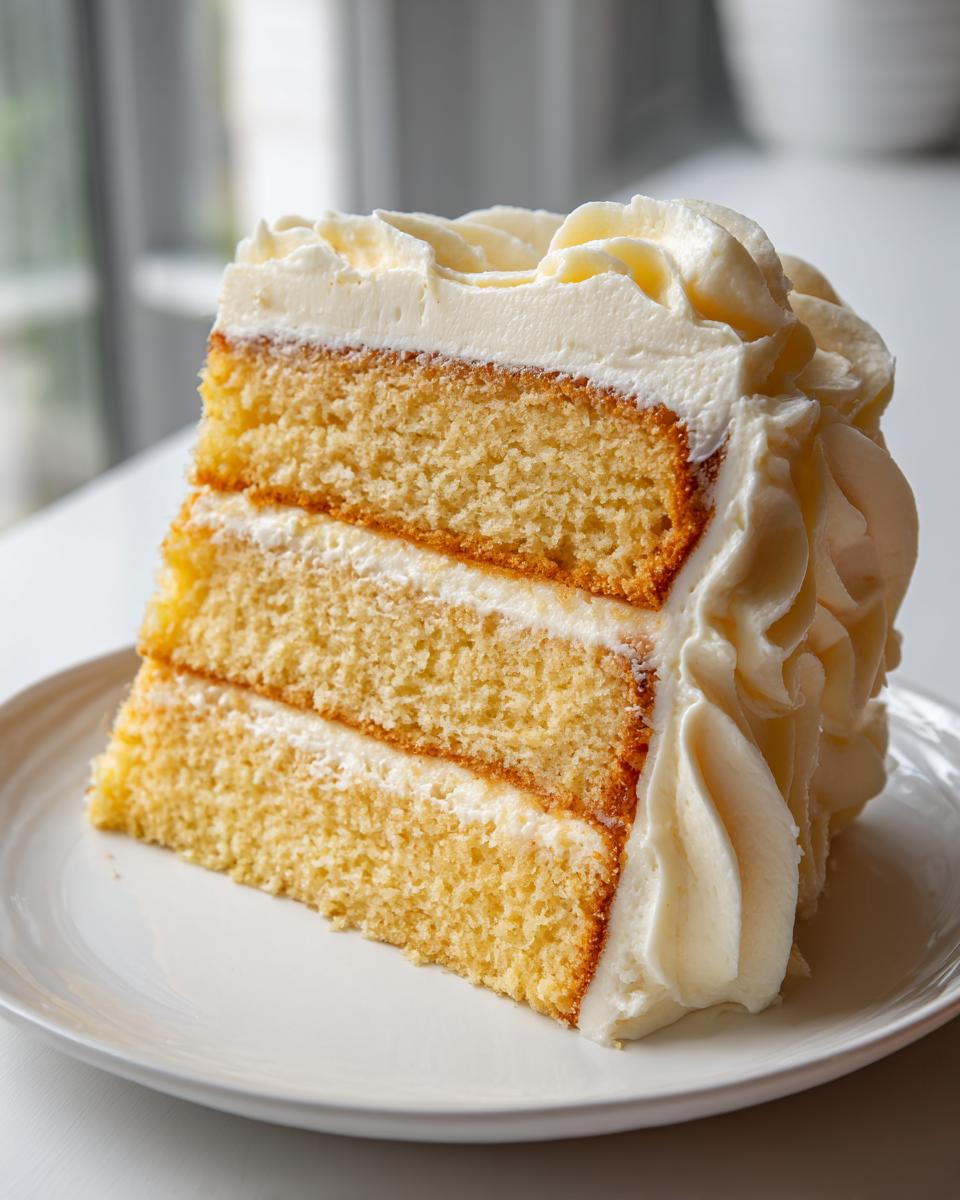
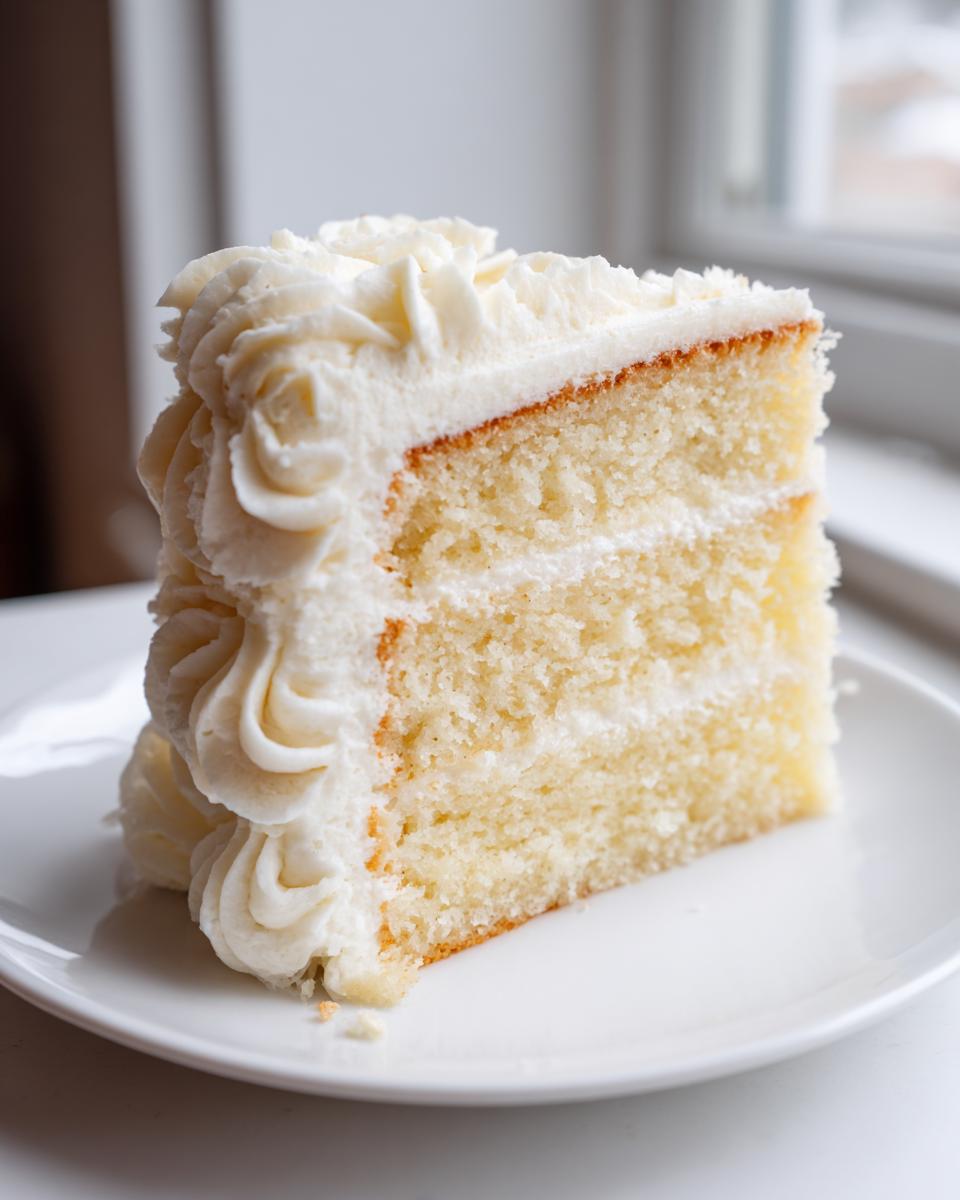
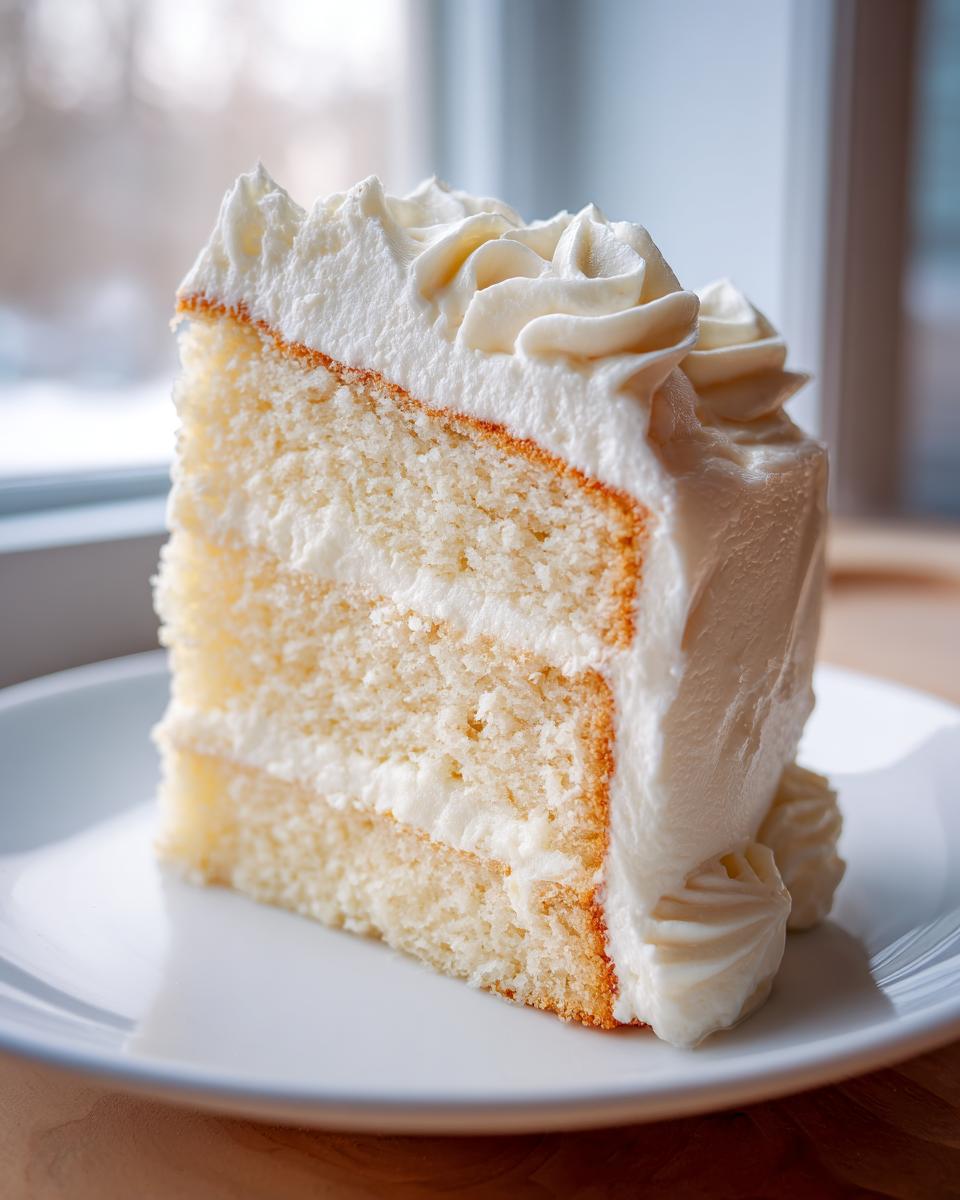
Assembling Your Classic Birthday Cake Vanilla
The moment we’ve waited for: putting this beautiful Classic Birthday Cake Vanilla together! Make sure those layers are completely cool—I mean stone cold—otherwise, you’ll end up with a melted, sad mess of vanilla goo. It’s worth the wait, I promise.
Take your first cake layer and pop it down on your serving plate. Scoop up about one-third of that dreamy frosting and spread it right to the edges. It doesn’t need to be perfect yet; we’re just creating the inner layer, kind of like building the foundation for a great house! This is where you can add fun extras like sprinkles if you want to spice up your Birthday Cake Ideas Vanilla.
Gently set the second cake layer on top. Now, use the rest of your silky vanilla buttercream frosting to generously cover the top and work it down the sides. Smooth it out with an offset spatula, or swirl it for a rustic look. For a really stunning finish, I sometimes peek at techniques shared by others, like the one found here for decorating inspiration. If you’re practicing for something fancy, you might want to check out how I assemble my cheesecake layer cakes for tips on crumb coating!
Tips for the Best Vanilla Cake Recipe Success
Even though this is an easy recipe, I have a few little tricks up my sleeve to make sure you get that perfect bakery result every time. Seriously, nailing the temperature of your components is half the battle! If your eggs and milk aren’t room temperature, the batter can curdle a bit, and that ruins the texture we’re looking for in this vanilla cake recipe.
Also, please watch those baking times closely. If you overbake this beautiful Moist Vanilla Cake Recipe by even five minutes, it starts turning dry, which is exactly what we are fighting against! Pull those layers out right when the toothpick comes out clean with just a few moist crumbs clinging to it.
Ingredient Substitutions for Your Vanilla Cake Recipe
I often get asked about swapping out the dairy, and yes, you absolutely can! If you don’t have sour cream handy, you can substitute it with buttermilk; it adds that nice little tang and keeps the crumb soft. If you need to swap out the butter for a different kind of fat, just know that you might lose a tiny bit of that signature rich flavor, but using something like coconut oil could work in a pinch if you adjust the final mixture carefully.
For the best flavor infusion, I always recommend using pure vanilla extract—the imitation stuff just tastes artificial. It’s worth it, just like using real butter is worth it for my overnight cookies!
Storing and Serving Your Tender Vanilla Cake
This Tender Vanilla Cake is actually great for making ahead because it stays so moist! If you’ve only frosted the layers, you can keep it safely wrapped at room temperature for about two days—placing it in the fridge can sometimes dry it out a touch. Wait until just before serving to frost the whole thing if you plan to store it for longer, or if you need to pop the whole thing away, make sure it’s tightly covered!
When it’s time to serve, letting it sit out on the counter for about 30 minutes before slicing helps the buttercream soften up perfectly. Honestly, this Simple Vanilla Dessert pairs like a dream with a hot cup of coffee or maybe even a tall glass of my homemade lemonade on a summer afternoon!
Frequently Asked Questions About This Vanilla Cake Recipe
I get so many great questions about this cake, especially from folks making it for the first time! It’s super reliable, but a little insider knowledge never hurts when attempting a Classic Vanilla Cake. Here are the things I hear most often about getting this Simple Vanilla Dessert just right.
Can I make this a Vanilla Sheet Cake instead of layers?
Absolutely! If you don’t want to deal with stacking layers, a 9×13 inch pan works perfectly for this recipe. You’ll need to adjust the baking time though. Since the batter is spread thinner, it usually only takes about 28 to 32 minutes. Just keep an eye on it and use that toothpick test near the edges!
What is the best vanilla extract to use for this vanilla cake recipe?
If you want that rich, deep flavor that screams ‘homemade,’ you absolutely must use pure vanilla extract. I know it costs a little bit more than the imitation stuff, but that quality shines through in a vanilla-forward cake like this one. Anything less just tastes flat, and we want big, joyful flavor!
If you’re looking for other simple, flavor-packed recipes, you need to check out my recipe for creamy Dijon chicken—it’s another one where quality flavor makes all the difference!
Estimated Nutritional Data for This Vanilla Cake Recipe
Now listen, I’m Avery, not a registered dietitian, so take this information with a grain of salt! This is just an estimate for one slice of this amazing vanilla cake recipe based on the standard ingredients used. Since this is such a rich dessert, especially with all that frosting, the numbers reflect a generous serving size. I always tell people that food made with love tastes better than any spreadsheet item anyway!
Here’s a general breakdown for one serving slice:
- Serving Size: 1 slice
- Calories: 450
- Fat: 25g
- Saturated Fat: 15g
- Trans Fat: 0.5g
- Carbohydrates: 55g
- Fiber: 1g
- Sugar: 45g
- Protein: 5g
- Cholesterol: 80mg
Just remember, these figures assume you aren’t sneaking extra frosting onto the side of your plate when nobody’s looking! If you’re using different butter or milk brands, these numbers will shift a little. It’s best enjoyed fresh!
Share Your Homemade Vanilla Cake Creations
I really hope you loved baking this cake as much as I love sharing it with you! Watching you all bring this Homemade Vanilla Cake to life in your own kitchens is genuinely my favorite reward. If you followed along with this Moist Classic Vanilla Layer Cake Recipe, please don’t keep that sweet success a secret!
Take a moment and leave a rating right below—it helps other bakers know this recipe is reliable and delicious. And seriously, tag me in your pictures on social media! I want to see those beautiful layers and that silky frosting. It makes my whole week when I see your beautiful desserts!
If you have any questions while you’re baking or just want to share your favorite memory inspired by this cake, don’t hesitate to reach out through my contact page. Happy baking, and enjoy every single bite of that perfect piece of cake!
PrintMoist Classic Vanilla Layer Cake with Silky Vanilla Buttercream
Bake a classic, moist vanilla layer cake from scratch. This easy recipe yields a soft, fluffy cake perfect for birthdays and special occasions, topped with creamy vanilla buttercream frosting.
- Prep Time: 20 min
- Cook Time: 35 min
- Total Time: 55 min
- Yield: 10 servings 1x
- Category: Dessert
- Method: Baking
- Cuisine: American
- Diet: Vegetarian
Ingredients
- 1 3/4 cups all-purpose flour
- 1 3/4 cups granulated sugar
- 1 tablespoon baking powder
- 1/2 teaspoon salt
- 1/2 cup unsalted butter, softened
- 2 large eggs
- 1 cup whole milk
- 2 teaspoons pure vanilla extract
- 1/2 cup sour cream (for cake)
- 1 cup unsalted butter, softened (for frosting)
- 4 cups powdered sugar, sifted (for frosting)
- 1 teaspoon pure vanilla extract (for frosting)
- 1/4 cup heavy cream or milk (for frosting)
- Pinch of salt (for frosting)
Instructions
- Preheat your oven to 350°F (175°C). Grease and flour two 8-inch round cake pans or line them with parchment paper.
- In a large bowl, whisk together the flour, sugar, baking powder, and salt for the cake.
- Add the softened butter, eggs, milk, and vanilla extract to the dry ingredients. Beat with an electric mixer on medium speed for two minutes until the batter is smooth.
- Stir in the sour cream until just combined. Do not overmix.
- Divide the batter evenly between the prepared cake pans.
- Bake for 30 to 35 minutes, or until a toothpick inserted into the center comes out clean.
- Let the cakes cool in the pans for 10 minutes before inverting them onto a wire rack to cool completely.
- To make the frosting, beat the softened butter in a large bowl until creamy.
- Gradually add the sifted powdered sugar, one cup at a time, mixing well after each addition.
- Beat in the vanilla extract and heavy cream until the frosting is smooth and fluffy. Add a pinch of salt. Add more cream if the frosting is too stiff.
- Once the cakes are completely cool, place one layer on a serving plate. Spread about one-third of the frosting evenly over the top.
- Place the second cake layer on top and frost the top and sides of the entire cake.
Notes
- For extra moist cake layers, use room temperature milk and eggs.
- Sifting the powdered sugar prevents lumps in your silky buttercream.
- You can substitute buttermilk for milk and sour cream for a slight tang.
Nutrition
- Serving Size: 1 slice
- Calories: 450
- Sugar: 45g
- Sodium: 250mg
- Fat: 25g
- Saturated Fat: 15g
- Unsaturated Fat: 10g
- Trans Fat: 0.5g
- Carbohydrates: 55g
- Fiber: 1g
- Protein: 5g
- Cholesterol: 80mg