
If you’re looking for a dessert that stops people right in their tracks, you’ve found it. I love whipping up impressive ‘showstopper desserts’ for holidays like Valentine’s Day or Christmas, and this is absolutely my top choice. Forget fiddling with complicated layer cakes; this red velvet cheesecake brings the drama without sending you into a baking panic. This is the absolute ultimate recipe because we skip the guesswork. I’ve tested this formula—with its rich Oreo crust and beautiful, creamy swirl—over and over again to make sure it’s reliably stunning every single time you bake it. As I explain over on my About Page, I test everything thoroughly so you don’t have to worry! Trust me, this one is worth the oven time!
- Why This Classic Red Velvet Cheesecake Recipe is a Showstopper
- Ingredients for Your Showstopper Red Velvet Cheesecake
- Step-by-Step Instructions for the Red Velvet Cheesecake
- Tips for the Best Creamy Red Velvet Dessert
- Variations: Easy Layered Cheesecake and No Bake Red Velvet Cheesecake Options
- Making Your Red Velvet Cheesecake a Stunning Dessert Presentation
- Storage and Making Ahead for Your Red Velvet Cheesecake
- Frequently Asked Questions About Red Velvet Cheesecake
- Estimated Nutrition for This Red Velvet Cheesecake Recipe
- Share Your Showstopper Red Velvet Cheesecake Experience
- Estimated Nutrition for This Red Velvet Cheesecake Recipe
- Share Your Showstopper Red Velvet Cheesecake Experience
Why This Classic Red Velvet Cheesecake Recipe is a Showstopper
When you need a dessert that truly wows, this is the one! It hits all the right notes, making it a permanent fixture on my list of must-make showstopper desserts. Here is why I promise it will be yours too:
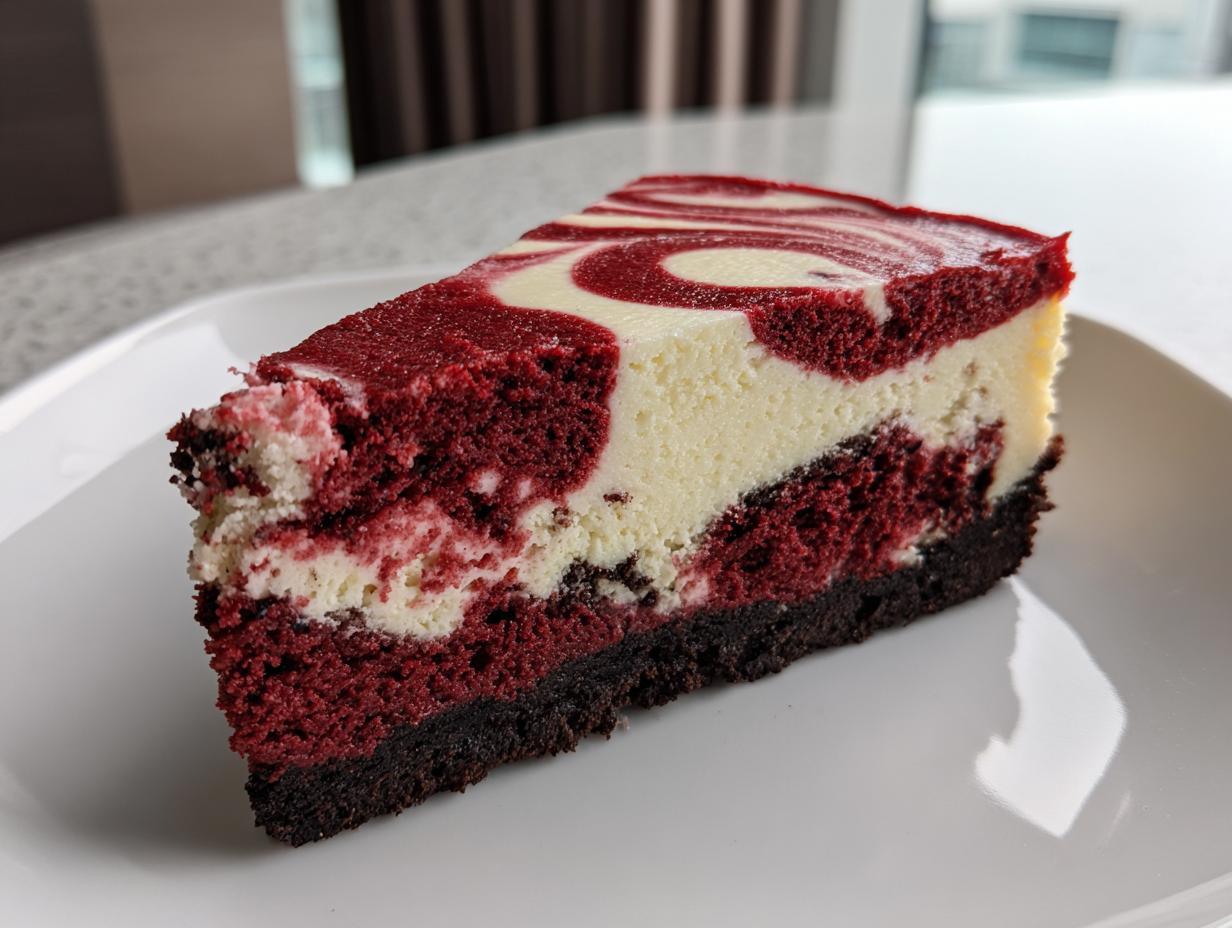
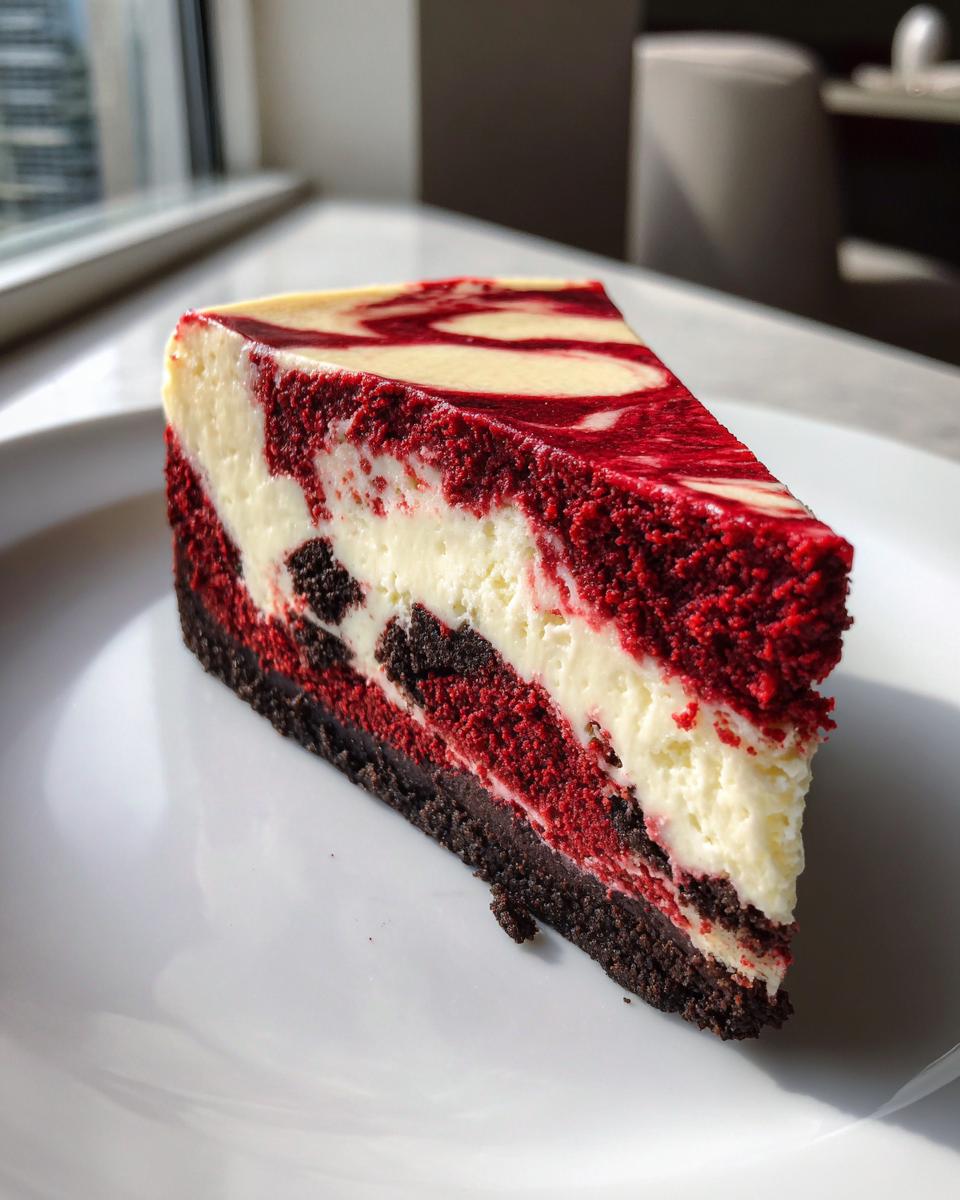
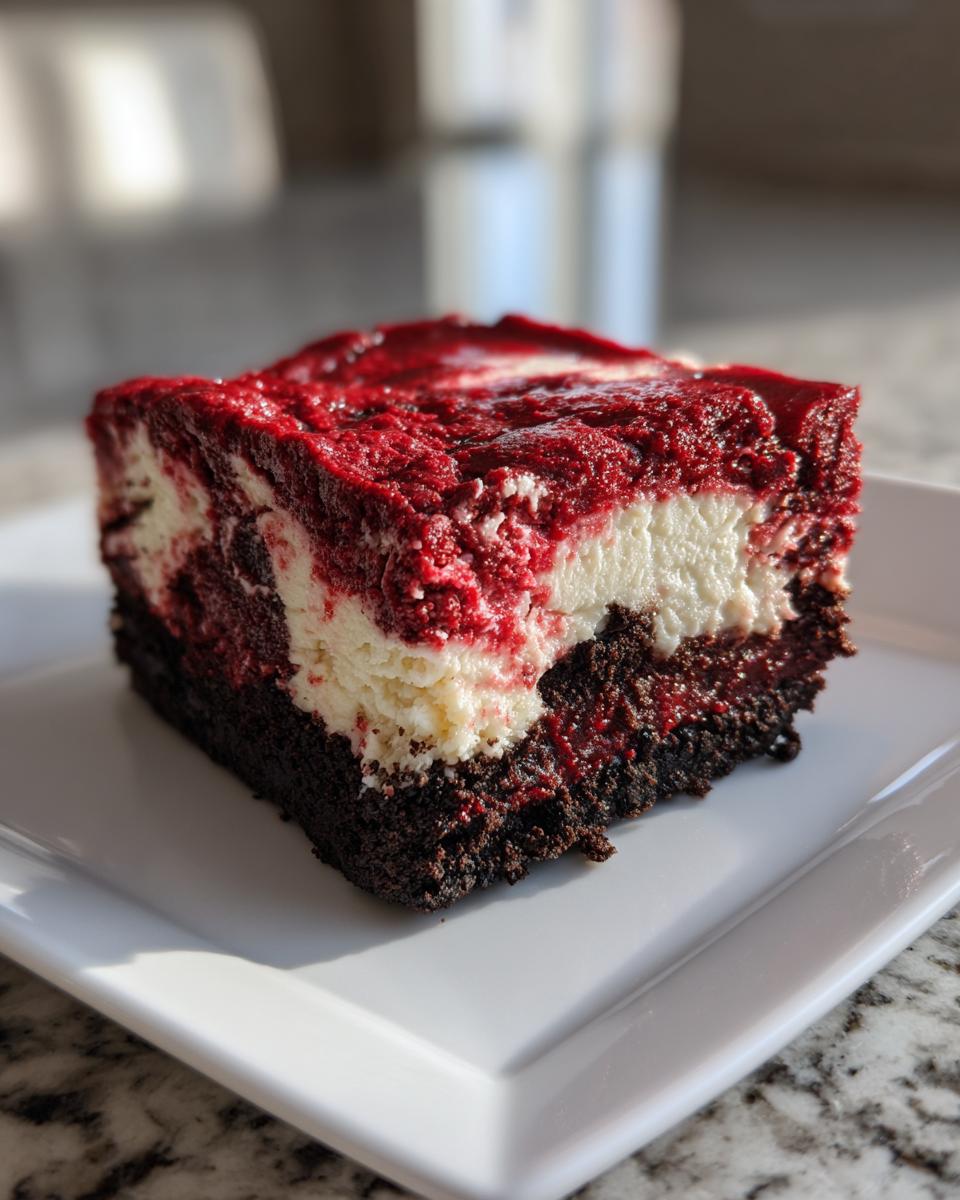
- The texture is just crazy—incredibly creamy, yet sturdy enough to slice beautifully.
- That dark, crunchy Oreo crust gives you the perfect salty-sweet contrast.
- The deep red swirl against the creamy white? Instant eye-catcher!
Ingredients for Your Showstopper Red Velvet Cheesecake
Okay, let’s talk about what you need! For a dessert this luxurious, you can’t cut corners, especially on the cream cheese. I always grab the full-fat blocks—no light stuff here, please! That’s the secret to a truly creamy red velvet dessert, and it’s non-negotiable for me. I’ve linked my favorite creamy cheesecake recipe notes if you want to see how important ingredient temp is! Also, if you can find gel food coloring, use it; it gives you that vibrant red without watering down the batter.
For the Oreo Crust Cheesecake Base
The base needs to be super firm so it holds up all that gorgeous filling. Make sure you crush those Oreos finely—I put them through the food processor, crumbs and all (the filling helps bind it!).
- 1 1/2 cups crushed Oreo cookies
- 6 tablespoons unsalted butter, melted
For the Swirled Red Velvet Cheesecake Filling
We need to keep the batters separate until the last minute so we can create that amazing marbled look. Remember, we are making two halves—one regular, one red!
- 3 (8 ounce) packages cream cheese, softened (this is crucial!)
- 1 1/2 cups granulated sugar
- 1 teaspoon vanilla extract
- 1/4 cup all-purpose flour
- 1/2 cup sour cream
- 2 large eggs
- 1 teaspoon white vinegar
- 2 tablespoons unsweetened cocoa powder
- 2 tablespoons red food coloring (gel is best!)
- 1/4 cup buttermilk
Step-by-Step Instructions for the Red Velvet Cheesecake
Alright, this is where the magic happens! Since this is a red velvet cheesecake, we need to treat it with a little respect, especially when it comes to the heat. Don’t worry, I’m going to walk you through the water bath trick, which is the absolute gatekeeper to a crack-free, perfectly smooth top. If you follow these steps closely, you’ll have mastered the art of the homemade cheesecake tutorial!
Preparing the Oreo Crust and Oven Setup
First things first, get your oven ready! Preheat it to 350°F (175°C). Now, grab a 9-inch springform pan—and this is important—wrap the outside of it super tight with heavy-duty aluminum foil. We’re making a water bath, and we absolutely cannot let any water sneak in and make our crust soggy!
Just mix your crushed Oreos and melted butter, press it down firmly in the bottom, and pop it into that hot oven for exactly 10 minutes. Once that’s done, pull it out, but immediately drop your oven temperature down to 325°F (160°C) for the main bake. See? Easy setup!
Mixing the Cheesecake Batter Components
Remember, room temperature ingredients are your best friend here! Beat that softened cream cheese and sugar together until it looks velvety smooth—no lumps allowed! Then gently fold in the vanilla and flour. Now, mix your wet stuff: sour cream, eggs, and vinegar. Be careful not to overmix once the wet goes into the cheese mixture, or you’ll bring in too much air.
Once that base batter is ready, divide it evenly into two bowls. To one half, add the cocoa powder, the buttermilk, and all of that beautiful red food coloring. Mix that red half until the color is totally uniform. You now have your white layer and your red layer, ready to go!
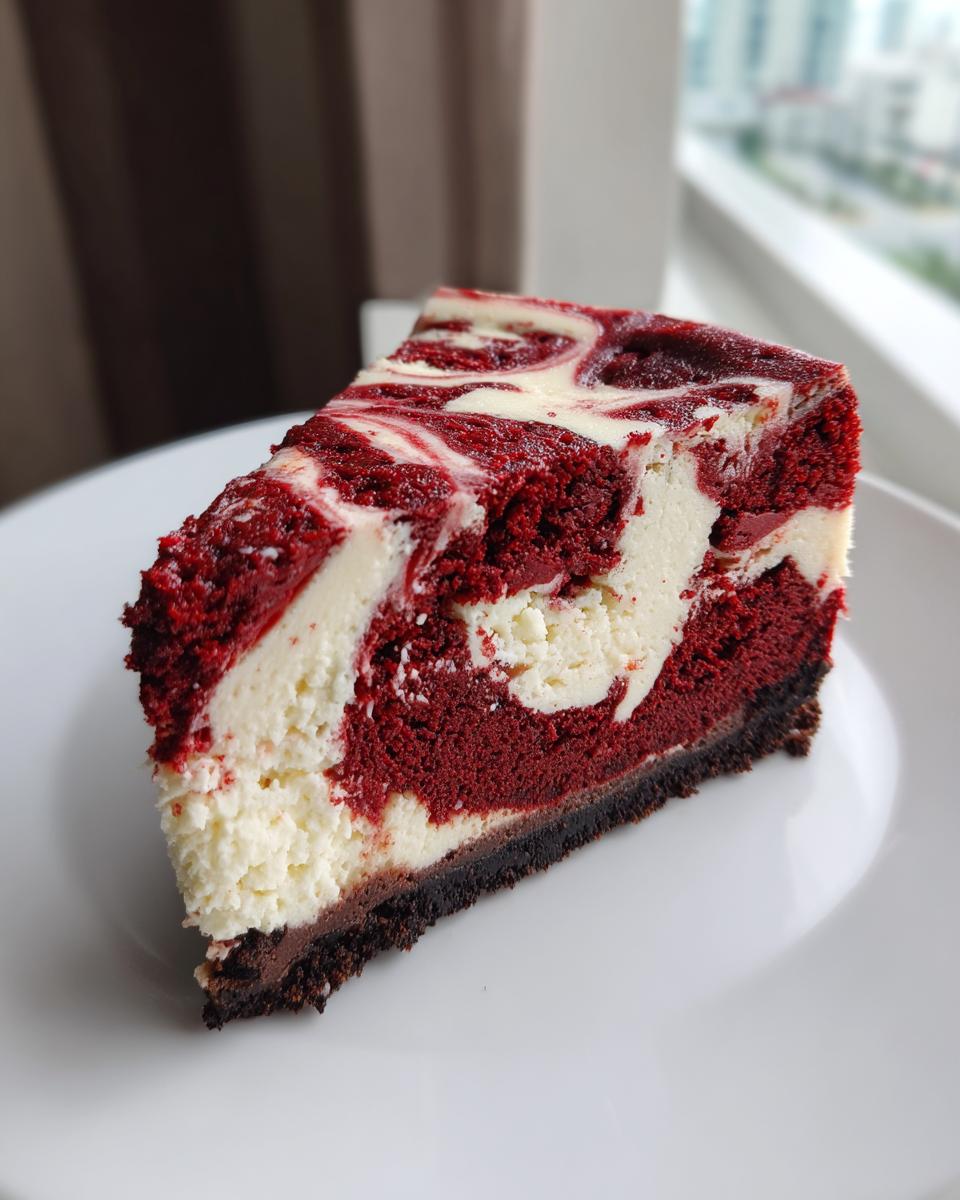
Assembling and Baking the Swirled Red Velvet Cheesecake
Pour the plain (white) batter right over that slightly cooled Oreo crust. Then, take your red batter and gently spoon dollops all over the top. Think polka dots! Use a butter knife or a skewer and drag it *once or twice* through the layers to gently swirl them. Seriously, just a quick figure-eight motion—if you over-swirl, you lose that distinct color contrast. Next, put that foil-wrapped pan into a larger roasting pan and carefully pour hot water into the big pan until it’s about halfway up the sides of your cheesecake pan. That water bath makes the texture divine!
Cooling and Chilling for Perfect Texture
Bake this beauty at 325°F for about 55 to 65 minutes. It’s done when the edges look set, but the very center still jiggles like Jell-O. This next step is what keeps it from cracking, so pay attention! Turn the oven OFF, crack the door open just a hair, and let it hang out in the cooling oven for a whole hour. After that gentle cooldown, move it to a wire rack to cool completely to room temperature. Finally, you must cover the gorgeous red velvet cheesecake and chill it for a minimum of 6 hours, but honestly, overnight is always best for that true, creamy set.
Tips for the Best Creamy Red Velvet Dessert
You want that ultra-creamy texture, right? I learned the hard way that cheesecake is needy! The biggest tip I can give you is to treat your ingredients gently once they are mixed. That means everything—especially the cream cheese—needs to sit out until it’s truly soft. Cold cream cheese equals lumpy filling, and who wants that?
Also, don’t skip the water bath step we talked about earlier! That steamy environment keeps the entire surface from baking too fast and cracking. It’s the difference between a shiny, smooth top and a disaster. If you want that signature deep red color without making the filling too thin, definitely reach for the gel food coloring instead of the liquid drops. Gel is super concentrated, so a little bit goes a long way! If you’re looking for another example of creamy perfection, check out my berry cheesecake recipe for more moisture secrets!
Variations: Easy Layered Cheesecake and No Bake Red Velvet Cheesecake Options
I love that this base recipe is so flexible! Even though this layered version is my favorite—because combining the red velvet flavor with that vanilla cheesecake swirl is just divine—I know sometimes you need something a little faster or completely different. It’s all about making food work for your busy life, just like I try to do over at my Snickerdoodle Cheesecake post!
If you’re aiming for an easy layered cheesecake but maybe don’t want the swirl, you could completely skip the color divide. Just mix all your filling ingredients together, but add all the cocoa, food coloring, and buttermilk into the *entire* batch. You end up with a wonderfully rich, one-color red velvet cheesecake that’s still delicious, just less dramatic looking!
Now, if you need a true shortcut, let’s talk no bake red velvet cheesecake. I included a little note about it in the main instructions, but it’s honestly super simple. You just skip the whole oven setup—no water bath, no pre-baking the crust! Mix up your filling, pour it over the cooled Oreo crust, and then pop it into the fridge. It needs a good 8 hours to set up firm enough to slice neatly, but it saves you all the oven time and heat.
Making Your Red Velvet Cheesecake a Stunning Dessert Presentation
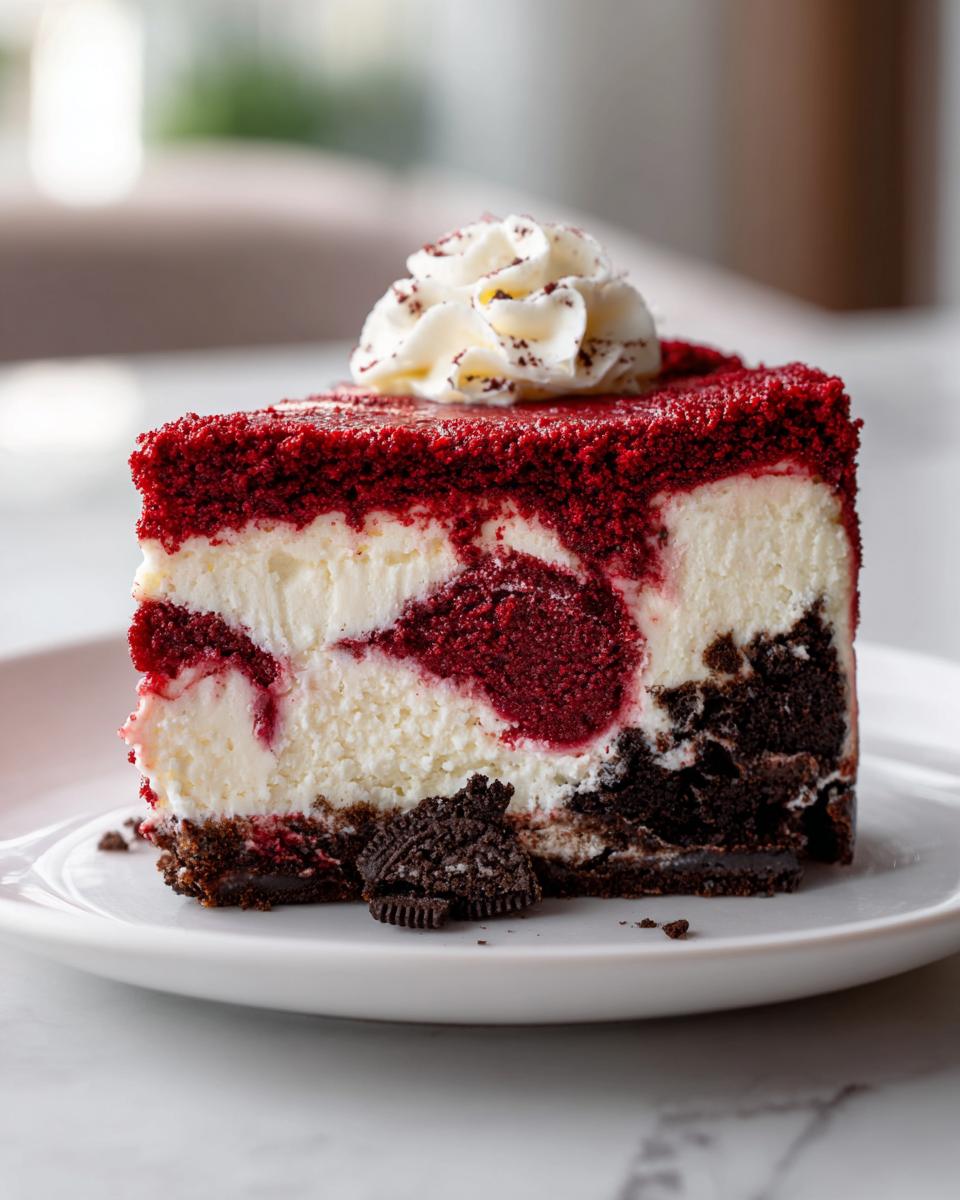
We’ve worked hard to get that perfect creamy texture and dramatic swirl, so naturally, we want the final presentation to match! This is where your red velvet cheesecake truly shines as a centerpiece for your table, especially when you’re planning out your holiday cheesecake ideas.
Once the cheesecake has chilled overnight and is fully firm, the first thing I usually reach for is a generous layer of that luscious cream cheese topping. If you need a killer frosting recipe to top this beauty, my recipe for cream cheese frosting works magically here; just thin it slightly with a teaspoon of milk so it spreads smoothly over the top.
If frosting feels like too much effort, a simple, elegant drizzle of melted dark chocolate also looks incredible against that vibrant red. You can even shave some chocolate curls over the top or sprinkle some reserved Oreo crumbs around the base. I saw a gorgeous presentation on Treat Savvy’s site that used fresh raspberries, and oh my goodness, the color pop was just stunning. Remember, a little presentation effort goes a long way!
Storage and Making Ahead for Your Red Velvet Cheesecake
I know you’re going to want to eat half of this the minute it comes out of the fridge, but hold tight! This red velvet cheesecake actually needs time to mature, which is great news for anyone who hates day-of baking stress. Since we put so much effort into getting that creamy texture, we need to respect the chilling time.
Can you make it ahead? Yes, please do! I honestly find the flavor develops better if I bake it the day *before* I plan to serve it. Letting it chill overnight—at least 6 hours, but preferably 8 to 12—allows the cheesecake filling to fully set up around those swirls. That’s essential for getting those clean, beautiful slices everyone stares at!
To store leftovers, just cover the springform pan gently with plastic wrap or simply cover whatever portion you have left with foil. Keep it in the refrigerator. Because of the high fat and sugar content, this keeps really well. I’ve kept leftovers fresh and delicious, tasting almost as good as day one, for about four to five days.
If you ever have to freeze it—and I hope you don’t have to share this much goodness away!—make sure it’s completely chilled first. Wrap the entire cheesecake tightly in a double layer of plastic wrap, followed by a layer of heavy foil. When you thaw it, let it sit in the fridge for a full day before serving. Trust me on the make-ahead timing; it takes the pressure off party day!
Frequently Asked Questions About Red Velvet Cheesecake
Even with all those steps, I know you might still have a little voice in your head asking questions! That’s totally fine. When you’re making a big, beautiful red velvet cheesecake, you want to get it right. Here are a few things readers often ask me about trying this recipe.
Can I use red velvet cake mix instead of cocoa powder and coloring?
That’s a great way to simplify things if you’re after a quicker dessert! My recipe uses cocoa powder and food coloring to get that classic red velvet *flavor profile* mixed into a pure cheesecake batter. If you want to switch to using a box of red velvet cake mix instead, it becomes closer to the ‘cake and cheesecake fusion’ idea that’s popular. You’d usually adjust the liquid ratios significantly, maybe skipping the buttermilk and mixing the dry ingredients from the cake mix into the cream cheese base. If you try that route, remember the texture will change—it might be slightly less dense than this pure cheesecake approach, but it’s a fun shortcut!
My cheesecake always cracks! What is the secret to preventing cracks?
Ah, the nemesis of every baker! Cracking usually happens because the cheesecake cools down too fast or unevenly. We fight this with two main methods here, and they work every time. First, the water bath is mandatory; it keeps the heat gentle and humid around the outside. Second, the slow cooling inside the turned-off oven for a full hour. Don’t rush it! If you pull a hot cheesecake straight out into the cool kitchen air, it’s going to shrink too fast and—crack! Be patient, and you’ll get that smooth surface you want for your stunning dessert presentation.
How do I get the most vibrant, deep red color in my cheesecake?
I touched on this in the tips, but it deserves its own question! If you are using liquid food coloring, you might have to use a ton of drops to get a true red, and that extra liquid can actually mess with your creamy texture. My number one recommendation is to switch to a high-quality **gel food coloring**. It’s super concentrated, so just a few drops give you the intense, festive red you want without adding unwanted moisture to your batter. This keeps everything stable, which is key for any best cheesecake recipe!
Is this red velvet cheesecake actually better than just baking a regular red velvet cake?
That’s like asking if chocolate is better than vanilla—it depends on what mood you’re in! A classic red velvet cake is tender, airy, and relies heavily on that tangy cream cheese frosting. However, this red velvet cheesecake recipe leans into luxury. You get that unique cocoa hint but paired with the dense, cool richness of a true cheesecake. If you want a sliceable showstopper for a holiday buffet, the cheesecake wins every time. If you want something light for a casual afternoon tea, maybe stick to a cake. But for pure decadence, this fusion beats both!
If you want to see how I handle classic red velvet cakes without the cream cheese topping, you should definitely check out my thoughts on red velvet cake pops!
Estimated Nutrition for This Red Velvet Cheesecake Recipe
Because this is certainly a richer, more decadent dessert—perfect for special occasions like Christmas or Valentine’s Day—it pulls a few more calories than a standard slice of layer cake. Here is what you can generally expect per slice, but remember these are always estimates based on my ingredients!
- Serving Size: 1 slice
- Calories: 450
- Fat: 30g
- Carbohydrates: 40g
- Protein: 7g
- Sugar: 35g
It’s definitely a treat meant for savoring! Definitely don’t worry about exact counts when you are serving up something this gorgeous; just enjoy the experience.
Share Your Showstopper Red Velvet Cheesecake Experience
I seriously can’t wait to see the beautiful, swirled masterpieces you all create! Baking is so much more fun when we share the results. When you pull that stunning cheesecake out of the oven—or better yet, slice into it after its long chill—snap a picture and tag me!
If you followed along and this ended up being your new favorite, please do me a huge favor and leave a star rating and a quick comment below. Your feedback helps other bakers trust this recipe, which is so important to me here at Devour Dish. You can always reach out via my Contact Page if you have any tricky questions during your bake! Happy creating!
PrintShowstopper Red Velvet Cheesecake with Oreo Crust
Make a stunning, creamy Red Velvet Cheesecake featuring a rich Oreo crust and a beautiful cream cheese swirl. This recipe is designed to be a visually impressive dessert for any special occasion.
- Prep Time: 30 min
- Cook Time: 65 min
- Total Time: 7 hours 35 min
- Yield: 12 servings 1x
- Category: Dessert
- Method: Baking
- Cuisine: American
- Diet: Vegetarian
Ingredients
- 1 1/2 cups crushed Oreo cookies
- 6 tablespoons unsalted butter, melted
- 3 (8 ounce) packages cream cheese, softened
- 1 1/2 cups granulated sugar
- 1 teaspoon vanilla extract
- 1/4 cup all-purpose flour
- 1/2 cup sour cream
- 2 large eggs
- 1 teaspoon white vinegar
- 2 tablespoons unsweetened cocoa powder
- 2 tablespoons red food coloring (liquid or gel)
- 1/4 cup buttermilk
Instructions
- Preheat your oven to 350°F (175°C). Wrap the outside of a 9-inch springform pan tightly with heavy-duty aluminum foil.
- Prepare the crust: Combine the crushed Oreo cookies and melted butter. Press the mixture firmly into the bottom of the prepared springform pan. Bake for 10 minutes. Remove and let cool slightly.
- Reduce the oven temperature to 325°F (160°C).
- Prepare the cheesecake filling: In a large bowl, beat the softened cream cheese and granulated sugar with an electric mixer until smooth. Beat in the vanilla extract and flour until just combined.
- In a separate small bowl, whisk together the sour cream, eggs, and white vinegar. Mix this wet mixture into the cream cheese mixture until smooth. Do not overmix.
- Divide the cheesecake batter in half. To one half, add the cocoa powder, red food coloring, and buttermilk. Mix until the color is uniform and deep red.
- Pour the plain (white) batter over the cooled Oreo crust. Gently spoon dollops of the red velvet batter over the white layer.
- Use a knife or skewer to gently swirl the two batters together to create a marbled effect. Do not over-swirl.
- Place the foil-wrapped springform pan into a larger roasting pan. Carefully pour hot water into the roasting pan until it reaches halfway up the sides of the springform pan (this is a water bath).
- Bake for 55 to 65 minutes, or until the edges are set but the center still has a slight jiggle.
- Turn off the oven, crack the door open slightly, and let the cheesecake cool inside the oven for 1 hour. This prevents cracking.
- Remove the cheesecake from the water bath and let it cool completely on a wire rack.
- Once cool, cover and refrigerate for at least 6 hours, or preferably overnight, before serving.
Notes
- For a showstopper presentation, top the chilled cheesecake with a layer of cream cheese frosting or stabilized whipped cream before serving.
- If you prefer a no-bake version, skip the water bath and oven steps. Chill the filling mixture for at least 8 hours until firm.
- Use gel food coloring for the most intense red color without adding excess liquid to the batter.
Nutrition
- Serving Size: 1 slice
- Calories: 450
- Sugar: 35g
- Sodium: 310mg
- Fat: 30g
- Saturated Fat: 18g
- Unsaturated Fat: 12g
- Trans Fat: 0.5g
- Carbohydrates: 40g
- Fiber: 1g
- Protein: 7g
- Cholesterol: 95mg