

I used to think that truly beautiful, crusty **artisan bread**—the kind that shatters a little when you slice into it—was something only professional bakers in brick ovens could manage. So much of my early cooking was focused on intricate techniques, which is why I started Devour Dish: to show you that the best food is often the simplest. Well, friends, this recipe is the absolute proof! This is my go-to, practically foolproof **Easy Homemade Bread** that requires zero kneading, just four basic ingredients, and the simple magic of a Dutch oven. If you’ve been intimidated by yeast, stop right there. When I started cooking, I dreamed up recipes like this one to bring that bakery-style joy into real life, busy weeknights and all. Trust me, you’re going to feel like a baking wizard by lunchtime tomorrow!
- Why This No Knead Artisan Bread Recipe Works for Beginners
- Ingredients for Your Simple Artisan Loaf
- Essential Equipment for Making Artisan Bread
- Step-by-Step Instructions for No Knead Artisan Bread
- Tips for the Best Artisan Bread Results Every Time
- Storing and Serving Your Homemade Artisan Bread
- Frequently Asked Questions About Making Artisan Bread
- Nutritional Estimates for This Simple Artisan Loaf
- Share Your Fresh Baked Loaf Experience
Why This No Knead Artisan Bread Recipe Works for Beginners
I know what you’re thinking: real artisan bread involves serious kneading and waiting hours for dough to proof correctly. Wrong! That’s the beauty of this method. We skip the elbow grease entirely. Because we use instant yeast and let the dough rest for a whole day—yes, seriously—the gluten develops all on its own, making this one of the most reliable recipes for **Beginner Bread Baking**. You get incredible flavor and structure with almost zero effort on your part! It’s practically fool-proof. If you want to see how simple professional results can be, check out this amazing guide from Bitezly on artisan bread recipes.
The Magic of Long Fermentation in Artisan Bread
That 12 to 18-hour rest period is where the real work happens, and your job is just covering the bowl! During this long, slow fermentation, the yeast slowly wakes up and works its magic. It builds up the complex flavor we usually associate with long-aged doughs. Plus, it creates those beautiful air pockets that make the inside of your loaf so wonderfully soft and airy.
Achieving the Perfect Crusty Bread Recipe with a Dutch Oven
The Dutch oven is our secret weapon for that show-stopping, shatteringly crisp exterior. When we put that heavy pot into the oven while it preheats, it gets screaming hot. That trapped heat and steam create the perfect environment. The steam allows the dough to expand fully before the crust sets, giving you that thick, crackly shell every good **Crusty Bread Recipe** needs. Honestly, without the Dutch oven, homemade bread just doesn’t hit the same way!
Ingredients for Your Simple Artisan Loaf
Seriously, preparing this **4 Ingredient Bread** is shockingly minimal. You probably have everything you need in your pantry right now! Transparency is key because I want you to succeed, so please measure carefully here. We aren’t adding sugar or oil—those are handled by the fermentation magic later! If you want to see another amazing simple recipe focusing on minimal ingredients, check out Her Kitchen Stories.
- 3 cups all-purpose flour (Yes, regular AP flour works! No need for fancy bread flours here.)
- 1 1/2 teaspoons salt (Don’t skip this, or your bread tastes flat!)
- 1/4 teaspoon instant yeast (Instant is key; active dry needs blooming first.)
- 1 1/2 cups cool water (Cool, not warm—we want a slow, long rise.)
Essential Equipment for Making Artisan Bread
You need surprisingly few things to make this lovely rustic loaf. The star of the show, bar none, is the Dutch oven. It traps all that steam to give our **Dutch Oven Bread** that gorgeous, thick crust we love. For those of you without one, don’t worry! You can absolutely bake this on a sheet pan, but you have to create your own steam (I mention how in the tips section below). If you want to see the absolute best way people are using their Dutch ovens for this specific loaf, take a peek at this post over at Bowl of Delicious—it’s fantastic!
Step-by-Step Instructions for No Knead Artisan Bread
Okay, let’s get baking! This is the fun part, even though most of the time is just waiting. Remember, because this is a **No Knead Bread**, your biggest job is simply mixing early and leaving it alone. Seriously, don’t touch it! If you want to see how perfectly easy texture development is, check out my recipe for Soft Pretzel Bites—it’s a different dough, but the satisfaction of easy results is the same!
Mixing the Dough and Starting the Long Rest for Artisan Bread
First, grab your large bowl. Whisk together all your dry things: flour, salt, and that tiny bit of instant yeast. Now, pour in the cool water. Mix it quickly with a wooden spoon until it all comes together into one sticky, messy blob. I mean it, it should look shaggy and kinda gross—that’s right! Do not knead it! Seriously, resist the urge. Cover that bowl up super tight with plastic wrap and just leave it on your countertop for 12 to 18 hours. It’s going to bubble up and look nothing like dough you’ve made before.
Preheating and Preparing the Dutch Oven Bread
About 30 minutes before that long rest time is up, it’s time to wake up and get hot! Place your Dutch oven, lid and all, right into the cold oven. Now, set your oven to 450°F (232°C) to heat up. While that’s heating, gently scrape your bubbly dough—it’ll look like a slightly collapsed, giant bubble now—onto a lightly floured counter. Fold it over on itself just a couple of times to form a rough ball. Be super careful coming back to that oven! You need to pull out the blazing hot **Dutch Oven Bread** liner, using parchment paper as a sling to gently set your dough right inside the hot pot. Then quickly pop the lid back on.

Baking Your Crusty Artisan Bread Loaf
This is where the magic happens. We bake covered first, which traps all that steam we created—this is essential for that huge oven spring and that soft interior crumb. Bake it covered for a full 30 minutes. When that time is up, carefully remove the lid. Watch it—the dough should look pale but massive. Now, continue baking it uncovered for another 15 to 20 minutes. You’re looking for that deep, gorgeous golden-brown color on the crust. Once it hits that color, pull it out! Resist cutting it right away—you have to let it cool completely on a wire rack so the inside can set up properly.

Tips for the Best Artisan Bread Results Every Time
Even though this recipe is super simple, I always want you to get that bakery result! If you want the absolute best flavor in your **Best Artisan Bread Guide** submission, try to let that dough rest for the full 18 hours. I know it seems like forever, but that extra time converts starches into sugars, giving you deeper flavor and a better texture. It’s worth the planning!
If you don’t have a heavy Dutch oven lying around—maybe you just started baking and haven’t invested yet—don’t stress. You can still get a fantastic crusty loaf by using a regular baking stone or sturdy sheet pan baked at that same hot temperature. The key is steam. Place a pan on the bottom rack while your oven preheats, and right before you put your dough in, carefully pour about a cup of boiling water into that hot pan. That blast of steam mimics the professional oven environment beautifully. For more great ways to achieve that perfect shell, check out this guide on Dutch oven baking! If you can’t wait to try another crusty loaf, my Soft Italian Bread is another favorite.
Storing and Serving Your Homemade Artisan Bread
This is the hardest part: letting it cool! I know that warm, crusty smell is dizzying, but you absolutely must let this **Soft Crumb Bread** cool completely on a wire rack before you slice it. If you cut it hot, all that steam escapes too fast, and you ruin that beautiful soft interior structure we worked so hard for.
Once cooled, store your loaf wrapped tightly at room temperature for a couple of days. If you made too much (which is hard to do!), it freezes beautifully—just slice it first! I love serving this rustic loaf simply with high-quality butter, but it’s incredible dipped into a hearty soup, like my Tuscan White Bean Soup. Enjoy that perfect crust!
Frequently Asked Questions About Making Artisan Bread
I always get questions about tweaking this recipe, which makes sense! It seems so simple that people wonder if they can change the timing or the flour. Don’t worry, I’ve tested the boundaries so you don’t have to waste flour on failed experiments. This recipe is truly built around those four core ingredients and the very long rest period. If you’re done with your loaf, maybe plan on serving it with some of my Fluffy Drop Dumplings next time!
Can I use bread flour instead of all-purpose flour for this artisan bread recipe?
Oh, that’s a good one! Yes, you absolutely can swap bread flour for the all-purpose flour. Bread flour has a higher protein content, so if you use it, your **Artisan Bread Recipe** will end up with a slightly chewier, more developed interior structure. But honestly? The magic of this specific **No Knead Bread** recipe is that the AP flour yields a wonderfully soft crumb without any effort from us. Stick with AP for that classic, tender texture!
What happens if I cut the resting time short for my homemade bread?
If you decide to rush that 12-hour minimum rest—maybe you only wait 8 hours—you will still get bread, but it won’t be the same! The long rest isn’t just about rising; it’s about flavor development and structure. If you cut it short, you’ll find the dough is much harder to handle, and the final loaf will likely be denser, losing that beautiful, airy interior we are aiming for in this **Rustic Bread Recipe**.
Is this considered a quick artisan bread, and can I speed up the rise?
That’s a tough question because what counts as “quick” in baking varies! While your hands-on prep time is nearly zero, the long fermentation is non-negotiable for the best result. If you try to rush the rise by using warm water or putting the dough somewhere hot, you change the flavor profile completely—it won’t have that deep, slightly sourdough-like tang that makes this bread so good. It’s not designed to be a **Quick Artisan Bread**, though the prep is certainly fast!
Nutritional Estimates for This Simple Artisan Loaf
Because we are sticking to just four basic ingredients—flour, water, yeast, and salt—this **Simple Artisan Loaf** comes out surprisingly lean! Remember, these numbers are just an estimate based on the recipe proportions and divided into one slice. I always say the best way to keep it healthy is to pair it with something good for you, like a bean soup!
- Serving Size: 1 slice
- Calories: 180
- Fat: 0.5g
- Carbohydrates: 37g
- Protein: 6g
- Sugar: 0.5g
- Sodium: 350mg
This is just based on the core components, of course. If you are eating a whole loaf yourself (I won’t judge!), the totals will change! Don’t worry about the trace amounts; focus on the wonderful savory flavor!
Share Your Fresh Baked Loaf Experience
Now that you have that gorgeous, crusty **artisan bread** cooling on your rack, I really want to know what you think! If you followed these steps and achieved that beautiful, airy crumb, please leave a quick star rating at the top of the page. Hearing from you makes my day, and it helps others see just how easy it is to conquer homemade yeast bread!
Snap a picture of your first successful loaf! That crackly crust is what we live for, so show it off! Tag me on social media. There is nothing more rewarding than seeing someone bake their first truly great loaf without ever having to knead dough. It proves my whole philosophy here at Devour Dish: simple food made with love wins every single time. If you’re looking for a simple-start sweet treat next, you might love my Easy Breakfast Cookie Recipe!
PrintEasy No-Knead Artisan Bread with Dutch Oven

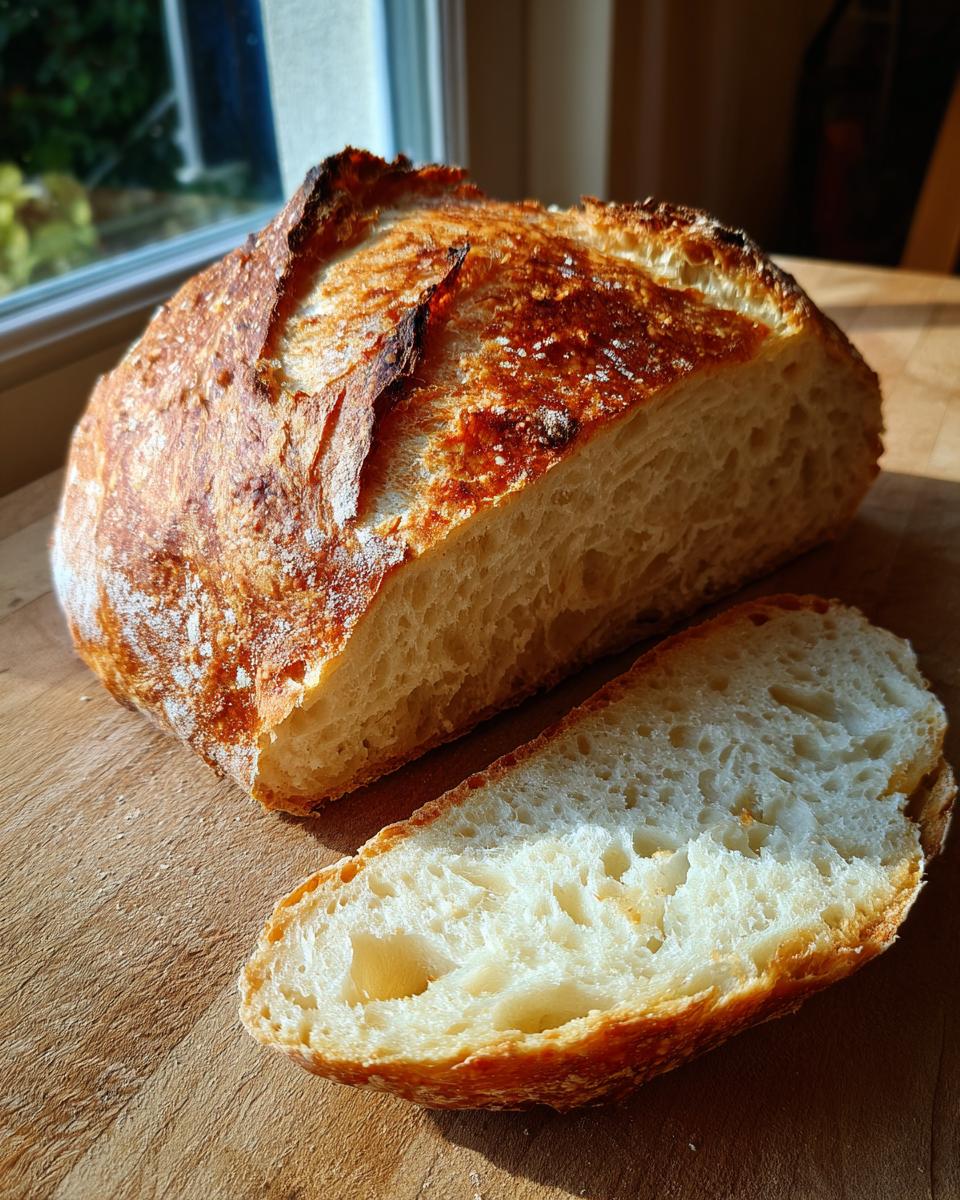
Make bakery-quality artisan bread at home using a simple, no-knead method. This recipe requires only four basic ingredients and a Dutch oven to achieve a thick, crusty exterior and a soft, airy interior.
- Prep Time: 5 min
- Cook Time: 50 min
- Total Time: 13 hours 55 min
- Yield: 1 loaf 1x
- Category: Baking
- Method: No-Knead Baking
- Cuisine: American
- Diet: Vegetarian
Ingredients
- 3 cups all-purpose flour
- 1 1/2 teaspoons salt
- 1/4 teaspoon instant yeast
- 1 1/2 cups cool water
Instructions
- In a large bowl, whisk together the flour, salt, and yeast.
- Pour in the cool water and mix with a wooden spoon until a shaggy, sticky dough forms. Do not knead.
- Cover the bowl tightly with plastic wrap and let the dough rest at room temperature for 12 to 18 hours. The dough will become bubbly and increase in volume.
- About 30 minutes before baking, place a 5-to-6-quart Dutch oven, with the lid on, into your oven. Preheat the oven to 450°F (232°C).
- Carefully remove the hot Dutch oven from the oven. Gently scrape the dough out of the bowl onto a lightly floured surface. Fold the dough over on itself a few times to form a rough ball.
- Using parchment paper as a sling, carefully lower the dough into the hot Dutch oven. Cover with the lid.
- Bake for 30 minutes with the lid on.
- Remove the lid and continue baking for another 15 to 20 minutes, or until the crust is deep golden brown.
- Carefully remove the bread from the Dutch oven and let it cool completely on a wire rack before slicing.
Notes
- For the best flavor and texture, allow the dough to ferment for the full 18 hours.
- If you do not have a Dutch oven, you can bake this on a baking stone or sheet pan, but place a pan of hot water on the bottom rack to create steam for a better crust.
- This recipe is excellent for beginners looking for foolproof bread baking results.
Nutrition
- Serving Size: 1 slice
- Calories: 180
- Sugar: 0.5
- Sodium: 350
- Fat: 0.5
- Saturated Fat: 0.1
- Unsaturated Fat: 0.4
- Trans Fat: 0
- Carbohydrates: 37
- Fiber: 1.5
- Protein: 6
- Cholesterol: 0