
I want to let you in on a little secret: you don’t need a fancy bakery counter to get that incredible, show-stopping dessert you’ve been dreaming about! Seriously, achieving that level of deliciousness right in your own 9×13 pan (or in this case, a gorgeous Bundt pan) is totally doable. I spent ages trying to figure out why so many red velvet recipes turned out… well, sad and dry. But trust me, I cracked the code. This red velvet bundt cake recipe is the ultimate answer. It’s rich, it’s perfectly velvety, and it guarantees that signature moist crumb every single time. This cake is my go-to when I need a dessert that just screams ‘special occasion’ without stressing me out!
- Why This is the Best Red Velvet Bundt Cake Recipe You Will Make
- Ingredients for the Ultimate Moist Red Velvet Bundt Cake
- Step-by-Step Instructions for Your Red Velvet Bundt Cake
- Tips for Making a Truly Moist Red Velvet Bundt Cake
- Ingredient Notes and Substitutions for Your Red Velvet Bundt Cake
- Storage and Reheating Instructions for Leftover Red Velvet Bundt Cake
- Serving Suggestions for Your Showstopper Bundt Cake Dessert
- Frequently Asked Questions About Making a Red Velvet Bundt Cake
- Sharing Your Homemade Red Velvet Bundt Cake Success
Why This is the Best Red Velvet Bundt Cake Recipe You Will Make
If you’ve had dry, disappointing red velvet cakes before, I need you to take a deep breath. This is different. We’re making this amazing red velvet bundt cake completely from scratch, and I promise, the result is worth every single minute. It’s not just about the color; it’s about that unbelievable texture that holds up beautifully outside the pan. We even make small tweaks to ensure it stays soft, kind of like those amazing recipes designed specifically for moist Christmas cakes.
- It’s truly homemade, hitting that deep cocoa note that boxed stuff just skips entirely.
- The crumb is unbelievably tender—you won’t catch me serving anything less!
- This recipe handles the cream cheese glaze perfectly without getting soggy too fast.
Achieving That Signature Tender Crumb
The secret weapon here, as you’ll see in the ingredients, is buttermilk reacting with a tiny bit of vinegar and baking soda. That gentle lift ensures the cake doesn’t turn dense or tough. We’re also careful not to overmix, which keeps the gluten relaxed and the texture soft.
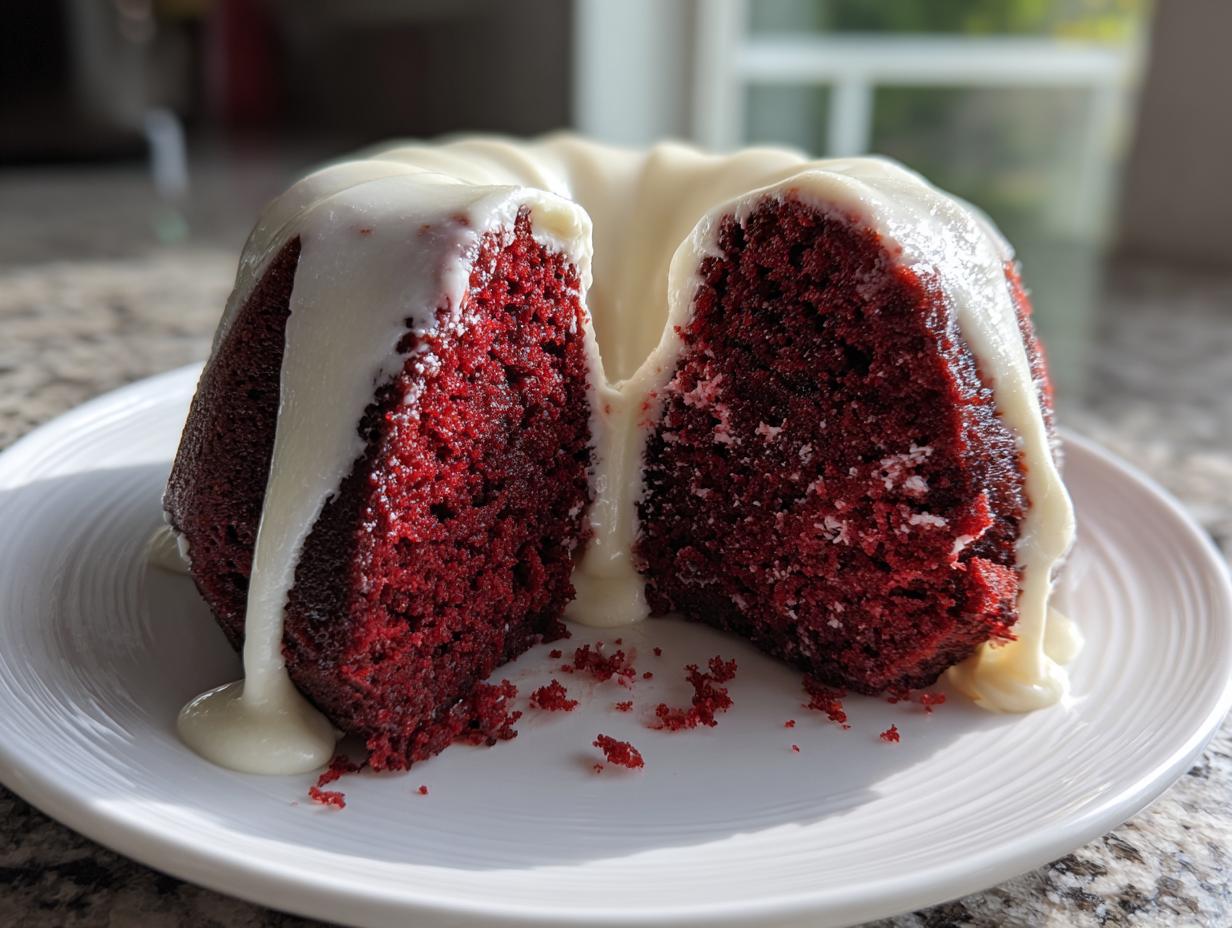
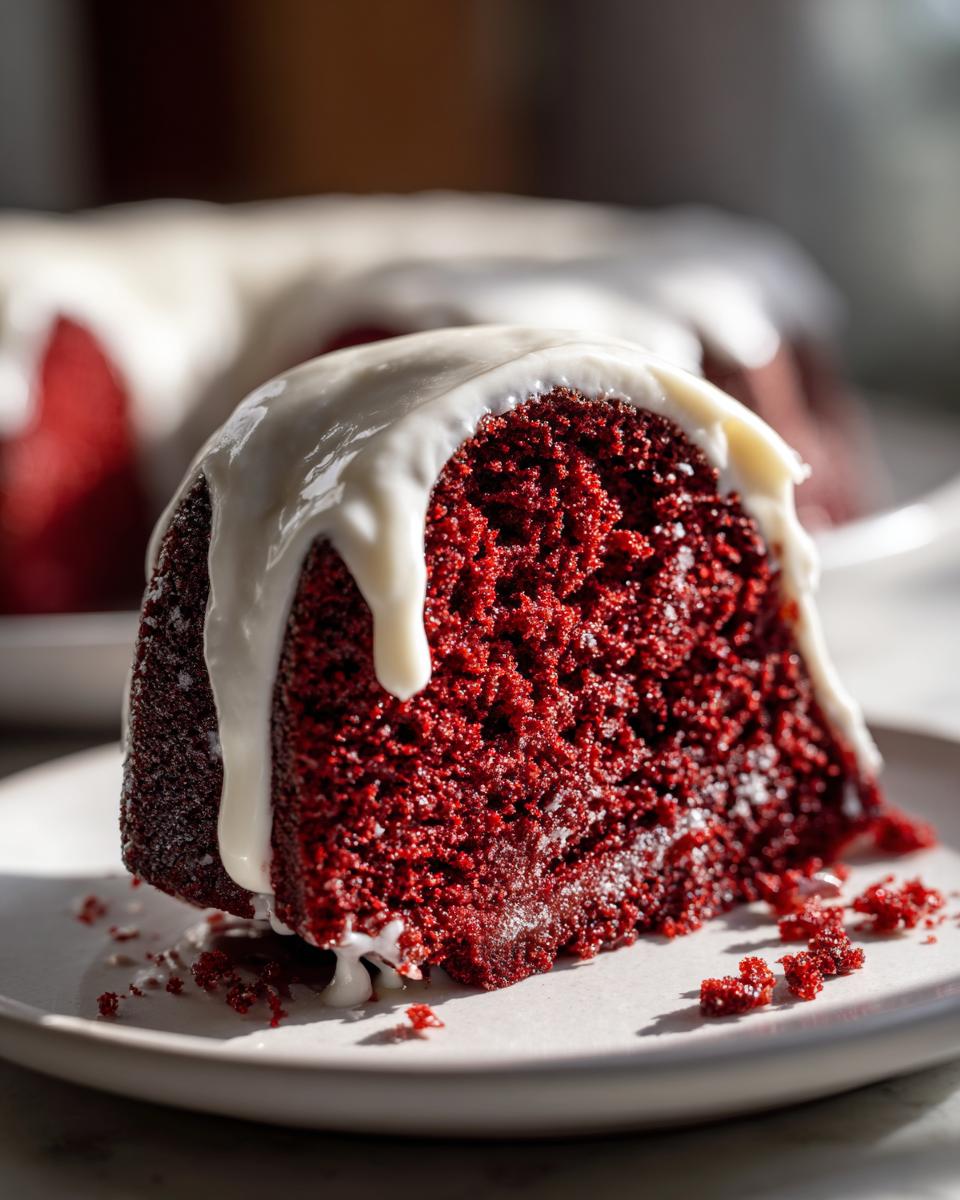
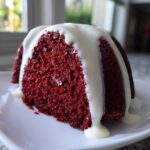
The Showstopper Look of Our Red Velvet Bundt Cake
There is nothing more elegant on a holiday table than a perfectly set red velvet bundt cake. The deep, vibrant red color just pops, especially when you drizzle that tangy cream cheese glaze over the ridges. It immediately looks like it belongs on a bakery shelf, making it perfect for holidays or whenever you need an impressive homemade red velvet dessert.
Ingredients for the Ultimate Moist Red Velvet Bundt Cake
Okay, let’s talk about what goes into this beauty. Because we are aiming for that super moist result—the kind that tastes like a bakery treat—we can’t skimp on quality here. Using room temperature ingredients, especially the butter and eggs, is going to be your first step toward success. Don’t sweat the small stuff, though; I’ve listed exactly what you need below, broken down so you can check off your list easily. If you love getting deep into red velvet flavor, check out my post on moist red velvet cupcakes for extra tips!
Here’s what you need:
- 2 1/2 cups all-purpose flour
- 1 teaspoon baking soda
- 1 teaspoon salt
- 1 tablespoon unsweetened cocoa powder
- 1 cup unsalted butter, softened
- 2 cups granulated sugar
- 2 large eggs
- 1 cup buttermilk
- 1 teaspoon white vinegar
- 1 teaspoon vanilla extract
- 2 tablespoons red food coloring (or more for deep color)
For the Tangy Cream Cheese Glaze
You absolutely cannot have red velvet without that sharp, slightly tangy cream cheese topping, right? This glaze is simple—no need for tons of extra sugar that makes everything sickly sweet. Make sure your cream cheese is fully softened, or you’ll end up with little lumps that ruin the pretty drizzle. We’re aiming for a thick but pourable texture here so it drips down the sides beautifully.
- 8 ounces cream cheese, softened
- 3 cups powdered sugar
- 1/4 cup milk
Step-by-Step Instructions for Your Red Velvet Bundt Cake
Alright, here’s where the magic happens! Baking this red velvet bundt cake is straightforward, but following these steps ensures you get that bakery-worthy texture and structure. Don’t rush the cooling times; that’s where most people lose their cakes! If you want a deep dive into why people love this shape, check out some great Bundt cake inspiration.
Preparing the Pan and Dry Ingredients
First things first: we need to preheat your oven to 350°F (175°C). Now, listen up, because Bundt pans are notorious for sticking! You want to grease and flour yours really, really well. I like to use a silicone pastry brush and make sure every nook and cranny of that intricate pan is coated with butter or shortening, followed by a light dusting of flour that you tap out completely. Seriously, don’t skip this part unless you want a panic attack later!
While that’s happening, grab a medium bowl. Whisk together your flour, baking soda, salt, and cocoa powder. This dry mixture is ready to go when you are.
Mixing the Red Velvet Bundt Cake Batter
Next up is creaming the fats and sugars in a large bowl. Beat that softened butter and granulated sugar until it gets light and fluffy—this probably takes a solid three minutes with an electric mixer, and it’s how we build air into this dense cake. Once that looks good, beat in your eggs one at a time.
In a separate small bowl, mix your buttermilk, white vinegar, vanilla, and all that glorious red food coloring until the color is even. Now, this is the most important mixing tip: gradually add your dry ingredients to the butter mixture, alternating slowly with the buttermilk mixture. Remember to always start and end with the dry ingredients! Mix *just* until everything is combined. I mean it—stop mixing the second you see no streaks of flour left. Overmixing is the enemy of a tender crumb, trust me!
Baking and Cooling the Showstopper Dessert
Pour that vibrant batter evenly into your perfectly prepped Bundt pan. Pop it into that 350°F oven and let it bake for about 45 to 55 minutes. You’ll know it’s ready when a wooden pick inserted right in the center comes out clean. That pick test is non-negotiable!
Once it looks done, gently remove the pan and let it rest right there on a wire rack for exactly 15 minutes. This cooling stage is crucial! If you try to flip it out immediately, the cake might just crumble right out. After those 15 minutes, go ahead and invert the cake onto the rack to cool completely. It needs to be stone cold before you even think about glazing it!
Finishing with the Cream Cheese Glaze
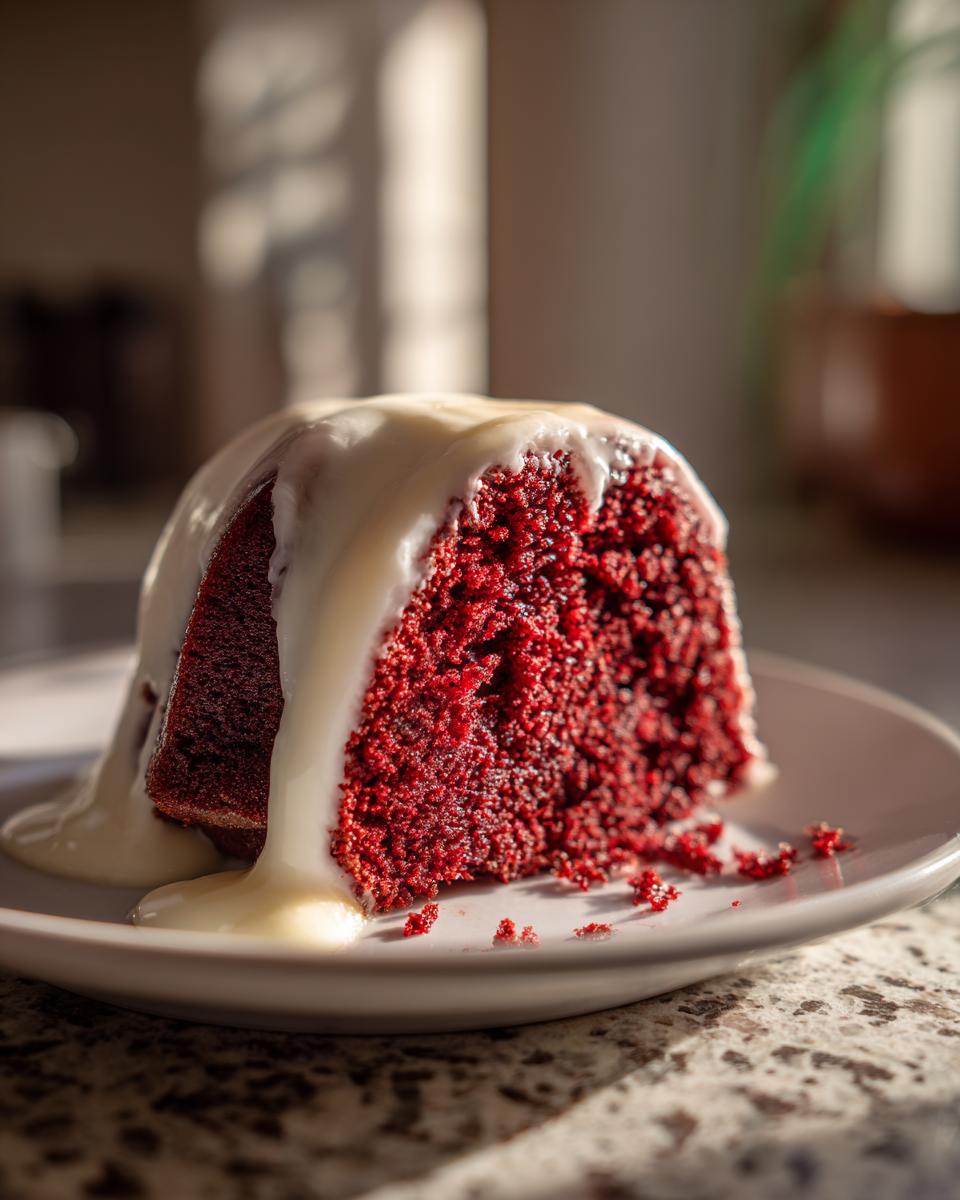
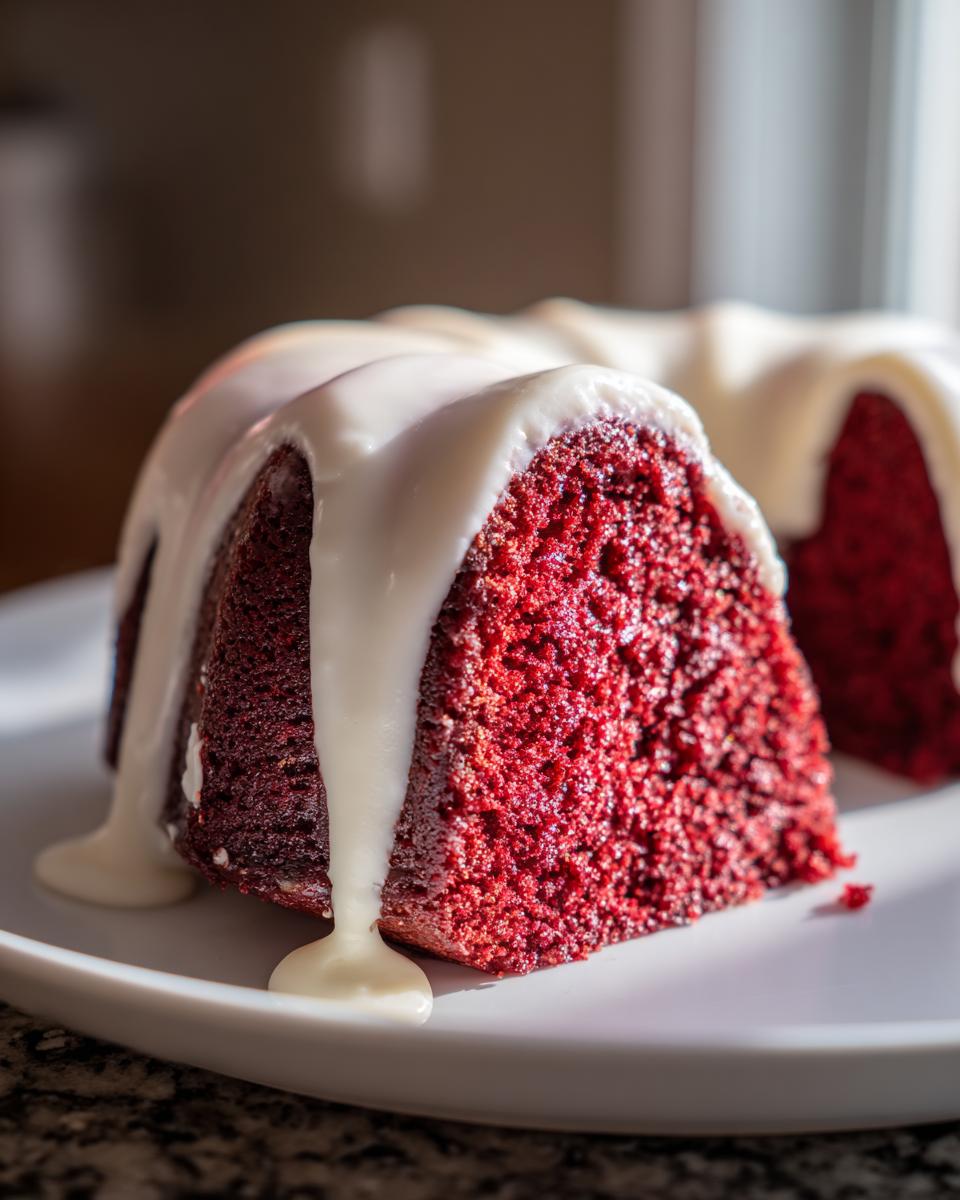
While the cake is cooling, whip up your glaze. Make sure that cream cheese is wonderfully soft. Beat it until it’s smooth, then slowly add the powdered sugar. Keep adding milk just a tablespoon at a time until you hit that perfect consistency—it should be thick enough to coat the back of a spoon but still flow nicely so it drips down the sides of your red velvet bundt cake like liquid silk.

Once the cake is completely cool, drizzle that tangy cream cheese glaze all over the top. Watch it drizzle down those ridges; that’s the moment you realize you just made a bakery-style dessert! If you need a good buttercream recipe for another cake project, take a look at my thoughts on vanilla buttercream!
Tips for Making a Truly Moist Red Velvet Bundt Cake
Okay, let’s get real for a minute. The number one thing people struggle with when baking red velvet is dryness, but that’s simply not going to happen here. I’ve taken all the secrets I learned—like making sure ingredients are right and keeping mixing to a minimum—and put them together just for this recipe. If you follow these tips, I guarantee you’ll have the most tender crumb you’ve ever experienced in a bundt cake! I’ve learned so much about moisture retention over the years, especially when working on lighter cakes like my moist lemon olive oil cake, and those principles carried right over to this baking masterpiece.
Here’s how we ensure your red velvet bundt cake is perfectly moist:
- Keep Everything Room Temperature: This is in the notes because it’s crucial! Room temperature butter, eggs, and buttermilk mix together smoothly and create a stable emulsion. When the batter is stable, it traps air better, which means a softer texture after baking. Don’t try to shortcut this step!
- Don’t Be Shy With the Color: While the food coloring doesn’t technically affect moisture, it helps achieve that deep, visually appealing hue everyone expects from a true red velvet. If you use liquid coloring, you might need a bit more, but if you’re like me, you might prefer a concentrated gel, which works better without adding extra liquid to the batter.
- Acid is Your Friend: That buttermilk and white vinegar combo is doing a lot of heavy lifting! The acid tenderizes the cocoa and flour proteins, leading to a softer result. When you see the baking soda mixing in, you’ll get a gentle fizz that sets you up for success. Feel free to check out advanced tips on moisture retention from sites like other bakers who focus on moisture; you’ll find similar advice!
- Cool Completely Before Glazing: I know you’re eager to drizzle that tangy cream cheese glaze, but if the cake is even slightly warm, the glaze will melt right into the pores of the cake, making the surface gummy instead of glossy. Patience pays off big time here!
Ingredient Notes and Substitutions for Your Red Velvet Bundt Cake
We’re making this red velvet bundt cake from scratch, which is always the best way to go, but sometimes life happens, and you realize you’re out of a key item. Don’t panic and throw in the towel! I’ve learned a few tricks over the years to keep the baking momentum going without sacrificing quality.
The most important ingredient, besides the butter, is definitely the buttermilk. It reacts with the soda and vinegar to give us that perfect tang and texture. If you’ve run out of buttermilk, don’t worry, I have a super easy fix. You can make faux buttermilk in just five minutes—I’ve saved meals with this trick!
Here’s how to whip up a fast substitute:
- Take one cup of regular milk (whole milk works best, but 2% is fine too).
- Add one tablespoon of white vinegar or lemon juice to the measured milk.
- Give it a quick stir and then let it sit on the counter for about five to ten minutes.
You’ll see it start to curdle slightly, and boom—you have the acid you need to keep that red velvet bundt cake beautifully tender!
What about the color? I stick to a combination of red food coloring and a tiny bit of cocoa powder. The cocoa is essential for that slight chocolate background flavor that makes red velvet what it is. If you skip the cocoa, it becomes just a brightly colored vanilla cake, and we aren’t making that today!
Also, when measuring your flour, please, please use the scoop-and-level method. Spoon the flour into your measuring cup and then level it off with a knife. Scooping straight from the bag compacts the flour, and you end up adding way too much, resulting in a tougher cake. That’s a common way to accidentally sabotage a recipe aiming for a luscious, velvety result!
Storage and Reheating Instructions for Leftover Red Velvet Bundt Cake
It’s highly unlikely you’ll have much left of this gorgeous cake, honestly, but if you manage to save a few slices, we need to treat them right so they stay moist! The biggest issue with storing any leftover cake, but especially one topped with a dairy-based glaze, is temperature control. You want to keep this cake tasting fresh, not dried out or funky.
Here’s the breakdown on how I store mine. Since this recipe features a tangy cream cheese glaze, which contains actual cream cheese, refrigeration is a must once it’s iced. If you’ve decided to skip the glaze and only dust it with powdered sugar, you can actually leave it covered at room temperature for a day or so! That’s a nice little bonus if you’re eating it quickly.
For the completely glazed cake, follow these simple steps for maximum freshness:
- Covering is Key: Once the glaze is fully set (give it at least an hour on the counter after drizzling), cover the entire Bundt cake tightly with plastic wrap or place it in an airtight cake carrier. Remember, air is the enemy of moisture!
- Fridge Time: Place the covered cake in the refrigerator. It should stay wonderfully fresh for about three to four days. The cold might slightly firm up the cake texture initially, but don’t worry about that.
- Bringing it Back to Life: This is the reheating secret! Before serving refrigerated slices, let them sit on the counter for about 30 minutes to take the chill off. If you are really impatient (I totally get it!), you can microwave individual slices for about 10 to 15 seconds until they are just barely soft again. That little bit of warmth makes the cocoa flavor pop right back!
If you happen to have way too much cake and need to keep it longer than four days, slicing it first and freezing it is a great option. Just wrap the slices tightly in plastic wrap, then toss them into a freezer-safe zip-top bag. They should keep well for up to two months, and defrosting them overnight in the fridge works like a charm!
Serving Suggestions for Your Showstopper Bundt Cake Dessert
Now that you’ve created this stunning, deeply flavorful dessert, you definitely want to show it off! When I pull this cake out of the pan, I feel like a culinary rockstar, and I want you to feel that way too. The beautiful shape of the Bundt pan does most of the decorating work for you, but presentation is everything when you’re aiming for that gorgeous, showstopper effect.
I always make sure the glaze is set before I even think about putting it on the serving plate. A fully hardened glaze means your drizzle will stay exactly where you want it, creating those gorgeous ribbons of cream cheese contrast against the deep red cake.
Here are a few ways I like to serve this cake to make it extra special:
- Simple Elegance: A simple dusting of cocoa powder or a sprinkle of finely chopped pecans right over the glaze is often all this beauty needs. If you want to keep it simple, check out my recipe for homemade bread bowls to see how often simple presentation shines through!
- Fresh Fruit Brightness: Red velvet is rich, so balancing it with something tart or fresh is always a fantastic idea. I love serving individual slices alongside a small mound of fresh raspberries or sliced strawberries. The color pop is incredible, especially next to that tangy glaze.
- The Classic Companion: Need a beverage pairing? This cake goes perfectly with a strong cup of coffee—the bitterness really complements the cocoa notes. For a richer experience, try serving it with a small glass of cold buttermilk (yes, really!) or just a really good quality vanilla bean ice cream on the side.
If you’re going for a full spread, pairing this luxurious cake with something a little unexpected also works wonders. Think about how amazing it would look next to a platter of light citrus desserts, or maybe a tart coffee cake. For inspiration on pairing rich flavors, sometimes seeing what others are doing with similar flavors, like the beautiful ways people serve red velvet cream cheese desserts, can spark some great serving ideas!
Frequently Asked Questions About Making a Red Velvet Bundt Cake
I know you might still have a few lingering questions about achieving that perfect red velvet bundt cake. It’s all about technique, and I want to make sure you feel 100% confident before you even turn on the oven. I’ve gathered the questions I get asked the most—especially around keeping things moist!
Why is my red velvet bundt cake turning out dry?
Honestly, this is the number one fear we have when baking! Dryness usually comes from two places: overbaking or overmixing. If you bake it even a few minutes too long, that moisture evaporates. Always check it early, and remember that a toothpick coming out with just a few moist crumbs attached means it’s done. Also, if you over-developed the gluten by mixing too vigorously after adding the flour, the cake will be tough and dry. Be gentle!
Can I skip the red food coloring in this recipe?
You technically *can*, but then you’re not making red velvet, are you? You’d end up with a very mild chocolate cake, since the cocoa powder is key to the flavor profile. The red color is iconic! If you are trying to avoid traditional dyes, I suggest using a high-quality, concentrated gel coloring, or even focusing on natural colorants like beet powder, though that can slightly alter the flavor profile. But for that true, vibrant velvety red bundt cake experience, I recommend sticking with the coloring.
What makes this recipe different from a Nothing Bundt Cake copycat?
That’s a great question, especially since those bakery ones are so popular! The biggest difference usually lies in the simplicity and the finishing touch. Many copycat recipes rely heavily on a boxed mix hack to stay *easy*, but this is a true red velvet bundt cake from scratch. Our glaze here is a simple, tangy drizzle, whereas those bakery cakes usually use a thick, poured application of pure white confectionery glaze. We focus on a richer, slightly more complex flavor profile using buttermilk rather than just relying on sugar for the structure. For an interesting comparison, you can look at how others approach it here: Nothing Bundt copycat recipes.
Do I need to use buttermilk, or can I substitute regular milk?
I strongly urge you to use buttermilk, or at least create the substitute I mentioned above (milk plus vinegar/lemon juice). Buttermilk is crucial because its acidity tenderizes the gluten structure in the flour and activates the baking soda perfectly, leading to that unbelievably tender crumb red velvet bundt everyone raves about. Using standard milk without the acid often results in a denser final product, which defeats the purpose of making this specific recipe!
How much red food coloring will I need for the deepest red color?
This depends entirely on whether you use liquid drops or gel paste. If you use standard liquid coloring, you might need up to four tablespoons to get a truly deep color since the cocoa powder tries to muddy it up. I often find myself using a lot of coloring when I’m not careful! If you want an intense color without thinning the batter out, consider chilling your finished batter for 30 minutes before baking—sometimes chilling helps keep the colors vibrant, just like when I make my no-bake treats!
Sharing Your Homemade Red Velvet Bundt Cake Success
Look at you! You’ve conquered the creaming, you’ve managed the mixing, and you’ve pulled a spectacular, perfect ring of red velvet heaven out of your oven. I am so incredibly thrilled that you decided to bake this recipe. Sharing food is all about connection, and knowing this stunning dessert is sitting on your table right now makes my day!
I absolutely love seeing your creations! When you make this incredible red velvet bundt cake, please snap a picture and tag me on social media. It helps me know what recipes you love and encourages me to keep developing these simple, yet impressive, homemade red velvet desserts for you.

I want to know how it went for you! Did the glaze drape perfectly? Was the crumb as tender as you hoped? Leave a star rating and hit the comments below to tell me everything. Your feedback is the best part of running Devour Dish, and I genuinely read every single one.
If you had fun with this one, I promise there are so many more simple, reliable recipes waiting for you right here on the blog. Check out my collection of easy desserts when you’re ready for your next successful bake! And if you ever need to get in touch with a question, my contact page is always open, so don’t hesitate to reach out. Reach out to me here if you need anything at all!
PrintThe Ultimate Moist Red Velvet Bundt Cake with Tangy Cream Cheese Glaze
You want a show-stopping dessert that is moist and tender. This from-scratch red velvet bundt cake recipe delivers that deep red color and rich cocoa flavor, topped with a simple, tangy cream cheese glaze. It is the bakery-style red velvet bundt cake you need for any special occasion.
- Prep Time: 25 min
- Cook Time: 55 min
- Total Time: 80 min
- Yield: 12 servings 1x
- Category: Dessert
- Method: Baking
- Cuisine: American
- Diet: Vegetarian
Ingredients
- 2 1/2 cups all-purpose flour
- 1 teaspoon baking soda
- 1 teaspoon salt
- 1 tablespoon unsweetened cocoa powder
- 1 cup unsalted butter, softened
- 2 cups granulated sugar
- 2 large eggs
- 1 cup buttermilk
- 1 teaspoon white vinegar
- 1 teaspoon vanilla extract
- 2 tablespoons red food coloring (or more for deep color)
- 8 ounces cream cheese, softened
- 3 cups powdered sugar
- 1/4 cup milk
Instructions
- Preheat your oven to 350°F (175°C). Grease and flour a 10-cup Bundt pan well.
- In a medium bowl, whisk together the flour, baking soda, salt, and cocoa powder. Set this dry mixture aside.
- In a large bowl, beat the softened butter and granulated sugar with an electric mixer until light and fluffy, about 3 minutes.
- Beat in the eggs one at a time, mixing well after each addition.
- In a separate small bowl, mix the buttermilk, white vinegar, vanilla extract, and red food coloring until the color is uniform.
- Gradually add the dry ingredients to the butter mixture, alternating with the buttermilk mixture, beginning and ending with the dry ingredients. Mix only until just combined; do not overmix to keep the crumb tender.
- Pour the batter evenly into the prepared Bundt pan.
- Bake for 45 to 55 minutes, or until a wooden pick inserted into the center comes out clean.
- Let the cake cool in the pan on a wire rack for 15 minutes before inverting it onto the rack to cool completely.
- To make the glaze, beat the softened cream cheese until smooth. Gradually beat in the powdered sugar until combined. Add the milk, one tablespoon at a time, until you reach a thick, pourable consistency for your cream cheese glaze.
- Once the cake is completely cool, drizzle the tangy cream cheese glaze over the top.
Notes
- For an extra moist red velvet bundt cake, use room temperature ingredients.
- If you want a deeper red color, add an extra teaspoon of gel food coloring to the wet ingredients.
- This recipe makes a showstopper bundt cake dessert perfect for holidays.
Nutrition
- Serving Size: 1 slice
- Calories: 480
- Sugar: 55g
- Sodium: 350mg
- Fat: 26g
- Saturated Fat: 15g
- Unsaturated Fat: 11g
- Trans Fat: 0.5g
- Carbohydrates: 60g
- Fiber: 1g
- Protein: 5g
- Cholesterol: 85mg