
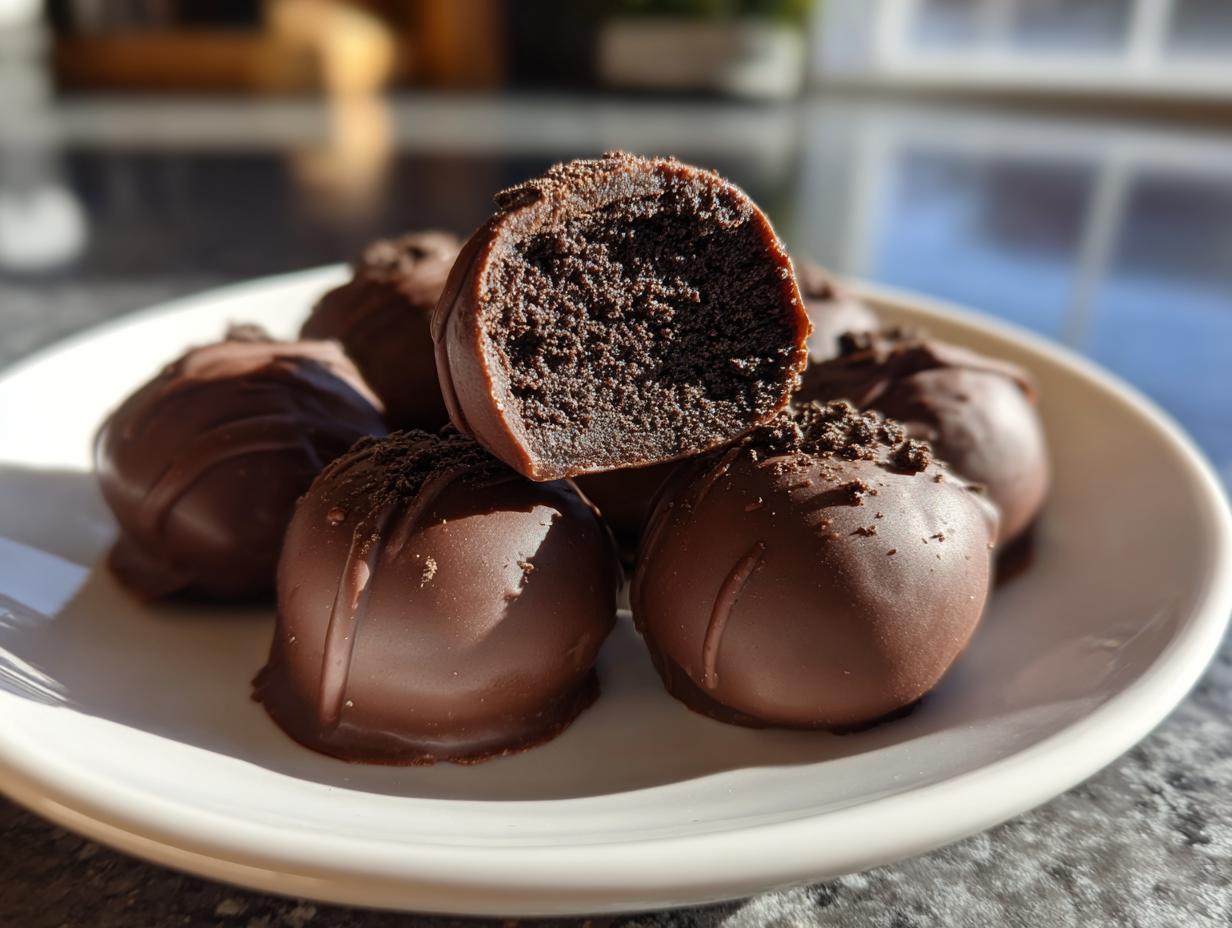
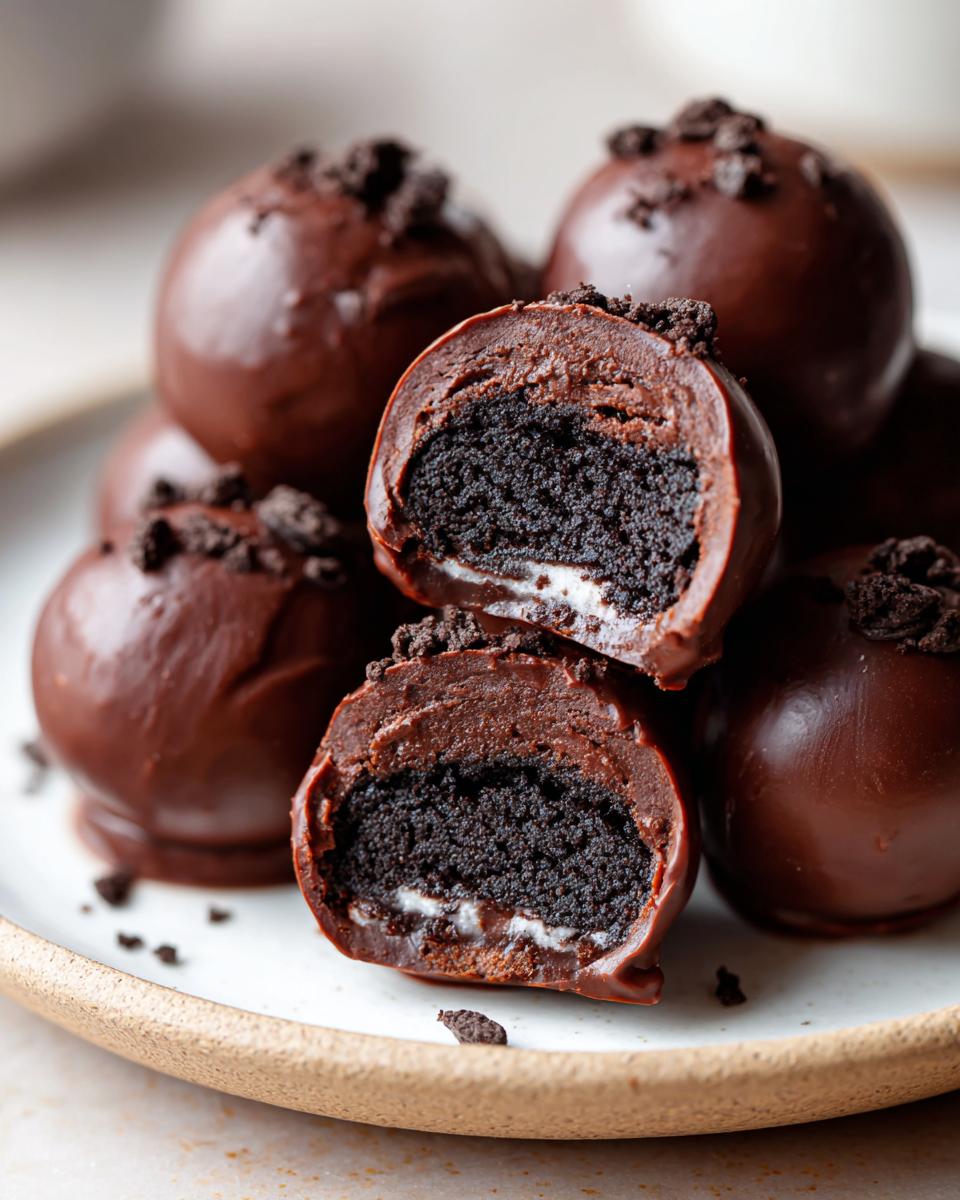
So glad you’re here at Devour Dish! If you’ve ever needed a crowd-pleasing sweet treat that involves zero turning on of the oven, you’ve landed in the right spot. I’m Avery, and I promise you, kitchen magic doesn’t always mean complicated techniques. Today, we are diving into what I consider the pinnacle of simple, decadent desserts: the ultimate easy 3-ingredient no-bake oreo balls. These classic truffle-style bites are foolproof, require minimal effort, and I guarantee you’ll rely on this trusted recipe again and again for parties and last-minute gifting.
- Why You Will Make These Oreo Balls Every Time
- Gathering Your Ingredients for the Oreo Balls Recipe
- Step-by-Step: Making No Bake Oreo Truffles
- Mastering the Chocolate Coating for Chocolate Covered Oreo Bites
- Tips for Perfect Oreo Balls Every Time
- Storage and Keeping Your Quick Oreo Treats Fresh
- Frequently Asked Questions About Oreo Balls
- Estimated Nutritional Information for Oreo Balls
- Share Your Oreo Dessert Ideas
Why You Will Make These Oreo Balls Every Time
I put my heart into developing recipes that truly *work* for real life, and that means cutting out the fluff. These Oreo balls are not just delicious; they tick every box you have when you’re short on time but need something guaranteed to impress. You’re going to love how quickly these come together!
It’s easy to see why this recipe is so popular, especially once you see how few things you actually need to buy to make them! I think you’ll agree that after making these once, they’ll be permanently added to your rotation. I’ve even linked to a great resource for more ideas on festive variations right here: Oreo & Holiday Treat Ideas.
The Magic of 3 Ingredient Oreo Balls
This is where the simplicity really hits home! We are talking about literally three core, common ingredients needed to make the rich, creamy center: Oreos, cream cheese, and whatever chocolate you choose for that final, perfect dip. That’s it! No eggs, no flour, no complicated steps requiring a stand mixer that costs a fortune. It’s the definition of a quick Oreo treat.
Perfect Party Dessert Recipes No Bake
If you’re planning any gathering—and really, who isn’t craving a crowd-pleasing sweet?—you need something that can be made ahead. Because these are no bake, they are ideal for chilling overnight. You can whip up a huge batch, store them neatly in the fridge, and pull them out whenever you need a bite-sized chocolate dessert. Imagine how much less stress you’ll have on party day!
Gathering Your Ingredients for the Oreo Balls Recipe
Okay, getting started with this recipe is so exciting because you barely have to grocery shop for it! Since we are keeping things super simple here at Devour Dish, you only need three main players. But trust me, the quality of these few things really makes a difference in the final outcome. Precision matters when you only have three steps!
I always keep an eye out for sales on the cookies, of course, and I recommend getting full-fat cream cheese because it just blends better for that rich texture we are aiming for. I’ve got a great guide on baking prep essentials that you might find helpful if you’re stocking your pantry! You can check out some of my favorite tried-and-true shopping links over here: Sally’s Essential Oreo Ball Prep Guide.
Ingredient Clarity for Cream Cheese Oreo Balls
Let’s talk absolutely essential details for these cream cheese Oreo balls. First, the cream cheese. You need the full 8-ounce block, but the most crucial part is that it needs to be *fully* softened. Leave it out on the counter for at least an hour, or use the microwave in 10-second bursts if you forgot. Cold cream cheese will make your dough crumble apart, and nobody wants that headache!
Second, the cookies. Don’t try to skip the filling! That white filling is part of what helps bind everything together and gives you that cheesecake-like tang. Just throw the whole Oreo—cookie and filling—right into the processor. Next up is the chocolate coating. While chips *can* work, they sometimes seize up weirdly when melting. I highly recommend picking up some good quality melting wafers or candy coating chocolates if you can find them. They flow so much smoother, which means your finished chocolate-covered Oreo bites look professional with way less fuss!
Step-by-Step: Making No Bake Oreo Truffles
This is the fun part, where your ingredients turn into something truly magnificent! Since we aren’t involving an oven, the process is super quick, but you do need to pay attention to how you combine everything. The key to success in these No Bake Oreo Truffles is texture. We want a consistency that holds its shape beautifully when you roll it, almost like sturdy cookie dough.
Remember, these simple truffle recipes are a staple on many popular food blogs, and I want to make sure you get the exact same amazing results everyone else is raving about! For the very best rolling experience, make sure you’ve got your chilling station ready beforehand. If you want to see a few different ways people handle these classic treats, check out this guide: Classic Oreo Truffle Methods.
Creating the Oreo Dessert Dough Base
First up, we crush those cookies! If you have a food processor, pulse those whole cookies until they are very fine crumbs. If you’re taking the classic home-kitchen route, throw them in a gallon zip-top bag and give them a really good whack with a rolling pin until you have super fine pieces. Seriously, put some elbow grease into it!
Next, dump your crumbs into a mixing bowl and add that softened cream cheese. Mix it up until it starts coming together. You’re looking for a consistency that’s firm enough that when you squeeze a tiny bit between your fingers, it sticks together easily. If your dough feels sticky or way too soft—oops!—your cream cheese might have been too warm. Don’t panic; we fix that next.
The Essential Chill Time for Your Oreo Balls
This step is non-negotiable, folks! Once that dough mixture is ready, you MUST get it in the refrigerator. Why? Because trying to roll soft, slightly greasy dough into perfect balls is a nightmare; they just stick everywhere! Chilling tightens up the fats in the cream cheese and provides the structure needed to form smooth, uniform balls. I always tell people to chill them for a minimum of 30 minutes. Honestly, my best batches are when I let them sit for a full hour. That firmness makes rolling a breeze!

Mastering the Chocolate Coating for Chocolate Covered Oreo Bites
Alright, we’ve got our firm, beautiful little dough balls chilling nicely in the fridge—this is when the real fun begins: the chocolate dip! Melting chocolate can sometimes feel super intimidating, but it shouldn’t be. If you’re using those melting wafers, follow the package directions, usually involving short blasts in the microwave. Stir constantly between each 30-second burst. If you overheat it for even a second, it can seize up and become grainy, and we definitely don’t want that texture contrast against our creamy insides.
When you drop the chilled balls out, work quickly! Drop one into the warm, smooth chocolate. I use a carving fork—one with only two tines works best—to gently roll the ball around until it’s totally submerged. Lift it out, let the extra chocolate drip back into the bowl by tapping the fork gently on the edge. That little tap is key to getting those thin, crisp chocolate shells that look professionally done. Then, pop that lovely, freshly coated treat onto your parchment paper. If you’re feeling festive, this is the *exact* moment to add sprinkles before the chocolate sets!

If you’re curious about dipping techniques, especially if you want to try dipping half and leaving half exposed, I found someone with some fantastic step-by-step photos for dipping truffles two ways here: Two-Way Chocolate Dipping Guide. Once they are coated, they just need about 15 minutes back in the fridge to firm up that perfect shell.
Tips for Perfect Oreo Balls Every Time
Even though this is one of the easiest recipes out there, sometimes little things trip us up, right? I want to make sure you get that smooth, professional finish every single time you make these oreo balls. After testing countless batches—seriously, my family got tired of Oreos for a month once!—I’ve figured out a few little tricks that elevate these from good to absolutely show-stopping. These tips are all about avoiding common texture pitfalls.
If you’re wondering how to get that incredibly smooth chocolate shell without any lumps or cracks, or if your dough was a little too soft to roll, this is the section for you. For more advice on achieving that perfect, rich truffle consistency, you can always check out more master tips here: The Best Oreo Balls Recipe Secrets.
Making Holiday Oreo Candy Variations
These treats are my absolute go-to when it comes to holiday cookie exchange ideas because they look so fancy but take almost no time! The basic version with dark chocolate is classic, but for a truly festive look, you HAVE to experiment with candy melts. Think bright red or green melts for Christmas, or pastel blues and yellows for Easter.
The key to using those colored candy melts is the same as standard chocolate: melt them slowly and stir often. Once you dip your *chilled* ball into the melted color, you need to work fast! This is your window to add visual flair. Before the coating sets—we’re talking within 30 seconds—drizzle with a contrasting color or just shower them generously with holiday sprinkles. The sprinkles stick instantly to the wet chocolate and create a gorgeous, professional presentation for your festive chocolate treats.
Storage and Keeping Your Quick Oreo Treats Fresh
Okay, you’ve successfully made the easiest, most delicious chocolate-covered bites, and now you have to resist eating all 30 of them in one sitting! The good news is that these quick Oreo treats store beautifully because the moisture is trapped inside that creamy center.
The absolute number one rule here is refrigeration. Since these rely on cream cheese for their structure, they absolutely must stay cold to keep their firm shape and prevent the chocolate shell from getting soft or melting onto the plate. Don’t leave them sitting out on your dessert platter for more than a couple of hours, especially if you’re having a party in a warm room.
Store your finished **oreo balls** in an airtight container. I usually use a glass container with a solid lid. If you stack them, put a sheet of parchment paper between the layers—never put the chocolate-coated bottoms directly against each other, or you’ll get annoying smudges when you try to separate them later. They last really well in the fridge for up to two weeks, sometimes longer! I often make a huge batch right before holidays to save time, and they are still perfect.
As for bringing them to room temperature? I let them sit on the counter for about 15 minutes before serving. This lets the chocolate smooth out just a tiny bit and softens the center slightly so you get that perfect melt-in-your-mouth texture we are going for. But honestly, they are delicious served straight from the fridge, too! If you’re looking for more fantastic make-ahead ideas for the holidays, you should definitely check out this list of 20 No Bake Christmas Treats for Kids for inspiration!
Frequently Asked Questions About Oreo Balls
It’s totally normal to have a few questions pop up when you try a new recipe, especially something as wonderfully simple as these oreo balls! I’ve gathered the questions I get most often from folks trying this easy Oreo dessert out for the first time. Getting these little details right ensures you get that perfect truffle result every time.
Can I make Easy Cookie Balls without cream cheese?
This is the big one! Honestly, for this specific, incredibly easy 3-ingredient recipe, no, you really can’t skip the cream cheese. It’s absolutely crucial! The cream cheese is what gives these treats that signature creamy, slightly tangy binder that makes them taste more like a rich truffle than just crushed cookies. If you were to use something else, like butter or even melted chocolate, the texture would change drastically.
If you absolutely cannot use cream cheese due to allergies or dietary needs, you’re moving into a different recipe territory entirely—we’d be looking at something more like a no-bake chocolate doughnut hole or a traditional truffle base. For these classic cream cheese Oreo balls, that block of cheese is essential for binding and flavor. My advice is always to stick to the recipe for the first time so you get that incredible flavor profile everyone loves! For ideas on how to adjust other elements, you can review some great tips here: No Bake Oreo Balls Troubleshooting.
Can I use other cookies instead of Oreos?
You can try, but I really caution against it for the *best* results. Oreos have a unique combination of intense dark chocolate cookie and that specific vanilla creme filling that works perfectly with the tang of the cream cheese. If you use a standard chocolate wafer cookie, you lose that filling component, and the texture will be way too dry. Stick to the classic Nabisco sandwich cookie for this batch of homemade Oreo truffles!
Do I have to chill them before dipping?
Yes, please! I know chilling feels like an annoying extra step when you’re so close to eating them, but trust me, this determines whether you have 30 perfectly coated bite-sized chocolate desserts or a sticky mess. If the dough balls are even slightly warm or soft, they absorb the warm chocolate too quickly, making the shell thin, or worse, they start melting into your dipping chocolate. A firm ball is a happy ball!
How should I store leftovers?
Since these are made with cream cheese, they are officially a refrigerated treat! Keep them in an airtight container in your fridge. They are fantastic right out of the cold, but if you plan on serving them later, pull them out about fifteen minutes before you intend to eat them. This lets the center soften up just a touch! If you are planning ahead for parties, these are fantastic Christmas Oreo candy additions that hold up beautifully for about two weeks.
Estimated Nutritional Information for Oreo Balls
Now, I know what you’re thinking: these are chocolatey, rich, and probably a little indulgent, so what exactly are we dealing with nutrient-wise? Since these delicious oreo balls are made with simple, whole ingredients like cookies and cream cheese, they pack a punch! But remember, these numbers are just estimates based on the standard ingredients I use.
The actual fat and sugar content can swing wildly based on whether you use dark chocolate, milk chocolate, or even if your brand of Oreo has slightly different sugar levels than mine. Always treat this information as a general guideline—the real value is in the joy they bring!
Here is the general breakdown for one single, perfect bite-sized treat:
- Serving Size: 1 ball
- Calories: 150
- Sugar: 14g
- Sodium: 85mg
- Fat: 9g
- Saturated Fat: 5g
- Carbohydrates: 16g
- Protein: 2g
Bottom line? They are a perfect little treat for your next gathering. Don’t worry too much about chasing perfect nutrition when dealing with a homemade classic like this! Just enjoy the fact that you made these amazing simple chocolate truffles yourself instead of buying something full of preservatives.
Share Your Oreo Dessert Ideas
And there you have it! The ultimate, foolproof, no-bake recipe for the best oreo balls you’ll ever make. I truly hope you’ve enjoyed this little journey into kitchen simplicity with me. There’s nothing more satisfying than pulling those perfectly chocolate-coated bites out of the fridge when company is ringing the doorbell!
I really want to hear all about your success! Did you stick to the classic three ingredients, or did you try spiking yours with some holiday spirit? Did you find the chilling time made a huge difference in your rolling game? Please, jump down into the comments below and leave me a rating for this recipe. Knowing that I’ve helped you make something easy and delicious makes my day!
If you snapped a picture of your gorgeous chocolate-covered cookie balls—especially if you used fun sprinkles or drizzled contrasting chocolate on top—I would absolutely love to see them! Tag me on social media so I can share your beautiful creations. You can find tons of inspiration and connection over at my friends’ site, too: See how others are styling their Oreo Truffles.
Thank you so much for baking with me today. Come back soon; I’ve got a super simple weeknight dinner coming up next! Happy cooking!
Warmly,
Avery Collins
PrintThe Ultimate Easy 3-Ingredient No-Bake Oreo Balls Recipe (Classic Truffle Style)

You can make these classic Oreo balls with just three ingredients. These no-bake Oreo truffles feature a rich, creamy center made from crushed cookies and cream cheese, coated in smooth chocolate. They are perfect for parties, gifting, or a quick sweet treat.
- Prep Time: 20 min
- Cook Time: 5 min
- Total Time: 50 min
- Yield: 30 servings 1x
- Category: Dessert
- Method: No Bake
- Cuisine: American
- Diet: Vegetarian
Ingredients
- 1 package (14.3 oz) Oreo cookies (about 36 cookies)
- 8 oz cream cheese, softened
- 16 oz melting chocolate wafers or chocolate chips (for coating)
Instructions
- Place all the Oreo cookies, including the cream filling, into a food processor. Pulse until you have fine crumbs.
- Transfer the crumbs to a medium bowl. Add the softened cream cheese.
- Mix the crumbs and cream cheese together using a hand mixer or a sturdy spoon until the mixture is fully combined and forms a thick dough.
- Roll the dough into small balls, about 1 inch in diameter. You should get about 30 to 36 balls. Place the balls on a baking sheet lined with parchment paper.
- Chill the Oreo balls in the refrigerator for at least 30 minutes. This step helps them firm up before dipping.
- Melt the chocolate wafers according to package directions. You can use a double boiler or microwave in 30-second intervals, stirring between each interval.
- Dip each chilled Oreo ball into the melted chocolate, ensuring it is fully coated. Use a fork to lift the ball out, tapping the fork gently on the side of the bowl to remove excess chocolate.
- Return the coated balls to the parchment-lined baking sheet.
- If desired, immediately sprinkle with festive sprinkles before the chocolate sets.
- Refrigerate the finished Oreo balls for about 15 minutes, or until the chocolate coating is completely firm.
Notes
- If you do not have a food processor, place the cookies in a large zip-top bag and crush them thoroughly with a rolling pin.
- For the best texture, make sure your cream cheese is fully softened to room temperature before mixing.
- If the mixture seems too soft to roll after mixing, chill it for 15 minutes before forming the balls.
- You can substitute dark, milk, or white chocolate for the coating based on your preference.
Nutrition
- Serving Size: 1 ball
- Calories: 150
- Sugar: 14
- Sodium: 85
- Fat: 9
- Saturated Fat: 5
- Unsaturated Fat: 4
- Trans Fat: 0.1
- Carbohydrates: 16
- Fiber: 0.5
- Protein: 2
- Cholesterol: 10