
Oh, the watery pie disaster! I swear, there is no feeling worse than pouring your heart into a beautiful double crust only to have the filling turn into lukewarm apple soup inside. If you’ve ever been there, trust me, I get it. That’s exactly why I developed this recipe for the ultimate quick stovetop apple pie filling. Seriously, this is my go-to; it comes together in about 30 minutes on the stove and guarantees that perfectly thick, velvety texture every single time, no sad, soggy bottoms here!
As someone who believes the best meals are simple and made with care—that’s the whole Devour Dish philosophy—I made sure this recipe uses straightforward ingredients you probably already have. Forget the complicated baking science; we are focusing on flavor and texture here. This spiced, rich filling works wonders in pies, but it’s also fantastic spooned over vanilla ice cream. You are going to want to use this homemade apple pie filling all fall long!

- Why This Homemade apple pie filling Recipe is Your New Favorite
- Selecting the Best Apples for apple pie filling
- Gathering Ingredients for Your Quick apple pie filling Stovetop Recipe
- How to Make apple pie filling from Scratch: Step-by-Step Instructions
- Tips for Success with Your Spiced apple pie filling
- Versatility: Using apple pie filling Beyond Pie
- Storage and Freezer Friendly apple pie filling Tips
- Frequently Asked Questions about Making apple pie filling
- Frequently Asked Questions about Making apple pie filling
- Sharing Your Comfort Food apple filling Creations
Why This Homemade apple pie filling Recipe is Your New Favorite
I know you’re probably here because you need a reliable recipe that doesn’t involve an hour of simmering or end up watery, right? Well, you’ve come to the right spot! This recipe is built around speed and that satisfying texture we all crave. It’s my absolute favorite for whipping up something special, even on a busy weeknight.
Here’s why you’ll toss out those sad cans of filling forever:
- It’s Quick! We’re talking about a genuinely quick apple pie filling stovetop method that’s ready in under 30 minutes total.
- Thick, Not Soupy: We use just the right amount of flour to ensure a wonderfully best apple pie filling thick sauce that hugs every apple slice.
- Flavor Bomb: This spiced apple pie filling uses real brown sugar and warming spices, giving you that deep, buttery, comforting taste.
- Versatile Magic: If you don’t make a pie, you can toss this amazing filling over baked apples or use it in my buttery oat crisp topping!
Selecting the Best Apples for apple pie filling
Getting the apples right is half the battle, and honestly, it’s where I see most people stumble when they are making their homemade apple pie filling. You can’t just grab any apple off the counter! If you use only sweet varieties, the whole thing tastes flat, and if you use only mushy apples, well, you know what happens—soup again!
My secret, and this is key for that perfect sweet and tart apple filling profile, is using a blend. I usually mix something super firm and tart, like a Granny Smith, with something that’s a bit sweeter but still holds its shape, like a Honeycrisp or a Fuji. This combination gives you structure so the apple pieces don’t turn to total mush, plus you get that lovely sweet-tart complexity in every bite.

When you prep them, make sure you’re consistent. Peel them, core them, and slice them all to about a 1/4-inch thickness. Uniformity in slicing ensures they all cook evenly on the stovetop, which is super important for our quick timeline!
The Best Apples for Pie Filling
Think about what you need from your apple—is it the backbone, or is it the flavor burst? I generally stick to these champions:
- Granny Smith: These are your structural heroes. They are tart and stay firm, giving you beautiful definition even when cooked.
- Honeycrisp/Fuji: These bring the sweetness! They break down just a tiny bit more than Granny Smiths, releasing delicious juices that help thicken the sauce naturally.
- Braeburn: A great all-around option if you only want to choose one type. They balance tartness and sweetness reasonably well.
Gathering Ingredients for Your Quick apple pie filling Stovetop Recipe
Okay, the best part about this recipe being so quick is that it keeps the ingredient list short and sweet! Remember, we are building big flavor here with simple pantry staples. Whenever you’re making something fast like this quick apple pie filling stovetop version, having your ingredients pre-measured is practically mandatory. It lets you move straight from measuring to cooking without losing momentum. It keeps the apples from browning while you chase down the nutmeg!
I always lay everything out on the counter first—it’s my version of mise en place, though I won’t pretend I’m a fancy chef. For this recipe, which will perfectly fill one 9-inch pie, here is exactly what you need:
- 6 large apples (think Granny Smith or Honeycrisp) that have been peeled, cored, and sliced uniformly to about 1/4-inch thick.
- 3/4 cup packed light brown sugar—and I mean packed! That molasses really adds depth.
- 1/4 cup granulated sugar—just the regular white stuff for a touch of brightness.
- 2 tablespoons all-purpose flour. This is helping us get that thick sauce we talked about, so don’t skip it! (If you’re going gluten-free, use cornstarch here instead.)
- 1 tablespoon lemon juice—this is vital to keep those pretty slices from going brown while you mix the spices.
- 1 teaspoon ground cinnamon—the star of the show!
- 1/4 teaspoon ground nutmeg.
- 1/8 teaspoon ground allspice—that little bit pushes the flavor over the edge.
- 1/4 cup water.
- 2 tablespoons glorious, cold unsalted butter. This goes in right at the end for shine and richness!
See? Nothing crazy! Those spices are what give you that incredible sweet and tart flavor that makes people ask if you bought the filling from a fancy bakery. It’s amazing what a little allspice can do for your cinnamon apple filling recipe!
How to Make apple pie filling from Scratch: Step-by-Step Instructions
I promise, this is where the magic happens, and it’s much faster than you might think! Since we are aiming for a total time under 30 minutes, preparation is key. We aren’t waiting for anything here; we are moving straight to flavor town. I always have my Dutch oven—or a heavy-bottomed pot if you’re not using one of my favorite Dutch ovens—ready on the burner before I even touch the cutting board. Let’s get this amazing making apple pie filling from scratch process rolling!
When I teach people how to make apple pie filling from scratch, I emphasize efficiency. If you follow these intuitive steps, you’ll have a rich, complex filling ready for baking or spooning over your morning oatmeal in no time.
Prepping Apples and Combining Dry Spices
First things first, grab those sliced apples from the bowl where you tossed them with lemon juice—we need to make sure they stay bright! Now, don’t just dump the sugar and flour into the pot; that’s a recipe for gritty, lumpy sauce, and nobody has time for that. Take a separate bowl and whisk your brown sugar, white sugar, flour, cinnamon, nutmeg, and allspice together really well. Whisking your dry ingredients first is my little trick for ensuring smooth distribution later on.
Simmering and Achieving the Perfect apple pie filling Consistency
Time to build the sauce! Add the dressed apples, your combined spice mixture, and the water into that heavy saucepan. You want to bring this up to a gentle simmer over medium heat. Once you see those gentle bubbles starting, turn the heat down low—we don’t want a violent boil, just a steady, happy bubble. Now, this is the critical step for solving the dreaded ‘watery’ problem: simmer for about 8 to 12 minutes, stirring every few minutes. Those minutes are where the flour does its job, turning the liquid into that beautiful, thick sauce that guarantees no more watery apple pie filling.

Finishing Touches for Rich, Buttery apple pie filling
When the apples feel tender-crisp—they should offer a little resistance but not feel raw—take the pan right off the heat. This is my absolute favorite step! Stir in those 2 tablespoons of cold, unsalted butter. Watch it melt; it adds such a glorious shine and richness to the final product. It smells incredible, so take a moment to enjoy that warm, buttery aroma!
Finally, and this is critical for its use in pies, you must let the apple pie filling cool completely. If you put hot filling into a pie crust, you’ll end up steaming your pastry. Let it sit on the counter until it’s room temperature, or even chill it for 20 minutes. Cooling helps the sauce truly set up perfectly.
Tips for Success with Your Spiced apple pie filling
Now that you’ve got the basic technique down for making quick, thick filling, I want to share a few pointers that elevate this from just ‘good’ to ‘best ever.’ These are the little things I picked up over the years that really make a difference when you’re focused on making that perfect spiced apple pie filling for your next dessert. Trust me, these details prevent common kitchen headaches!
First, let’s talk about those apples again. While I said a mix is best, if you have to choose just one, go for a firm apple. My number one rule for any homemade filling is consistency in slicing. If you have some big chunks and some thin slivers, the thin ones disappear into mush while the thick ones stay crunchy. Aim for that even 1/4-inch slice, maybe even use a mandoline if you’re feeling surgical, just be careful!
Next up, let’s dive into thickening, because that’s usually where things go wrong, right? Our recipe uses flour, which gives a nice, classic, slightly opaque sauce. But if you’re avoiding gluten or maybe just really want that clear, glossy look, you can absolutely swap it out. My tip is to use cornstarch instead. If you use cornstarch, swap the 2 tablespoons of flour for 3 tablespoons of cornstarch. Crucially, though, you have to mix the cornstarch with the cold water before you add it to the pot. Whisk it into the water until it’s totally dissolved—a slurry—and then add that mixture during Step 3 instead of just adding the plain water. It ensures you get an even, smooth thickening agent rather than clumps.
And finally, a flavor bonus: feel free to introduce a tiny bit of zest! If you’re using a tart apple like a Granny Smith, tossing in the zest of half a lemon with your spices adds a brightness that really wakes up the flavor profile of the whole dish. It goes wonderfully with that molasses note from the brown sugar too. You can actually use similar spice ideas when you’re making my recipe for moist spice cake from scratch—those warming notes really cross over well!
Versatility: Using apple pie filling Beyond Pie
Honestly, making this incredibly flavorful, thick apple pie filling and only using it once in a pie feels like a huge waste! The beauty of getting the seasonings and the thickness just right on the stovetop is that you unlock so many other comforting dessert possibilities. This isn’t just for Thanksgiving anymore; this is your everyday comfort food hero!
Once this rich, buttery, spiced mixture has cooled slightly, it becomes the MVP of my pantry. You really can use this pie filling beyond pie applications in so many ways. I find myself making a big batch just to have it ready to go when inspiration strikes on a Tuesday morning. Don’t feel locked into baking a full crust!
Think about how easy desserts can be when the main event is already done. Here are a few of my favorite ways to use up leftover—or I like to call it, ‘next-day’—apple pie filling:
- Crisps and Cobblers: Obviously, this is number one! Just dump the filling into a baking dish and top it with your favorite buttery crumble. If you need a fantastic topping recipe, check out the one I use for my buttery oat crisp—it’s dangerously good.
- Breakfast Topping: This is my personal addiction. Spoon a warm scoop of the filling right over a stack of pancakes or my morning banana oatmeal pancakes. It’s like having dessert for breakfast, which I fully endorse.
- Ice Cream & Yogurt Swirls: Warm it up slightly, and swirl it straight into vanilla ice cream or plain Greek yogurt. It adds that fall flavor instantly without needing any extra cooking.
- Stuffed French Toast: You can gently warm the filling and use it as the center filling when making stuffed French toast. Just seal the edges of the bread before dipping it in the egg wash.
See? Once you’ve mastered making the best apple pie filling thick and flavorful, you unlock a whole realm of easy, delicious fall desserts that require almost zero effort!
Storage and Freezer Friendly apple pie filling Tips
One of the absolute best parts about making a big batch of this quick stovetop filling instead of grabbing a store-bought jar? You get to keep the extras! I always try to double the recipe, even though it makes enough for one standard pie, just so I have some on hand. Having ready-made, perfectly spiced filling in the freezer saves weeknight desserts! This recipe is so wonderfully freezer friendly apple pie filling, which is a huge bonus.
But, there’s a small procedure to follow here to make sure you don’t end up with a disappointing, icy mess later. The most important element is temperature control, especially since we want that velvety sauce to set up like gold.
First, don’t even think about putting it in the freezer while it’s warm or even hot. Remember how I stressed cooling it thoroughly after stirring in that last bit of butter? You need to carry that cooling step through. Let the apple pie filling cool completely to room temperature first. If you seal a container of warm filling, the steam gets trapped, which causes condensation and ice crystals when it freezes—and that leads to that watery texture we fought so hard to avoid!
When you’re ready to freeze, use airtight containers, or heavy-duty freezer bags, making sure you press as much air out as possible. If you’re using bags, lay them flat on a baking sheet while they freeze so they freeze evenly and stack nicely later. You can keep this filling perfect for the freezer for about 3 months. That gives you plenty of time to use it in a last-minute crisp when guests pop over!
When you are ready to use your frozen masterpiece? Thaw it slowly overnight in the refrigerator. Seriously, patience here pays off! Once thawed, give it a gentle stir. If it seems slightly thinner than you remember, you can always pop it onto the stovetop over low heat for just two or three minutes to let that sauce thicken up again. It always comes back to life beautifully. If you like making things ahead, you should also check out my recipe for easy freezer jam; freezing things is definitely my favorite time saver!
Frequently Asked Questions about Making apple pie filling
I know when you’re diving into a new recipe, especially one that promises to solve a perennial kitchen headache like watery filling, you always end up with a few nagging questions. I always do! I’ve pulled together the most common things readers ask me about this quick, buttery, spiced filling below. If you don’t see your specific concern here, please drop a comment below!
What is the best ratio of sugar to apples for apple pie filling?
That’s a fantastic question, because sugar isn’t just for sweetness; it also helps pull moisture out of the apples during cooking before our flour/cornstarch thickener kicks in! In this specific recipe, we are using about 1.5 cups of combined sugar (both brown and white) for 6 large apples. This ratio is what I find creates that perfect, balanced taste—it’s sweet enough to feel comforting, but the tartness from the apples (and the little bit of lemon juice!) keeps it from being cloying. If you use super sweet apples like Gala, you might lean more towards the lower end of the sugar, but for the best flavor profile overall, this ratio works wonders for a classic apple pie filling.
Can I use this stovetop apple pie filling recipe without baking it?
Yes, absolutely! This is one of the many perks of using a quick apple pie filling stovetop method. Because you simmer the apples right on the burner until they are tender-crisp and the sauce is thick, the filling is technically fully cooked by the time you stir in that final bit of butter. This means you can let it cool completely, and use it immediately as a topping for pancakes, waffles, or stirred into a bowl of oatmeal. It’s amazing for a warm breakfast!
Just make sure it cools properly first. If you want it warm on top of ice cream, give it a quick zap in the microwave after it has completely cooled down. Never put hot filling directly onto cold ice cream—you want that creamy, tender filling, not instant melt!
While this recipe is designed to be ready to eat immediately, I want to quickly mention canning: this recipe is not officially tested for water bath canning because the cooking time is so quick! For safe home canning, you usually need longer boiling times for preservation, so stick to using this delicious filling within a few days or freezing it for later enjoyment.
Frequently Asked Questions about Making apple pie filling
Can I use different spices besides cinnamon and nutmeg?
Oh, you totally can! While cinnamon and nutmeg are the bedrock of any great spiced apple pie filling, I encourage you to experiment. A tiny pinch of ground cloves brings a fantastic depth, especially if you’re using tart apples. I also love adding a fresh grating of ginger once in a while when I want a little bit of a spicy kick—it’s really unexpected and delicious! Just remember a little goes a long way with those heavier spices, so start small if you’re adjusting the classic blend.
How do I prevent the apples from breaking down too much?
This is all about cooking time and apple choice! As we talked about, choosing firm apples like Granny Smith is half the battle. Because this is a quick apple pie filling recipe, we are only simmering for 8 to 12 minutes max. Once the sauce thickens, you need to pull it off the heat immediately. If you keep it simmering past that point, the apples will get soft and we’ll be back to that watery consistency we are trying to avoid. They should still have a little bit of structure left when you test them!
What’s the difference between using flour versus cornstarch for thickening?
Flour is a bit more traditional and gives you a slightly more opaque, velvety sauce that pairs beautifully with the brown sugar in this recipe. Cornstarch, if you use the substitution I mentioned in the Tips section, gives you a glossier, clearer sauce. Both work to thicken beautifully and prevent that dreaded soupy result, but it’s really just a texture preference! Both options are fantastic binders for your homemade apple pie filling.
Sharing Your Comfort Food apple filling Creations
Okay, now that you have mastered the art of the quick, thick, perfectly spiced apple pie filling, I want to hear all about it! This recipe truly makes me feel like I’m bringing a piece of my own comforting kitchen into yours, and seeing your results always makes my day.
Did you use it in a classic pie? Did you end up spooning that gorgeous, velvety sauce over some pancakes for a quick breakfast treat? Or maybe you experimented with that versatile filling base for one of your own amazing inventions? I truly love seeing things you create with these simple building blocks.
Please take a moment to come back and leave a star rating for this recipe right below. If you had success in getting that thick consistency we talked so much about—the one that stops them serving you soupy pie forever—let me know in the comments! I always read every single message, and your feedback helps other home cooks feel more confident trying this delicious recipe, perhaps even checking out my guide on using comfort food apple filling ideas.
If you shared a picture on Instagram or Pinterest, tag me! I’d love to show off your amazing work. And hey, if you’re looking for another quick and tasty reference guide for your next baking adventure, you might want to peek at this easy apple pie filling recipe for comparison purposes!
Thank you so much for cooking with me today. Happy baking, and enjoy that perfect slice!
PrintThe Ultimate Quick Stovetop Apple Pie Filling (Thick & Perfectly Spiced)

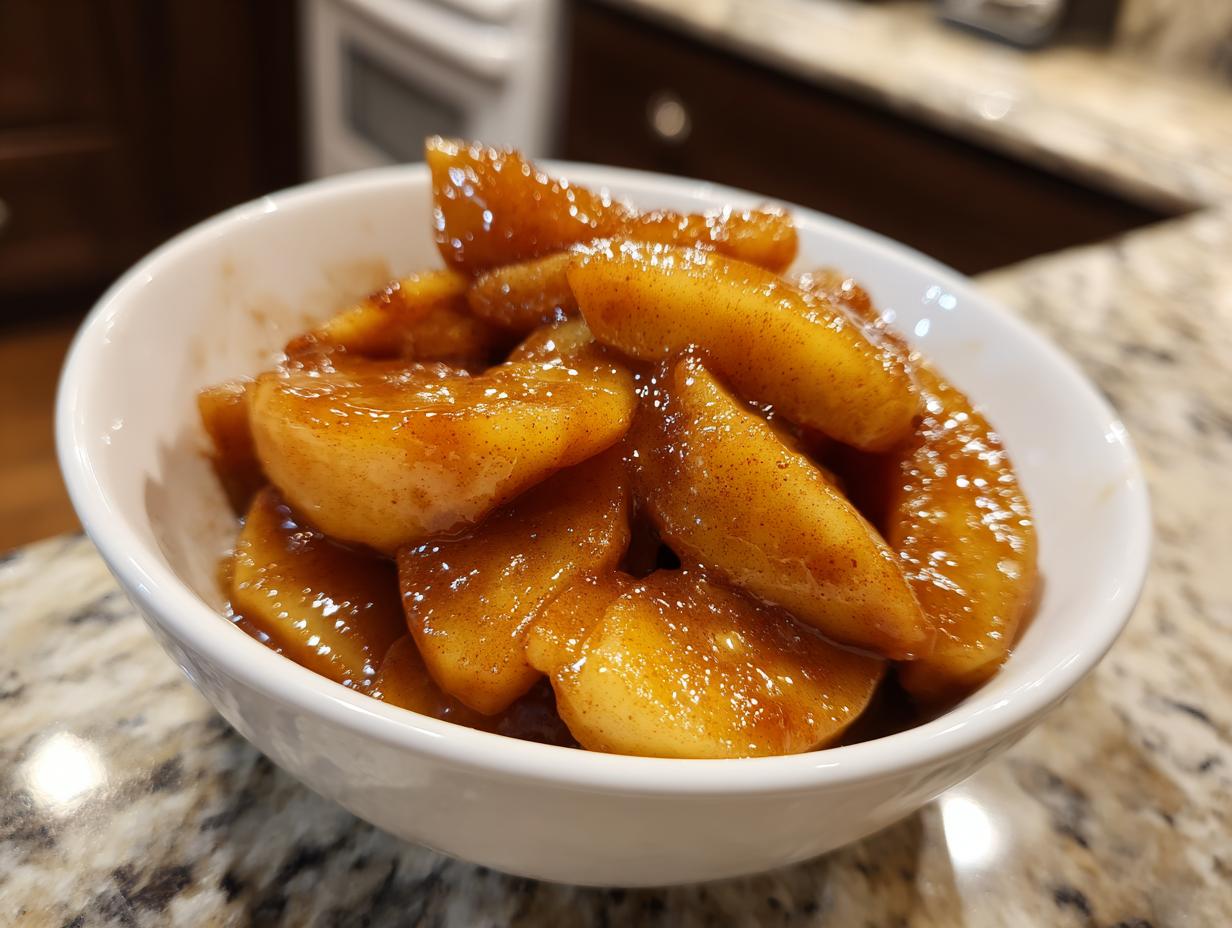
You need a thick, flavorful apple pie filling that comes together fast. This stovetop recipe uses simple ingredients to create a rich, buttery, and perfectly spiced filling that avoids the watery texture common in homemade versions. It is ideal for pies, crisps, or topping pancakes.
- Prep Time: 15 min
- Cook Time: 15 min
- Total Time: 30 min
- Yield: 1 standard pie filling 1x
- Category: Dessert Filling
- Method: Stovetop
- Cuisine: American
- Diet: Vegetarian
Ingredients
- 6 large apples (like Granny Smith or Honeycrisp), peeled, cored, and sliced 1/4-inch thick
- 3/4 cup packed light brown sugar
- 1/4 cup granulated sugar
- 2 tablespoons all-purpose flour (or cornstarch for gluten-free)
- 1 tablespoon lemon juice
- 1 teaspoon ground cinnamon
- 1/4 teaspoon ground nutmeg
- 1/8 teaspoon ground allspice
- 1/4 cup water
- 2 tablespoons unsalted butter
Instructions
- Prepare your apples: Peel, core, and slice the apples into uniform 1/4-inch pieces. Place them in a large bowl and toss immediately with the lemon juice to prevent browning.
- Combine dry ingredients: In a separate medium bowl, whisk together the brown sugar, granulated sugar, flour, cinnamon, nutmeg, and allspice. This step helps prevent lumps.
- Cook the apples: Add the sliced apples, water, and the sugar-spice mixture to a large, heavy-bottomed saucepan or Dutch oven.
- Simmer: Bring the mixture to a gentle simmer over medium heat, stirring often. Reduce the heat to medium-low.
- Thicken the filling: Continue to cook, stirring occasionally, for about 8 to 12 minutes, or until the apples are tender-crisp and the sauce has thickened significantly. You are looking for a velvety sauce, not a thin liquid.
- Finish with butter: Remove the pan from the heat. Stir in the 2 tablespoons of butter until it melts completely, adding richness and shine to your homemade apple pie filling.
- Cool: Let the filling cool completely before using it in your pie crusts or other desserts. Cooling allows the sauce to set fully.
Notes
- For the best texture, use a mix of tart apples (like Granny Smith) and sweeter apples (like Honeycrisp or Fuji).
- If you prefer a thicker sauce without flour, substitute 3 tablespoons of cornstarch for the flour and mix it with the water before adding it to the apples.
- This filling is freezer friendly. Cool it completely, store it in an airtight container, and freeze for up to 3 months. Thaw overnight in the refrigerator before using.
- This recipe makes enough spiced apple pie filling for one standard 9-inch pie.
Nutrition
- Serving Size: 1/8 of filling
- Calories: 240
- Sugar: 38g
- Sodium: 2mg
- Fat: 4g
- Saturated Fat: 2g
- Unsaturated Fat: 2g
- Trans Fat: 0g
- Carbohydrates: 53g
- Fiber: 3g
- Protein: 0g
- Cholesterol: 8mg