

There’s just something magical about waking up and deciding you’re going to bake something truly special for breakfast, right? Forget the store-bought stuff that tastes like cardboard! I’m Avery, and I promise you that mastering homemade English muffins is easier than you think, especially with this recipe. We aren’t using yeast or spending an hour kneading here; this is my favorite Easy No-Knead Homemade English Muffins recipe, and it’s all about achieving those signature, glorious little holes—the famous ‘nooks and crannies’—that just beg for melted butter.
Growing up, simple breakfast bread always meant comfort to me. This recipe brings that cozy, reliable feeling right to your stovetop. It’s straightforward, wonderfully quick, and guarantees those beautiful golden-brown domes every time. Ready to make breakfast the highlight of your day? You can see how these fit right into our collection of other easy brunch favorites!
- Why This Is the Best English Muffin Recipe for Your Kitchen
- Gathering Your Ingredients for Homemade English Muffins
- Step-by-Step Instructions: How to Make Homemade English Muffins
- Serving Suggestions for Your Homemade English Muffins Recipe
- Storage and Make-Ahead Tips for Homemade English Muffins
- Troubleshooting Common Homemade English Muffins Issues
- Frequently Asked Questions About Homemade English Muffins
- Estimated Nutritional Data for Homemade English Muffins
- Share Your Homemade English Muffins Success
Why This Is the Best English Muffin Recipe for Your Kitchen
I know there are a ton of recipes out there, but trust me when I say this one stands out for a busy home cook like you. We focus on what matters: incredible texture and ease. You get that beautiful, soft, and fluffy English muffins texture without any fuss. These are truly quick English muffins recipes that deliver on taste without the commitment of long proofing times.
- They are cooked right on the stovetop, no oven needed!
- The dough comes together in literally five minutes.
- They freeze beautifully for emergency breakfast restocking.
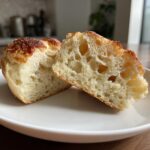
Achieving Perfect English Muffin Nooks and Crannies
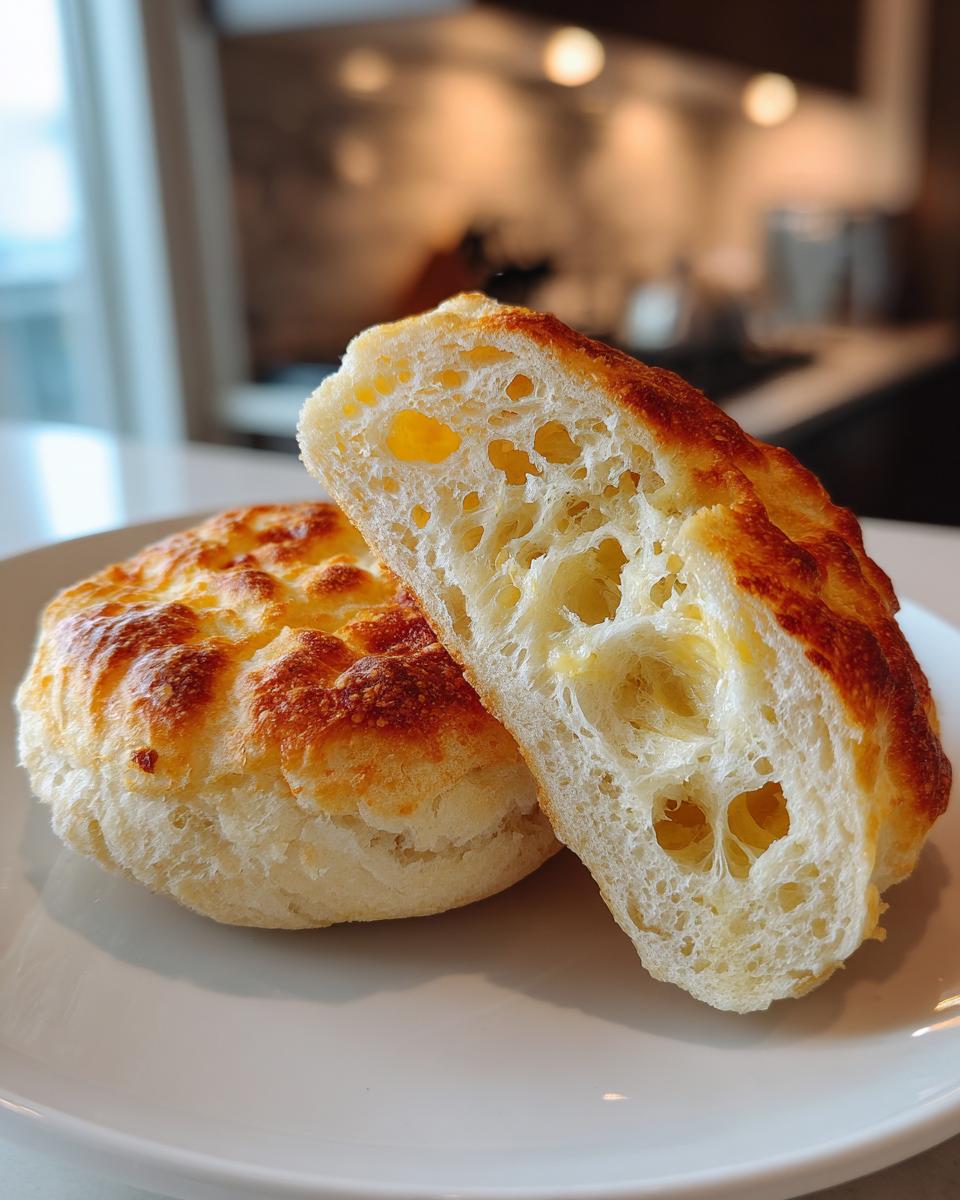
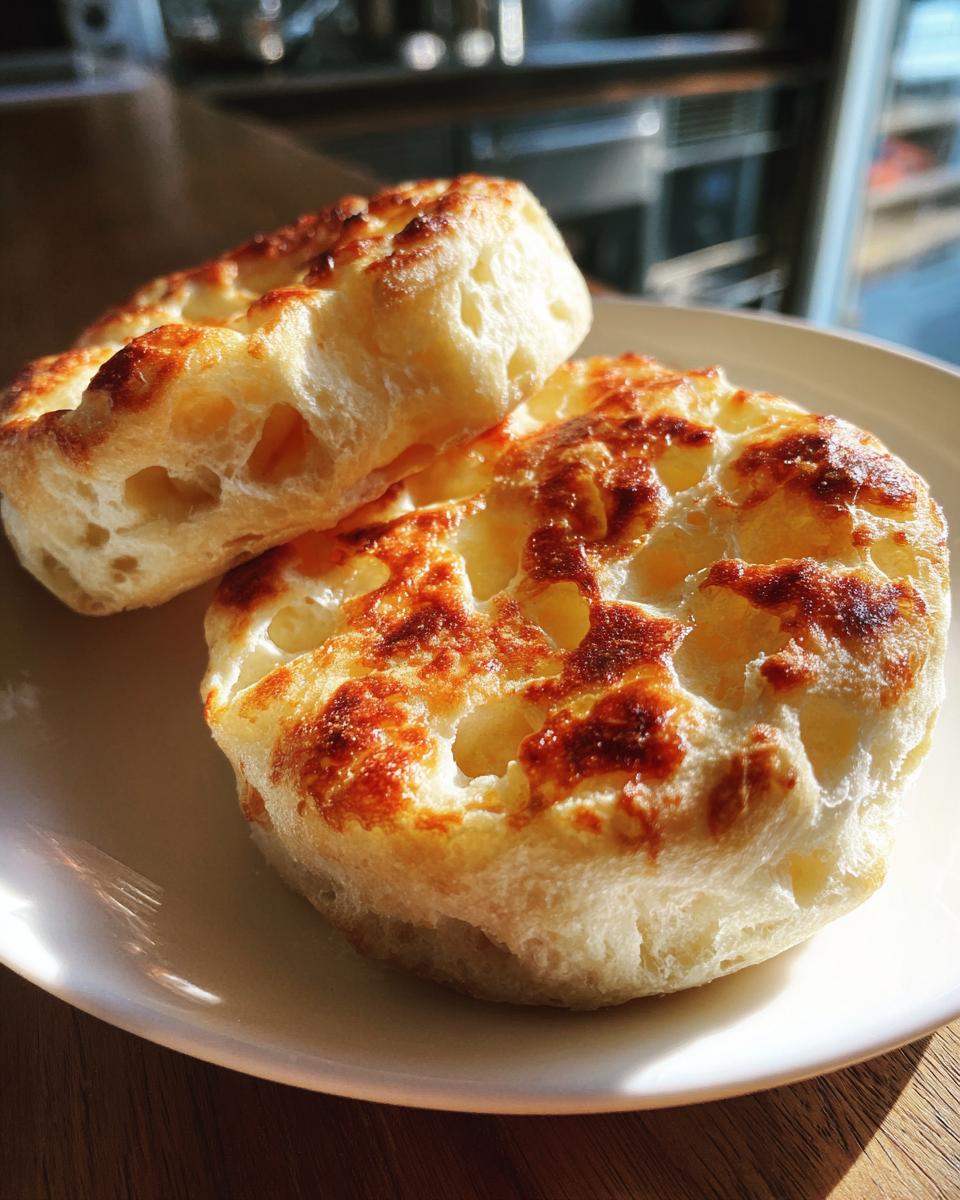
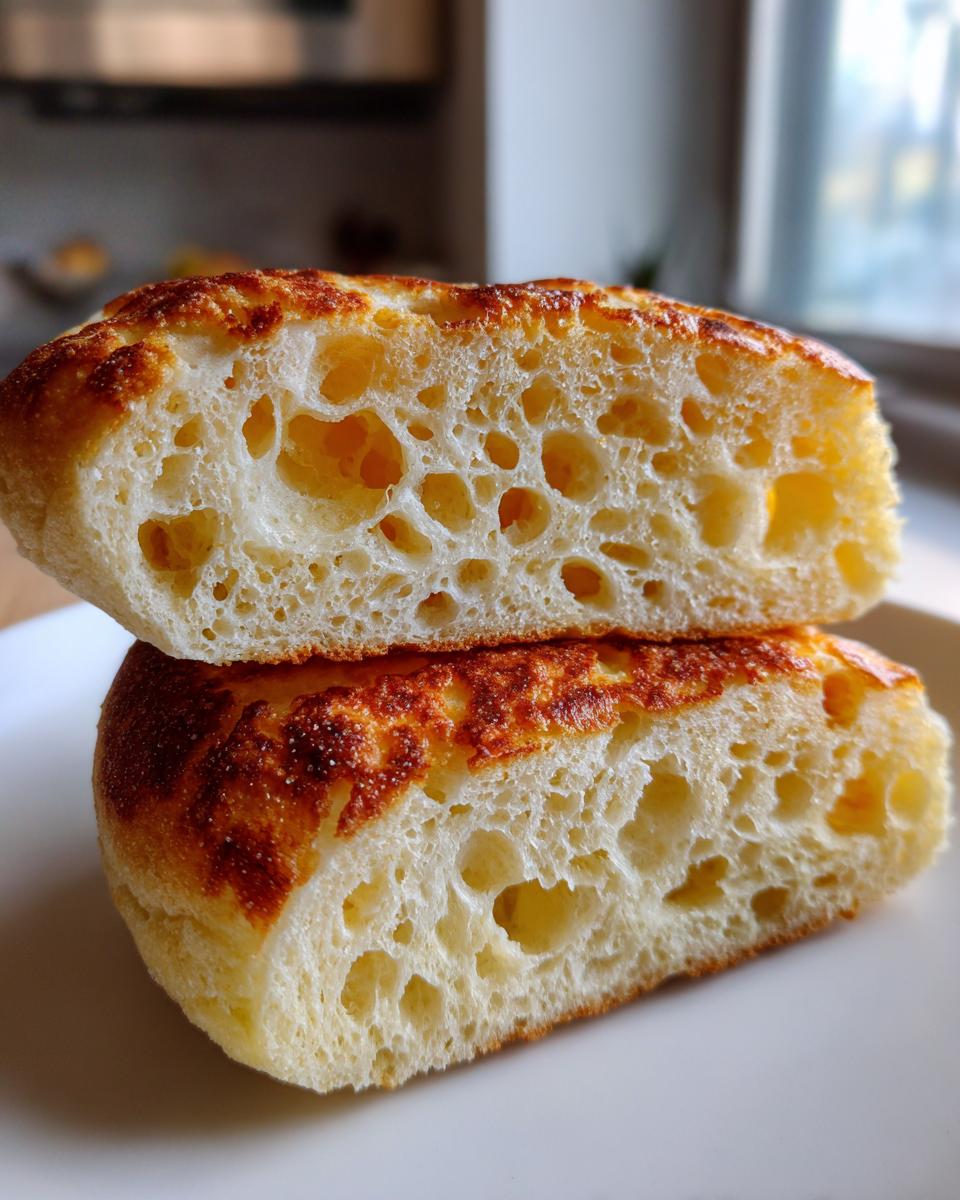
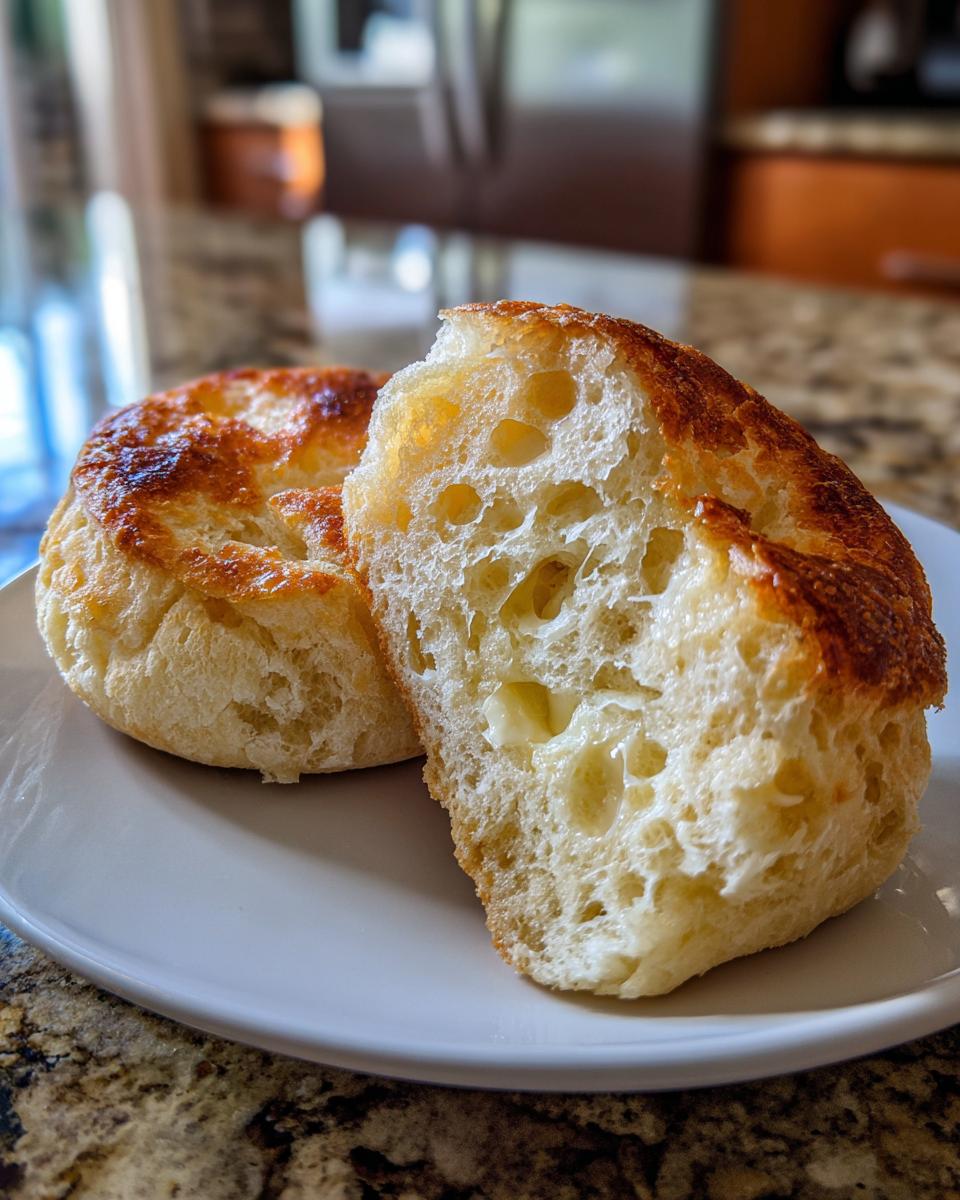
This is the part everyone asks about! Those beautiful, open holes—the famous English muffin nooks and crannies? They aren’t accidental. It comes down to three things: first, not overmixing the dough so you preserve the air bubbles. Second, cooking them low and slow on a dry skillet prevents the outside from browning too fast before the interior sets up. Finally, and this is my biggest tip, always split the cooled muffin with a fork, never a knife. The fork tears those internal tunnels open just right.
The Simplicity of No Knead Homemade English Muffins
If you see “yeast” and immediately close the tab, I totally get it! That’s why this recipe is such a game-changer. We use baking soda and powder, so there is zero kneading required. This is the beauty of no knead English muffins; you just mix until it looks messy and let time do the heavy lifting during a short rest. It makes making homemade English muffins feel accessible, even on a rushed weekday morning.
Gathering Your Ingredients for Homemade English Muffins
Okay, let’s talk supplies! Since this is such a simple recipe, the quality of what you toss into the bowl really matters for getting that bakery-style texture in your finished homemade English muffins. We’re keeping the ingredient list short and sweet, so make sure you have these basics ready to go. You’ll need about two cups of all-purpose flour, a tablespoon of sugar, one teaspoon each of salt, baking soda, and baking powder—that’s our chemical lift team! Don’t forget to melt down two tablespoons of good unsalted butter, and finally, one cup of buttermilk to bring it all together.
Ingredient Notes and Substitutions for Best Results
Buttermilk is my secret weapon here; its acidity really reacts well with the baking powder and soda, giving us lift and a tiny bit of tang. Now, if you’re staring at your fridge wondering where buttermilk is, don’t panic! Take one cup of whole milk—any kind works—and stir in one teaspoon of white vinegar or lemon juice. Let that sit on the counter for five minutes until it looks slightly curdled. That’s your substitute, and honestly, it works like a charm for these quick breads. Remember that extra flour or cornmeal is critical later for dusting, so make sure you have that ready for rolling!
Step-by-Step Instructions: How to Make Homemade English Muffins
Alright, this is where the magic really happens, and I promise, it’s so much simpler than it looks! If you follow these steps, you’ll see exactly how to make English muffins that taste like they came from a real bakery. We are going to keep our hands off the dough as much as possible, which is the secret to keeping them light and airy, perfect for your next homemade bread adventure.
Mixing the No-Knead Dough
Start by whisking all your dry ingredients—flour, sugar, salt, baking soda, and powder—in a big bowl. Then, pour in that buttermilk and the melted butter you set aside. Resist the urge to grab a mixer! Just use a wooden spoon and mix until everything is *just* combined. I mean it—it should look shaggy, maybe a little lumpy, and definitely sticky. Cover that bowl up tight and let it chill out on the counter for exactly 30 minutes.
Cutting and Preparing for Stovetop English Muffins
After the dough rests, turn it out onto a surface you’ve dusted generously with flour or, my preference, cornmeal for great flavor. Gently pat or roll it out until it’s about half an inch thick. Now, grab a 3-inch round cutter—that gives you the classic shape—and punch out your rounds. Dust both sides lightly with more flour or cornmeal before laying them out on parchment paper. Don’t smash them down; those little air pockets are precious!
Cooking for Golden Color and Fluffy Texture
Get your biggest cast-iron skillet ready and heat it over medium-low heat. Remember, we are dry frying them—no oil needed! This slow, gentle heat is what gives the inside time to puff up. Place your rounds onto the hot skillet, leaving a little space between them. Cook them for about 7 to 10 minutes on the first side until they look beautifully golden brown. Flip carefully and repeat. If you tap the cooked ones, they should sound hollow. That’s how you know your homemade English muffins are done!
Serving Suggestions for Your Homemade English Muffins Recipe
You did it! Now that you have these perfect, warm delights, you can’t just settle for plain toast, right? My favorite way to enjoy these is by splitting them fork-first and giving those beautiful nooks and crannies a generous smear of good quality butter—let it melt right in!
They are, of course, the absolute foundation for the best breakfast sandwiches imaginable. Think fried egg, a slice of sharp cheddar, and maybe some crispy bacon tucked inside.
If you’re looking for another big family breakfast idea, these muffins are amazing served alongside something sweet, like my recipe for cream cheese-stuffed French toast. Honestly, once you taste these fresh, you’ll wonder why you ever bought them pre-packaged. They make any morning feel like a special weekend brunch!
Storage and Make-Ahead Tips for Homemade English Muffins
One of the best parts about making a big batch of these is knowing you have grab-and-go breakfast ready for the whole week! Store any leftovers in a simple airtight container right on the counter for up to three days. They stay really fresh, which is different from a lot of other breads.
If you want to keep them longer, you can absolutely freeze them. Just make sure they are completely cool first—hot bread steams itself, making it soggy! Wrap them tightly, and they are good for a couple of months. When it’s time to eat a frozen one, I like to split it first, and then toast the cut sides directly in a dry skillet just like when we cooked them. That little bit of heat wakes up the texture again perfectly. You can even make some freezer jam to go with them!
Troubleshooting Common Homemade English Muffins Issues
Don’t worry if your first batch isn’t absolutely perfect! Baking bread at home always has a little learning curve, but these little stovetop muffins usually tell you exactly what’s wrong. If you’re finding your muffins are coming out flat and dense, I bet you either overmixed the shaggy dough—remember, we want it messy!—or maybe you accidentally pressed down on them while they were cooking on the griddle. Seriously, resist that urge to flatten them; those little air pockets depend on you leaving them alone!
Are they looking a bit pale instead of golden brown? That likely means your skillet temperature is too low. You want medium-low heat, not low heat. A proper temperature ensures the outside gets that beautiful, classic crust while the center cooks through slowly, which is vital for developing those wonderful nooks. Just adjust the heat slightly next time, and you’ll get that gorgeous color!
Frequently Asked Questions About Homemade English Muffins
Can I use active dry yeast instead of baking soda and powder?
That’s a fantastic question, and the short answer is no, not really for this recipe! This is designed as a quick English muffins recipe using chemical leaveners. If you switch to yeast, you’ll need to add milk instead of buttermilk, and crucially, you’ll have to knead the dough and let it rise for at least an hour or two. That completely changes the process! If you want that classic texture, stick to the baking soda and powder for these no knead English muffins!
How do I ensure I get those signature nooks and crannies?
This is the million-dollar question, isn’t it? As I mentioned before, the biggest secret to true English muffin nooks and crannies is gentle handling. Do not overmix the dough when combining wet and dry ingredients—it should stay shaggy! While cooking on the skillet, never, ever press them down with a spatula. That squishes the air out. Let them cook undisturbed on medium-low heat, and they will naturally puff up with lovely airy pockets inside.
Can I adapt this for sourdough English muffins?
Oh, I love playing around with sourdough! While this base recipe won’t work directly with sourdough discard—it relies on the specific lift from the baking powder—you absolutely can find dedicated recipes for sourdough discard recipes that achieve a similar result with more tang. If you’re looking for that authentic, slightly sour flavor, you might want to search for a recipe specifically calling for active starter, but for a fast, fluffy batch, stick to this one!
What is the best cutter size for homemade English muffins?
I find that a 3-inch round cutter gives you that perfect, slightly thick shape that looks just right when toasted. If you don’t have a specific cutter, a wide-mouth drinking glass works in a pinch! Just make sure you dust the rim well so it doesn’t stick when you cut through the dough. Consistency in size helps them cook evenly on the griddle, too.
Estimated Nutritional Data for Homemade English Muffins
When you’re whipping up a batch of these delicious homemade muffins, it’s good to know roughly what you’re taking in. Please keep in mind that these numbers are just an estimate based on general ingredients, as your exact amounts of flour or butter might vary just a tiny bit. It’s always best to treat this as a helpful guideline rather than exact dieting data!
- Serving Size: 1 muffin
- Calories: 185
- Fat: 4g
- Carbohydrates: 33g
- Protein: 5g
- Sugar: 2g
- Sodium: 350mg
See? For a satisfying breakfast bread that holds all that melted butter, those stats are totally manageable!
Share Your Homemade English Muffins Success
Oh, I just can’t wait to hear what you think! Seriously, when you make these homemade English muffins, please hop back down to the comments and leave me a star rating. Telling me how those nooks and crannies turned out makes my day!
Did you use cornmeal or flour for dusting? I love seeing your progress! You can always tag photos on social media so I can cheer you on. If you have any tricky questions down the road, just reach out to me on the contact page. Happy baking, friends!
PrintEasy No-Knead Homemade English Muffins with Classic Nooks and Crannies
You can make soft, fluffy English muffins from scratch using this simple, no-knead recipe. Cook them on the stovetop for that perfect golden crust and enjoy the classic nooks and crannies that hold melted butter.
- Prep Time: 15 min
- Cook Time: 25 min
- Total Time: 40 min
- Yield: 8 servings 1x
- Category: Breakfast
- Method: Stovetop Griddling
- Cuisine: American
- Diet: Vegetarian
Ingredients
- 2 cups all-purpose flour
- 1 tablespoon granulated sugar
- 1 teaspoon salt
- 1 teaspoon baking soda
- 1 teaspoon baking powder
- 1 cup buttermilk (or milk with 1 teaspoon vinegar added)
- 2 tablespoons unsalted butter, melted
- Extra flour or cornmeal for dusting
Instructions
- In a large bowl, whisk together the flour, sugar, salt, baking soda, and baking powder.
- In a separate bowl, whisk together the buttermilk and melted butter.
- Pour the wet ingredients into the dry ingredients. Mix with a spoon until just combined. Do not overmix; the dough will be shaggy and sticky. This is a no-knead recipe.
- Cover the bowl and let the dough rest at room temperature for 30 minutes.
- Lightly dust a clean surface with flour or cornmeal. Turn the dough out onto the surface. Gently pat or roll the dough to about 1/2 inch thickness.
- Use a 3-inch round cutter to cut out the English muffins. Reroll scraps once to cut out remaining muffins.
- Lightly dust both sides of the cut muffins with flour or cornmeal. Place them on a baking sheet lined with parchment paper, leaving space between them.
- Heat a large, dry cast-iron skillet or griddle over medium-low heat. You are dry frying them, not using oil.
- Place the muffins on the hot skillet. Cook for 7 to 10 minutes per side, until golden brown. The internal temperature should reach 200°F if you check with a thermometer, or they should sound hollow when tapped.
- Remove the muffins from the skillet and let them cool completely on a wire rack before splitting.
- To get the best nooks and crannies, split the cooled muffins using a fork, not a knife.
- Toast the split sides on the skillet or under the broiler before serving with butter or jam.
Notes
- For the best texture, use buttermilk. If you do not have buttermilk, mix 1 cup of whole milk with 1 teaspoon of white vinegar or lemon juice and let it sit for 5 minutes before using.
- Do not press down on the muffins while they cook on the griddle; this prevents the interior from developing air pockets.
- Store leftover English muffins in an airtight container at room temperature for up to 3 days, or freeze them for longer storage.
Nutrition
- Serving Size: 1 muffin
- Calories: 185
- Sugar: 2
- Sodium: 350
- Fat: 4
- Saturated Fat: 2
- Unsaturated Fat: 2
- Trans Fat: 0
- Carbohydrates: 33
- Fiber: 1
- Protein: 5
- Cholesterol: 15