
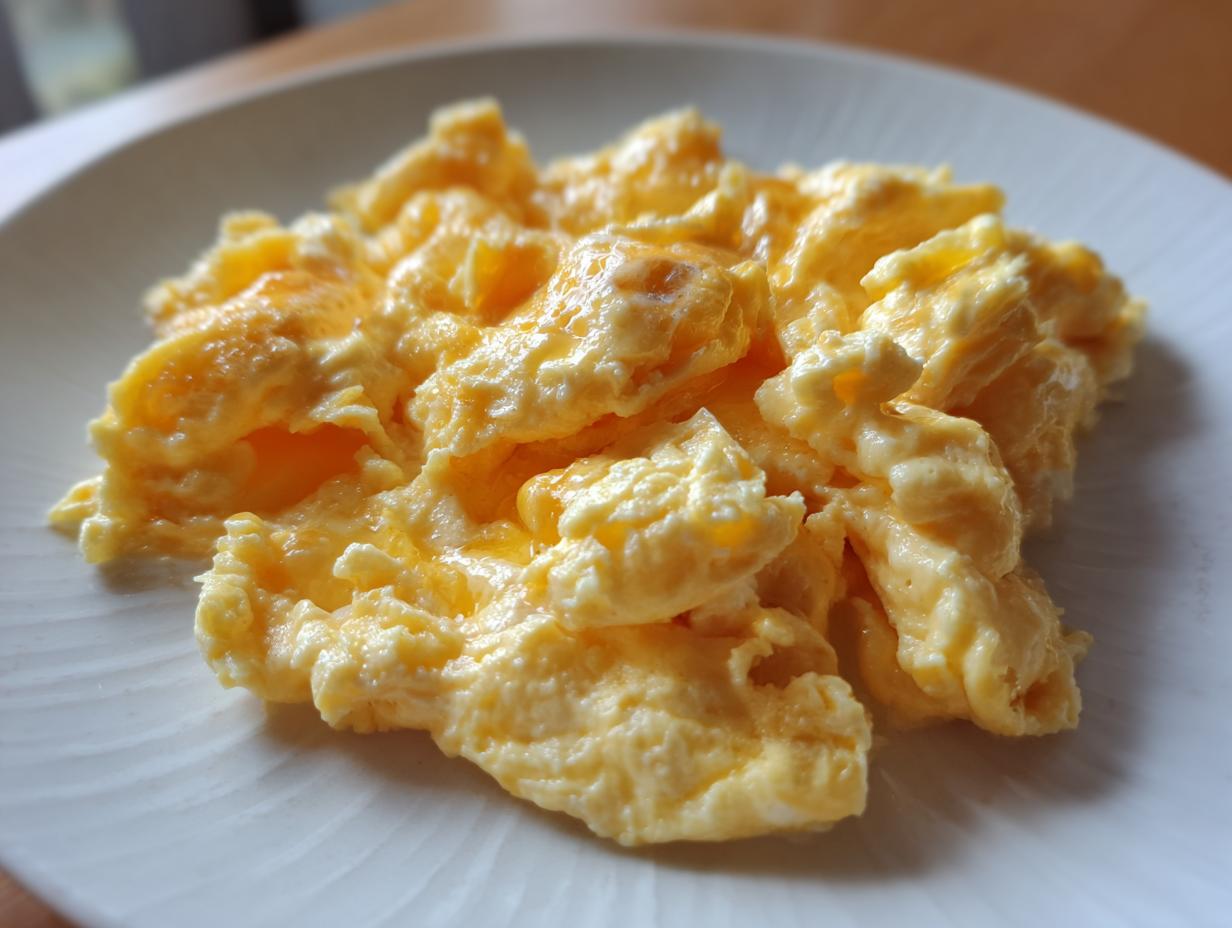
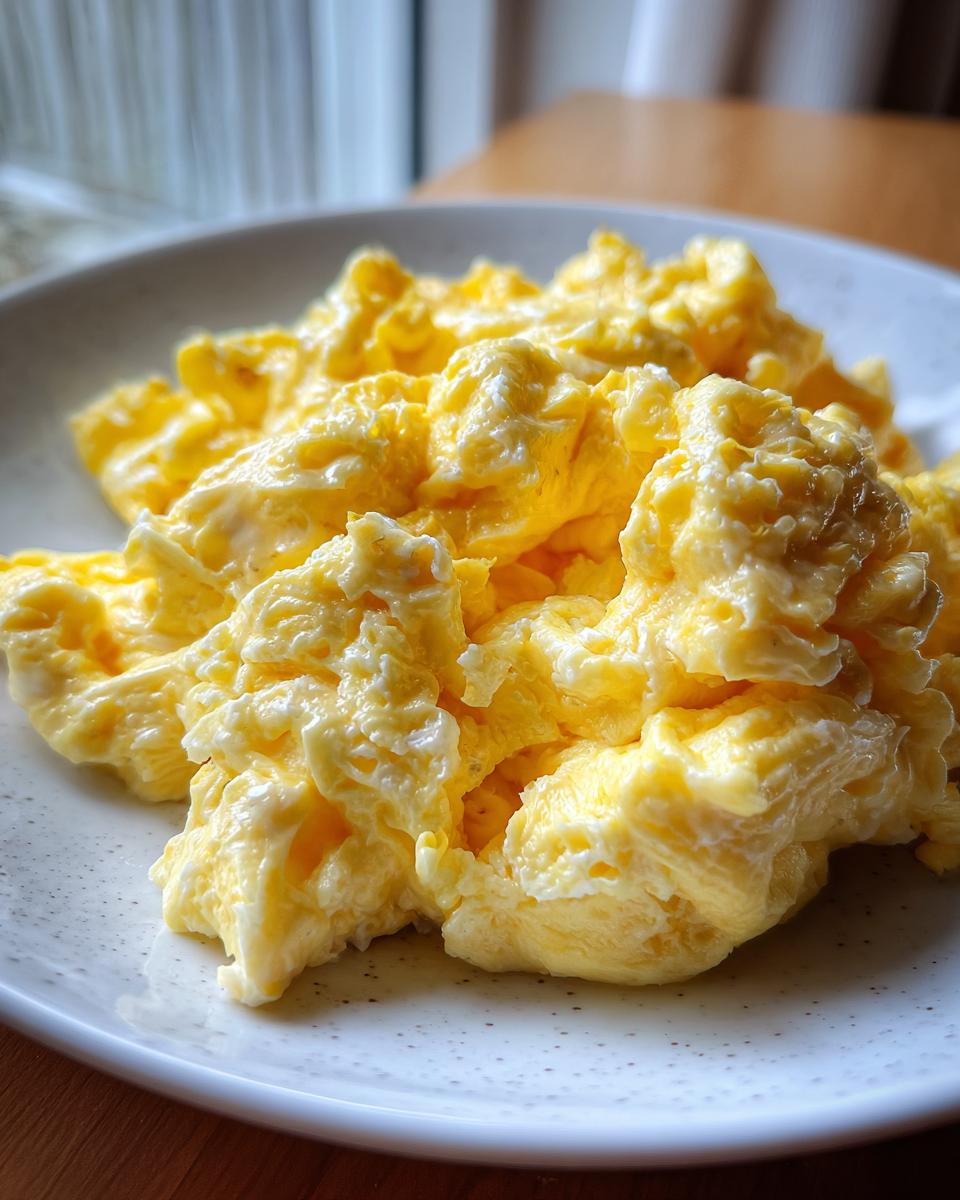
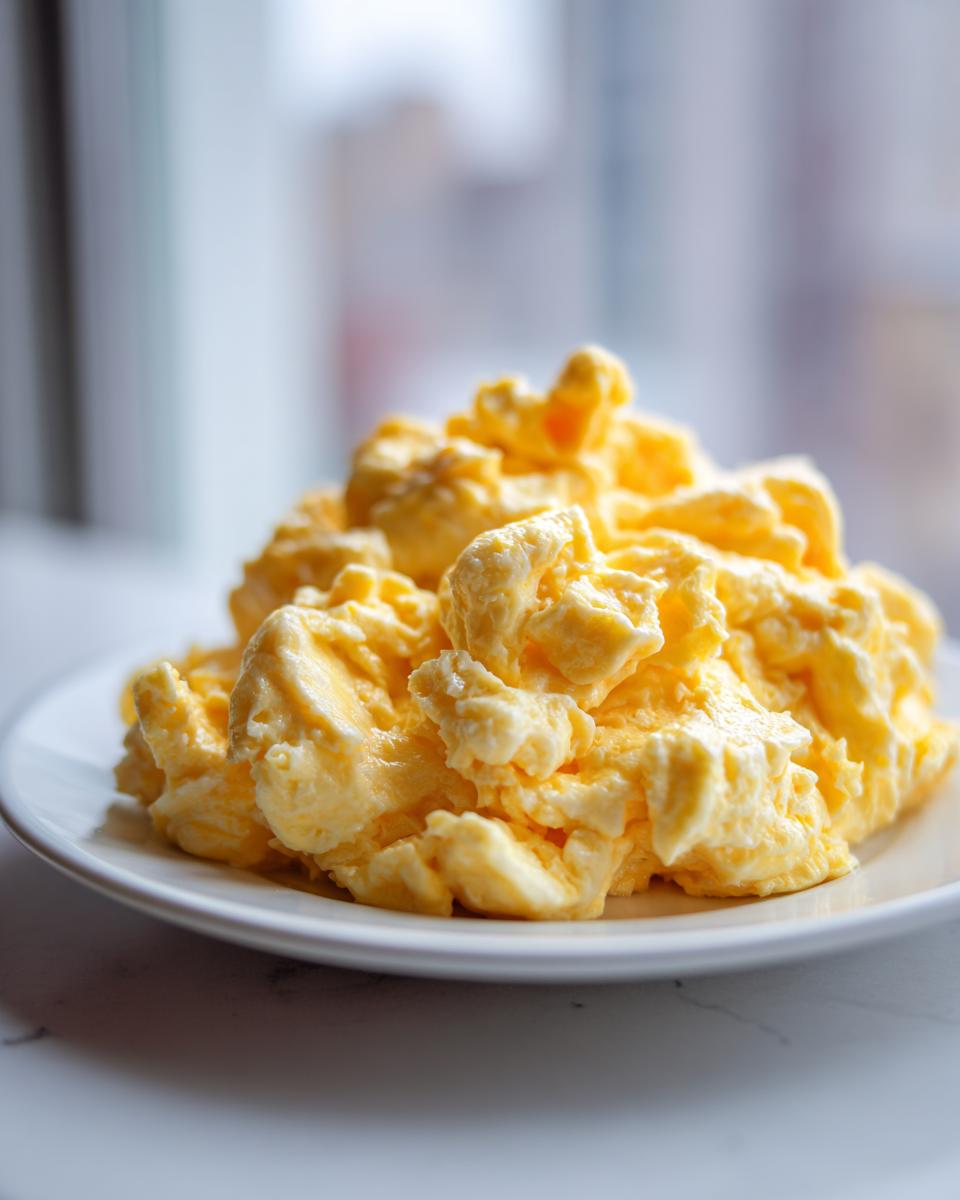
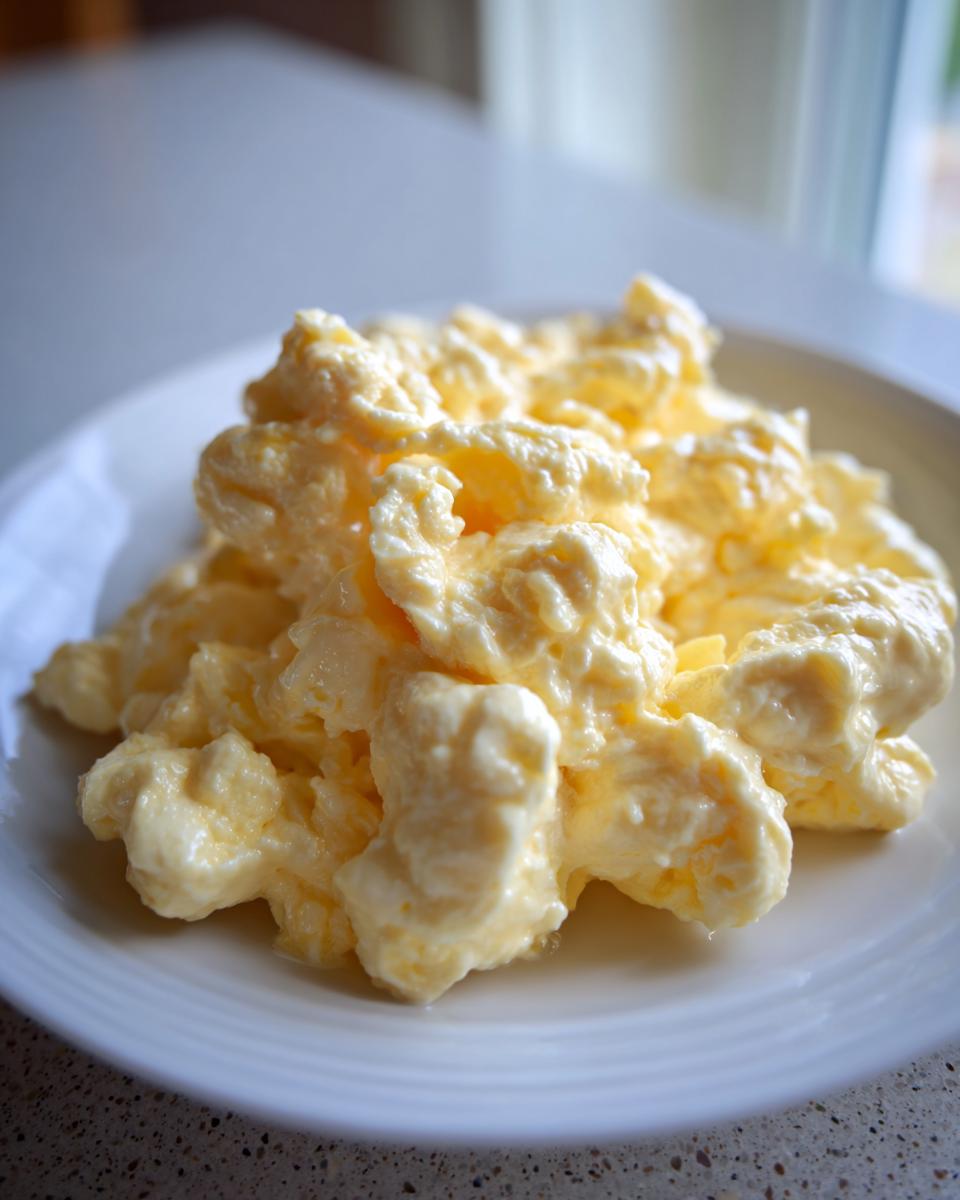
Oh, friends, let’s have a serious talk about dry, rubbery eggs. If you’ve ever taken a bite of your morning dish and sighed because it resembled rubber instead of richness, you are in the right place! Here at Devour Dish, I truly believe that even the simplest meals—like perfect scrambled eggs—should be memorable comforts. Forget those hurried, high-heat versions. I’m going to walk you through my absolute favorite technique for making velvety, incredibly creamy scrambled eggs every single time. Mastering this low-and-slow method is like unlocking a hidden level of easy breakfast recipes, and trust me, once you try this, you won’t go back. It’s all about technique, not time, which is exactly how I like to keep things! For more inspiration on starting your day right, check out my collection of easy breakfast recipes.
- Why This Low-Heat Method Creates The Best Creamy Scrambled Eggs Recipe
- Gathering Ingredients for Perfect Scrambled Eggs
- How to Make Perfect Scrambled Eggs: Step-by-Step Instructions
- Tips for Success When Making Restaurant Quality Eggs At Home
- Variations: Loading Your Scrambled Eggs
- Storage & Reheating Instructions for Soft Scrambled Eggs
- Quick Brunch Ideas: Serving Suggestions for Your Scrambled Eggs
- Frequently Asked Questions About Custardy Eggs Tutorial
- Nutritional Overview of These Creamy Scrambled Eggs
Why This Low-Heat Method Creates The Best Creamy Scrambled Eggs Recipe
The biggest secret to moving from sad, lumpy scrambled eggs to luxurious, velvety eggs is the temperature control. Seriously, put your ego aside and turn that dial way down! Cooking eggs slowly is my non-negotiable rule for achieving that perfect, custardy structure that melts in your mouth. When you cook eggs too fast over medium or high heat, the proteins tighten right up, squeezing out all the moisture and giving you that classic rubbery result. But with low heat, the proteins coagulate slowly, allowing fats and liquids to stay suspended within the structure instead of fighting their way out.
This technique ensures you get truly velvety eggs breakfast perfection. It takes a bit more patience—we are aiming for about 7 to 8 minutes total cooking time here—but the payoff is a rich consistency that mimics what you get in high-end restaurants. If you’re looking for other ways to master creamy textures, I talk a lot about slow mixing over on my creamy deviled eggs recipe page!
Achieving Fluffy Scrambled Eggs Technique: The Role of Temperature
If you are used to cooking your eggs in three minutes flat, this might feel weirdly slow at first. High heat is the enemy of soft scrambled eggs! When you use high heat, you essentially shock the eggs, leading to large, stiff curds. What we want for that **fluffy scrambled eggs technique** is tiny, delicate curds that bake into each other gently.
By committing to consistently low heat—think low and slow scrambled eggs—you are patient enough to let those tiny curds build up slowly over those crucial 7 to 8 minutes. It’s almost like poaching rather than frying them. Trust me on this; resisting the urge to crank up that burner is the single most important step toward achieving that soft, beautiful final product.
Gathering Ingredients for Perfect Scrambled Eggs
When making scrambled eggs this luxurious, the quality of your starting ingredients really shines through. We only need a few things, so let’s make sure they are the best! We are using six fresh, large eggs, and I insist on using unsalted butter for obvious reasons—we want to control the salt entirely. I also include a splash—just one tablespoon—of heavy cream or quality whole milk; this is optional, but it really pushes these eggs into that rich, velvety category!
Ingredient Notes and Substitutions for Velvety Eggs Breakfast
Let’s talk specifics here. If you can swing heavy cream over milk, do it! The higher fat content of the cream provides that gorgeous coat that makes the finished eggs so much richer. You’ll notice I add the salt right into the eggs while whisking them gently in the bowl. Adding salt early helps break down the protein just a tiny bit, leading to a more tender result later on. Don’t swap out that good unsalted butter for anything else; it’s crucial for creating that perfect, low-heat foam to start the cooking process.
How to Make Perfect Scrambled Eggs: Step-by-Step Instructions
This is where the magic happens, and remember, patience is your best friend! We are building those gorgeous, creamy curds from scratch using gentle heat. Do not rush this part if you want those truly restaurant quality eggs at home. Follow these steps exactly, and you’ll be amazed at the texture you create on your stovetop.
The Crucial Whisking and Initial Pan Setup for Soft Scrambled Eggs Best Method
First things first: crack your eggs into a bowl. Add your salt and pepper right there. Now, gently whisk them until the yolks and whites are just barely combined. I mean it—don’t whisk it into a fluffy froth! Over-whisking incorporates too much air, and we are aiming for dense creaminess, not airy fluff here. Next, set your non-stick skillet over a low burner—seriously, low! Add your butter and let it melt completely until it’s just foamy. Pour that egg mixture right in and let it sit, totally still, for about 30 seconds until you see the edges just starting to firm up.
The Low Heat Scrambled Eggs Cooking Technique
Once those edges set, grab your heat-proof spatula. You are going to start gently pushing the cooked parts from the edge toward the center, tilting the pan so the runny egg flows right underneath. Repeat this gentle push all the way around the pan. The game-changer for scrambled eggs is the timing between stirs: you want to continue this folding motion, stirring and pushing every 15 to 20 seconds. It feels slow, but this is the low heat method working its wonder!
If you are using cream, now is the time to drizzle it in during that last minute of cooking. Keep going until the eggs look glossy and slightly wet—this usually lands right around that 7 to 8-minute mark. You must resist the urge to cook them until they look completely done! Pull the pan off the heat immediately. The residual heat will carry them over to that perfect, supple stage. If you want to know more about timing, I cover a lot of great stove techniques in my French toast recipe breakdown too!

Tips for Success When Making Restaurant Quality Eggs At Home
Okay, we’ve reached that critical moment for your scrambled eggs—they look amazing in the pan, but they still seem slightly shiny. Don’t panic! This is the key to truly restaurant quality eggs at home: you must remove them from the heat slightly *before* you think they are done. Seriously, they should look almost too wet.
This relying on carryover heat is essential to avoid that dry, stringy texture. The heat retained in the pan and the eggs themselves will finish the cooking process perfectly once they hit the plate. Also, please, please use a good non-stick pan for this. Trying to gently fold and maneuver delicate curds in a stainless steel pan is just asking for trouble and sticking!
If you want more ways to master breakfast assembly, check out my guide on easy egg bites for quick meal prep options later in the week!
Variations: Loading Your Scrambled Eggs
I love that once you nail that creamy base, you get to play around a little bit! While my heart belongs to the simple, pure flavor of the low-heat method, I know sometimes you just need to bulk things up or add a cheesy kick. This method provides such a perfect foundation that it handles additions really well without collapsing into mush—and that’s practical for real life!
If you are looking for something richer, throwing in some shredded cheese right at the very end is divine. It melts into those soft folds beautifully. If you love a rich, savory bite similar to that offered in some potato casseroles, you should definitely check out my thoughts on cheesy scalloped potatoes; that flavor profile works wonders here too.
Making Scrambled Eggs for a Crowd Big Batch Tips
Now, this is a big question I always get: what if I need **scrambled eggs** for my entire family at once? The challenge when scaling up is maintaining that low, gentle heat across a huge area. If you dump twelve eggs into one big pan, the center will scorch before the edges cook through.
My best advice for making **scrambled eggs for a crowd** is actually to embrace cooking in batches! Yes, it means you have to work a little harder, but it ensures every serving gets that creamy texture we worked so hard for. You can keep the first batch warm in a double boiler or a very low oven (around 200°F) while you whip up the second small batch. For me, keeping the texture perfect is worth the extra step, even when feeding lots of people!
Storage & Reheating Instructions for Soft Scrambled Eggs
I know, I know—these eggs are so good you think there won’t be any leftovers! But sometimes, life happens, or maybe you just want a quick snack later. Soft eggs don’t store as well as, say, a frittata, but you can definitely save them! Store any cooled leftovers in an airtight container in the fridge for up to two days. When reheat time comes, you have to be so gentle.
The trick to reheating is adding moisture back in. Try heating them very slowly in the microwave in 15-second bursts, with a tiny splash of milk or water whisked in. Or, for the very best result, gently warm them in a buttered non-stick pan over the absolute lowest heat setting, stirring constantly. Don’t expect them to taste exactly as fresh as the first time, but this method keeps them from turning into dry sponges!
Quick Brunch Ideas: Serving Suggestions for Your Scrambled Eggs
Now that you have perfected your wonderfully creamy scrambled eggs, what should you serve them with? The beauty of this soft texture is how it pairs with contrast! I love serving these right alongside thick slices of toasted, crusty bread—you totally have to try my recipe for easy homemade French bread. A little sprinkle of fresh chives or maybe some creamy slices of avocado on the side brightens everything right up. It transforms a basic morning meal into a lovely, satisfying weekend brunch!
Frequently Asked Questions About Custardy Eggs Tutorial
It’s completely normal to have a few lingering questions when you are trying to master a new technique, especially when aiming for that perfectly custardy texture! I’ve compiled the questions I hear most often about getting my version of the best way to scramble eggs right at home. You might find the answer you’re looking for right here!
Can I use milk instead of cream in my scrambled eggs?
Absolutely, you can use milk! If you don’t have heavy cream or just prefer a slightly lighter result, whole milk works fine. But I have to be honest: cream gives you that superior richness and that velvety mouthfeel we are chasing. If you want the **best breakfast ever** results, stick to the cream, but milk is a totally acceptable swap if you’re in a pinch!
What is the secret to fluffy scrambled eggs technique?
The biggest secret is twofold: first, keep your heat consistently low—we are talking low heat scrambled eggs territory the whole time. Second, you must resist aggressive whisking right at the start! We whisk just enough to combine the yolk and white. The fluff comes from the gentle, constant folding and stirring during the slow cook, allowing for the expansion of tiny, soft curds instead of one big fluffy cloud.
How do I get diner style scrambled eggs texture?
Oh, that slightly firmer, almost folded texture you get at a classic diner? That usually involves cooking them a bit hotter and faster. While this recipe focuses on achieving the softest, most creamy scrambled eggs recipe, if you want that diner vibe, you can push your cooking time one minute longer or stir in that shredded cheese right when they look about 90% done. That little bit of extra heat sets them up just a touch firmer.
If you’re interested in other simple, creamy dishes, you might want to take a look at my creamy avocado egg salad for lunch later this week!
Nutritional Overview of These Creamy Scrambled Eggs
I think it’s important to see the full picture when we cook, even if this recipe is purely for comfort and joy! Knowing the basics helps you fit these delicious eggs into your day, whether you’re having them for a quick brunch or a satisfying weeknight meal. Remember what I always say: food is about connection, and that includes knowing what you’re putting into your body.
Below you’ll find the estimated nutritional breakdown for one serving of these creamy scrambled eggs, based on the ingredients listed in the recipe. Please keep in mind that these numbers are definitely approximations. If you use half-and-half instead of heavy cream, or if you add extra salt or pepper for seasoning, these numbers will shift a little bit. They’re a solid guide, though, perfect for keeping track!
- Serving Size: 1 serving
- Calories: 260
- Fat: 20g
- Saturated Fat: 10g
- Carbohydrates: 2g
- Sugar: 1g
- Protein: 15g
- Cholesterol: 450mg (Those yolks!)
- Sodium: 250mg
This low-heat method keeps the fat content up because we are using butter and cream to achieve that velvety texture, but it remains a protein-packed, simple start to your day! It fits right in with my philosophy here at Devour Dish: real food, made simply for real life.
PrintThe Best Low-Heat Scrambled Eggs: Creamy and Fluffy Every Time

Learn the foolproof, low-and-slow technique to make restaurant quality scrambled eggs that are velvety, creamy, and perfectly fluffy. This method avoids dry, rubbery results for the best breakfast ever.
- Prep Time: 3 min
- Cook Time: 8 min
- Total Time: 11 min
- Yield: 2 servings 1x
- Category: Breakfast
- Method: Stovetop Cooking
- Cuisine: American
- Diet: Vegetarian
Ingredients
- 6 large eggs
- 2 tablespoons unsalted butter
- 1 tablespoon heavy cream or whole milk (optional, for extra richness)
- 1/4 teaspoon salt
- Pinch of black pepper
Instructions
- Crack the eggs into a medium bowl. Add the salt and pepper. Whisk the eggs gently until the yolks and whites are just combined; do not over-whisk to incorporate too much air, as this can lead to a less creamy texture.
- Place a non-stick skillet over low heat. Add the butter and let it melt completely until it foams slightly.
- Pour the egg mixture into the skillet. Let the eggs sit undisturbed for about 30 seconds until the edges just begin to set.
- Using a heat-proof rubber spatula, gently push the cooked egg from the edge toward the center, tilting the pan so the uncooked egg flows underneath. Repeat this process slowly around the pan.
- Continue cooking over low heat, stirring and folding the eggs gently every 15 to 20 seconds. This slow cooking is key to achieving a custardy texture.
- If using cream, stir it in during the last minute of cooking.
- Continue cooking until the eggs are mostly set but still look slightly wet and glossy. This usually takes 7 to 8 minutes total. Remove the pan from the heat immediately. The residual heat will finish cooking them to a perfect, soft consistency.
- Serve immediately for a truly delicious breakfast.
Notes
- For a bigger batch, increase ingredients proportionally, but cook in batches if your pan is too small to maintain low heat across the surface.
- For diner style scrambled eggs, add a small amount of shredded cheddar cheese right before the eggs are fully set.
- If you prefer a slightly firmer texture, cook for one minute longer, but remove from heat before they look completely done.
Nutrition
- Serving Size: 1 serving
- Calories: 260
- Sugar: 1
- Sodium: 250
- Fat: 20
- Saturated Fat: 10
- Unsaturated Fat: 10
- Trans Fat: 0
- Carbohydrates: 2
- Fiber: 0
- Protein: 15
- Cholesterol: 450