

Oh, friends, let’s talk about the smell. You know the smell I mean—when yeast wakes up and meets hot flour, filling every corner of your house with that warm, comforting aroma? That’s the smell of success! For years, I thought truly great French bread, the kind with that satisfying, audible *crack* when you press the crust, was reserved only for professional bakers. But I was absolutely wrong! I developed this recipe because I wanted that authentic, bakery-style experience—that deeply crisp, crackly crust paired with the softest, fluffiest interior crumb—without needing a fancy hearth oven or an entire day.

This recipe is a game-changer for weeknight dinners because it proves real artisan bread doesn’t need to be intimidating. It’s about simple steps and real ingredients, which is what Devour Dish is all about. Keep reading, and I’ll show you exactly how to bring that perfect loaf home!
- Why This Homemade French Bread Recipe Works So Well
- Ingredients for Your Bakery Style French Bread
- How to Make French Bread: Step-by-Step Instructions
- Tips for Success When Baking Homemade French Bread
- Variations for Your Easy French Bread Loaf
- Storage and Reheating Instructions for Leftover French Bread
- Frequently Asked Questions About Making French Bread
- Estimated Nutritional Data for This French Bread
- Share Your Homemade French Bread Creations
Why This Homemade French Bread Recipe Works So Well
The magic here isn’t complicated; it’s just understanding what your dough needs at the right time. We are aiming for that incredible textural contrast: shattering crust meeting cloud-like interior. Trust me, getting both elements perfect in a homemade loaf is easier than you think once you know the two non-negotiable techniques. If you want to bake bread that genuinely rivals your favorite bakery, keep these two secrets in mind. For even deeper diving into artisan techniques, check out my guide on easy artisan bread recipes.
Achieving the Perfect Crackly Crust on Your French Bread
The crust comes down entirely to steam. When you first put your French bread into the screaming hot oven, you need humidity, not dry heat. That initial blast of steam keeps the outer layer of the dough moist and flexible temporarily. This allows the loaf to expand fully without immediately setting into a hard shell. When the steam eventually escapes, the crust dries out rapidly into that gorgeous, crackly texture we all crave.
The Secret to a Soft and Fluffy Interior Crumb
To get that light, airy internal structure—the soft french loaf texture—we need to be gentle. This recipe uses just the right measure of water, giving us the necessary hydration without making the dough sticky and tough. Also, notice how little we knead it! Over-kneading locks in gluten too tightly. Gently mixing the dough ensures we maintain those beautiful, uneven air pockets inside the French bread.
Ingredients for Your Bakery Style French Bread
When you’re aiming for that authentic taste, you can’t compromise here. Thankfully, this recipe uses just five things you probably already have! We’re keeping this one super straightforward because the technique matters more than a long shopping list. Make absolutely sure you use instant yeast; it mixes right in without fuss. And remember those water temperatures—it’s key for waking up the yeast without shocking it!
- 3 cups all-purpose flour
- 1 1/2 teaspoons salt
- 1 teaspoon instant yeast
- 1 1/2 cups warm water (this needs checking! Aim for 105–115°F, so it feels warm but not hot to the touch).
- 1 tablespoon olive oil (just to keep the mixing bowl from sticking, nothing fancy!).
How to Make French Bread: Step-by-Step Instructions
Alright, here is where we put the plan into action! Baking this delicious French bread is all about patience during the rise times and boldness when it comes to the oven. Don’t worry if your first-time shaping looks a little wonky; rustic bread forgives a lot! For great savory sides to go with your fresh bread, check out my recipe for easy homemade onion dip.
Mixing and First Rise for the French Bread Dough
First up, grab a big bowl and whisk your flour, salt, and yeast together—make sure they are good and combined! Then, pour in that warm water. Use a wooden spoon; that’s all you need. Mix it until it looks messy and clumpy—we call that a “shaggy dough.” Don’t try to perfect it now! Drizzle in your olive oil, turn the dough out onto a lightly floured counter, and knead for about five minutes until it’s smoother. Pop it back into the oiled bowl, cover it up, and let it relax in a warm spot for an hour to 90 minutes until it has truly doubled. It’s amazing what yeast can do when left alone!
Shaping and Second Proofing of the Loaves
Gently punch that dough down—don’t wrestle it! Divide the dough into two equal pieces. Now, be gentle here; we want to keep those air bubbles we just trapped. Shape each piece into a long, rustic loaf or a simple baguette shape. Place them on a parchment-lined baking sheet, giving the loaves plenty of room to breathe. Cover them loosely again and let them rest for a final 30 minutes. This second, shorter rise relaxes the gluten one last time before the heat shock.
Creating the Perfect Crust with Oven Steam
This next part is non-negotiable for that crackly crust! Preheat your oven to a roaring 450°F, and remember to put an empty, shallow metal pan on the very bottom rack while it heats up. Five minutes before you bake, carefully score the top of each loaf twice diagonally using a really sharp knife. Then, brace yourself! Open the oven quickly and pour about one cup of very hot water into that hot metal pan—it will steam up instantly! Close that door right away. That steam is your secret weapon for that authentic, crispy French bread crust.
Tips for Success When Baking Homemade French Bread
Baking your French bread should feel fun, not frustrating! If you want to guarantee success every time you pull these loaves from the oven, focus on two main areas: temperature control and presentation. Remember, the steam step for the crust truly makes all the difference, so don’t let your oven intimidate you. The high heat paired with moisture creates that perfect, shatteringly crisp exterior.

Also, remember that while this recipe makes two great loaves, you *can* skip the steam if you prefer a much softer crust, but then you should definitely treat the outside right after baking. If you’ve gone soft, brush the tops immediately with melted butter when they come out. It’s a different vibe, but still delicious! And for something amazing to dip that crusty bread into, you have to try my cowboy butter dipping sauce.
Variations for Your Easy French Bread Loaf
Just because this is an easy recipe doesn’t mean we can’t play around with it a little! Once you nail the basic technique for that wonderful crusty exterior, customizing your French bread is a joy. If you serve this with soup or pasta, try mixing about a tablespoon of dried Italian herbs or garlic powder right into the flour mixture before adding the water. That adds lovely depth!

If you’re looking for one great big sandwich bread loaf instead of two skinny ones, just skip dividing or shaping the dough after the first rise. Put the entire happy ball of dough into a greased, standard 9×5 inch loaf pan. It will bake up beautifully, though it might need 5 or 10 extra minutes in the oven since it’s thicker. And speaking of flavor boosters, you absolutely have to try this bread alongside my French onion butter rice!
Storage and Reheating Instructions for Leftover French Bread
I always *intend* to eat the whole loaf in one sitting, but let’s be real, sometimes there’s leftover French bread! For the best results, store it loosely wrapped at room temperature for no more than two days. Don’t seal it tight in plastic; that traps moisture and totally ruins that hard-earned crust we worked so hard for.
If the crust has gone a little soft by day two, don’t panic! Just pop the loaf directly onto the oven rack at about 350°F for about five to seven minutes. This little refresh blast brings back a fantastic crispness. It’s like magic for day-old bread!
Frequently Asked Questions About Making French Bread
Can I make this a quick french bread recipe if I’m in a hurry?
Oh, I totally get the need for speed! While the full rise time gives us the best flavor, you can speed it up. To make this a truly quick french bread recipe, use warmer water—like 125°F—and place your dough bowl in a slightly warm oven (just turn the oven light on; don’t actually heat it). This can cut the first rise down to about 30 to 40 minutes. Keep in mind that a shorter rise means slightly less developed flavor, but you’ll still get a fantastic loaf!
Is this beginner bread recipe really okay for new bakers?
Absolutely! If you’ve never touched yeast before, this is your starting point. We aren’t using any complex techniques, and we skipped the long, multi-day fermentation that scares people off. The hardest part is just waiting for it to rise! Since we use instant yeast and don’t require a stand mixer, it’s a perfect beginner bread recipe. Once you master this, you’ll feel ready for anything, even more rustic styles like those found in this guide on crusty homemade French bread.
What if my crust isn’t crackly like I wanted?
If your crust didn’t get that satisfying crunch, 99% of the time, it’s the steam! You must create plenty of steam when that French bread goes in. The oven needs to be hot (450°F), and you need that burst of hot water filling the bottom chamber immediately before you close the door. If you skip the steam, you end up with a soft crust bread, which is still tasty, but not the classic crackly texture we aimed for!
Can I use bread flour instead of all-purpose flour?
You certainly can. Bread flour has a little more protein, which means you might end up with a slightly chewier interior loaf. For this recipe, I stick to all-purpose flour because it keeps the crumb softer and lighter, which is my goal for a tender interior. If you swap it out, just watch your dough while kneading—it might take less time to feel smooth.
How do I reheat leftover bread to bring back the crunch?
This is my favorite trick! Never microwave it; that just makes it tough. Instead, take your leftover French bread and place it directly on the oven rack—no pan needed. Bake it at 350°F for about 5 to 7 minutes. This dries out the exterior just enough to reactivate that crusty texture. It’s perfect alongside roasted potatoes, like my recipe for crispy oven-roasted potatoes!
Estimated Nutritional Data for This French Bread
I always like to show you the numbers, but please remember these are just estimates based on how I measured things out for two loaves! Nutrition in baking can change based on the exact flour brand or how much water evaporates. Feel free to use this as a starting point when planning your meals.
- Serving Size: 1 slice
- Calories: 180
- Fat: 1g
- Carbohydrates: 37g
- Protein: 5g
- Sodium: 350mg
- Sugar: 1g
Share Your Homemade French Bread Creations
Wow, I am so excited for you to try this! Seriously, when you pull that crusty loaf out, take a picture and tag me! I want to see those beautiful, crackly crusts and fluffy interiors. Let me know in the comments below how it came out for you, and if you’ve got any genius dipping sauces to go with it—I’m always looking for new ideas, like these easy sausage pinwheels!
PrintEasy Homemade French Bread with a Crackly Crust

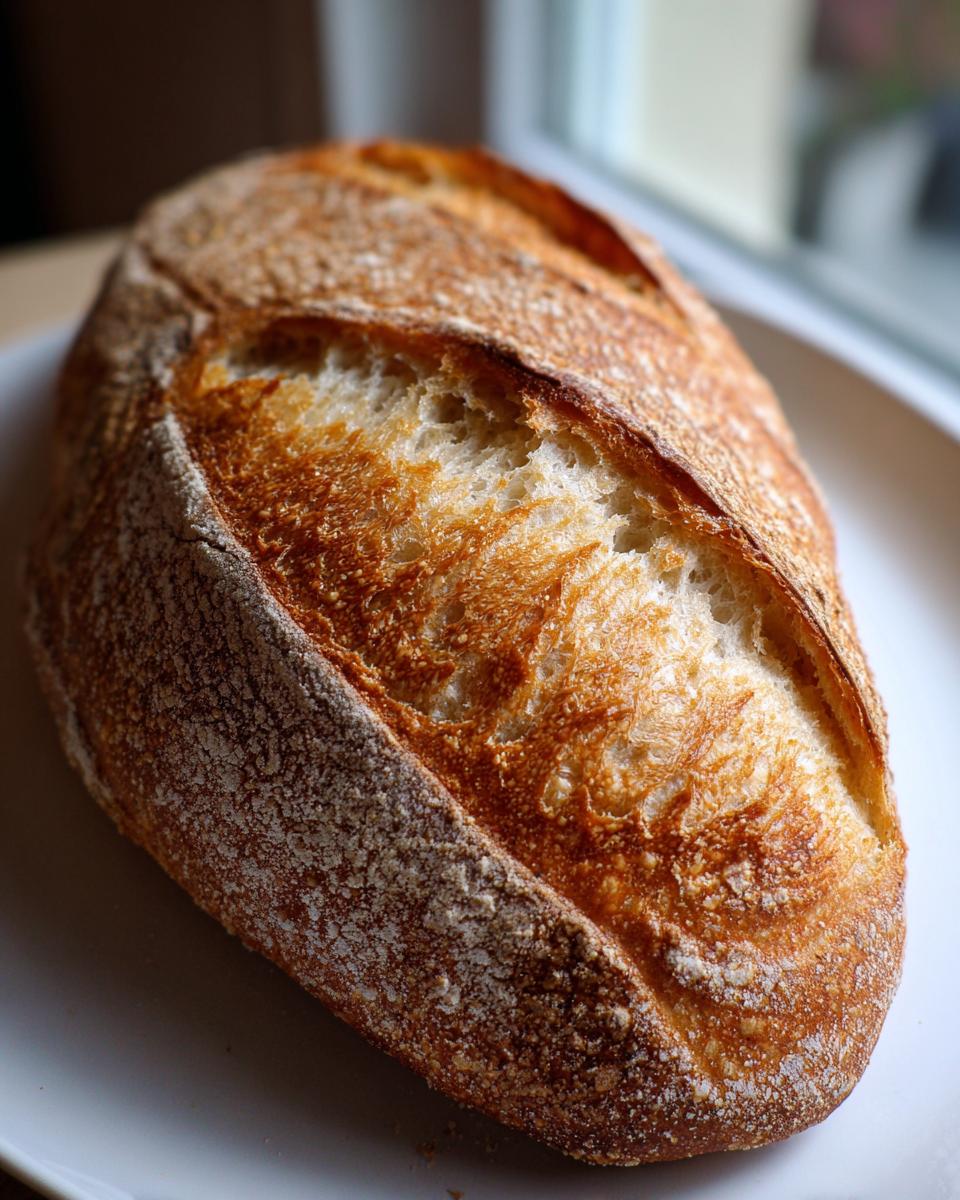
Bake bakery-style French bread at home that features a wonderfully crisp, crackly crust and a soft, fluffy interior crumb. This recipe is straightforward and perfect for beginners.
- Prep Time: 20 min
- Cook Time: 25 min
- Total Time: 1 hour 50 min
- Yield: 2 loaves 1x
- Category: Baking
- Method: Baking
- Cuisine: French
- Diet: Vegetarian
Ingredients
- 3 cups all-purpose flour
- 1 1/2 teaspoons salt
- 1 teaspoon instant yeast
- 1 1/2 cups warm water (about 105-115°F)
- 1 tablespoon olive oil (for the bowl)
Instructions
- In a large bowl, whisk together the flour, salt, and instant yeast.
- Pour in the warm water and mix with a wooden spoon until a shaggy dough forms. Do not overmix.
- Drizzle the olive oil over the dough, turn it out onto a lightly floured surface, and knead for about 5 minutes until the dough is smooth.
- Lightly oil your bowl. Place the dough in the bowl, turning to coat. Cover the bowl with plastic wrap or a clean kitchen towel. Let the dough rise in a warm place for 60 to 90 minutes, or until it has doubled in size.
- Gently punch down the dough. Divide it into two equal pieces. Shape each piece into a long, rustic loaf or baguette shape.
- Place the shaped loaves on a baking sheet lined with parchment paper, leaving space between them. Cover loosely and let them rest for a second rise for 30 minutes.
- Preheat your oven to 450°F (232°C). Place a shallow metal pan on the bottom rack while the oven heats; this is for creating steam.
- Just before baking, score the top of each loaf twice diagonally with a sharp knife or razor blade.
- Carefully pour 1 cup of hot water into the preheated metal pan on the bottom rack to create steam. Quickly close the oven door.
- Bake the French bread for 20 to 25 minutes, or until the crust is deep golden brown and sounds hollow when tapped.
- Remove the loaves from the oven and transfer them to a wire rack to cool completely before slicing.
Notes
- For the best crackly crust, the steam in the oven is essential. Do not skip adding hot water to the pan.
- If you prefer a softer crust, skip the steam step and brush the loaves lightly with melted butter immediately after they come out of the oven.
- This recipe makes a great sandwich bread loaf when baked as a single, thicker loaf.
Nutrition
- Serving Size: 1 slice
- Calories: 180
- Sugar: 1
- Sodium: 350
- Fat: 1
- Saturated Fat: 0
- Unsaturated Fat: 1
- Trans Fat: 0
- Carbohydrates: 37
- Fiber: 1
- Protein: 5
- Cholesterol: 0