
If you’re anything like me, you sometimes need a wildly satisfying sweet treat without the guilt or the hour-long commitment of making traditional ice cream. Well, stop scrolling! I’ve got the recipe that proves healthy desserts don’t have to be complicated. This is my absolute favorite, Easiest Ever 3-Ingredient Banana Ice Cream. We usually call this “nice cream,” and seriously, you don’t need an ice cream maker for this one. As someone who focuses on simple, tested recipes here at Devour Dish, I promise this banana ice cream is a game-changer for busy nights.
- Why This Easy Banana Ice Cream Recipe Works So Well
- Gathering Your Ingredients for Banana Ice Cream
- Step-by-Step Instructions for Blender Banana Ice Cream
- Tips for Creamier Banana Nice Cream Hacks
- Customizing Your Banana Ice Cream Flavors
- Serving Suggestions for This Quick Summer Dessert
- Storage and Reheating for Your Dairy Free Frozen Dessert
- Frequently Asked Questions About Banana Ice Cream
- Nutrition Estimates for This Guilt Free Sweet Treat
Why This Easy Banana Ice Cream Recipe Works So Well
I know what you’re thinking: can frozen bananas really taste like real ice cream? Trust me, they absolutely can! This recipe shines because it cuts out all the unnecessary steps and heavy ingredients people think they need for a perfect frozen dessert. It’s designed for real life, which means fast results.
- It’s a fantastic healthy ice cream alternative—you are literally just eating frozen fruit!
- You get that instant gratification of a guilt free sweet treat ready in about ten minutes total.
- It’s super versatile and lets you easily pivot to other flavors, just like my vegan banana bread variations.
It is a Simple 2 Ingredient Dessert Base
While I add vanilla here for extra pop, the actual magic relies on just two things: frozen banana and a splash of liquid. That’s it! Because it relies only on the fruit, you are already ahead of the game when it comes to health and simplicity. It turns into gorgeous vegan banana soft serve before your eyes.
Achieving Creamy Banana Dessert Texture Without Churning
This is where we save you time and money! You absolutely do not need one of those expensive ice cream makers. Using a sturdy blender or food processor, the mechanical action breaks down the frozen fruit into these tiny, velvety particles that mimic the way churning aerates heavy cream. That’s how we get that perfect creamy banana dessert texture every single time without any dairy.
Gathering Your Ingredients for Banana Ice Cream
Okay, let’s talk supplies! Since this is my beloved banana ice cream, we only need a few things, but they have to be right. You want ripe bananas, obviously, because that brings the natural sugar we need for flavor. The main rule is that those bananas need to be totally, rock-solid frozen. Don’t try this with mushy ones; they won’t blend right!
Here is exactly what I keep ready when making this easy frozen banana treat for two people:
- 4 large ripe bananas, which you absolutely must peel, slice up, and freeze solid.
- 1/4 cup of milk—I usually grab almond milk, but any plant-based or dairy milk works great here.
- 1 teaspoon of pure vanilla extract to enhance that sweet factor.
Step-by-Step Instructions for Blender Banana Ice Cream
I love showing people how this goes from rock-hard chunks to silky-smooth dessert in just a few minutes. Using your high-powered blender or food processor is key here—this isn’t the time for a weak machine! Remember, getting this truly creamy texture requires a little elbow grease (or, well, machine grease) and patience. This is the cornerstone of my blender banana ice cream process. If I’m rushing, I sometimes think about my foolproof method for creamy scrambled eggs just to remind myself that patience pays off, even with frozen fruit!
The Initial Blend: Crumbly Stage
First things first, toss all those frozen banana slices into the machine. I always add the milk and vanilla right on top—this tiny bit of liquid helps get the blades moving. Now, start slow! Seriously, begin on the lowest setting. It’s going to look crumbly and chunky, almost like frozen granola. Don’t freak out! This is normal. Stop the machine frequently, maybe every 30 seconds, and use a spatula to push everything down toward the blades. You have to scrape it down a few times to help it along. This step manages expectations for the easy frozen banana treat.
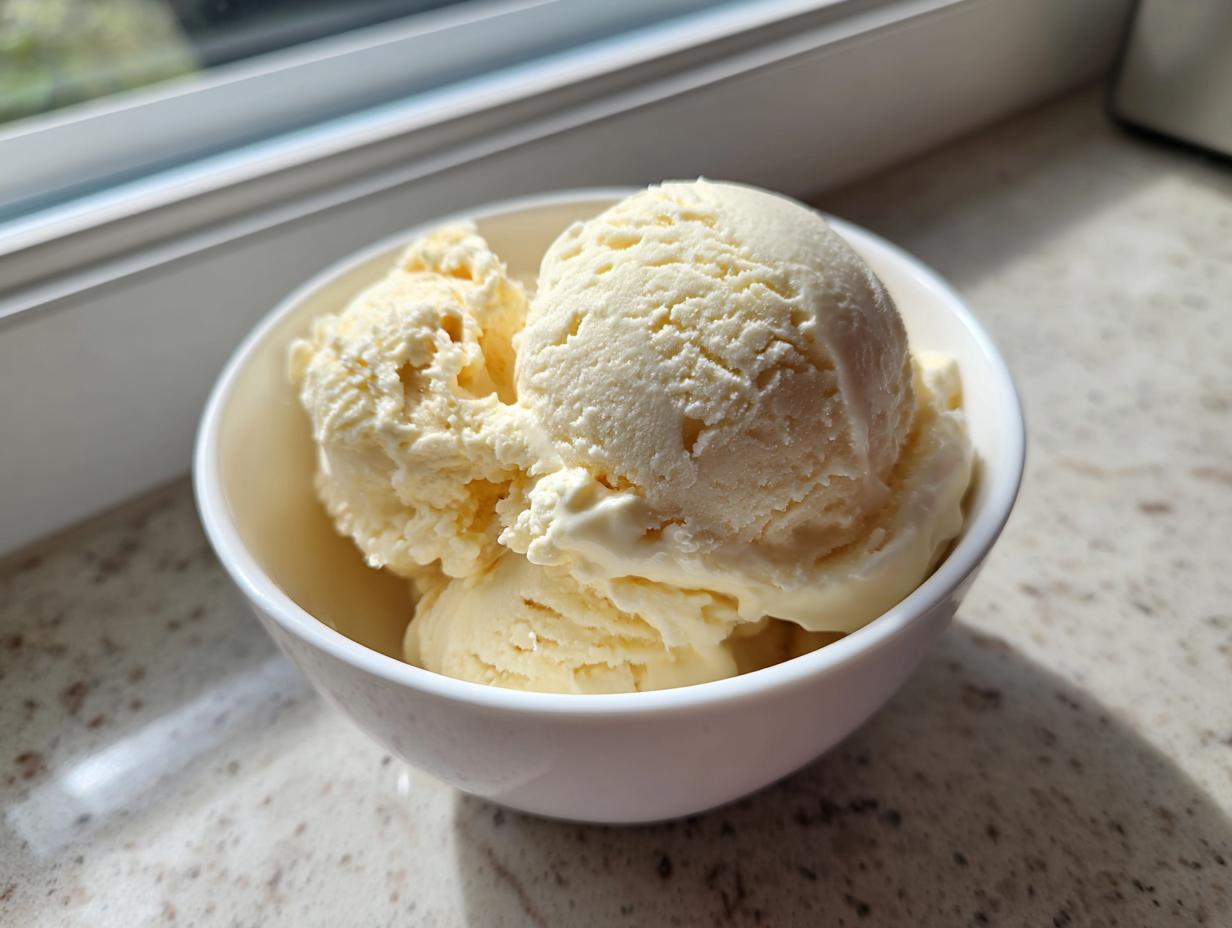
Reaching Smooth Perfection for Vegan Banana Soft Serve
As you keep blending and scraping, you’ll notice the texture changing dramatically. The mixture will go from crumbly to clumpy, and then suddenly—*whoosh*—it becomes totally smooth and glossy, just like the thickest soft serve you’ve ever seen. That’s your signal! If those blades are just spinning and nothing is happening, add milk just one tablespoon at a time until it starts moving again. Don’t add too much, or it turns into a thick smoothie instead of that perfect vegan banana soft serve we are aiming for! Get it smooth, serve it immediately, and enjoy!

Tips for Creamier Banana Nice Cream Hacks
I’ve definitely had batches of this dessert turn out watery or too icy before I figured out the secrets. Getting that lush, satisfying texture for a creamy banana dessert without heavy cream or an ice cream maker is all about preparation. These few hacks really separate an okay nice cream from a spectacular one. I swear by these steps now, especially when I’m trying to replicate that texture I got in my banana chocolate chip muffins!
Using Ripe Bananas for Naturally Sweet Frozen Fruit
This is non-negotiable! When people ask why their banana ice cream tastes bland, it’s usually because they froze bananas that were too green or just perfectly yellow. You want those bananas sporting lots of brown freckles—that brown means the starches have converted into simple sugars. More sugar means deeper flavor and that velvety smooth melt we’re chasing. This natural sweetness is why this recipe is such a winner for a naturally sweet frozen fruit fix.
Adjusting Liquid for No Churn Banana Dessert
When you’re blending, if you stop and the blades are just whizzing around without grabbing the frozen bits, you need a tiny splash more liquid. But listen closely: add it one tablespoon at a time! If you dump in too much milk at once, you lose that thick, scoopable quality and end up with something more like a very thick milkshake. We are aiming for luxurious, thick no churn banana dessert here, so precision matters in this final stage.
Customizing Your Banana Ice Cream Flavors
The beauty of this base recipe is how incredibly simple it is to customize! Since we aren’t relying on eggs or heavy cream, this naturally sweet frozen fruit mixture begs to be changed up. You can turn this into just about any flavor profile you want—think of it as a blank canvas for your perfect frozen treat. If you’re looking for something richer than a standard fruit based frozen yogurt alternative, try these mix-ins. I always have some of my homemade decadent sauces ready for exactly this purpose!
Making Peanut Butter Banana Ice Cream Delight
If you love that classic pairing, adding nut butter is amazing. When you are in the final stages of blending—right before it gets completely smooth—toss in about a tablespoon of creamy peanut butter. It adds richness and a fantastic salty-sweet dynamic that makes it taste like total indulgence. This is how you make a truly decadent flavor variation, similar to the satisfying crunch you get from my peanut butter pretzel bark recipe, but served cold!
Adding Chocolate for a Richer Banana Ice Cream
For chocolate lovers, this is a game-changer. You can substitute about 1/4 cup of the frozen banana with 1-2 tablespoons of unsweetened cocoa powder, or even a scoop of your favorite chocolate protein powder if you’re feeling ambitious. If you want it extra dark and delicious, drizzle in a spoonful of homemade sauce right at the end—check out my recipe for easy homemade chocolate pudding sauce to see how simple it is to make your own drizzle!
Serving Suggestions for This Quick Summer Dessert
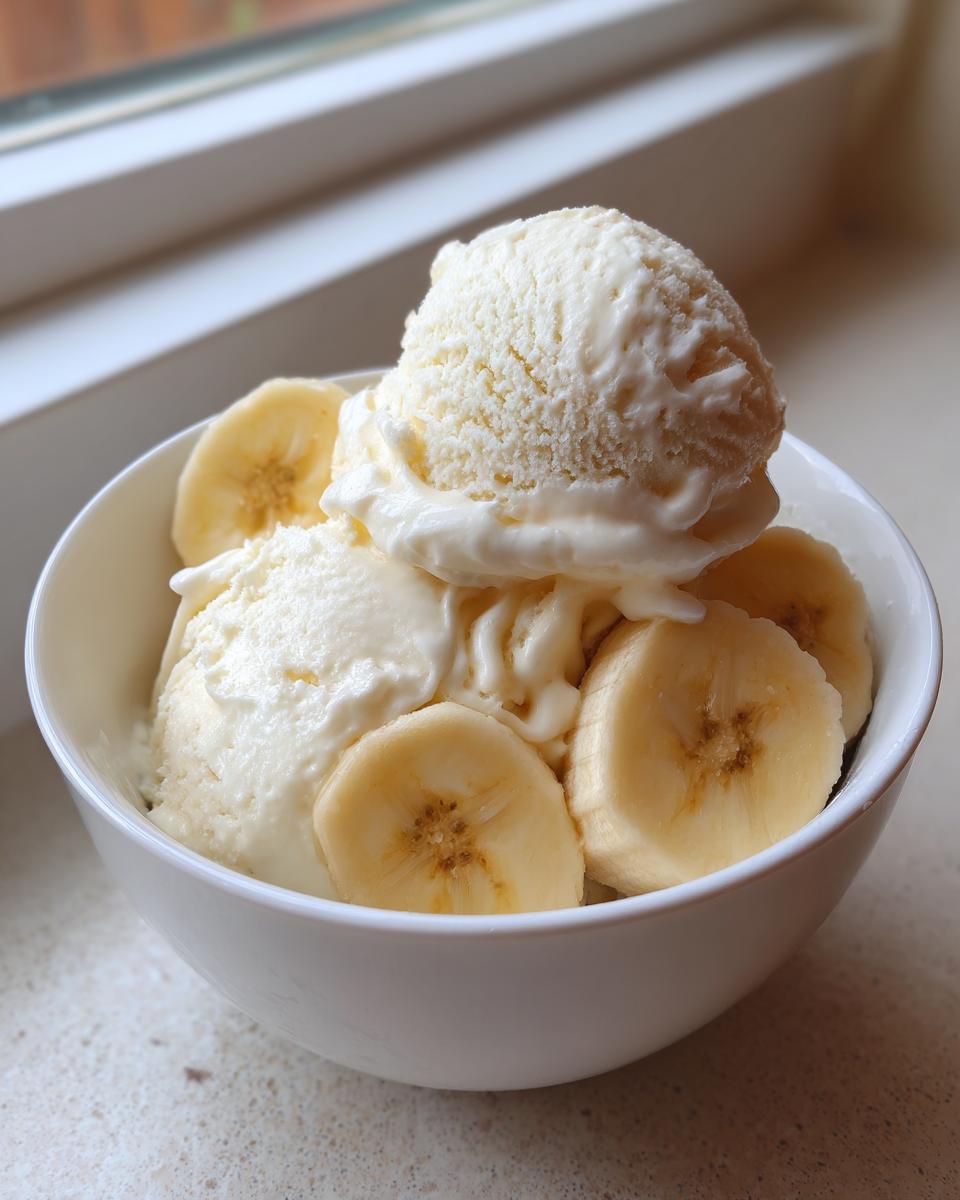
The best part about making this banana ice cream is how quickly you can serve it. If you eat it straight from the blender, you get that amazing, fluffy soft serve texture—perfect for a spontaneous quick summer dessert right when the craving hits! But if you want a proper scoop, put it in a freezer-safe container and let it firm up for an hour or two. That’s how you get that satisfying scoopable texture for cones or bowls.
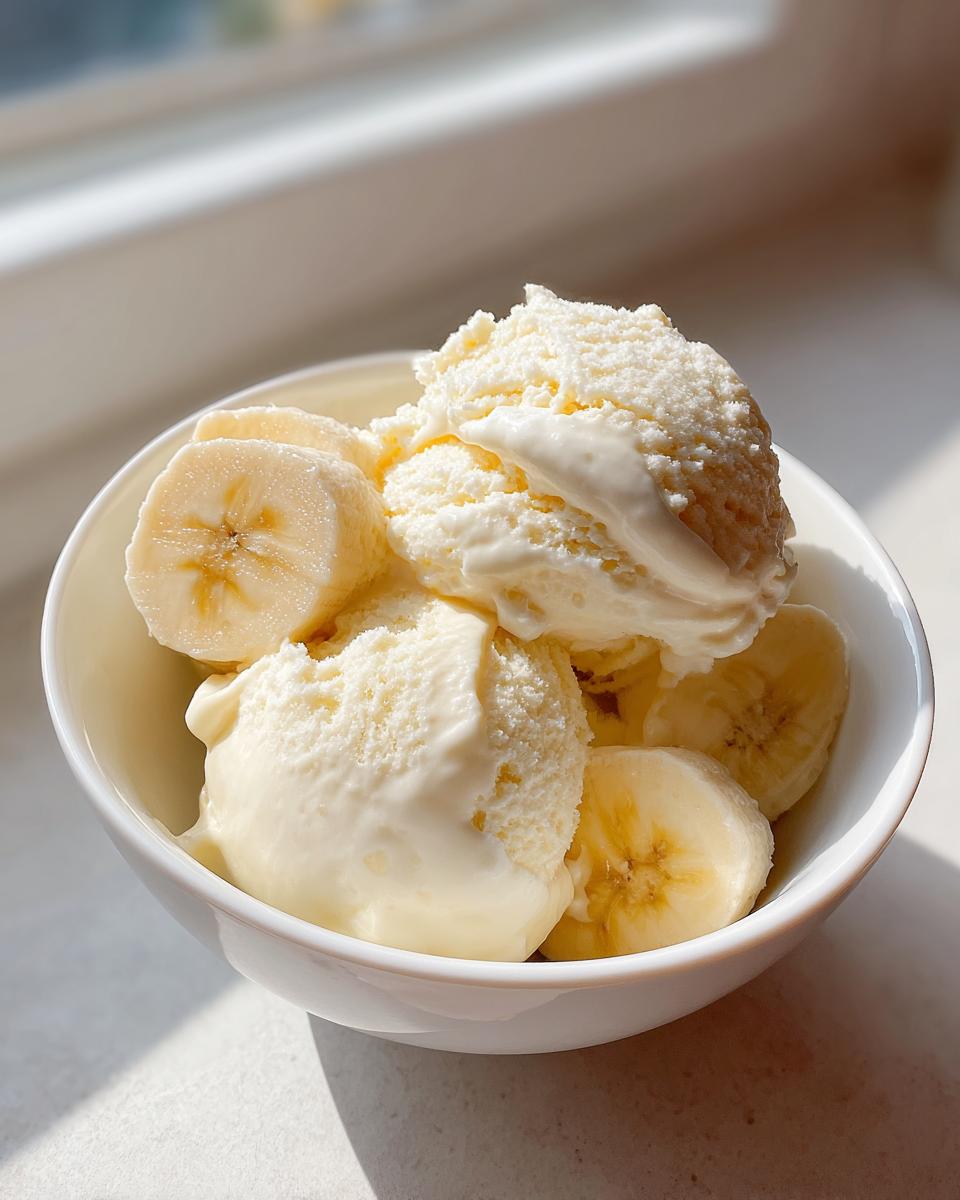
Toppings elevate this from simple fruit to a true indulgence. My favorite is a drizzle of homemade sauce, like my recipe for easy silky homemade chocolate sauce. If you want crunch, a scattering of those crunchy nuts is always a winner; I saw a great variation using those on Pinterest over at Banana Ice Cream With Nuts! It’s the perfect finishing touch on this healthy ice cream alternative.
Storage and Reheating for Your Dairy Free Frozen Dessert
So you made a huge batch, or maybe you just couldn’t eat it all right away! That’s okay. Storing this dairy free frozen dessert is easy, but you need to know what to expect regarding texture. If you eat it immediately, it’s heavenly, light, soft serve, right? If you freeze it solid for scooping later, it gets much firmer than traditional ice cream because we skipped the cream and stabilizers.

When you want to dig into that firm scoop later on, don’t stick a spoon in it right out of the freezer—you’ll risk breaking a tooth! Set the container out on the counter for about 10 to 15 minutes before serving. That small wait time lets it soften up just enough so you can easily scoop it and enjoy that perfectly creamy texture we worked so hard to achieve. It melts beautifully and doesn’t leave a watery mess like some fruit-based desserts can.
Frequently Asked Questions About Banana Ice Cream
I always get so many questions when people try this recipe because it feels like magic! It’s natural to wonder about the details when you’re used to heavy cream and churning. Here are the answers to the things I hear most often about turning fruit into amazing frozen dessert. If you have more questions, feel free to ask in the comments—I love chatting food science!
Can I make this banana ice cream without a blender?
Okay, this is important: you really can’t skip the machine magic here. To get that smooth, creamy texture that tastes like a scoopable treat, you need power. A food processor or a high-powered blender is necessary to properly break down the frozen chunks into that velvety consistency we want for this easy dessert no ice cream maker style recipe. If you try to mash it by hand, you’ll end up with banana chunks in milk, which is just a sad, thick smoothie, not ice cream!
What is the best way to freeze bananas for nice cream?
This detail makes a massive difference in how fast this comes together and how smooth the final texture is. Never throw a whole, peeled banana into the freezer! That results in massive clumps that will destroy your blades. My trick is always to peel them first, slice them into coins about the size of a quarter, and then spread those slices out in a single layer on a baking sheet lined with parchment paper. Freeze them hard like that for maybe an hour, and *then* you can dump the frozen coins into a zip-top bag. That pre-freezing step ensures they blend beautifully every time.
Is this a healthy ice cream alternative that has no added sugar?
Yes, absolutely! This is one of the best reasons to love this recipe. The base recipe—bananas, milk, vanilla—has zero added sugar. The sweetness comes entirely from the fruit itself, specifically by using very ripe, spotty bananas. If you’re looking for a truly healthy dessert no added sugar option, this is it. If you start adding things like chocolate chips or sweet sauces, those will add sugar, but the core recipe keeps it pure and natural, which I love for an afternoon pick-me-up. If you substitute ingredients, you might want to check my recipe for my vegan chocolate chip cookies for topping ideas that fit a healthier profile!
Nutrition Estimates for This Guilt Free Sweet Treat
Since this delightful banana ice cream relies almost entirely on fruit, the nutrition profile is fantastic! It’s naturally low in fat and cholesterol-free. Remember, these numbers are estimates for half the recipe, but it gives you a great snapshot of how this works as a guilt free sweet treat.
- Serving Size: 1/2 of recipe
- Calories: 150
- Fat: 1g
- Carbohydrates: 38g
- Protein: 2g
It’s amazing how much flavor we get using so few standard ingredients, isn’t it?
PrintEasiest Ever 3-Ingredient Banana Ice Cream (No Machine Needed)

You can make this creamy, naturally sweet banana ice cream, often called ‘nice cream,’ in minutes using just three simple ingredients. It is a healthy ice cream alternative that requires no special equipment.
- Prep Time: 10 min
- Cook Time: 0 min
- Total Time: 10 min
- Yield: 2 servings 1x
- Category: Dessert
- Method: Blending
- Cuisine: American
- Diet: Vegan
Ingredients
- 4 large ripe bananas, peeled, sliced, and frozen solid
- 1/4 cup milk (dairy or plant-based like almond milk)
- 1 teaspoon pure vanilla extract
Instructions
- Place the frozen banana slices into a high-powered blender or food processor.
- Add the milk and vanilla extract to the blender.
- Start blending on low, scraping down the sides frequently. The mixture will look crumbly at first.
- Continue blending, increasing the speed gradually. Stop and scrape down the sides every 30 seconds until the mixture becomes completely smooth and creamy, resembling soft serve ice cream. This may take 3 to 5 minutes depending on your machine.
- Serve the banana ice cream immediately for a soft serve texture.
- For a firmer texture, transfer the mixture to a freezer-safe container and freeze for 1 to 2 hours before scooping.
Notes
- For the creamiest banana nice cream, ensure your bananas are fully frozen. Use very ripe bananas for the best natural sweetness.
- If the mixture is too thick to blend, add milk one tablespoon at a time until the blades move freely.
- Customize this easy frozen banana treat by adding 1 tablespoon of peanut butter or cocoa powder during the blending step for a different flavor.
Nutrition
- Serving Size: 1/2 of recipe
- Calories: 150
- Sugar: 18g
- Sodium: 5mg
- Fat: 1g
- Saturated Fat: 0g
- Unsaturated Fat: 1g
- Trans Fat: 0g
- Carbohydrates: 38g
- Fiber: 4g
- Protein: 2g
- Cholesterol: 0mg