
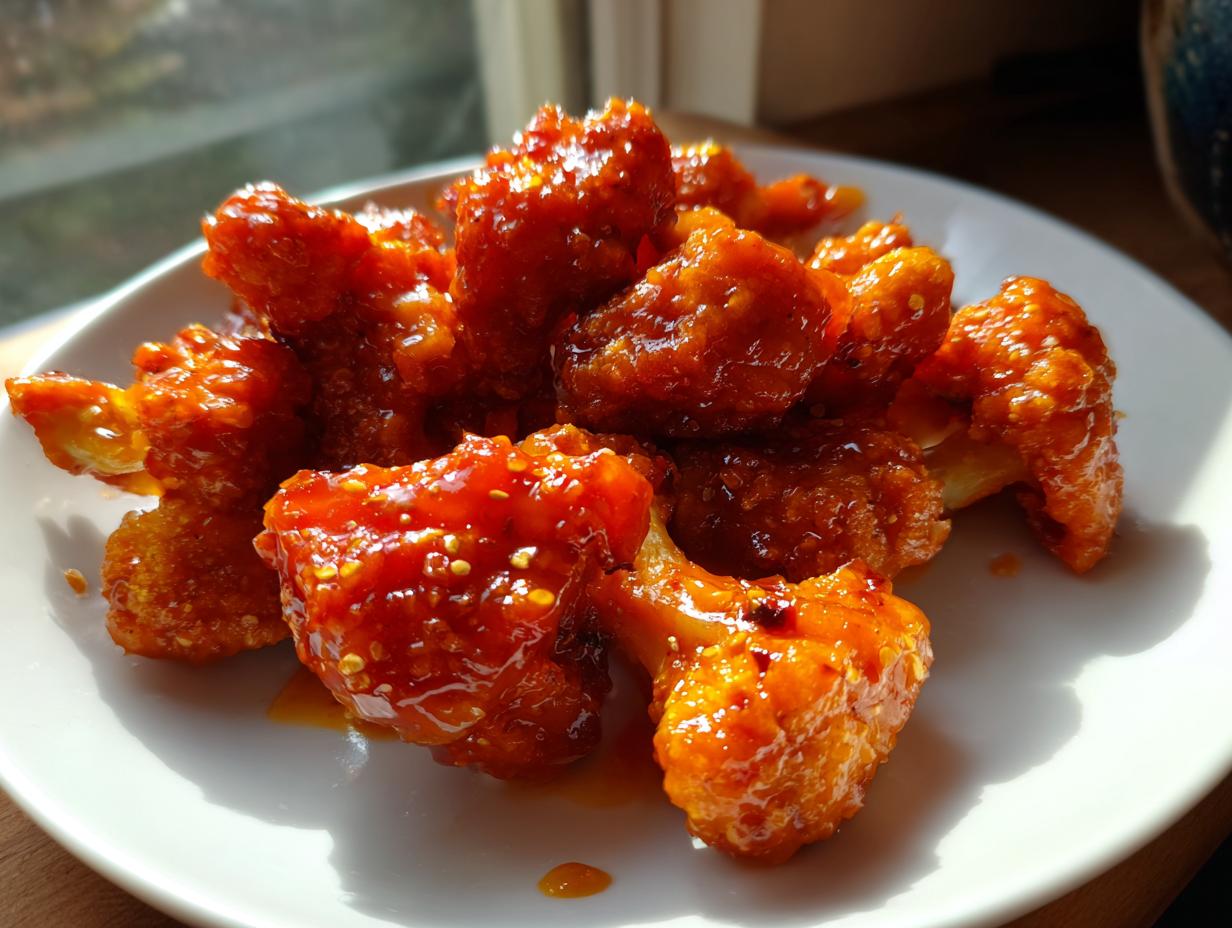
Look, if it involves game day, a party, or just a serious craving for something spicy and dippable, traditional wings always feel like a hassle, right? That’s why I put so much work into perfecting my ultimate buffalo cauliflower recipe. Forget soggy veggies! My goal here at Devour Dish is to get you that amazing, shatteringly crispy texture everyone loves, using straightforward methods that actually work in a real kitchen. I promise, these bites are simple, they’ve been tested until they were perfect, and they are proof that genuinely delicious appetizers don’t require complicated techniques. Check out all my appetizers and snacks for more inspiration, but get ready for your new favorite go-to first!

- Why This Is The Best Crispy Buffalo Cauliflower Recipe
- Ingredients Needed for Crispy buffalo cauliflower Bites
- Step-by-Step Instructions for the Ultimate buffalo cauliflower
- Tips for Success with Your buffalo cauliflower
- Serving Suggestions for Game Day Cauliflower Snacks
- Storage and Reheating Instructions for leftover buffalo cauliflower
- Frequently Asked Questions About buffalo cauliflower
- Estimated Nutritional Data for Spicy Cauliflower Bites
- Share Your Experience with This Easy Cauliflower Appetizer
Why This Is The Best Crispy Buffalo Cauliflower Recipe
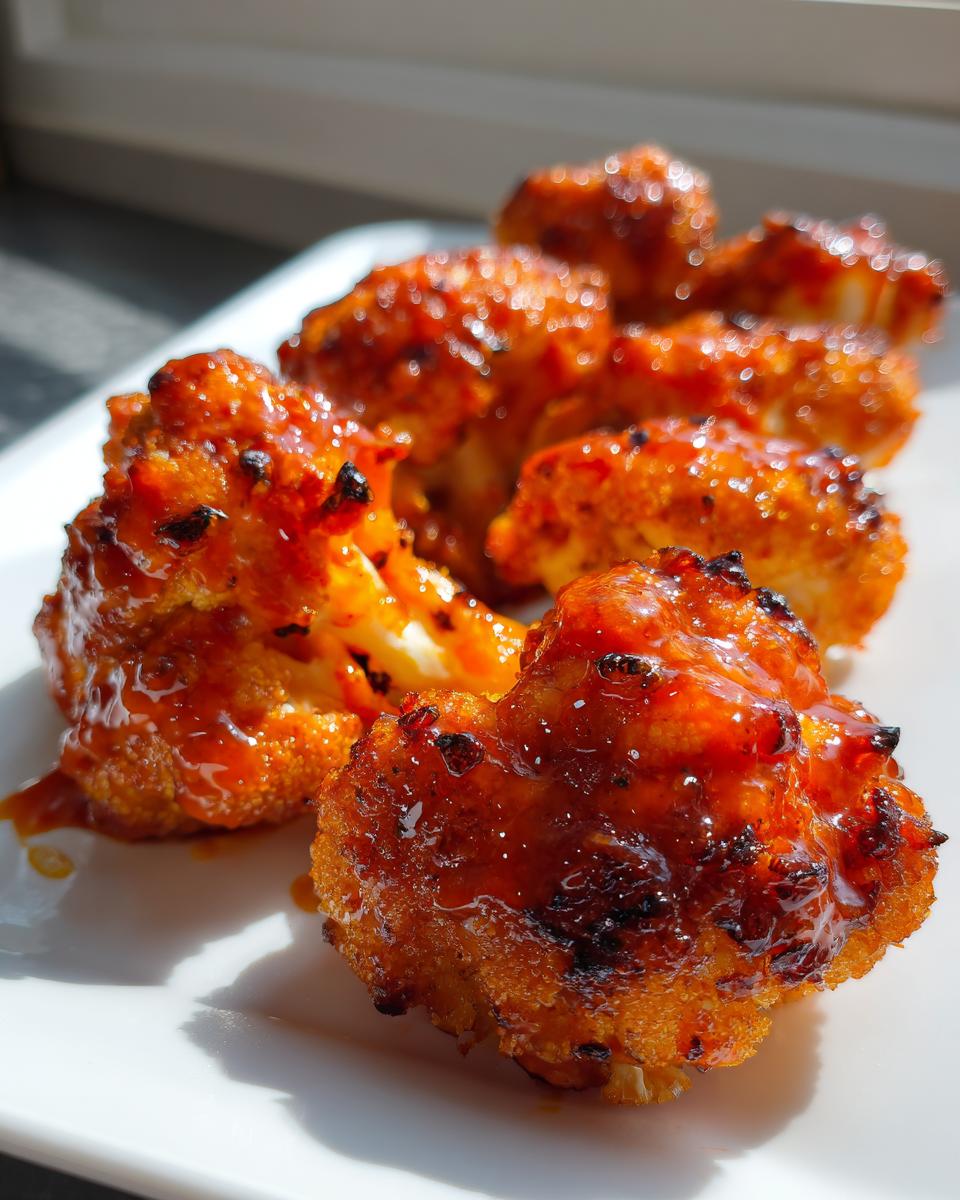
I’ve tested so many methods trying to figure out how to keep vegetables from getting sad and floppy when they interact with sauce. That’s why I can confidently say this is the Best Buffalo Cauliflower Recipe you’ll find. We aren’t just tossing florets in hot sauce; we are building them up first! The difference between soggy and satisfyingly crunchy comes down to preparation, which is something I am very serious about here at Devour Dish. If you love that fantastic crunch you get with restaurant appetizers, you’ll want to pay close attention to these next two secrets.
Achieving Restaurant Style Buffalo Cauliflower Crunch
The real star power here is the coating! We aren’t just dusting the cauliflower; we are giving it a proper bath. This requires a two-step dance: first, a thin wet batter, and then a thorough coat in dry flour. This double-dip action traps moisture inside the batter shell, and when it hits the heat, it transforms into a robust, thick crust. This technique is key to achieving true Crispy Buffalo Cauliflower that holds up perfectly when you toss it in the spicy sauce later on. Trust me, don’t skip that second coating of flour!
Versatile Cooking Methods for Perfect buffalo cauliflower
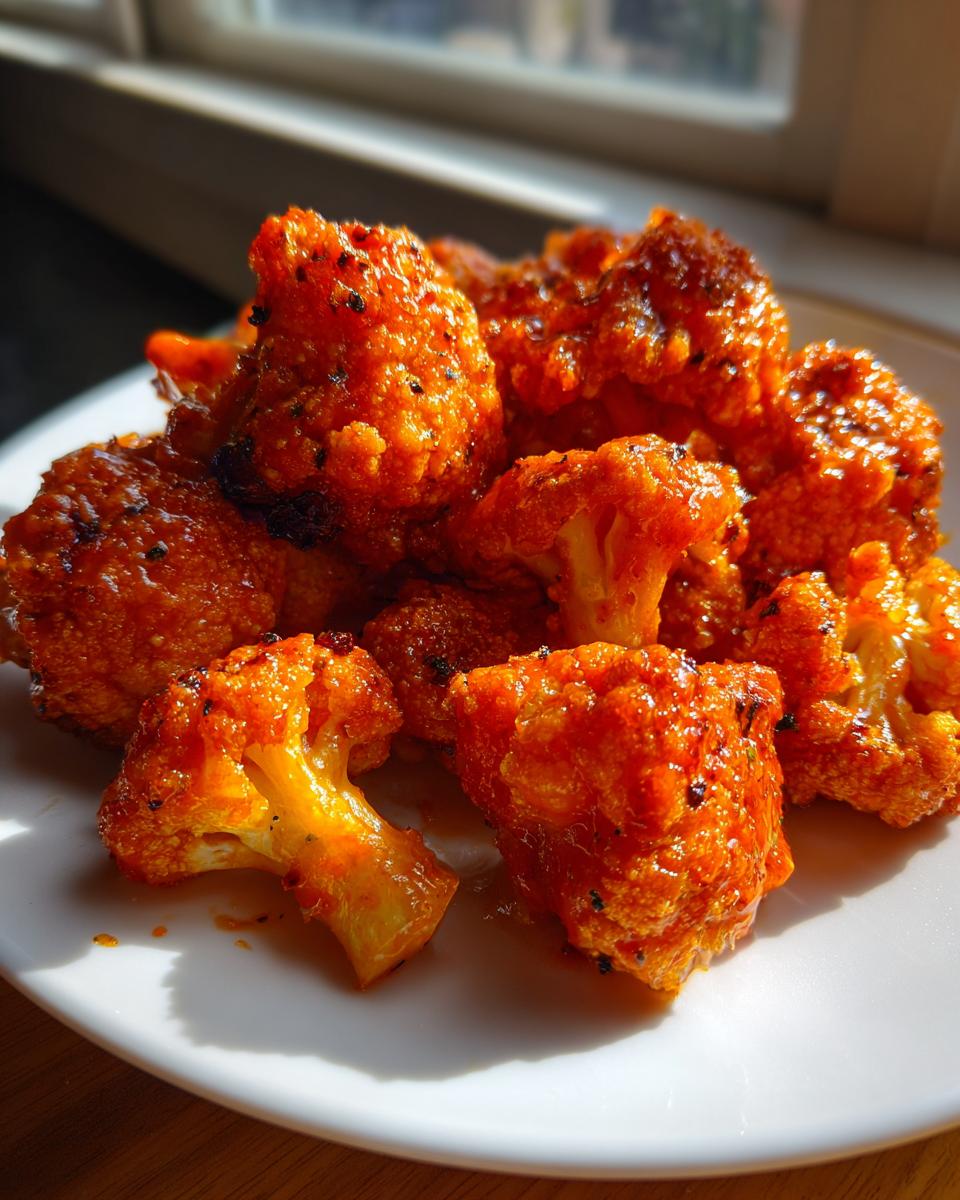
I know everyone’s kitchen setup is different, so I made sure this recipe works wonderfully whether you own an air fryer or not. If you use the air fryer, you get lightning-fast results that are incredibly crisp—perfect for quick snacks. For those bigger gatherings, popping them in the oven works great too, giving you a massive batch of what everyone will call amazing Air Fryer Cauliflower Wings, even if they’re technically Oven Baked Buffalo Cauliflower! Either way, they come out golden and ready for sauce. You can check out my tips for crispy roasted potatoes if you want more guaranteed crunch in your life!
Ingredients Needed for Crispy buffalo cauliflower Bites
Okay, assembling the lineup for these bites is super simple. I always lay everything out on the counter before I start mixing so I don’t have to hunt around later—especially not when I’m excited to get these fiery snacks going! You’ll notice we use flour twice; that’s part of the crispiness secret we just talked about. Make sure your cauliflower is ready to go before you start making the batter, because once it’s coated, you need heat, fast!
- 1 large head of cauliflower, cut into bite-sized florets
- 1 cup all-purpose flour (this is for the wet batter)
- 1 teaspoon salt
- 1/2 teaspoon black pepper
- 1/2 teaspoon garlic powder
- 1/2 cup unsweetened plant milk (for vegan option) OR 1/2 cup regular milk
- 1/2 cup all-purpose flour (this is for dredging/the dry coat)
- 1/2 cup buffalo sauce – use your favorite heat level!
- 4 tablespoons melted butter (or vegan butter if you’re keeping it plant-based)
- 1 tablespoon apple cider vinegar
- For Serving: Vegan ranch or blue cheese dressing, celery sticks
Ingredient Notes and Substitutions for your buffalo cauliflower
Because these are so popular for parties, I’ve tweaked them a few times to make sure everyone can enjoy them. If you’re aiming to make Vegan Buffalo Bites, that substitution is super easy—just make sure you use plant milk, like unsweetened almond or soy milk, in your wet batter, and definitely use vegan butter when you mix up the sauce later. Simple swaps!
Now, if you’re going for Gluten Free Buffalo Cauliflower, you can absolutely do that too! Just swap out the all-purpose flour in both the wet and dry coatings for a good quality 1-to-1 gluten-free flour blend. It works like a charm, though sometimes I find the GF blends need just a tiny splash more milk to get that perfect pancake consistency. Always check your batter thickness before you dip!
And about the sauce—if you want them spicier, throw in a teaspoon of cayenne pepper when you melt the butter. If you want them a little tarter, squeeze in a bit more of that apple cider vinegar. It’s really your spice level to control!
Step-by-Step Instructions for the Ultimate buffalo cauliflower
Alright, let’s get cooking! Preparing these buffalo cauliflower bites is all about setting up that protective crunch layer before the heat hits. The absolute first thing you must do, and I mean never skip this, is wash and dry your florets. The dryer they are, the better that coating will stick. Seriously, pat them down like you’re drying a baby after a bath!
Preparing the Batter and Dredging Process
Next up is the coat. In one bowl, you’ll whisk together the first measure of flour with your seasonings—salt, pepper, garlic powder. Then, slowly whisk in the milk. You’re aiming for a thin batter, almost like a crepe or thin pancake mix. It shouldn’t be gloppy! Once that’s smooth, get your second measure of flour ready in a separate shallow dish.
This is the fun part: Dip a floret straight into that wet batter, let the excess drip off for just a second, and then immediately toss it into the plain flour. Make sure it’s totally covered in that dry flour layer. That simple one-two punch is what gives us that amazing coating!
Cooking: Air Fryer Cauliflower Wings Technique
If you’re using the air fryer, preheat it to 390°F (199°C). This is the sweet spot for crisping these up! Spray your basket lightly—we don’t want them sticking! Arrange your coated florets in just a single layer. Don’t crowd the basket, or they will steam instead of crisp. Cook them for 12 to 15 minutes total. You absolutely must shake the basket vigorously around the 7-minute mark so they brown evenly on all sides.
Oven Baked Buffalo Cauliflower Instructions
If you’re going the oven route, preheat to a nice hot 425°F (220°C) and line that baking sheet with parchment paper for easy cleanup. Arrange the florets in one layer. Remember: single layer is non-negotiable for crisping! Bake these for about 20 to 25 minutes. Make sure you flip them halfway through so you don’t end up with one side soft and sad. They should look golden brown when they are done!
Saucing and Serving the Spicy Cauliflower Bites
While the cooking is happening, mix up your sauce mixture: buffalo sauce, melted butter (or vegan butter), and that splash of apple cider vinegar. As soon as your cauliflower comes out of the fryer or oven—while it’s piping hot—dump those crunchy pieces straight into a large bowl and pour that sauce right over the top. Toss everything together gently until every single one of these Spicy Cauliflower Bites is shining with sauce. Serve them right away; the crunch is best when fresh!
If you’re looking into some other easy oven recipes that really deliver on texture, you should absolutely look at my guide for creamy peanut butter pie, just kidding! That one is no-bake, but seriously, baking well makes everything better!
Tips for Success with Your buffalo cauliflower
I feel like this recipe is pretty foolproof because I tested it so many times, but there are a few little things I do that really take these buffalo cauliflower bites from “really good” to “I can’t believe this isn’t fried chicken!” These little expert touches make all the difference, especially when trying to keep that beautiful crispiness we worked so hard to build up with that double-coat.
First off, if you are using the oven mainly because you need to make a huge batch, listen up: let the coated cauliflower rest on the pan for about 10 minutes before you slide it into the oven. I know, I know, baking means waiting, but this short resting time actually lets the coating set up slightly. It’s like giving the flour a moment to really hydrate and bond before the harsh heat hits it. This simple step, which I learned from some of my best deep-fried recipes like my juicy fried chicken, makes a huge impact on texture.
If you are still worried about keeping the coating thick and crunchy, especially if you are a fan of extra, extra heavy coating, try the double-dip method. Dip from wet batter to dry flour, toss it around, and then dip it back into the wet batter, and then back into the dry flour again! It takes slightly longer, but you end up with this wonderfully thick, almost crunchy shell that absolutely yells flavor once it meets the sauce.
And speaking of sauce: don’t let the hot pieces just sit in the sauce. Toss them right before serving, like, literally 60 seconds before they hit the plate. The longer they sit soaking in the buffalo sauce, the softer that amazing crust will become. We want maximal crunch when you take that first bite of spicy cauliflower bites!
Serving Suggestions for Game Day Cauliflower Snacks
The cooking is done, they are perfectly tossed, and now comes the best part: arranging the platter! These make the absolute perfect Healthy Buffalo Wing Alternative for watching the game or hosting a party where you want something punchy that isn’t fried meat. The crispy texture really shines when you serve these right away, so grab your prettiest serving platter!

You absolutely need something cool and creamy to cut through that spicy vinegar kick, right? The classic pairing is a good, chunky blue cheese dip or, if you’re keeping things plant-based, a fantastic creamy ranch. I always make sure I have plenty of both on hand because some people go straight for the ranch, and others can’t handle the heat without that cooling flavor.
Don’t forget the crunch factor outside of the cauliflower itself! Serving them alongside fresh, crisp celery sticks is a must—it cleanses the palate beautifully between bites of those saucy, hot florets.
Buffalo Cauliflower with Dipping Sauce Pairings
While blue cheese and ranch are the MVP duo, feel free to get creative with what you are dipping into! If you have a few extra minutes, a quick homemade aioli goes incredibly well here. Seriously, a homemade garlic aioli dipped cauliflower bite is next-level delicious—the richness of the garlic is such a nice contrast to the sharp buffalo sauce.
If you are looking for something tangier, try mixing crème fraîche with a little squeeze of lime juice and some chopped chives. It’s a lighter option that still offers that soothing creaminess you want when eating something spicy. Remember, the better the dipping situation, the faster these Easy Cauliflower Appetizer Ideas disappear!
Storage and Reheating Instructions for leftover buffalo cauliflower
Okay, here’s a tough love moment: The absolute, 100% best way to eat these buffalo cauliflower bites is straight out of the bowl, seconds after they’re tossed in that glorious hot sauce. That’s when the crust is screamingly crisp! They might still be completely wonderful the next day, but let’s be real, no sauced coating stays perfectly crunchy forever once tucked into the fridge.
If you do manage to have leftovers, you store them in an airtight container—make sure it’s not too crowded in there. Keep them chilled in the refrigerator for up to three days max, though I’d aim for enjoying them within 24 hours.
Now, how do we revive them? Please, please, for the love of crunch, skip the microwave! Microwaving turns crispy things instantly soft and sad. Our secret weapon for bringing back texture on leftovers is the air fryer again. Set your air fryer to about 350°F (175°C) and pop the leftover spicy cauliflower bites in a single layer for just 4 to 6 minutes. Give the basket a quick shake halfway through.
This quick blast of dry heat pulls the moisture off that crust without totally overheating the interior or burning the sauce. They won’t be quite as shatteringly crisp as when they were first made, but they will be warm, saucy, and have way more satisfying texture than they would if you tried to reheat them any other way. If you only have an oven, you can use that—just bake at 375°F for about 8 minutes, still making sure they are in a single layer on a baking sheet.
Frequently Asked Questions About buffalo cauliflower
It’s totally normal to have questions when you’re trying to achieve next-level texture, especially when dealing with vegetables! Here are a few things I hear pretty often about making sure these buffalo cauliflower bites turn out exactly how you want them—spicy, flavorful, and definitely not soggy.
Can I make this buffalo cauliflower recipe gluten-free?
Oh yes, you absolutely can! Remember when we discussed substitutions in the ingredients section? You can easily turn this into Gluten Free Buffalo Cauliflower. All you need to do is swap out the all-purpose flour for a 1-to-1 gluten-free flour blend in both your wet batter and your dry dredging station. It works beautifully, and you still get that awesome thickness around the floret. It’s a great way to make sure everyone at your party gets to enjoy these!
How do I ensure my cauliflower wings stay crispy?
This is the million-dollar question, isn’t it? Honestly, it comes down to two big preparation steps we talked about. First, you have to dry the fresh cauliflower florets completely after washing them—I use paper towels until they feel bone dry. Second, you MUST do the double coating: dip in the wet batter, then dry flour, giving you that sturdy shell. That coating is what protects the cauliflower from getting swamped by the sauce! Follow those two rules, and you’ll have amazing Crispy Buffalo Cauliflower every single time.
Can I use frozen cauliflower for this recipe?
I really, really wish you could, but for this specific recipe, no, you can’t use frozen cauliflower. Frozen cauliflower holds a ton of extra water, even after you thaw it. If you try to put our beautiful coating on wet cauliflower, what happens? Steam! And steam means soggy coating! To get those amazing, crunchy Air Fryer Cauliflower Wings we’re aiming for, start with fresh, dry florets. It’s worth the five extra minutes of prepping the heads of cauliflower, I promise!
Estimated Nutritional Data for Spicy Cauliflower Bites
I always get asked about the nutrition when serving these up, especially since people see them as a healthier alternative to traditional wings. Now, remember, because we used butter or vegan butter, and depending on if you use regular milk or plant milk in the batter, these numbers are just estimates based on standard ingredient amounts—but you get a fantastic snapshot here!
This information is helpful, especially because they are packed with fiber from the cauliflower, making them a great choice for your next round of fueling Game Day Cauliflower Snacks. But take these values as a general guide—your final count will change slightly based on how much you slather them in that amazing dipping sauce!
- Serving Size: 1 cup
- Calories: 250
- Sugar: 5g
- Sodium: 650mg
- Fat: 12g
- Saturated Fat: 3g
- Trans Fat: 0g
- Carbohydrates: 30g
- Fiber: 6g
- Protein: 5g
- Cholesterol: 0mg
See? Not bad for something that tastes this indulgent! When you think about how much better this is than ordering out, these Spicy Cauliflower Bites look pretty great on paper, too. Just be mindful of that sodium count, which largely comes from the buffalo sauce itself!
Share Your Experience with This Easy Cauliflower Appetizer
I have given you all my secrets for making the most unbelievably crispy buffalo cauliflower, but now I really want to hear from you! When you make these easy cauliflower appetizer ideas, please come back here and tell me how they turned out!
The Devour Dish kitchen thrives on seeing what you’re cooking up. Did you choose the air fryer for maximum crunch, or did you batch-bake them successfully in the oven? Did you adjust the heat by adding extra cayenne, or maybe dial it back a bit?
If you have a minute, please hit that star rating button right below the recipe card and let me know you loved them—a five-star rating really helps other folks find this recipe when they are craving Game Day Cauliflower Snacks!
And seriously, if you snap a picture of your beautifully sauced, crunchy pieces next to some celery sticks and blue cheese dip, tag me on social media! It makes my day to see my tried-and-true recipes showing up in your real-life celebrations. If you ever have a burning question after trying this recipe—or just want to say hi—you can always reach out directly through my Contact Page. Happy dipping, everyone!
PrintUltimate Crispy Air Fryer Buffalo Cauliflower Bites

Make the best crispy buffalo cauliflower bites using an air fryer or oven. This easy recipe delivers a satisfying crunch and spicy flavor, perfect for game day or a simple appetizer.
- Prep Time: 15 min
- Cook Time: 25 min
- Total Time: 40 min
- Yield: 4 servings 1x
- Category: Appetizer
- Method: Air Frying / Baking
- Cuisine: American
- Diet: Vegetarian
Ingredients
- 1 large head of cauliflower, cut into bite-sized florets
- 1 cup all-purpose flour
- 1 teaspoon salt
- 1/2 teaspoon black pepper
- 1/2 teaspoon garlic powder
- 1/2 cup unsweetened plant milk (for vegan option) OR 1/2 cup regular milk
- 1/2 cup all-purpose flour (for dredging)
- 1/2 cup buffalo sauce
- 4 tablespoons melted butter (or vegan butter)
- 1 tablespoon apple cider vinegar
- For Serving: Vegan ranch or blue cheese dressing, celery sticks
Instructions
- Prepare the cauliflower: Wash and dry the cauliflower florets completely. This step helps achieve crispiness.
- Make the wet batter: In a medium bowl, whisk together 1 cup of flour, salt, pepper, and garlic powder. Slowly whisk in the milk until you have a thin, pancake-like batter.
- Dredge the cauliflower: In a separate shallow dish, place the remaining 1/2 cup of flour. Dip each floret first into the wet batter, letting excess drip off, then immediately coat it thoroughly in the dry flour. Place coated florets on a plate.
- Air Fryer Method (For Maximum Crispiness): Preheat your air fryer to 390°F (199°C). Lightly spray the air fryer basket with cooking spray. Arrange the coated cauliflower in a single layer, working in batches if necessary. Air fry for 12 to 15 minutes, shaking the basket halfway through, until golden brown and crispy.
- Oven Method: Preheat your oven to 425°F (220°C). Line a baking sheet with parchment paper. Arrange the coated cauliflower in a single layer. Bake for 20 to 25 minutes, flipping halfway, until crispy.
- Make the sauce: While the cauliflower cooks, combine the buffalo sauce, melted butter (or vegan butter), and apple cider vinegar in a bowl. Whisk until smooth.
- Toss and serve: Once the cauliflower is cooked, transfer the hot florets to a large bowl. Pour the buffalo sauce mixture over the cauliflower and toss gently until every piece is coated.
- Serve immediately with your choice of dipping sauce and celery sticks.
Notes
- For extra crispy results, especially when baking, let the coated cauliflower rest for 10 minutes before cooking.
- If you prefer a thicker coating, double-dip the florets: wet batter, dry flour, wet batter again, then dry flour again.
- Adjust the amount of buffalo sauce based on your preferred level of spice.
Nutrition
- Serving Size: 1 cup
- Calories: 250
- Sugar: 5
- Sodium: 650
- Fat: 12
- Saturated Fat: 3
- Unsaturated Fat: 9
- Trans Fat: 0
- Carbohydrates: 30
- Fiber: 6
- Protein: 5
- Cholesterol: 0