
Oh, I totally get it! There are those days when you’ve crushed your workout, you’re watching your macros like a hawk, but that craving for something rich, creamy, and completely decadent hits like a freight train. For years, I thought those cravings meant choosing between indulgence and hitting my nutrition targets. But that’s where my background in nutrition science really kicked in! I became obsessed with finding the magic balance. And folks, I have cracked the code with this amazing baked Protein Cheesecake. It delivers that velvety smooth texture you dream about while keeping things incredibly macro-friendly. You can check out other great high protein meal prep recipes later, but right now, focus here! This isn’t some gritty, sad substitute; this is the real deal, and I’m so excited to share it with you. Seriously, other bakers agree that creamy texture is tough to nail, but this recipe shines—feel free to get inspired by how others talk about their versions of this high protein baked cheesecake too!
- Why This Baked Protein Cheesecake is Your New Favorite Healthy Cheesecake Recipe
- Gathering Ingredients for Your Protein Cheesecake
- Step-by-Step Instructions for a Flawless Protein Cheesecake
- Ingredient Notes and Substitutions for Your Protein Cheesecake
- Making Variations of This Protein Cheesecake
- Storage and Reheating Instructions for Your Protein Cheesecake
- Frequently Asked Questions About High Protein Dessert
- Estimated Nutrition Profile for This Protein Cheesecake
- Share Your Perfect Protein Cheesecake Creation
Why This Baked Protein Cheesecake is Your New Favorite Healthy Cheesecake Recipe
Listen, I know what you’re thinking: high-protein dessert usually means dry, chalky, or tasting vaguely like chalk mixed with yogurt. Nope, not here! When I developed this recipe, my goal was maximum flavor with minimum guilt, and I think we nailed it. It’s genuinely delicious, which is why it’s the ultimate meal prep dessert.
- It packs a serious protein punch—we’re looking at 28 grams per slice, people! That’s why it’s such a solid fitness friendly sweet treat.
- Everything is kept low-sugar, making it perfect for when you need a real, satisfying fix without the crash. It’s a true guilt free dessert candidate.
Macro-Friendly Sweet Treat
Seriously, 28 grams of protein! That’s better than most of my actual protein shakes, but it tastes like dessert heaven. Because we use sugar substitutes, the sugar count stays super low, which makes hitting those daily goals so much easier. I love knowing I can enjoy this after dinner and still feel good about my choices. You should definitely check out my protein muffins if you need more macro-friendly snacks!
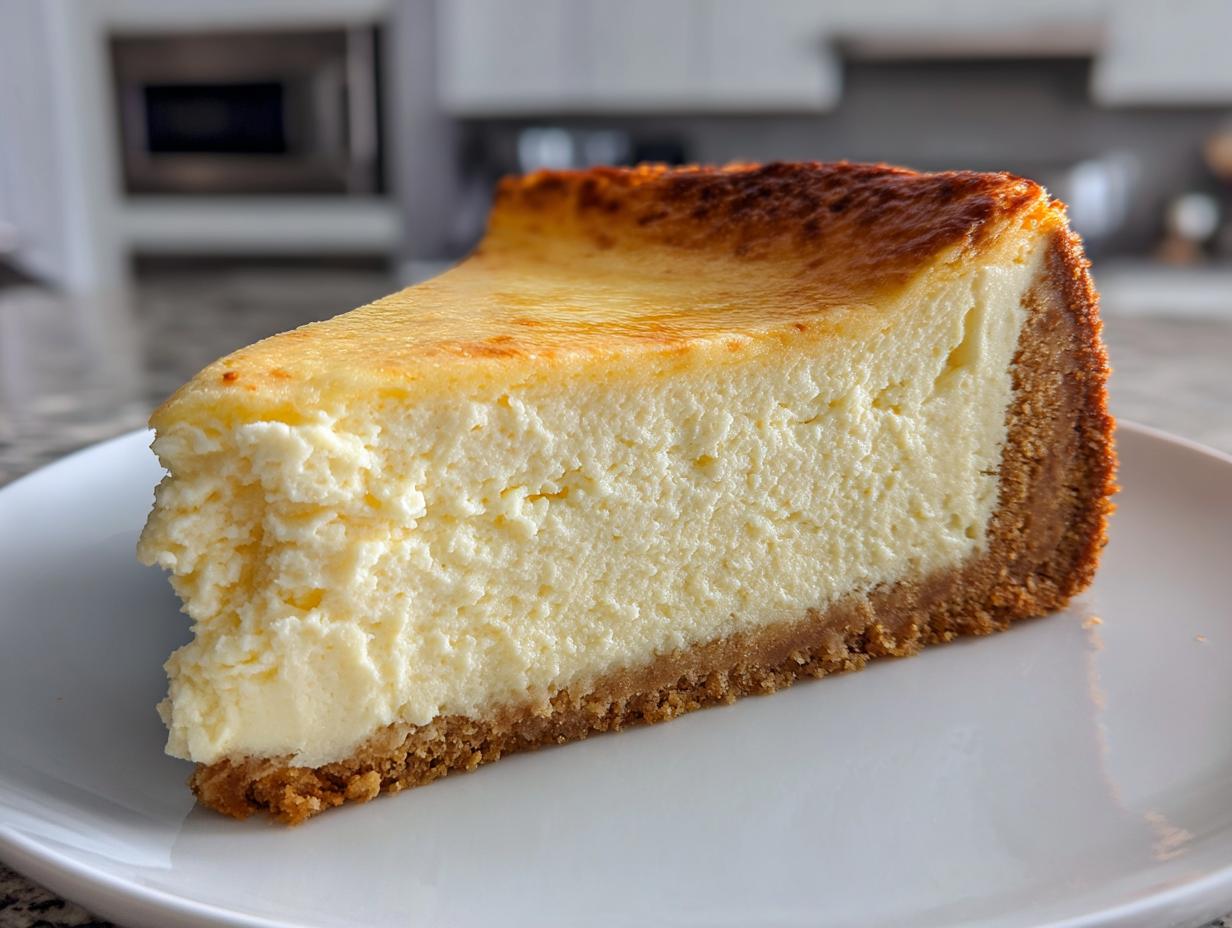
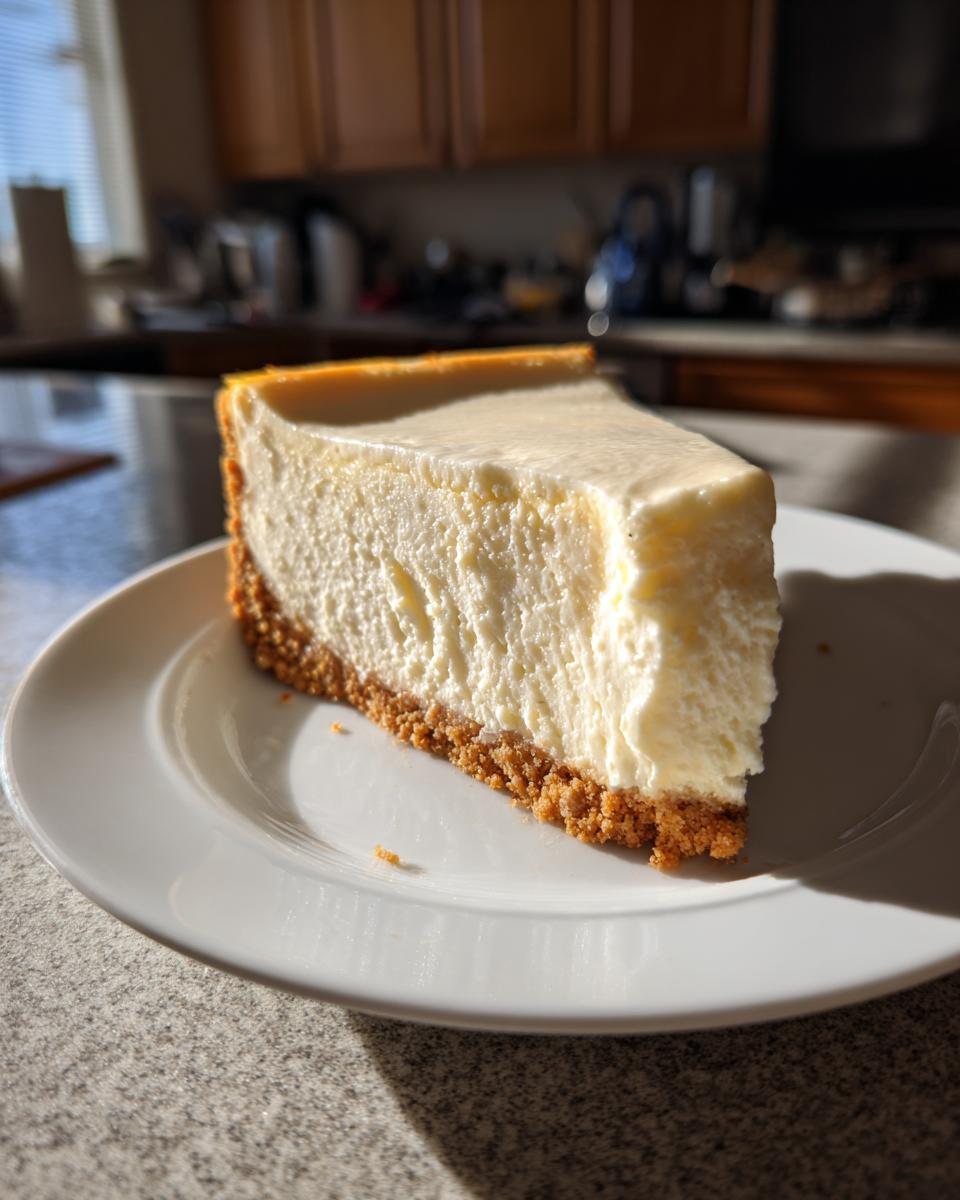
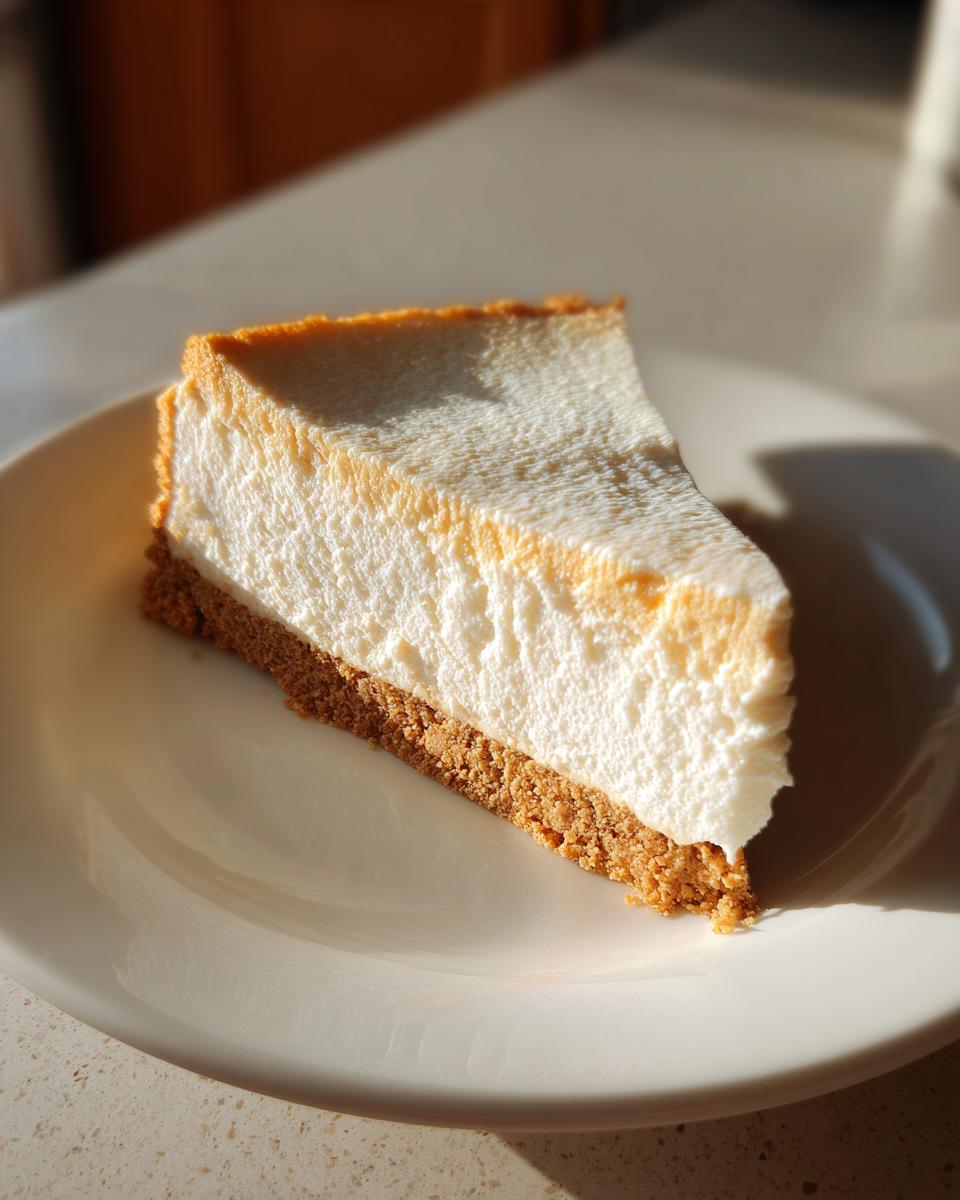
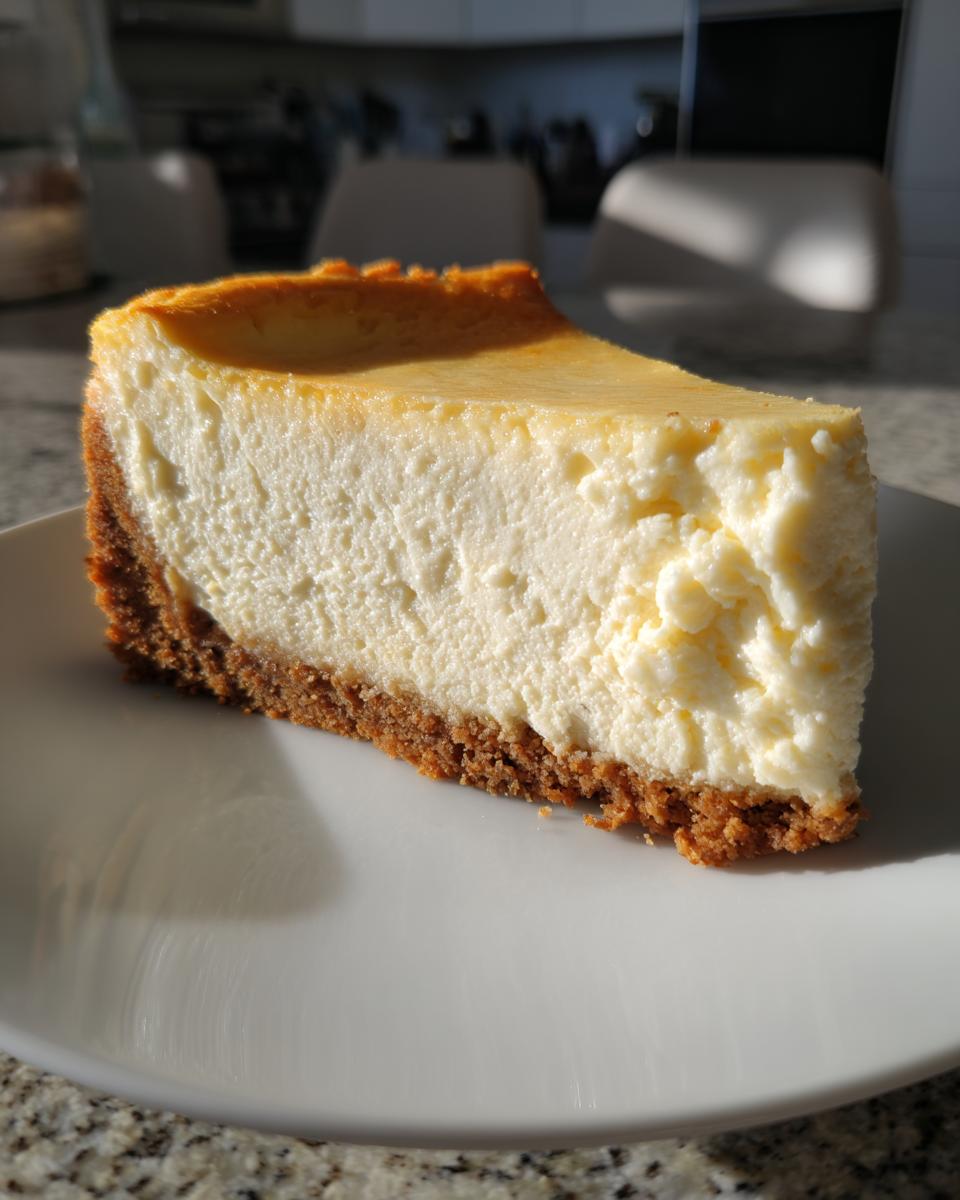
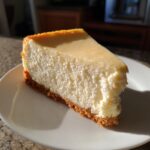
The Creamy Texture of Perfect Protein Cheesecake
This is the most important part! Most lower-fat cheesecakes turn rubbery, but we load this up with the right dairy to keep it lush. The combination of cream cheese and cottage cheese (or Greek yogurt if you prefer!) creates a richness you wouldn’t expect from a Protein Cheesecake. It melts in your mouth—I promise!
Gathering Ingredients for Your Protein Cheesecake
Okay, let’s get our list together! When you’re aiming for a healthy cheesecake recipe this good, ingredient quality matters, even if we are keeping things simple. I’ve learned that using softened cream cheese is non-negotiable for smoothness, so plan ahead! Don’t worry if you need to swap out the crust ingredients—I’ve got lots of ideas later on, but for the original, here’s exactly what you need.
For that perfect filling structure and macro split, here is the lineup. Remember, texture is everything, so make sure you have your two large eggs ready!
- One cup of graham cracker crumbs—use your favorite gluten free cheesecake swap if you need to!
- Two tablespoons of melted butter or sometimes I use coconut oil, just decide beforehand.
- Just one teaspoon of sugar substitute for the crust, this is optional but adds a nice little touch.
- Sixteen ounces of cream cheese, and please make sure this is softened to room temperature!
- One cup of either low-fat cottage cheese or thick Greek yogurt. Choose wisely for your texture preference!
- One full cup of vanilla or unflavored protein powder—this is where the bulk of the protein comes from.
- Half a cup of granulated sugar substitute, like erythritol or monk fruit blend.
- Two large eggs—that’s right, two of them!
- One teaspoon of pure vanilla extract for that classic flavor.
- And don’t forget that tiny pinch of salt to balance everything out.
If you’re looking for other delicious ways to incorporate healthy fats and flavors, you should check out my creamy avocado egg salad recipe!
Step-by-Step Instructions for a Flawless Protein Cheesecake
Alright, it’s time to mix! I know you’re eager to get that creamy goodness into the oven, but follow these steps exactly, especially the cooling part, and I guarantee you won’t end up with a cracked top. That’s the secret handshake of a great baked dessert! When I first started making these, I rushed the cooling, and boom—instant cracks. Don’t let that happen to your gorgeous Protein Cheesecake! I learned a ton about setting up bases properly when I perfected my easy homemade french bread, and that patience pays off here, too.
Preparing the Crust for Your Protein Cheesecake
First things first, get that oven heated up to 325°F (160°C) and grease that 7-inch springform pan—don’t skip the greasing! In a little bowl, mix your graham cracker crumbs with the melted butter and any extra sweetener you decided to use. Once it looks like wet sand, press it firmly into the bottom of your prepared pan. That crust needs a quick pre-bake for about 8 minutes just to set it up before we add the filling. Bake it, pull it out, and let it cool down just a touch.
Mixing the Filling: Achieving the Best Protein Cheesecake Batter
This is the mixing order that ensures everything emulsifies just right. Grab your big bowl and beat the softened cream cheese until it’s beautifully smooth—no lumps allowed! Then, beat in your cottage cheese or Greek yogurt until that mixture is totally combined. Now, gently add in your protein powder and the sugar substitute. Mix on low speed—I mean *low*—just until it disappears into the cheese mixture. The real warning comes next: add those two eggs one at a time, mixing only until you see the yolk vanish. Seriously, overmixing the eggs is what destabilizes everything! Finally, stir in the vanilla and salt by hand.
Baking and Cooling: Secrets to a Crack-Free Protein Cheesecake
Pour that gorgeous batter over your prepped crust. Now for the trick that saves you every time: place the cheesecake in the oven for 45 to 55 minutes. You’re looking for the edges to be firm but the very center should still have a little jiggle, like Jell-O. When that time is up, *do not take it out*. Just turn the oven off, crack the door open a tiny bit, and let that Protein Cheesecake relax inside for a full hour. This slow cooling prevents the drastic temperature change that causes those awful cracks. After the hour, move it to a wire rack to finish cooling on the counter before it heads to the fridge! If you want some inspiration on how other bakers tackle timing and presentation, you can look up different takes on high-protein cheesecake recipes online. Then, let it chill overnight—trust me, the flavor is so much better the next day!

Ingredient Notes and Substitutions for Your Protein Cheesecake
One of the best parts about making a truly healthy cheesecake recipe at home is customizing it! People often ask me about ingredient swaps, especially when they are trying to hit specific macros. If you’re worried about fat content, using non-fat Greek yogurt instead of cottage cheese in this Protein Cheesecake is a fantastic swap, and honestly, the texture is still super creamy. Trust me, yogurt works beautifully here!
Also, don’t stress about the sweetener. Since we are using a granulated substitute, it bakes up just like sugar without the glucose spike. If you love the flavor profile of this recipe, you might also want to whip up a batch of my easy hot cocoa mix to use in other protein treats!
And for those looking for a no-bake option, which is great for a quick protein packed snack, you technically *could* omit the eggs and just rely on the chilling power of the cheese mixture, but I always lean toward this baked version because it locks in that superb texture.
Making Variations of This Protein Cheesecake
Part of the fun in developing a staple recipe like this is figuring out all the ways you can twist it! Since this base Protein Cheesecake is so sturdy and packed with flavor, it takes well to mixing in extras. You mentioned things like chocolate and strawberry—and oh boy, have I experimented with those!
You don’t need a totally new recipe if you’re craving something different. Just a few tiny tweaks to the filling and you’ve got a whole new feast ready for meal prep. If you love strawberry, you absolutely must check out my amazing strawberry shortcake cheesecake recipe for some non-protein inspiration, but for this one, let’s stick to boosting that protein!
Creating Chocolate Protein Cheesecake
If you’re a die-hard chocolate fan, this is super easy! You just need to swap out some of that vanilla protein powder for a chocolate version. If you use a chocolate protein powder, that’s it—just use it straight in place of the vanilla powder. If, however, you want to use vanilla protein but add deep chocolate flavor, here’s what I do: replace about 2 tablespoons of the required protein powder with unsweetened cocoa powder. But you have to be careful! Cocoa powder can dry things out quickly, so if you make that swap, add an extra teaspoon of vanilla extract just to keep that moisture working for us.
Quick Tips for Mini Protein Cheesecakes
Sometimes you don’t want to commit to a whole 7-inch cake, especially if you’re prepping single-serving snacks for the week ahead. That’s where these turn into mini protein cheesecakes! Just grab a standard muffin tin and use paper liners—the same ones you use for cupcakes work perfectly. You pour the batter in just like you would for the big pan, but here’s the timing change: they bake much faster since there’s less volume. You’ll only need about 20 minutes in the oven. They set up much quicker this way, making them perfect for grabbing straight from the fridge when you need an easy protein boost. You can even find ideas for layering them into glasses, kind of like those protein cheesecake jars people love!
Storage and Reheating Instructions for Your Protein Cheesecake
Once you’ve managed to wait the agonizing few hours (or ideally, overnight!) for your Protein Cheesecake to set up properly in the fridge, the next big question is keeping that perfection around for future enjoyment. Good news: this recipe stores like a dream because the high protein content acts like a great preservative!
For the absolute best texture, you must give this at least four hours to chill in the refrigerator before you even think about slicing it. I highly recommend making this the day before you plan to serve it. When it’s fully set and chilled, this cheesecake will easily last for about five days stored tightly covered in the fridge. I always use a cake carrier with a tight lid, or I cover the pan tightly with plastic wrap.
Now, about reheating—cheesecake isn’t really something we reheat, right? It’s best served chilled or at a cool room temperature. If you happen to want to freeze some portions for later (which is great for expanding your high protein dessert supply!), wrap individual slices tightly in plastic wrap first, then slide them into a freezer bag. They stay great for about two months tucked away in the freezer. When you’re ready to eat a frozen slice, just let it thaw slowly in the fridge overnight. Don’t try to microwave it; you’ll mess up that beautiful creamy texture we worked so hard to achieve!
If you’re ever making homemade toppings or jams that you want to save for these amazing slices, you should check out my guide on easy freezer jam—it makes an incredible topping for a slice of chilled cheesecake!
Frequently Asked Questions About High Protein Dessert
When you’re diving into making a new high protein dessert, I know you’re going to have a few questions bounce around in your head! It’s smart to ask! We want to make sure your experience is seamless and that you end up with something truly fantastic. Here are some things I hear most often about adapting these types of recipes.
Can I make a no bake protein cheesecake using this method?
You absolutely can try to adapt it! The original recipe here is baked because baking locks in that wonderfully dense, velvety texture we love—it creates structure where the protein powder might otherwise make things crumbly. If you skip the baking steps, you are essentially creating a thick cheesecake fluff recipe. You’ll just omit the crust bake, mix your filling, pour it over the unbaked crust, and then you must chill it for a minimum of 6 hours, but overnight is truly best so it firms up enough to slice. Check the recipe notes for the basic structure, but know that “no-bake” often means a slightly lighter texture than this baked version.
What is the best protein powder to use in this healthy cheesecake recipe?
This is a great question for anyone looking at the best texture possible! If you want the absolute creamiest result that mimics traditional cheesecake flavor, I highly recommend a whey/casein blend. A blend handles cooking much better than pure whey, which can sometimes seize up or get too dry in the heat. Casein adds that creamy, slow-digesting thickness that really helps hold the structure together when you’re aiming for a high protein count, like in this low carb cheesecake base. If you use 100% whey isolate, you might need just an extra tablespoon of Greek yogurt to keep things moist. If you love the idea of a rich, low-sugar treat, you should also peep my recipe for keto white chicken chili for a savory option!
For even more ideas on great protein recipes, you can always browse what other folks are pinning, like this great recipe from Protein Cheesecake!
Estimated Nutrition Profile for This Protein Cheesecake
Okay, let’s talk numbers, because I know many of you are tracking your macros like pros! Remember that these nutrition facts are an estimate based on using low-fat cottage cheese and a standard non-caloric sweetener. That said, look at that protein count!
- Serving Size: 1 slice (about 1/8th of the cake)
- Calories: Around 240—that’s surprisingly low for dessert!
- Protein: A whopping 28 grams! This easily qualifies as a massive high protein dessert.
- Sugar: Barely 4 grams, thanks to the sweeteners we used instead of regular sugar!
Enjoy this fantastic, satisfying treat knowing it’s supporting your goals!
Share Your Perfect Protein Cheesecake Creation
Okay, you’ve made the best Protein Cheesecake ever, and now I absolutely need the scoop! Sharing recipes is the heart of Devour Dish, and I live for seeing your kitchen creations pop up online. Did you go for the rich chocolate swirl? Did you top it with fresh strawberries? Tell me everything!
Please don’t just leave me hanging! If you made this, rate it as soon as you can—those star ratings genuinely help other people decide if this macro-friendly delight is for them. And if you tweaked the crust or found an amazing sugar substitute that worked perfectly, drop a comment below. I read every single one!
If you ended up making a huge batch for your meal prep dessert rotation, snap a quick photo and tag me on social media! I love featuring reader photos on my feed. If you run into any snags, or if you just need to chat about baking in general, feel free to reach out through my contact page. I’m always here to help troubleshoot!
Happy baking, and may your next fitness-friendly sweet treat be this perfect cheesecake!
PrintHigh-Protein Baked Cheesecake: Creamy and Satisfying
You want a decadent dessert that supports your fitness goals. This high-protein baked cheesecake delivers the creamy texture you crave while keeping macros in check. It is a perfect guilt-free dessert for meal prep.
- Prep Time: 20 min
- Cook Time: 50 min
- Total Time: 70 min
- Yield: 8 servings 1x
- Category: Dessert
- Method: Baking
- Cuisine: American
- Diet: Low Fat
Ingredients
- 1 cup graham cracker crumbs (or gluten-free alternative)
- 2 tablespoons melted butter or coconut oil
- 1 teaspoon sugar substitute (optional)
- 16 ounces cream cheese, softened
- 1 cup low-fat cottage cheese or Greek yogurt
- 1 cup vanilla or unflavored protein powder
- 1/2 cup granulated sugar substitute (like erythritol or monk fruit blend)
- 2 large eggs
- 1 teaspoon vanilla extract
- Pinch of salt
Instructions
- Preheat your oven to 325°F (160°C). Lightly grease a 7-inch springform pan.
- Prepare the crust: Mix the graham cracker crumbs, melted butter, and sugar substitute in a small bowl. Press the mixture firmly into the bottom of the prepared springform pan. Bake the crust for 8 minutes, then remove and let it cool slightly.
- Prepare the filling: In a large bowl, beat the softened cream cheese until smooth. Add the cottage cheese or Greek yogurt and beat until fully combined.
- Add the protein powder and granulated sugar substitute to the cheese mixture. Mix on low speed until just incorporated. Do not overmix.
- Beat in the eggs one at a time, mixing only until each egg is blended into the batter. Stir in the vanilla extract and salt.
- Pour the filling over the cooled crust in the springform pan.
- Bake for 45 to 55 minutes. The edges should look set, but the center should still have a slight jiggle.
- Turn off the oven, crack the door open slightly, and let the cheesecake cool inside the oven for 1 hour. This prevents cracking.
- Remove the cheesecake from the oven and let it cool completely on a wire rack.
- Cover the cheesecake and refrigerate for at least 4 hours, or preferably overnight, before slicing and serving.
Notes
- For a lower-calorie option, use non-fat Greek yogurt instead of cottage cheese.
- If you prefer a no-bake protein cheesecake, skip the crust baking and chilling time, and set the filling in the refrigerator for 6 hours.
- This recipe works well for mini protein cheesecakes if you use a muffin tin lined with paper cups. Adjust baking time to about 20 minutes.
Nutrition
- Serving Size: 1 slice
- Calories: 240
- Sugar: 4
- Sodium: 280
- Fat: 10
- Saturated Fat: 6
- Unsaturated Fat: 4
- Trans Fat: 0
- Carbohydrates: 15
- Fiber: 1
- Protein: 28
- Cholesterol: 55