
I used to think making meringue cookies was reserved for professional pastry chefs. Every time I tried, they’d spread out, crack, or worst of all, stick to the counter like glue! But I refused to believe that something so delicate and light shouldn’t be achievable in a regular kitchen. Friends, after many, many carefully tested batches right here in the Devour Dish kitchen, I cracked the code.
This is my ultimate easy meringue cookies recipe, built on the foundational French meringue method. We’re aiming for that perfect texture: crisp on the outside and that magical, melt-in-your-mouth soft center. It’s proof that the simplest ingredients—just egg whites and sugar—can create stunning, delicate sweet treats. I promise, if you follow these reliable, tested steps, you’ll have a tray full of perfect meringue kisses that everyone will talk about!

- Why This Easy Meringue Cookies Recipe Works for Beginners
- Gathering Your Ingredients for Perfect Meringue Cookies
- Step-by-Step Instructions: How to Make Meringue
- Tips for Achieving Perfect Meringue Texture
- Flavor Variations for Your Meringue Cookies
- Storage and Gifting Your Delicate Sweet Treats
- Frequently Asked Questions About Meringue Cookies
- Estimated Nutritional Information for Meringue Cookies
- Share Your Perfect Meringue Cookies Creations
Why This Easy Meringue Cookies Recipe Works for Beginners
I know you’re here because you want light and airy cookies that don’t turn into a sticky mess! That’s exactly why I developed this process around the classic French technique. It’s incredibly straightforward once you know the secrets, which is why I call this recipe foolproof. We skip fancy steps and jump straight to the results you want: meringue cookies that are crisp when you tap them, but truly dissolve the second they touch your tongue.
Because we rely on simple egg whites and sugar, these are naturally gluten free meringues, which is a great bonus if you’re baking for friends with dietary restrictions. Trust me, you don’t need complicated equipment for these wins!
Key Benefits of Our Meringue Cookies Recipe
- Simple Ingredients Only: No weird stabilizers needed here—just sugar, egg whites, and vanilla.
- Reliable Texture: We focus on the slow-dry baking method so you get that perfect crisp exterior every single time.
- Beginner Friendly: The key is watching the whipping stage, not worrying about complex folding techniques.
- Naturally Gluten Free: A crowd-pleaser that fits right onto any dessert table without any fuss!
Gathering Your Ingredients for Perfect Meringue Cookies
Okay, let’s talk about what you need before you grab that whisk! Because we are mastering the classic French Meringue Cookies here, the ingredient list is gloriously short. But simplicity means precision! Every single item needs to be exactly right if we want those delightfully light and airy cookies.
You’ll need four large egg whites—and I mean large—and one full cup of granulated sugar. Don’t try to eyeball this, measuring is key! A pinch of salt and cream of tartar are our stability helpers, and about a teaspoon of good vanilla extract makes sure they smell as delicious as they taste.
Ingredient Notes and Substitutions for Meringue Cookies
The biggest non-negotiable here, and please listen up on this, is that your egg whites absolutely must be at room temperature. Cold egg whites just won’t whip up to the volume we need! Also, make sure your bowl and whisk attachment are sanitized—I mean spotless. Any trace of grease, like leftover oil from a dish, will stop those whites from ever forming stiff peaks; it’s a classic baking disaster waiting to happen.
If you wanted to try a different flavor, you could definitely swap out some of that white sugar for maple sugar, just reduce the granulated sugar slightly to keep the ratio right. That little trick makes for incredible maple meringue cookies!
Step-by-Step Instructions: How to Make Meringue
This is where the magic—and the patience—comes in! You absolutely have to preheat your oven to its very lowest setting, usually around 200°F (95°C). Honestly, for making nice, delicate sweet treats like these, think of the oven less like an oven and more like a warm, dry closet. Line those baking sheets with parchment paper; we learned in the last section that cheating on grease protection is a recipe for disaster!
Grab your stand mixer if you have one, because your arm will thank you. We start whipping those room-temperature egg whites with the cream of tartar on medium speed until they turn soft and foamy. This is the start of making actual meringue!
Whipping the Meringue to Stiff Peaks
Now, the sugar incorporation! This must be slow. I add it about one tablespoon at a time, waiting thirty seconds in between each addition. If you dump it all in at once, you’ll shock the meringue and it deflates. Keep the mixer going, and watch it transform. You know it’s done when the mixture looks super glossy and holds a stiff peak that doesn’t flop over when you lift the whisk. Be brave and rub a tiny bit between two fingers—if you feel any sugar grit, keep beating! We want them to be flawlessly smooth.
Once you hit that perfect glossy stage, mix in that vanilla extract until it just disappears.
Piping and Drying Your Meringue Kisses Recipe
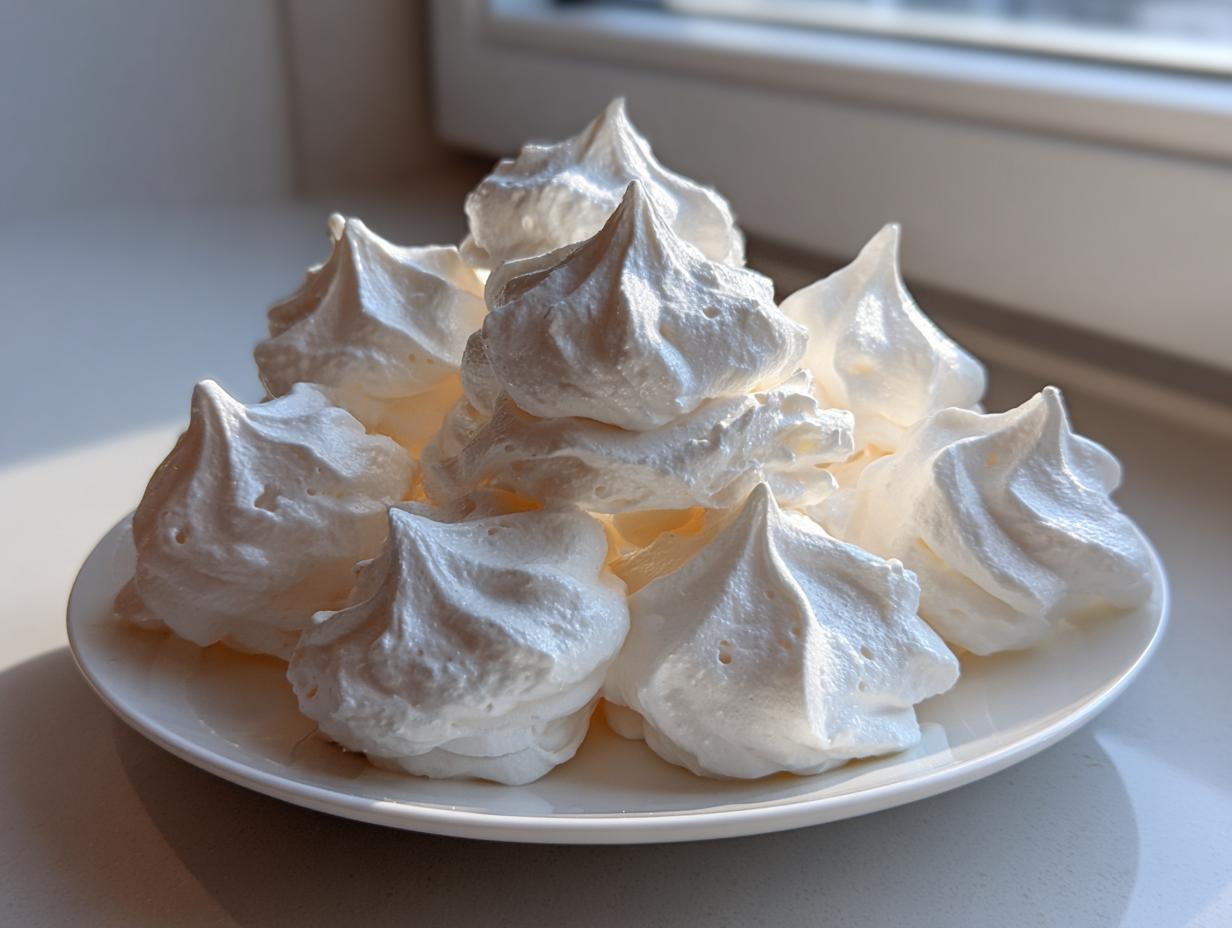
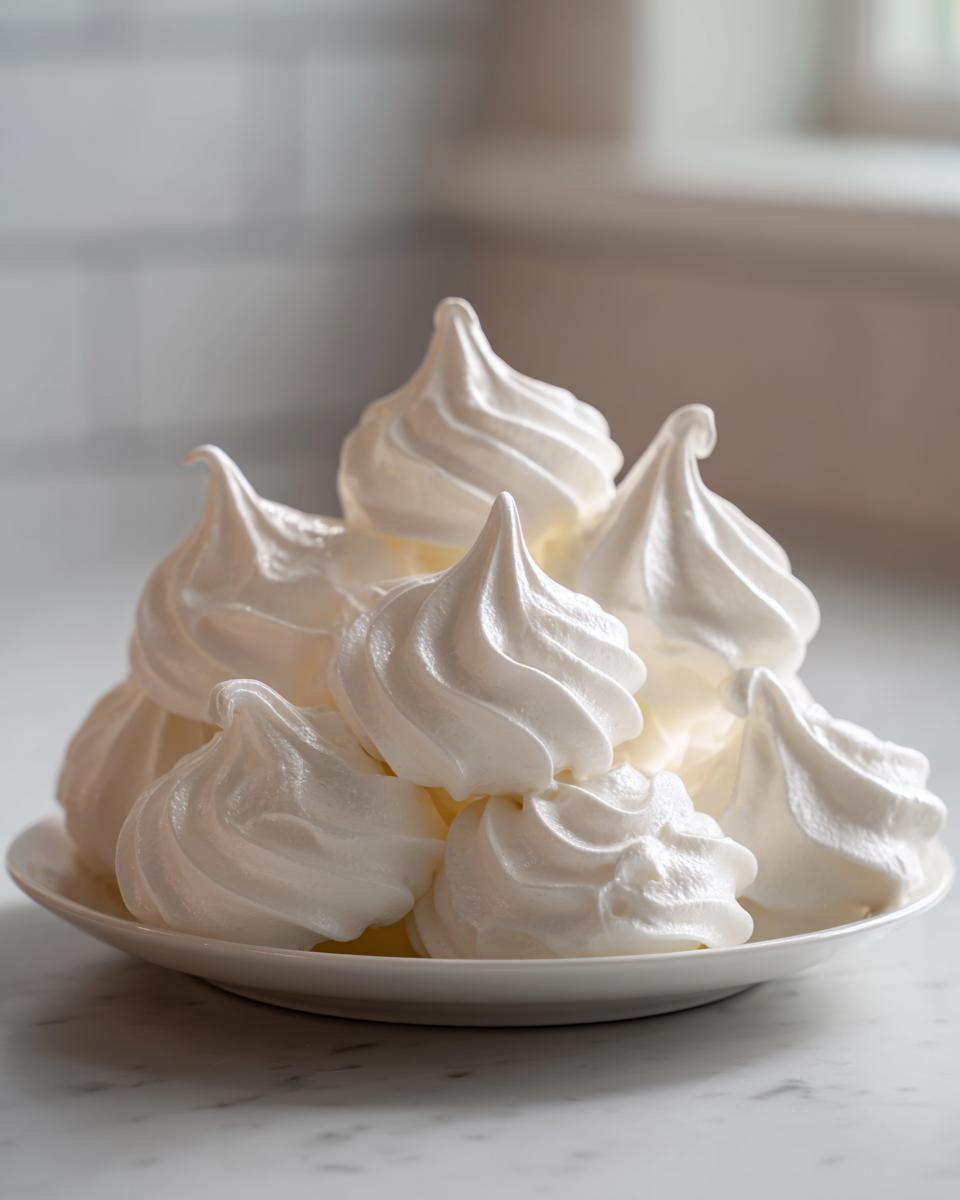
Time to shape these beauties! I love using a star tip because it makes them look like perfect meringue kisses, but honestly, two spoons work just fine if you want rustic, drop-style cookies. Pipe little mounds about an inch and a half wide onto your parchment paper.

Now the waiting game. Pop them in that low oven for about an hour to an hour and a half, depending on their size. The goal is drying, not browning! When they look set, turn the oven OFF. This is the secret weapon for achieving those crispy meringue treats. Prop the oven door open with a wooden spoon—just a tiny gap—and let them cool completely inside. Seriously, leave them alone for at least an hour, or even overnight. This slow cool-down prevents those dreaded cracks!
Tips for Achieving Perfect Meringue Texture
It is so frustrating when you follow every step perfectly, and your meringue cookies still weep or crack while cooling! I’ve done the research, and usually, the enemy is humidity. Meringues are like little sponges for moisture in the air, so try to avoid making these on a rainy or especially damp day if you can help it. That’s just my one honest piece of advice for getting that perfect meringue texture.
The second most important thing, which we already touched on, is the cooling process. Do not panic and open that oven door once they are baked! If you rush them into room temperature air, the sudden temperature change will shock them, usually causing cracks or making the outside soft again. Keep that oven off, prop the door gently, and let them dry out slowly as the oven cools down around them. This slow drying keeps them light and airy inside, just how we want those lovely melt in your mouth cookies!

Flavor Variations for Your Meringue Cookies
The vanilla meringue recipe is divine on its own—truly a delicate sweet treat—but this base recipe is begging for some fun variations, especially when the holidays roll around! It’s so easy to turn these into festive meringue kisses or colorful summer bites.
If you want those bright, fun colors and flavors, you should absolutely look into the Jello Meringue Cookie Recipe. All you do is swap out about a tablespoon of your sugar for an equal amount of flavored Jello powder when you’re adding the sugar to the egg whites. The Jello dissolves beautifully and gives you vibrant colors and strong flavor without adding any extra liquid that could ruin your meringue structure. It tastes fantastic!
Creating Holiday Meringue Cookie Ideas
For my favorite Christmas cookie swaps, peppermint is the absolute winner. You can achieve some gorgeous Peppermint Meringue Cookies by simply leaving out the vanilla and beating in a teaspoon of peppermint extract right at the end. If you want something swirly, try dusting your piped cookies with a little crushed peppermint pieces—it pairs so well with the vanilla base. It’s almost as good as my favorite peppermint bark!
You can also use this concept to make those pretty maple meringue cookies by swapping in maple sugar for some of your white sugar, or even adding something like lemon zest to the batter for a bright pop. See? Once you master the technique, the possibilities for these light desserts are endless!
Storage and Gifting Your Delicate Sweet Treats
Now that you’ve baked these little cloud-like beauties, we need to protect them! Meringue cookies are wonderfully delicate, so the storage situation is crucial if you want them to stay crisp and light. The number one rule for storing your delicious meringue kisses recipe batches is this: airtight container only!
Keep them at room temperature—never the fridge, because the cold air makes them weep, trust me on that one. They’ll stay perfectly crisp for at least a week, sometimes longer if your kitchen isn’t too humid. If you’re planning on making these for beautiful homemade meringue gifts, pack them carefully. Line your gift boxes with a little tissue paper, and don’t stack them too high, or you’ll end up with crushed crumbs instead of elegant cookie smiles!
Frequently Asked Questions About Meringue Cookies
Whenever I share these crispy meringue treats, I always get the same handful of questions, especially from first timers trying to master how to make meringue. Don’t worry if you’re nervous about baking with egg whites; these answers should give you total confidence to make perfect, melt-in-your-mouth cookies!
Can I make these meringue cookies ahead of time?
Absolutely, you should! Making these ahead of time is actually the best way to go. Since the goal is to dry them out completely, the longer they sit after baking and cooling, the better their final texture gets. If you store them correctly in a truly airtight container at room temperature, they should maintain their great texture for at least a week. I never make them less than a day before an event, just to ensure I’ve had time for that necessary slow cooling period!
Why are my meringue cookies sticky or weeping?
This is the number one complaint I hear about simple egg white desserts, and it always comes down to two culprits, usually working together. First, humidity! If it’s raining outside, the sugar in your meringue is sucking up that moisture, leading to a sticky exterior instead of a crisp finish. Second, weeping—when little beads of syrup form on the cookies—usually means they were pulled from the oven too soon, or you didn’t let them cool slowly enough in the turned-off oven. Make sure those cookies are fully dried out before you even *think* about opening the oven door for that final cooling rest!
Estimated Nutritional Information for Meringue Cookies
I know some of you are super interested in the details, and while baking something this light and airy feels almost like eating air, it’s still polite to look at the numbers! Please remember that this is my best estimate based on standard ingredient measurements for about two cookies. If you’re making a big batch that yields more, the numbers per serving will naturally drop.
For a serving size of two of these wonderful meringue cookies, here is what we are looking at:
- Calories: 55
- Sugar: 14g
- Fat: 0g
- Protein: 0.5g
See? These are fantastic, simple egg white desserts! Because they are pure sugar and egg white, they are naturally fat-free and cholesterol-free, which is great news for a sweet treat. If you manage to stop after just two cookies, you’re doing great!
Share Your Perfect Meringue Cookies Creations
I have given you every single trick I know about whipping up these ethereal little meringue cookies. I really hope you feel confident enough now to try the French meringue method yourself! Honestly, seeing your success stories—especially if this is your first time trying to make meringue—is the best part of my day.
When you nail that crisp exterior and that soft, dreamy center, please come back here and let me know! Rate this recipe right below this section so other home bakers know they can trust these tips. Did you manage to get those stunning, glossy stiff peaks? Maybe you tried one of those fun holiday variations like the peppermint swirl?
I absolutely love seeing how creative you all get! If you snap a picture of your finished batch of homemade meringue treats, tag me on social media. I still get so excited when I see what you’re all making in your kitchens! I’m always looking for new flavor inspiration, too—maybe your twist will inspire my next bake, perhaps something savory next time like my honey garlic salmon!
Don’t be shy in the comments; tell me everything! Happy baking, friends!
PrintThe Ultimate Easy Meringue Cookies Recipe: Light, Crisp, and Perfect Every Time

Make light, airy meringue cookies that are crisp outside and melt-in-your-mouth soft inside using this simple French meringue technique. This recipe is foolproof for beginners and results in delicate sweet treats.
- Prep Time: 20 min
- Cook Time: 90 min
- Total Time: 110 min
- Yield: About 3 dozen 1x
- Category: Dessert
- Method: Baking
- Cuisine: American
- Diet: Gluten Free
Ingredients
- 4 large egg whites, room temperature
- 1 cup granulated sugar
- 1 teaspoon vanilla extract
- 1/4 teaspoon cream of tartar
- Pinch of salt
Instructions
- Preheat your oven to the lowest setting, typically 200°F (95°C). Line two baking sheets with parchment paper.
- In a very clean, grease-free bowl of a stand mixer fitted with the whisk attachment (or use a hand mixer), combine the egg whites and cream of tartar. Beat on medium speed until soft peaks form.
- Gradually add the sugar, about one tablespoon at a time, while beating continuously on medium-high speed. Wait about 30 seconds between each addition.
- Once all the sugar is added, increase the speed to high and beat until the meringue is stiff, glossy, and holds firm peaks. When you rub a small amount between your fingers, you should not feel any sugar granules.
- Beat in the vanilla extract until just combined.
- Transfer the meringue to a piping bag fitted with a large star tip (or use two spoons for rustic drops).
- Pipe or drop small mounds (about 1.5 inches wide) onto the prepared baking sheets, leaving a little space between each cookie.
- Bake for 1 to 1.5 hours, depending on the size of your cookies and your oven. The goal is to dry them out, not brown them.
- Turn off the oven, prop the door open slightly with a wooden spoon, and let the meringue cookies cool completely inside the oven for at least 1 hour, or preferably overnight. This step helps prevent cracking and ensures a crisp texture.
- Store the finished meringue kisses in an airtight container at room temperature.
Notes
- Ensure your mixing bowl and whisk are completely free of any fat or grease; even a tiny bit will prevent the egg whites from whipping properly.
- For festive holiday meringue cookie ideas, you can add 1 teaspoon of peppermint extract instead of vanilla, or mix in 1 tablespoon of Jello powder with the sugar for flavored meringue cookie recipes.
- These cookies are naturally gluten free meringues, making them a safe option for various diets.
- If you want to make maple meringue cookies, substitute 1/4 cup of the granulated sugar with maple sugar, reducing the total granulated sugar slightly.
Nutrition
- Serving Size: 2 cookies
- Calories: 55
- Sugar: 14g
- Sodium: 5mg
- Fat: 0g
- Saturated Fat: 0g
- Unsaturated Fat: 0g
- Trans Fat: 0g
- Carbohydrates: 14g
- Fiber: 0g
- Protein: 0.5g
- Cholesterol: 0mg