

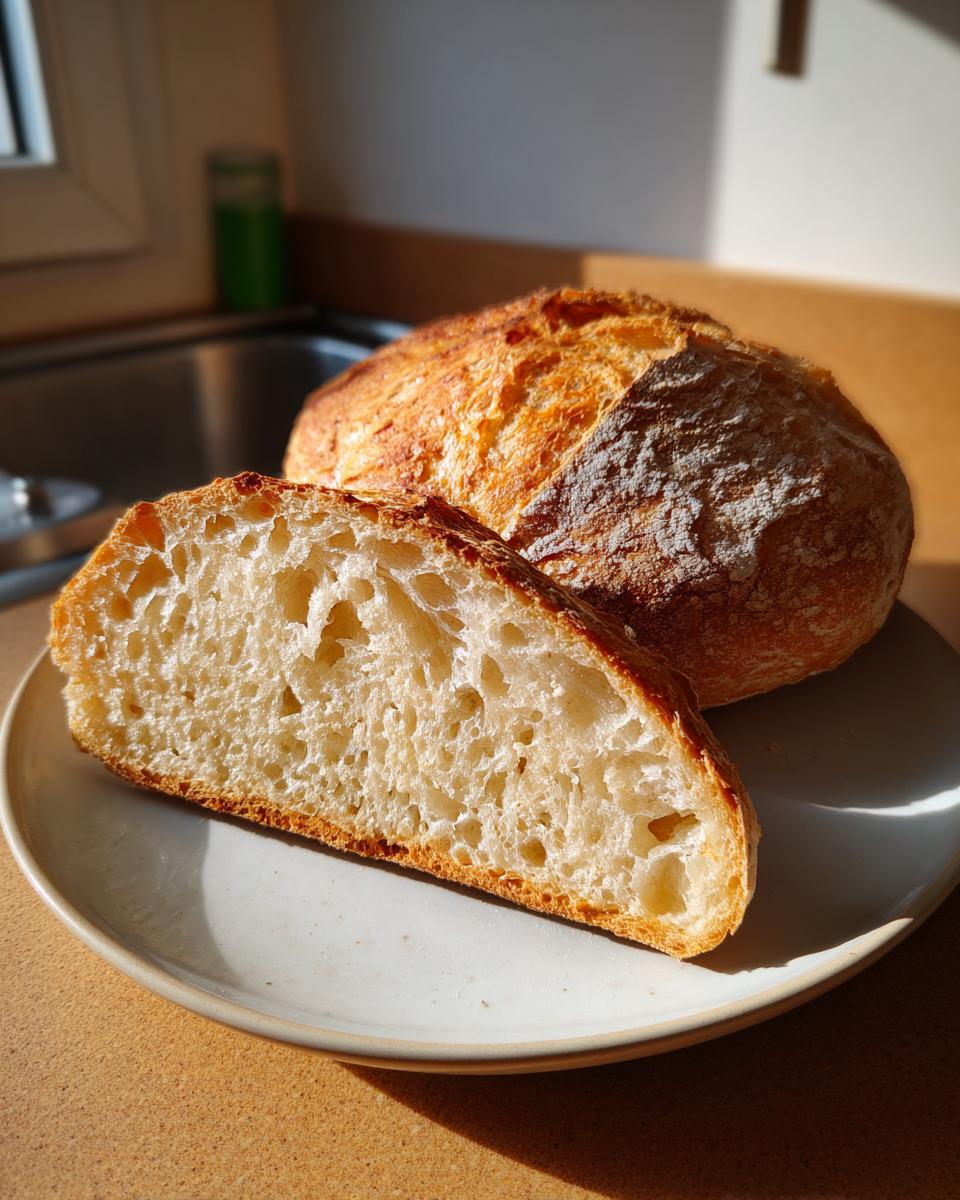
Oh, there’s just nothing that beats the smell of fresh bread warming up the whole house, is there? Seriously, that warm, yeasty aroma just signals instant comfort. If you’ve always wanted that stunning, bakery-quality loaf—you know, the one with the golden, crackly crust that shatters just right, melting into a perfectly soft, airy inside—but you think it’s too complicated, I have great news. Forget those intimidating recipes! Here at Devour Dish, I, Avery Collins, promise you that memorable meals are the simple ones. This Easy Bakery-Style Crusty Italian Bread is my absolute favorite testament to that philosophy. It’s straightforward, tested until it’s perfect, and it transforms basic pantry items into the best italian bread you’ve ever made.
- Why This Easy Bakery-Style Crusty Italian Bread is a Must-Try
- Gathering Ingredients for Your Homemade Italian Bread
- Step-by-Step Instructions for Rustic Italian Loaf
- Expert Tips for Perfect Bakery Style Bread Results
- Serving Suggestions for Your Fresh Baked Bread Aroma Loaf
- Storing Your Easy Homemade Italian Bread
- Frequently Asked Questions About This Beginner Bread Recipe
- Estimated Nutritional Data for This Italian Loaf Recipe
- Share Your Crusty Italian Bread Creations
Why This Easy Bakery-Style Crusty Italian Bread is a Must-Try
I get it—sometimes bread just seems like a project. But this recipe cuts right to the chase! If you want that dreamy contrast between a crispy exterior and a chewy interior, this is the one to trust. We focus on making this italian bread as foolproof as possible, even if you’re brand new to yeast.
- You actually get that beautiful, bakery-style shine and crunch without a stand mixer!
- The whole process, including rises, fits easily into an afternoon. Hello, easy bread baking!
- It produces a loaf that is just begging to be torn apart and dipped in olive oil.
Achieving the Perfect Soft Inside Crusty Outside Bread Texture
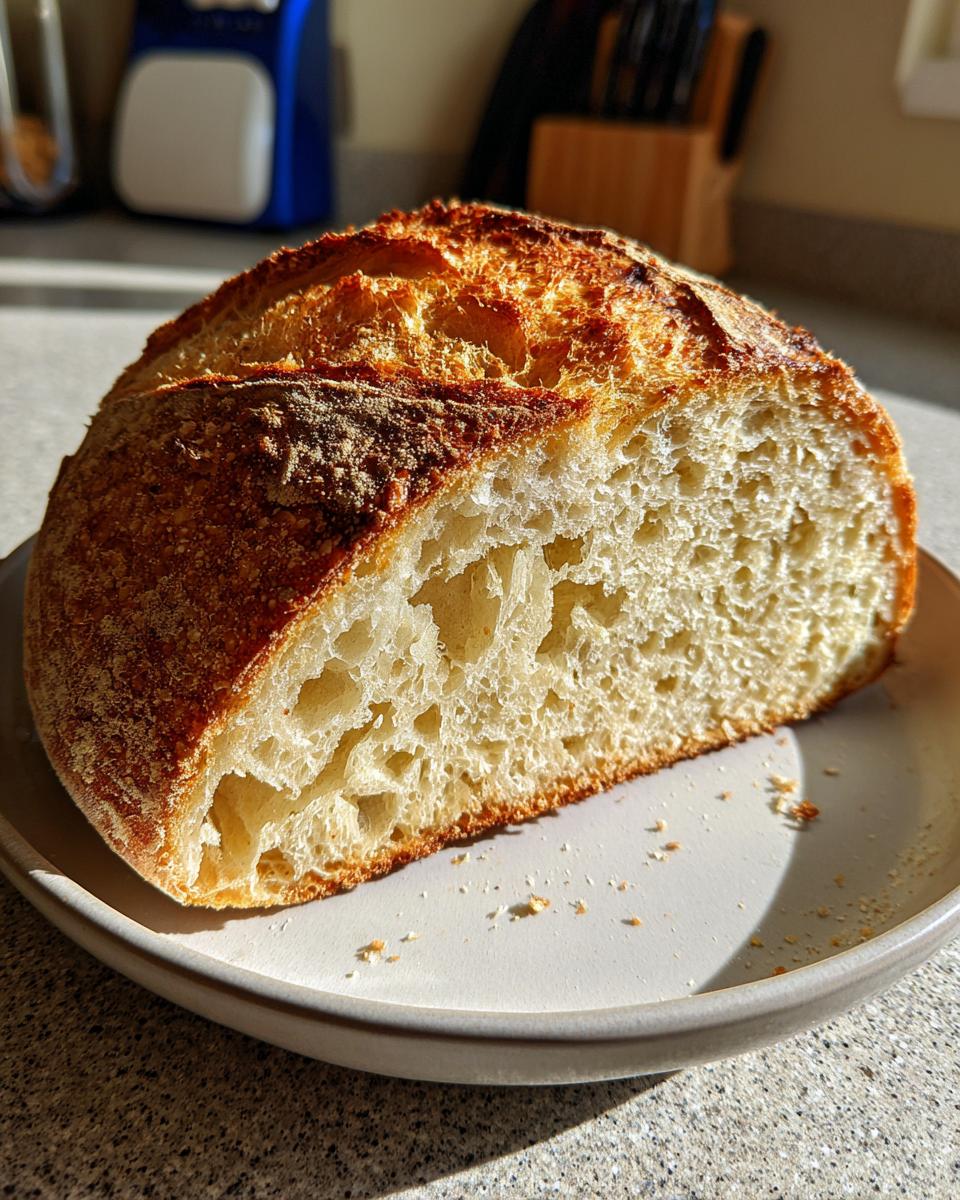
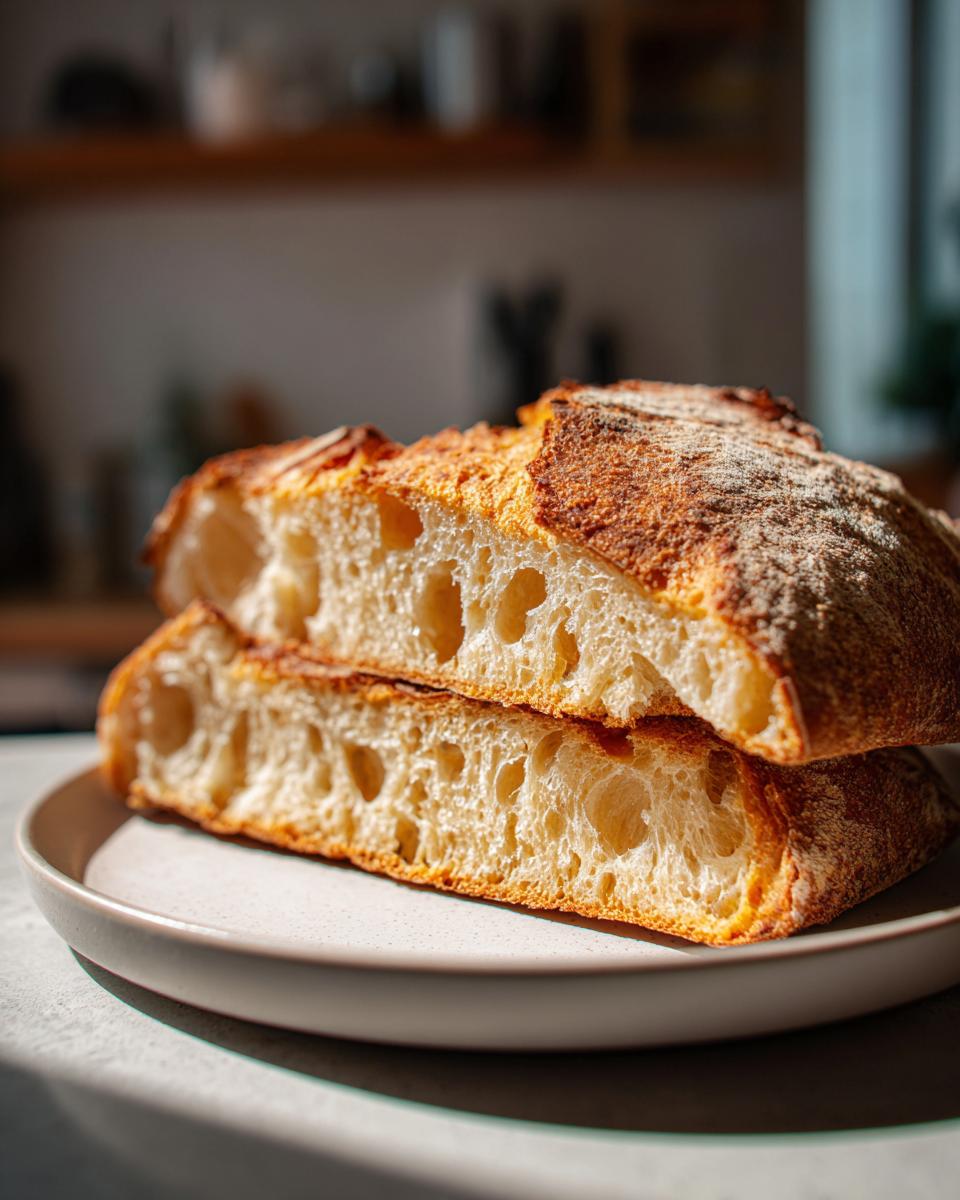
It all comes down to two main things we focus on: enough kneading to build strength, and steam in the oven! That burst of steam right when the dough goes in is what makes the crust set up beautifully crispy instead of soft and dull. That’s how we guarantee that amazing soft inside crusty outside bread experience you’re looking for.
Simple Ingredients for Classic Italian Bread
See that ingredients list? That’s pretty much it! We aren’t calling for any fancy conditioners or obscure flours here. This italian bread relies on the essentials. You likely have most of what you need right now, making it a perfect weeknight bake!
Gathering Ingredients for Your Homemade Italian Bread
You don’t need a massive grocery haul to make incredible italian bread! We stick to the basics here because great bread doesn’t need fuss. You’ll need flour, salt, sugar, yeast, water, and olive oil. That’s really it, trust me. Keep these staples on hand, and you can decide to bake a loaf right now!
Ingredient Clarity and Preparation Notes
Before we mix anything, let’s talk about the yeast, because this step really matters for a successful rise. Make sure your water is comfortably warm—think 105 to 115°F. If it’s too hot, you’ll kill your yeast, and we don’t want that sad, flat dough!
Also, we are using standard all-purpose flour. No need for fancy high-protein bread flour here; this recipe is designed to be easy and reliable for everyone.
Step-by-Step Instructions for Rustic Italian Loaf
Okay, let’s get our hands dusty! This process seems long, but trust me, most of it is just waiting for the dough to do its magic. We are going to mix, knead, wait, shape, wait again, and then bake this glorious italian bread until it sings.
Activating Yeast and Initial Dough Formation
First things first, we wake up that yeast! Mix your warm water, the tiny bit of sugar, and the yeast together in your big bowl. Don’t stir it too much! Just let it sit exactly as the recipe says, about five minutes. When you come back, it should look happy—bubbly and foamy on top. If it doesn’t foam? Dump it out and try again with slightly warmer water. That foam is key!
Kneading Time and First Rise for Italian Bread
Now, dump in your flour, salt, and that slick olive oil. Stir it with a spoon until it gets too hard to stir, then turn that shaggy mess out onto your floured surface. This is where you get your workout! You need to knead this dough for a solid 8 to 10 minutes until it feels smooth and stretchy—not sticky anymore. Pop it into an oiled bowl, cover it up, and find a warm corner. Let this first rise go for 1 to 1.5 hours. Be patient; this is what gives your italian bread its beautiful structure.
Shaping and Creating Steam for a Crusty Bread Recipe
When the dough has doubled, gently punch the air out—it’s surprisingly satisfying! Shape it into whatever rustic loaf you want. Place it on your pan, cover it loosely, and let it puff up again for about 30 to 45 minutes. Right before it goes in the oven (after scoring the top!), preheat that oven high to 400°F. Before you slide the loaf in, heat up a shallow pan on the bottom rack, then pour hot water into it right before you shut the door. That steam is the secret sauce for that perfect crusty bread recipe finish!
Expert Tips for Perfect Bakery Style Bread Results
You’ve done the hard work, now let’s make sure this Italian bread looks as professional as it tastes! Achieving that true Bakery Style Bread finish is all about controlling the environment for those first few minutes in the oven. I want you to impress everyone at dinner tonight!
Maximizing Crust Crispness on Your Italian Bread
The steam setup we used is huge, but if you want an extra gorgeous, crackly crust on your loaf, here’s my favorite trick. Once the bread is in the oven, keep an eye on it. During the first 10 minutes of baking, quickly open the door—just a crack—and spray the sides of the oven walls with water from a clean spray bottle. Do this maybe two or three times. Be careful! It creates an instant burst of steam that just locks in that crispness. It’s slightly dramatic, but wow, does it work!
Shaping Variations for a Rustic Italian Loaf
Remember that you don’t *have* to use a standard loaf pan! If you want that real, authentic Italian loaf recipe feel—that rustic look—just skip the pan altogether. Shape your dough into a longer oval or round shape and bake it directly on parchment paper on your baking sheet. Free-form dough spreads out a bit more, giving you more surface area for that glorious, golden crust you’re aiming for. Both ways are delicious, but the free-form loaf feels extra special.

Serving Suggestions for Your Fresh Baked Bread Aroma Loaf
When your kitchen is filled with the incredible fresh baked bread aroma this italian bread gives off, you’ll want to show it off immediately! Seriously, this warm loaf is the ultimate companion for any pasta night. It’s perfect for soaking up every bit of a rich italian dinner sides sauce you happen to have going. But don’t just stick to sauce! A drizzle of good olive oil and balsamic vinegar is divine. If you’re feeling ambitious after baking, you can turn leftovers into amazing bread for dipping!
Storing Your Easy Homemade Italian Bread
We’ve all been there. You bake the most perfect, golden, fragrant italian bread, and a day later, the crust is just… sad and soft. That crispy exterior is the first joy of this loaf, so we absolutely need to talk about storage!
Here’s my rule: If you can’t finish it the same day, you shouldn’t seal it up immediately. Sealing a warm loaf traps steam inside, and that steam turns your beautiful crust instantly chewy and soft. Let the entire crusty bread recipe loaf cool completely on a wire rack. Once it’s stone-cold, wrap it loosely in a paper bag or a clean kitchen towel. Never airtight plastic if you want to save that crunch!
Reheating for That Fresh From the Oven Italian Bread Experience
If you stored your italian bread correctly (not in plastic!), bringing it back to life for dipping or sandwiches is incredibly simple. Don’t even bother with the microwave—that’s a crust killer!
To get that “just out of the oven” magic back, just wrap the piece or half-loaf tightly in foil. Pop it into a 350°F oven for about 7 to 10 minutes. If you really want the crust to snap again, take the foil off for the last two minutes of reheating. Instant fresh italian bread! It’s perfect for reviving any leftovers.
Frequently Asked Questions About This Beginner Bread Recipe
It’s totally normal to have questions when you start working with yeast! Bread baking is such a rewarding skill, but the rising times and ingredient swaps can trip people up. Don’t sweat it; that’s why I’m here! I want everyone, especially beginners looking for a solid beginner bread recipe, to succeed with this italian bread. Here are some of the questions I get most often.
Can I use bread flour instead of all-purpose flour in this italian bread recipe?
Oh, that’s a great question about flour! You absolutely *can* switch to bread flour. Since bread flour has a higher protein content, it develops more gluten. What that means for your loaf is that it will likely rise a little higher and have a slightly chewier texture. My recipe uses all-purpose because it’s what everyone has, and it creates that perfect balance—a sturdy, slightly crisp crust with a nice, soft interior. If you swap, just watch your hydration; you might need an extra tablespoon of water, but keep kneading until it feels smooth!
How long can I let the dough rise for this quick homemade bread?
This is where the “quick” part of quick homemade bread can get tricky! When the recipe says 1 to 1.5 hours, that’s based on room temperature. If your kitchen is cold, it might take 2 hours. If your kitchen is super warm (like near the dishwasher!), it might only take 45 minutes. The visual cue is way more important than the clock! You must let it double in size. If you let it go too long past doubling—that’s over-proofing—the dough can deflate when you handle it, leading to a denser final crusty bread recipe. Don’t push it past double!
What is the best way to get that golden color on the crust?
That gorgeous, deep golden color you see in bakery photos isn’t just luck—it’s all about exposure to heat and moisture! First, you need to score the top of the loaf right before it goes into the oven. Those slashes allow the trapped gas to escape in a controlled way, and the edges of those cuts always catch the heat and brown up beautifully. Second, **the steam**! Remember that pan of hot water we used? That steam keeps the surface of the dough moist long enough for the crust to expand before hardening. That combination of scoring and steam gives you that professional golden hue on your artisan bread at home.
Estimated Nutritional Data for This Italian Loaf Recipe
Like any baking project, the final nutrition profile depends on how you measure, but I wanted to give you a ballpark idea for this Italian loaf recipe so you know what you’re enjoying!
Keep in mind that this data is an *estimate* based on the exact list of ingredients I used. If you swap in oil for butter or use different flour weights, the numbers will shift a little bit. But generally speaking, this is wonderfully simple food!
- Serving Size: 1 slice
- Calories: 150
- Fat: 2.5g
- Saturated Fat: 0.4g
- Carbohydrates: 28g
- Fiber: 1.5g
- Protein: 4.5g
- Sodium: 250mg
- Sugar: 0.5g
- Cholesterol: 0mg
Isn’t that great? Very little sugar, and no cholesterol! It’s a fantastic base for everything from dips to hearty sandwiches. Enjoy every slice of your crusty bread recipe knowing you made it right!
Share Your Crusty Italian Bread Creations
Honestly, seeing your beautiful loaves makes my day! That’s the payoff for all that kneading and waiting. If you made this italian bread and it came out perfectly golden and crackly, please don’t keep that success to yourself!
I absolutely love hearing what you pair this loaf with. Are you dipping it in tomato soup? Using it for massive sandwiches? Let me know how you enjoyed tearing into that crusty bread recipe! Drop a comment below and tell me about your bake time and how crispy that crust got. If you shared a picture on Instagram, tag me so I can cheer you on!
If this recipe saved your weeknight dinner, would you mind giving it a star rating at the top of the page? Those ratings help other home cooks feel confident trying this easy bread baking adventure. And hey, if you mastered this loaf, maybe you’re ready to try even more? Check out some of my other favorite baking projects!
If you want to send me specific feedback or photos directly, you can always reach out through the contact page. If you landed here from a different recipe, I hope you found what you needed for the ultimate crusty Italian bread! Happy baking, my friends!
PrintEasy Bakery-Style Crusty Italian Bread: Foolproof Recipe for the Perfect Crispy Crust and Soft Interior

Bake a classic Italian bread loaf with a golden, crispy crust and a soft, airy interior using this simple, straightforward recipe. This bread is perfect for dipping or serving with any dinner.
- Prep Time: 20 min
- Cook Time: 35 min
- Total Time: 2 hours 45 min
- Yield: 1 large loaf 1x
- Category: Bread
- Method: Baking
- Cuisine: Italian
- Diet: Vegetarian
Ingredients
- 3 1/2 cups all-purpose flour
- 1 1/2 teaspoons salt
- 1 teaspoon granulated sugar
- 2 1/4 teaspoons active dry yeast (1 packet)
- 1 1/4 cups warm water (about 105-115°F)
- 2 tablespoons olive oil
Instructions
- In a large bowl, mix the warm water, sugar, and yeast. Let this mixture sit for 5 minutes until it becomes foamy.
- Add the flour, salt, and olive oil to the yeast mixture. Mix with a wooden spoon until a shaggy dough forms.
- Turn the dough out onto a lightly floured surface. Knead the dough for 8 to 10 minutes until it becomes smooth and elastic.
- Lightly oil a clean bowl. Place the dough in the bowl, turning it once to coat. Cover the bowl with plastic wrap or a clean kitchen towel.
- Let the dough rise in a warm place for 1 to 1.5 hours, or until it has doubled in size. This is your first rise.
- Gently punch down the dough to release the air. Shape the dough into a round or oval loaf.
- Place the shaped loaf on a baking sheet lined with parchment paper or in a prepared loaf pan. Cover it loosely.
- Let the dough rise again for 30 to 45 minutes, or until it looks puffy. This is your second rise.
- Preheat your oven to 400°F (200°C). Place a shallow pan on the bottom rack to create steam later.
- Before baking, lightly brush the top of the loaf with water. Use a sharp knife to score the top of the bread with a few shallow slashes.
- Carefully pour about 1/2 cup of hot water into the shallow pan on the bottom rack to create steam, then quickly close the oven door.
- Bake for 30 to 35 minutes, or until the crust is deep golden brown and the internal temperature reaches 200-210°F.
- Remove the bread from the oven and transfer it to a wire rack to cool completely before slicing. Enjoy the aroma of fresh baked bread.
Notes
- For an extra crispy crust, spray the sides of the oven with water a few times during the first 10 minutes of baking.
- If you want a rustic Italian loaf, shape it into a longer, free-form shape rather than using a loaf pan.
- This bread is excellent for dipping in olive oil or serving alongside pasta dishes.
Nutrition
- Serving Size: 1 slice
- Calories: 150
- Sugar: 0.5
- Sodium: 250
- Fat: 2.5
- Saturated Fat: 0.4
- Unsaturated Fat: 2.1
- Trans Fat: 0
- Carbohydrates: 28
- Fiber: 1.5
- Protein: 4.5
- Cholesterol: 0