
We’ve all been there, right? You turn your back for one afternoon, and suddenly those perfectly yellow bananas on your counter look like they’ve been through a marathon. They’re speckled, they’re squishy, and they’re giving you the side-eye. Don’t toss them! That is when you know it’s time to make the absolute best **banana bread recipe** you’ll ever need. When I started Devour Dish, my goal was to provide reliable, simple recipes, and this “Super Moist and Easy Classic Banana Bread Recipe” is the poster child for that philosophy. It uses those overly ripe bananas to create a tender loaf that’s fantastic for breakfast or a comforting snack. Trust me, this dependable quick bread recipe is about to solve your fruit bowl crisis!
- Why This Banana Bread Recipe Delivers Ultimate Moisture
- Gathering Ingredients for Your Easy Banana Bread Recipe
- Simple Steps: How to Make Banana Bread
- Tips for Success with Your Homemade Banana Bread
- Variations on the Classic Banana Bread Recipe
- Storing Your Moist Banana Loaf
- Frequently Asked Questions About This Banana Bread Recipe
- Estimated Nutritional Breakdown for This Banana Bread Recipe
- Share Your Perfect Banana Loaf
Why This Banana Bread Recipe Delivers Ultimate Moisture
The secret to never having dry banana bread again isn’t just in the bananas themselves; it’s in the fat and acid pairings we use! This is why this particular **banana bread recipe** is my go-to. We use softened butter for a great structure, but the real magic for moisture comes from the sour cream or yogurt. That little bit of extra fat and the slight tang acid help activate the baking soda, leading to a fluffier rise, but its main job is locking in moisture so your loaf stays tender for days. If you love moisture in your quick breads, you’ll want to check out how I keep my Cranberry Orange Bread just as soft!
The Role of Overripe Bananas in Your Banana Bread Recipe
When it comes to **overripe banana recipes**, remember: brown is beautiful! You aren’t looking for yellow bananas, or even slightly speckled ones. I mean seriously brown—almost black is perfect. As bananas ripen past the yellow stage, their starches convert into natural sugars. This means more sweetness and, crucially, way more moisture content for your batter. This natural liquid power is why this loaf comes out so decadent and never dry. It’s nature’s perfect baking ingredient!
Gathering Ingredients for Your Easy Banana Bread Recipe
Before we get this amazing **banana bread recipe** in the oven, let’s talk about what you need. The best part about making a truly classic, foolproof loaf is that you probably have everything you need hanging out in your pantry right now. You won’t need any specialty flours or strange extracts here. We are focusing on making this as **easy banana bread** as possible. Remember to measure your flour gently—don’t pack it in! Here is the lineup required for one perfect loaf:
- 1 cup (2 sticks) unsalted butter, softened
- 1 3/4 cups granulated sugar
- 4 large eggs
- 1 teaspoon vanilla extract
- 1/2 cup sour cream or plain Greek yogurt
- 4 very ripe, mashed large bananas (about 1 1/2 cups)
- 3 cups all-purpose flour
- 2 teaspoons baking soda
- 1 teaspoon salt
- 1/2 teaspoon ground cinnamon (optional)
Ingredient Notes and Smart Substitutions
Since we are aiming for **simple banana bread**, ingredient clarity is important! If you find yourself short on sour cream, don’t panic. Plain Greek yogurt works beautifully as a direct substitute; it provides that essential acidity and fat, so your texture won’t suffer a bit. Another note: that cinnamon is totally optional but highly recommended! It gives the banana flavor a little extra warmth, especially welcome when you’re baking this for breakfast. If you are adding mix-ins like nuts, wait until the final step of mixing to gently fold them in. This attention to detail ensures your loaf turns out exactly as intended.
Simple Steps: How to Make Banana Bread
Okay, now that we have everything measured out, let’s get baking! This is where the magic of the **banana bread recipe** really comes together. First things first: make sure your oven is ready to go at 350°F (175°C). You want to grease and flour your 9×5 inch loaf pan or, my preferred method for easy cleanup, line it with parchment paper. We’re moving quickly, but we need to treat this batter gently later so don’t skip the prep!
Creaming Butter and Sugar for the Best Banana Bread Recipe
The foundation for that wonderful texture starts right here. In a big bowl, take your softened butter and sugar and beat them—either by hand with a strong spoon or with a mixer—until they look genuinely light and fluffy. This isn’t just a suggestion; this creaming step incorporates the air that prevents your loaf from getting dense. Keep working it until it looks pale yellow, almost cloud-like. This is crucial for a great **homemade banana bread**!
Mixing Wet and Dry Components for a Tender Crumb
Once your wet ingredients (butter/sugar, eggs, vanilla, sour cream, and those beautiful mashed bananas) are blended, it’s time for the flour mixture. Here’s my most important warning: Mix on low, or fold by hand, and stop mixing the instant you see the last streak of flour disappear. If you keep going, you’ll develop gluten, and your bread will be tough instead of having that perfect **tender crumb banana bread** texture everyone craves. We just want it *combined*—under-mixing is better than overmixing here. Pour that glorious batter into your prepared pan. It bakes for about 60 to 75 minutes, but check it at the hour mark. You’re done when a skewer comes out with moist crumbs attached, not wet goo! If you want to see how I handle mix-ins for my Chocolate Chip Banana Bread, check that out!

Remember to let it rest in the pan for 15 minutes before turning it out onto a rack to cool. If you try to rush that cooling process, the loaf might actually break apart. For more foolproof ideas, check out all my easy baking recipes for quick treats!
Tips for Success with Your Homemade Banana Bread
Just because this is an **easy banana bread recipe** doesn’t mean we can’t sneak in a few pro tips to guarantee perfection! Building trust in your baking means knowing the little things that make a big difference. I always give my bananas a quick mash by hand first, even if I plan to use a mixer later. Mashing them helps release just the right amount of that wonderful, sugary moisture right away. Also, don’t be afraid of the dark color of those very ripe bananas; that’s where all the flavor lives!

I want your **homemade banana bread** to last, so remember the key rule I learned from watching my mom bake: for the absolute best flavor payoff, let this loaf cool completely, then wrap it tightly in plastic wrap and foil. It tastes exponentially better the next day. If you’re looking for other perfectly moist ideas, you absolutely have to try my Bakery Style Banana Nut Muffins!
Here are a few other tricks mentioned in my original notes that I swear by for this moist banana bread recipe:
- For the best flavor profile, you absolutely must use bananas that are heavily spotted or almost black. That’s where the real depth of flavor comes from.
- If you decide to toss in additions like a cup of chocolate chips or walnuts (because who wouldn’t?), make sure you gently fold those in right at the very end after the flour is incorporated.
- If you don’t have a skewer handy for testing doneness, just try this: gently press the top center of the bread. If it springs back softly to your touch, you know it’s done and not going to collapse!
Variations on the Classic Banana Bread Recipe
While this **classic banana bread recipe** is perfect as is—a simple, comforting loaf—I totally get the urge to mix things up! Whether you’re dealing with a crowd or just want an extra treat, turning this into a specialty bread is super easy. We absolutely have to talk about my two favorite additions: chocolate chips and that gorgeous cinnamon swirl. Remember that rule about gently folding in your extras? It’s twice as important here!
If you’re adding in things like chocolate chips or chopped nuts, wait until that very last step when you combine the wet and dry ingredients. You don’t want to over-beat them in, or you risk breaking up that tender crumb we worked so hard on. If you love the chocolate chip version, you have to try my Banana Bread Cookies sometime too; they pack all that flavor into a handheld treat!
Creating a Cinnamon Swirl Banana Bread
Wanting that beautiful ribbon of spice? It’s shockingly simple! Take about a quarter cup of sugar, mix it with one teaspoon of cinnamon—add a tablespoon of melted butter if you want it extra gooey. Pour half your batter into the pan, sprinkle that cinnamon mixture over the top, and then gently dollop the remaining batter over that. Use a knife to swirl it around once or twice. For a full-on spiced version, you should definitely check out how my friends handle their homemade cinnamon swirl banana bread!
Storing Your Moist Banana Loaf
So you’ve baked the perfect loaf! Now, how do we keep that wonderful moisture locked in? This is key if you want to enjoy this **banana loaf recipe** for more than one sitting. If you plan on eating it within two or three days, just let it cool completely, wrap it tightly in plastic wrap, and then wrap that tightly again in foil or place it in a sealed container. Room temperature is totally fine, ideally somewhere cool, away from sunlight.

If you really need it to last, or if your kitchen is super warm, you can freeze it! Wrap individual slices tightly—this makes for the best grab-and-go breakfast later. Seriously, it freezes beautifully. You can even make a lovely batch of freezer jam to spread on a slice when you thaw it out. Just remember, make sure it’s cold before sealing it up!
Frequently Asked Questions About This Banana Bread Recipe
I get so many wonderful messages asking for clarification on this **banana bread recipe**, which just proves how many people are out there trying to rescue their sad, brown bananas! Since I want every attempt at this **moist banana bread** to be a total success, I thought I’d answer the most common questions right here. Whether you’re brand new to baking or you are looking for a reliable stand-in for a tired old recipe, these quick bread tips should help!
Can I use yellow bananas instead of very ripe ones in this banana bread recipe?
You absolutely *can*, but please, only use them if you have absolutely no choice! If your bananas are still bright yellow or just starting to get a few spots, you’re missing the essential depth of flavor and the high sugar content that makes this loaf so wonderfully moist. Yellow bananas will produce a bread that tastes mostly like sweet cake with a hint of banana, rather than that rich, deep flavor profile you get from letting them turn fully black. Stick to the ripe ones for the **best banana bread recipe** experience!
Is this considered an easy baking recipe?
Yes, 100%! This is designed to be one of the most **easy baking recipes** you try all year. You don’t need a stand mixer at all—a sturdy bowl and a wooden spoon work just fine for the creaming step! The steps are straightforward: cream, mix wet, mix dry separately, then combine gently. It’s all about simple incorporation, which is why it’s a foolproof way to make a **simple banana bread** loaf. If you’re looking for other minimal-fuss projects, be sure to look at my full collection of quick bread recipes.

If you’re curious about other people’s experiences or want to see what others are raving about, you can check out reviews for the classic banana bread!
Estimated Nutritional Breakdown for This Banana Bread Recipe
I always want to give you a snapshot of what you’re diving into when you make one of my recipes! Because we are using real, whole ingredients like butter, sugar, and four large eggs—which is quite a bit for a quick bread—this loaf is definitely more of a treat than a low-calorie snack. Please remember that these figures are just estimates. If you swap out the sugar for a substitute or use low-fat yogurt instead of sour cream, the numbers will shift!
This data is calculated based on 10 equal slices of the final **banana loaf recipe**. If you cut your slices thicker (which, honestly, I rarely object to!), your numbers will be higher. Here’s the quick look at what we are estimating for one generous slice:
- Calories: Around 350
- Sugar: About 25 grams
- Fat: Roughly 17 grams
- Carbohydrates: Close to 48 grams
- Protein: Approx. 5 grams
It’s comfort food baking, folks! Enjoy it with a cup of coffee or a tall glass of milk, knowing it’s got plenty of energy if you need a serious breakfast boost. It’s the best way to use up those sweet, sweet ripe bananas!
Share Your Perfect Banana Loaf
Now that you have the instructions for the **best banana bread recipe**—one that is packed with moisture and flavor—I really want to hear about your bake! Did you stick to the classic, perfect loaf, or did you get adventurous with the mix-ins? I love seeing how everyone puts their spin on my favorites.
Please take a moment to leave a rating below! Your feedback helps other home cooks feel confident trying this recipe for the first time. Did you add chocolate chips? Try the cinnamon swirl? Or maybe you shared this wonderful **sweet bread recipe** with a neighbor?
If you had any questions pop up while baking, or if you want to share pictures of your beautiful, tender loaf, don’t hesitate to reach out via my contact page. Happy baking, and thank you again for trusting Devour Dish with your kitchen adventure!
PrintSuper Moist and Easy Classic Banana Bread Recipe

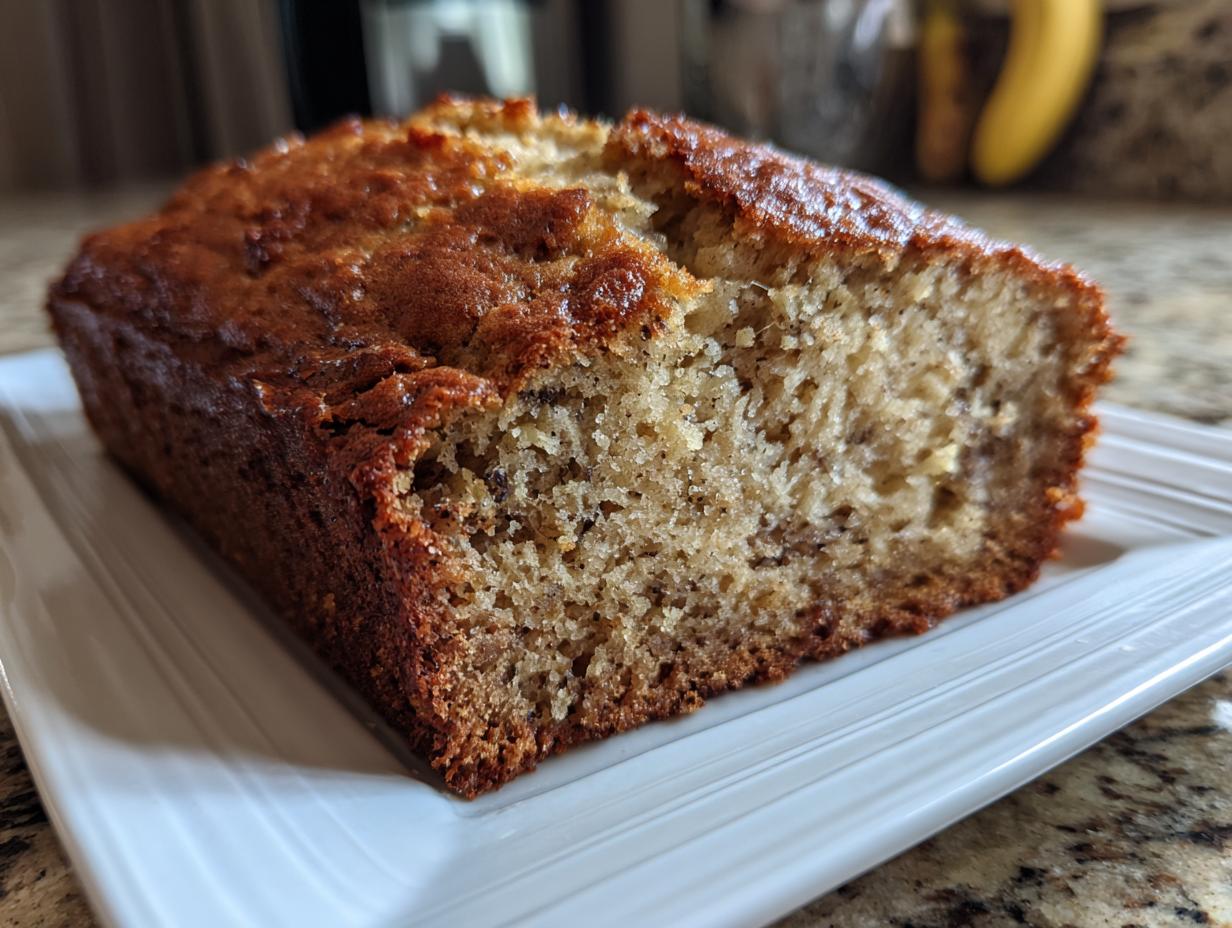
Welcome! If you need a simple, reliable recipe to use up those overripe bananas, this is it. You get a wonderfully moist banana bread with a tender crumb every time. This classic recipe is perfect for breakfast, a quick snack, or a simple dessert.
- Prep Time: 15 min
- Cook Time: 70 min
- Total Time: 85 min
- Yield: 1 loaf (about 10 servings) 1x
- Category: Breakfast
- Method: Baking
- Cuisine: American
- Diet: Vegetarian
Ingredients
- 1 cup (2 sticks) unsalted butter, softened
- 1 3/4 cups granulated sugar
- 4 large eggs
- 1 teaspoon vanilla extract
- 1/2 cup sour cream or plain Greek yogurt
- 4 very ripe, mashed large bananas (about 1 1/2 cups)
- 3 cups all-purpose flour
- 2 teaspoons baking soda
- 1 teaspoon salt
- 1/2 teaspoon ground cinnamon (optional)
Instructions
- Preheat your oven to 350°F (175°C). Grease and flour a 9×5 inch loaf pan, or line it with parchment paper.
- In a large bowl, cream together the softened butter and sugar until the mixture is light and fluffy. You can use a hand mixer or a sturdy spoon for this step.
- Beat in the eggs one at a time, mixing well after each addition. Stir in the vanilla extract and sour cream.
- Add the mashed bananas to the wet ingredients and mix until just combined. Do not overmix at this stage.
- In a separate medium bowl, whisk together the flour, baking soda, salt, and cinnamon (if using).
- Gradually add the dry ingredients to the wet ingredients, mixing on low speed or by hand until just incorporated. Stop mixing as soon as you see no more streaks of flour. This keeps your bread tender.
- Pour the batter evenly into your prepared loaf pan.
- Bake for 60 to 75 minutes, or until a wooden skewer inserted into the center comes out clean or with moist crumbs attached.
- Let the banana loaf cool in the pan on a wire rack for 15 minutes before carefully removing it from the pan to cool completely on the rack.
Notes
- For the best flavor and moisture, use bananas that are heavily spotted or almost black.
- If you want to add mix-ins like 1 cup of chocolate chips or chopped walnuts, gently fold them in after combining the wet and dry ingredients.
- To check for doneness without a skewer, gently press the top center of the bread; if it springs back slightly, it is likely done.
Nutrition
- Serving Size: 1 slice
- Calories: 350
- Sugar: 25
- Sodium: 280
- Fat: 17
- Saturated Fat: 10
- Unsaturated Fat: 7
- Trans Fat: 0
- Carbohydrates: 48
- Fiber: 2
- Protein: 5
- Cholesterol: 75