
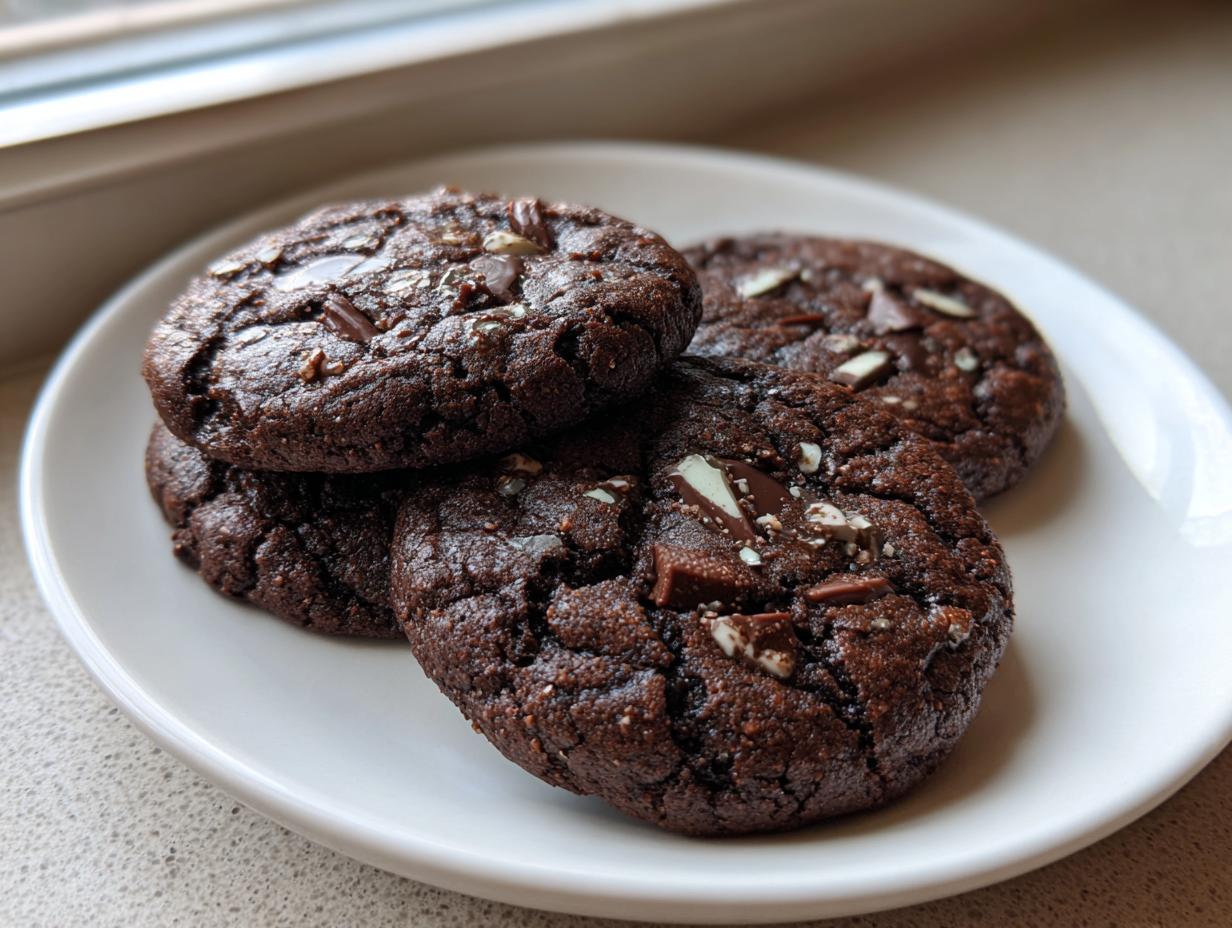
If you are anything like me, sometimes you just need that perfect blend of deep, rich chocolate followed by that bright, cooling burst of mint. It’s such a satisfying flavor combination, especially when it comes in cookie form! That’s why I spent ages testing batch after batch to bring you the Easy Chewy Chocolate Andes Mint Cookies. Seriously, I tested this recipe repeatedly to make sure these weren’t cakey or crumbly—we want that wonderful, slightly gooey texture that just melts in your mouth. This simple recipe proves that festive favorites don’t need complicated steps. If you love the mint and chocolate pairing, you might also adore my recipe for peppermint chocolate chip cookies! It’s quickly become one of my go-to comfort bakes, perfect for holiday platters or just a rainy Tuesday afternoon treat.
- Why These are the Best Andes Mint Cookies You Will Make
- Gather Your Ingredients for Andes Mint Cookies
- Step-by-Step Instructions for Easy Andes Mint Cookie Recipe
- Tips for Achieving Perfect Chewy Andes Mint Cookies
- Ingredient Notes and Substitutions for Homemade Mint Chocolate Cookies
- Making Andes Mint Cookies Ahead and Storage Tips
- Serving Suggestions for Festive Cookie Baking
- Frequently Asked Questions About Andes Mint Cookies Recipe
- Share Your Homemade Mint Chocolate Treats
Why These are the Best Andes Mint Cookies You Will Make
I really stand by this recipe because it delivers exactly what you want every single time. You won’t find a dry, crumbly cookie here! We spent time getting the ratios just right so you get that perfect texture and flavor payoff. These are designed for real life, meaning less fuss for more flavor.
- Incredibly Chewy Texture: Thanks to the right balance of sugars and butter, these stay wonderfully soft, even the next day.
- Intense Chocolate Flavor: We use a good amount of cocoa powder to make sure the chocolate base really sings against that cool mint.
- Quick Assembly: You can literally mix up the dough while the oven is preheating—perfect for quick mint chocolate treats!
- Holiday Ready: These look beautiful all dolled up with extra mint pieces on top—perfect for your next cookie exchange or just sharing with friends!

Gather Your Ingredients for Andes Mint Cookies
Okay, let’s get baking! For any recipe to come out perfectly, especially something involving that specific, delicious chocolate and mint vibe, you need to make sure your ingredients are ready to go. I’ve found that measuring precisely makes all the difference, particularly when using cocoa powder, because it can pack down easily. We want these Andes Mint Cookies to be rich but still wonderfully soft, so pay close attention to the butter temperature—softened, not melted, is key!
Also, a little pro tip related to the mints themselves: we are going to use two different amounts of the Andes Candies. One amount gets mixed *into* the dough to melt slightly and flavor everything, and the other is sprinkled on top right before baking to give you that beautiful, colorful finish. Don’t skip separating them!
For the Rich Chocolate Mint Cookie Base
Grab these items first; this is the foundation for our Chocolate Mint Cookies:
- 1 cup unsalted butter, softened
- 3/4 cup granulated sugar
- 3/4 cup packed light brown sugar (Make sure to pack it firmly into the cup!)
- 2 large eggs
- 1 teaspoon vanilla extract
- 1 3/4 cups all-purpose flour
- 3/4 cup unsweetened cocoa powder (Use good quality here—it makes a huge difference!)
- 1 teaspoon baking soda
- 1/2 teaspoon salt
- 1 cup Andes Mints, roughly chopped
For Finishing Your Andes Mint Cookies
These are the goodies that make these treats extra special:
- 1/2 cup Andes Mints, whole or halved, for topping
Step-by-Step Instructions for Easy Andes Mint Cookie Recipe
This recipe is so straightforward; you’ll be amazed at how quickly these Andes Mint Cookies come together. Seriously, the hardest part is waiting for them to cool down enough to eat! We are using a very basic creaming method, which is essential for that perfect texture we are aiming for. When you mix, you need to be gentle when combining the final dough elements because we don’t want tough cookies. Trust me; I learned that the hard way! If you need a break while baking, check out my recipe for super easy Oreo balls—no oven required there!
Preparation and Creaming the Wet Ingredients for Andes Mint Cookies
First things first, get that oven preheated to 350 degrees Fahrenheit. While it heats up, line your baking sheets completely with parchment paper—this makes cleanup a dream! Now for the creaming:
In a big bowl, take your softened butter, granulated sugar, and that lovely packed brown sugar. Beat them together until they look light and fluffy, maybe 3 to 4 minutes with a hand mixer. My expert tip: Don’t beat them into submission! We want air incorporated, but if you overbeat this stage, the cookies tend to spread too much in the oven, and we lose that wonderfully chewy center we love in the Best Andes Mint Cookies.
Next, add the eggs one at a time, letting each fully incorporate before adding the next, and then stir in your vanilla extract.
Combining Dry Ingredients and Mixing the Andes Mint Cookies Dough
In a separate bowl, grab a whisk and combine the flour, cocoa powder, baking soda, and salt thoroughly. Whisking actually helps break up any lumps in the cocoa, which is crucial for avoiding pockets of unmixed powder in your final cookie.
Now, reduce your mixer speed to low; this is important! Gradually add those dry ingredients into your wet mixture. Mix only until they are *just* combined. I mean it—stop mixing as soon as you don’t see any more white streaks of flour. If you mix longer, you develop gluten, and that’s how you get cakey or tough cookies instead of our desired Soft Andes Mint Cookies.
Finally, gently fold in that first cup of roughly chopped Andes Mints using a spatula. You want them mixed in, but don’t pulverize them!
Baking and Cooling Your Soft Andes Mint Cookies
Scoop the dough into rounded tablespoons and make sure they are spaced about 2 inches apart on your parchment-lined sheets. This gives them room to spread a little without turning into one big minty sheet!
Take those extra whole or halved Andes Mint pieces and press a few right onto the top of each dough ball. This enhances the look and guarantees that burst of mint flavor right away. Bake them for 9 to 11 minutes. You are looking for the edges to look set, but the middle of our Easy Andes Mint Cookie Recipe dough should still look a little soft and underdone. They firm up as they cool!

Don’t touch them yet! Let them rest right there on the hot baking sheet for about 5 minutes. This allows them a little transition before you carefully move them to a wire rack to cool completely.
Tips for Achieving Perfect Chewy Andes Mint Cookies
It’s all in the details when you are chasing that perfect soft and chewy cookie texture, right? These Andes Mint Cookies are so good when done right, but they can sometimes get a little flat or crisp if you rush the process. I’ve learned a few things over the years that really cement the texture, moving them from “pretty good” to “oh my gosh, you have to make these!”
The biggest game-changer for preventing the cookies from spreading too thin—which often happens with a chocolate base—is chilling the dough. It really helps the fats in the butter firm up again after creaming. If you have time, even just 30 minutes in the fridge works wonders, but you can let it go longer! Remember, time in the fridge results in a thicker, chewier cookie.
Another often-overlooked area is the temperature of your major additions. When you add the eggs to the creamed butter and sugar, you want those eggs to be room temperature. Cold eggs shock the creamed mixture, causing the fats to seize up a bit, which means you don’t incorporate as much air. If you’re in a hurry, just set the eggs in a bowl of warm (not hot!) water for about five minutes before you actually start mixing. This small step keeps everything happy and emulsified beautifully for those classic Chewy Andes Mint Cookies.
Also, pay attention to the size of your chopped candy pieces when you fold them in. The recipe calls for roughly chopping them, which I love because you get varied flavor pockets. If you chop them too finely, they almost melt completely into the batter, and you lose that nice textural surprise that makes Homemade Mint Chocolate Cookies exciting. Keep those chunks chunky!

If you are curious about other methods for keeping your homemade treats soft, I wrote a whole rundown on how I stick to my texture rules for my classic chocolate chip cookies recipe, and honestly, a lot of those principles apply right here too!
Ingredient Notes and Substitutions for Homemade Mint Chocolate Cookies
Sometimes substitutions are necessary, life happens, or you just run out of that one specific item! I totally get it. When we’re making Homemade Mint Chocolate Cookies, the candy is obviously the star, but a few other ingredients can cause questions, especially the cocoa powder.
For this recipe, since we are using baking soda (which needs an acid to fully activate), unsweetened cocoa powder is usually the natural kind. However, if you use Dutch-process cocoa powder, which has a lower acidity, your cookies might not rise quite as much, but they will have a deeper, darker, almost Oreo-like flavor! If you go that route, you might need to add a tiny pinch (maybe 1/8th teaspoon) of cream of tartar to help lift the cookies a bit. It’s a minor tweak, but it helps maintain that lovely texture we worked so hard for in the Andes Mint Cookies recipe.
Now, let’s talk mints! Andes Mints are fantastic because they already have that perfect three-layer structure, but what if you only have something else on hand? You absolutely can use chopped peppermint patties! Just be warned: those patties are softer. If you use them, you *must* skip the step of pressing extra mints on top, or they might melt and pool too much.
If you want to lean heavier into the mint, you can add just 1/4 teaspoon of pure peppermint extract to the wet ingredients along with the vanilla. But go easy! Peppermint extract is strong. A little goes a long way in boosting that cool flavor profile. It pairs surprisingly well with chocolate, just like how I use other flavor infusions in my no-churn banana ice cream. It’s all about layering that flavor!
Making Andes Mint Cookies Ahead and Storage Tips
One of the best things about a reliable cookie recipe, especially a delicious one like these rich chocolate mint treats, is that you can prep them in advance! I love having dough stashed away for those sudden cravings or unexpected guests.
You have two main options for making these Andes Mint Cookies ahead of time: chilling or freezing. If you plan to bake within a week, chilling the dough is perfect. Simply mix the whole batch, cover the bowl tightly with plastic wrap or transfer the dough into an airtight container, and stick it in the fridge. Chilling for 24 to 48 hours actually deepens that chocolate flavor, which is a bonus!
If you are looking further ahead, freezing is the way to go. I prefer rolling the dough into individual balls right after mixing—don’t forget to press those extra mint pieces on top before freezing if you want them baked that way! Place the dough balls on a parchment-lined cookie sheet and freeze them solid. Once they are hard little balls, scoop them all into a heavy-duty freezer bag. You can keep these frozen dough balls for up to three months. When you want to bake, just pull out as many as you need and bake them straight from frozen, but add about 2 to 3 extra minutes to the baking time. Easy peasy!
As for storing the actual baked cookies? These are definitely at their peak the day they come out of the oven, but they stay soft surprisingly well! Store your cooled Andes Mint Cookies in a good airtight container at room temperature. If stored correctly, they should stay fresh and chewy for about 4 days. If you add powdered sugar dust instead of actual mint toppers, avoid overcrowding the container, or the sugar will melt off onto the other cookies.
If you’re looking for ways to preserve other seasonal treats, I have a fantastic method for making slow cooker pear butter that lasts forever, which can be a nice counterpoint to these rich cookies!
Serving Suggestions for Festive Cookie Baking
It’s one thing to bake the perfect batch of Andes Mint Cookies, and it’s another thing entirely to serve them up in a way that makes everyone say “Wow!” Because these cookies are so rich—that deep chocolate layer paired with the cool mint—they pair wonderfully with simple, contrasting flavors or things that cut through the richness. They are already holiday ready just by existing, but presentation always helps!
Of course, the absolute classic pairing is a tall, ice-cold glass of milk. There’s just something magical about that combination, isn’t there? The cold milk seems to wake up the mint flavor even more. If you’re serving them at a party or during the holidays, try offering a small bowl of crushed peppermint candies on the side. It adds a nice visual crunch and lets people decorate their own cookie if they want extra minty goodness!

For grown-up gatherings, these Dessert Recipes with Mints are just fantastic alongside a hot beverage. A classic black coffee really balances the sweetness of the cookie perfectly. Or, if you want something slightly more elegant, try a creamy, warm latte—maybe even a chai latte! The spices in chai work surprisingly well with the cool mint, which is a combination I never would have guessed until I tried it.
If you’re serving these as part of a larger dessert spread, remember that they are quite decadent. They shine next to something lighter, like a scoop of homemade vanilla bean ice cream or maybe even a simple fruit platter to break up all that chocolate. I love pairing them with a lightly flavored dessert so the Andes Mint really stays the star. For instance, if you look at my side dish recipes, I sometimes make things that feel summery, like my homemade Caesar salad, just to prove that even savory food can be simple. But for dessert, keep it simple to let the mint shine!
Frequently Asked Questions About Andes Mint Cookies Recipe
It’s totally normal to have questions when you’re diving into a new cookie recipe, especially one as wonderfully decadent as these Andes Mint Cookies! I’ve gathered the most common things people ask me about the dough, the texture, and making these ahead of time. We want to make sure you get that perfect melt-in-your-mouth experience every time. If you’re looking for other quick make-ahead meals, I have great advice on my easy shredded chicken taco recipe!
Can I make these Andes Mint Chocolate Chip Cookies ahead of time?
Oh yes, and I highly recommend it! As I mentioned before, chilling the dough is great for texture, but it also means you can bake these whenever you want. You can refrigerate the dough for up to three days. If you want to bake them weeks or months down the line, roll the dough into balls, place them on a parchment-lined tray, and freeze them solid. Once frozen, move them into a freezer bag. When you want festive cookie baking on demand, just pop them onto a prepared sheet and add a couple of extra minutes to the bake time. They bake up beautifully from frozen!
What is the secret to getting soft Andes Mint Cookies?
There are two major secrets here, and both relate to managing temperature and time. First, you must let the dough chill! Even if it’s just for 30 minutes, that helps the fats stay firm, preventing the cookies from spreading too thin and becoming crispy. Second, and this is my *big* secret for all soft Andes Mint Cookies: underbake them slightly! You want the edges to look baked and set, but that center should still look a little soft and puffy when you pull them out of the oven. They will continue to cook on that hot pan for those five minutes, setting up perfectly chewy rather than dry crunchy.
Share Your Homemade Mint Chocolate Treats
Honestly, seeing your creations is the best part of running Devour Dish! Knowing that my recipe for these wonderful Andes Mint Cookies made it into *your* kitchen—whether it’s for a festive holiday platter or just a regular weeknight sugar craving—just makes my day. I so hope you loved that perfect marriage of rich chocolate and cool mint!
If you tried this recipe, please, please, please come back and leave a star rating right here on the recipe card. It really helps other bakers know they can trust this method for the Best Andes Mint Cookies. A five-star rating tells me I nailed that chewy texture we were aiming for!
And if you took a picture? I want to see it! Tag me on social media when you share your beautiful Homemade Mint Chocolate Cookies. I love seeing how everyone styles them—whether you went for the simple dusting or went all out with extra mint on top!
If you are looking for another simple, crowd-pleasing dessert to make after these go fast, you should check out my recipe for moist vanilla cupcakes. They are simple, elegant, and everyone always asks for the recipe!
Happy baking, my friend. I’m already looking forward to hearing about your next delicious creation!
PrintEasy Chewy Chocolate Andes Mint Cookies

Make these soft and chewy Andes Mint Cookies for a rich chocolate treat with a refreshing mint layer. This simple recipe is perfect for holiday baking or any time you need a quick dessert.
- Prep Time: 15 min
- Cook Time: 11 min
- Total Time: 26 min
- Yield: 2 dozen cookies 1x
- Category: Dessert
- Method: Baking
- Cuisine: American
- Diet: Vegetarian
Ingredients
- 1 cup unsalted butter, softened
- 3/4 cup granulated sugar
- 3/4 cup packed light brown sugar
- 2 large eggs
- 1 teaspoon vanilla extract
- 1 3/4 cups all-purpose flour
- 3/4 cup unsweetened cocoa powder
- 1 teaspoon baking soda
- 1/2 teaspoon salt
- 1 cup Andes Mints, roughly chopped
- 1/2 cup Andes Mints, whole or halved, for topping
Instructions
- Preheat your oven to 350 degrees Fahrenheit. Line baking sheets with parchment paper.
- In a large bowl, cream together the softened butter, granulated sugar, and brown sugar until light and fluffy.
- Beat in the eggs one at a time, then mix in the vanilla extract.
- In a separate medium bowl, whisk together the flour, cocoa powder, baking soda, and salt.
- Gradually add the dry ingredients to the wet ingredients, mixing on low speed until just combined. Do not overmix.
- Fold in the 1 cup of chopped Andes Mints.
- Drop rounded tablespoons of dough onto the prepared baking sheets, spacing them about 2 inches apart. Press a few extra Andes Mint pieces onto the top of each dough ball.
- Bake for 9 to 11 minutes. The edges should be set, but the centers should still look slightly soft for a chewy texture.
- Let the cookies cool on the baking sheet for 5 minutes before transferring them to a wire rack to cool completely.
Notes
- For extra chewy Andes Mint Cookies, chill the dough for at least 30 minutes before scooping and baking.
- If you want a richer chocolate flavor, substitute 1/4 cup of the all-purpose flour with cake flour.
- Store cooled cookies in an airtight container at room temperature for up to 4 days.
Nutrition
- Serving Size: 1 cookie
- Calories: 180
- Sugar: 16g
- Sodium: 95mg
- Fat: 10g
- Saturated Fat: 6g
- Unsaturated Fat: 4g
- Trans Fat: 0g
- Carbohydrates: 22g
- Fiber: 1g
- Protein: 2g
- Cholesterol: 30mg