
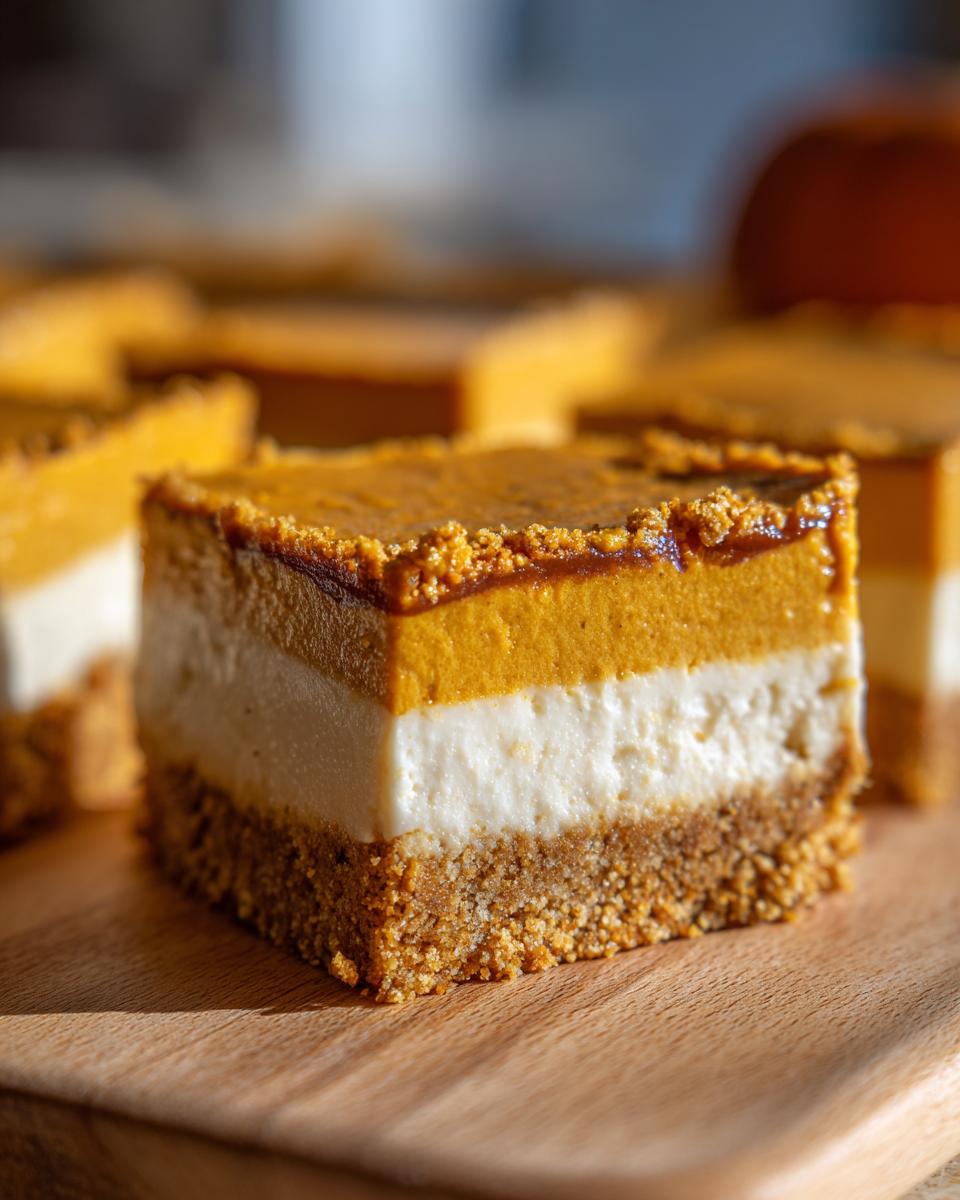
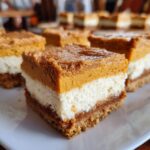
Oh, fall! It’s my absolute favorite time of year, and that means it’s time for all the cozy, comforting flavors. And if there’s one dessert that screams autumn louder than a crunching pile of leaves, it’s got to be pumpkin. But what if you want even *more* deliciousness? That’s where these incredible Pumpkin cheesecake bars come in! Seriously, they’re the ultimate mashup: all the warm spice and smooth texture of pumpkin pie meets the rich, creamy decadence of cheesecake. I love whipping these up for gatherings because they’re surprisingly easy to make ahead and everyone always raves about them. As someone who studied nutrition science and is all about making delicious, reliable recipes for real life, I can tell you these bars are a guaranteed hit every single time you bake them.
- Why You'll Love These Pumpkin Cheesecake Bars
- Essential Ingredients for Perfect Pumpkin Cheesecake Bars
- Step-by-Step Guide to Making Pumpkin Cheesecake Bars
- Tips for Success with Your Pumpkin Cheesecake Bars
- Make-Ahead and Storage for Your Pumpkin Cheesecake Bars
- Serving Your Pumpkin Cheesecake Bars for Holidays
- Frequently Asked Questions About Pumpkin Cheesecake Bars
- Estimated Nutritional Information
- Share Your Pumpkin Cheesecake Bar Creations!
Why You'll Love These Pumpkin Cheesecake Bars
These easy cheesecake bars are an absolute dream for so many reasons! First off, they’re surprisingly simple to make, even for a beginner baker. Plus, they’re the perfect make ahead dessert – just pop them in the fridge overnight and you’re good to go! The flavor combo of creamy cheesecake and warm, spiced pumpkin is just heavenly and always a hit with everyone. And the best part? They slice so beautifully, which makes them totally perfect for parties and potlucks without any fuss.
Essential Ingredients for Perfect Pumpkin Cheesecake Bars
Okay, let’s talk about what goes into these amazing bars! Having good ingredients really makes a difference, especially for something as lovely as these pumpkin cheesecake bars. It’s all about getting that perfect balance of creamy, spiced, and crunchy.
For the Crust:
- 1 1/2 cups graham cracker crumbs (that’s about 10 full crackers, crushed really fine!)
- 1/4 cup granulated sugar
- 6 tablespoons unsalted butter, melted
For the Pumpkin Layer:
- 1 (15 ounce) can pumpkin puree (and listen, this is important! Make sure it’s pure pumpkin puree, NOT pumpkin pie filling. We want that pure pumpkin flavor, not something pre-spiced or sweetened.)
- 1 (8 ounce) package cream cheese, softened (super important for smoothness!)
- 1/2 cup granulated sugar
- 1 large egg
- 1 teaspoon pumpkin pie spice
- 1/2 teaspoon vanilla extract
For the Cheesecake Layer:
- 1 (8 ounce) package cream cheese, softened (again, softened is key here!)
- 1/2 cup granulated sugar
- 1 large egg
- 1 teaspoon vanilla extract
Crust Options: Graham Cracker vs. Gingersnap
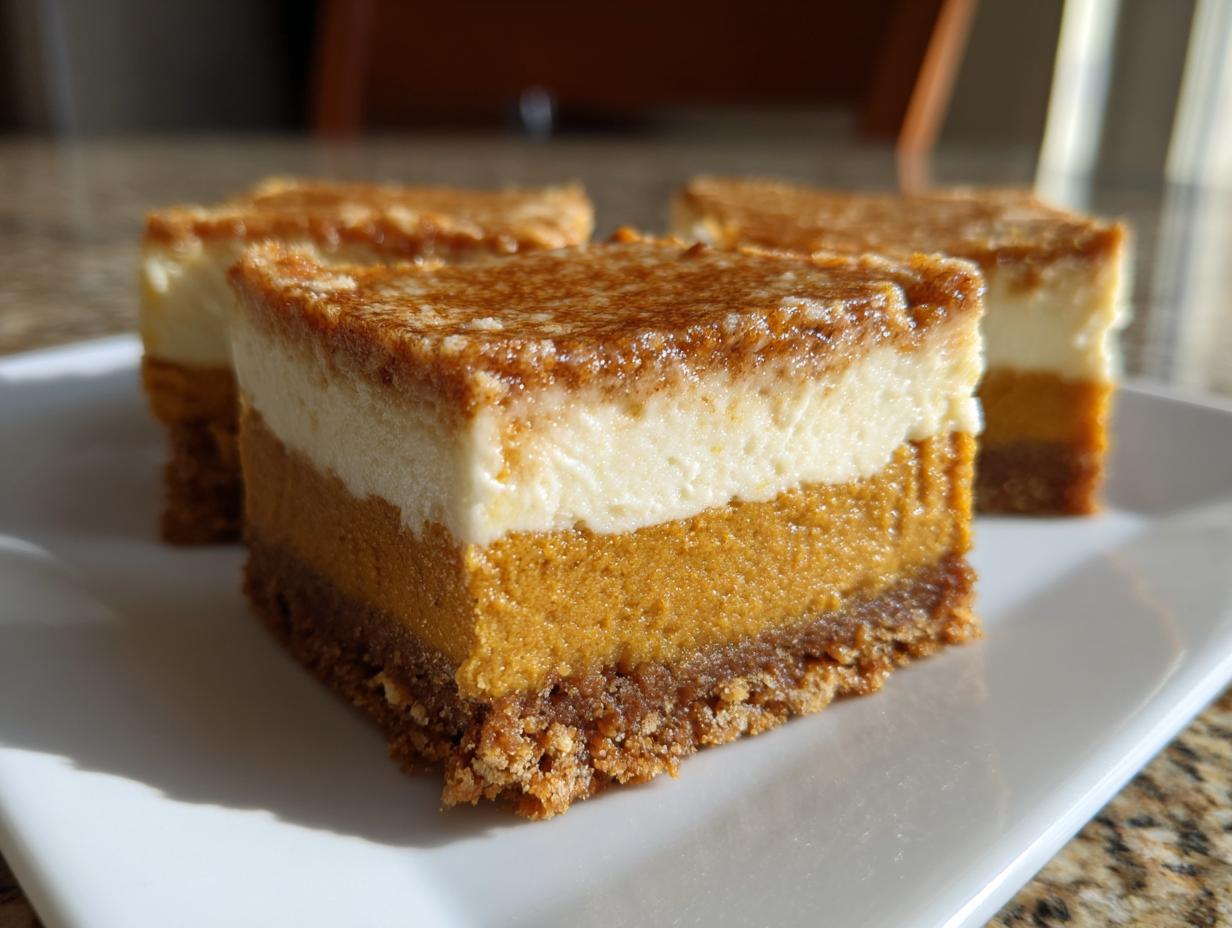
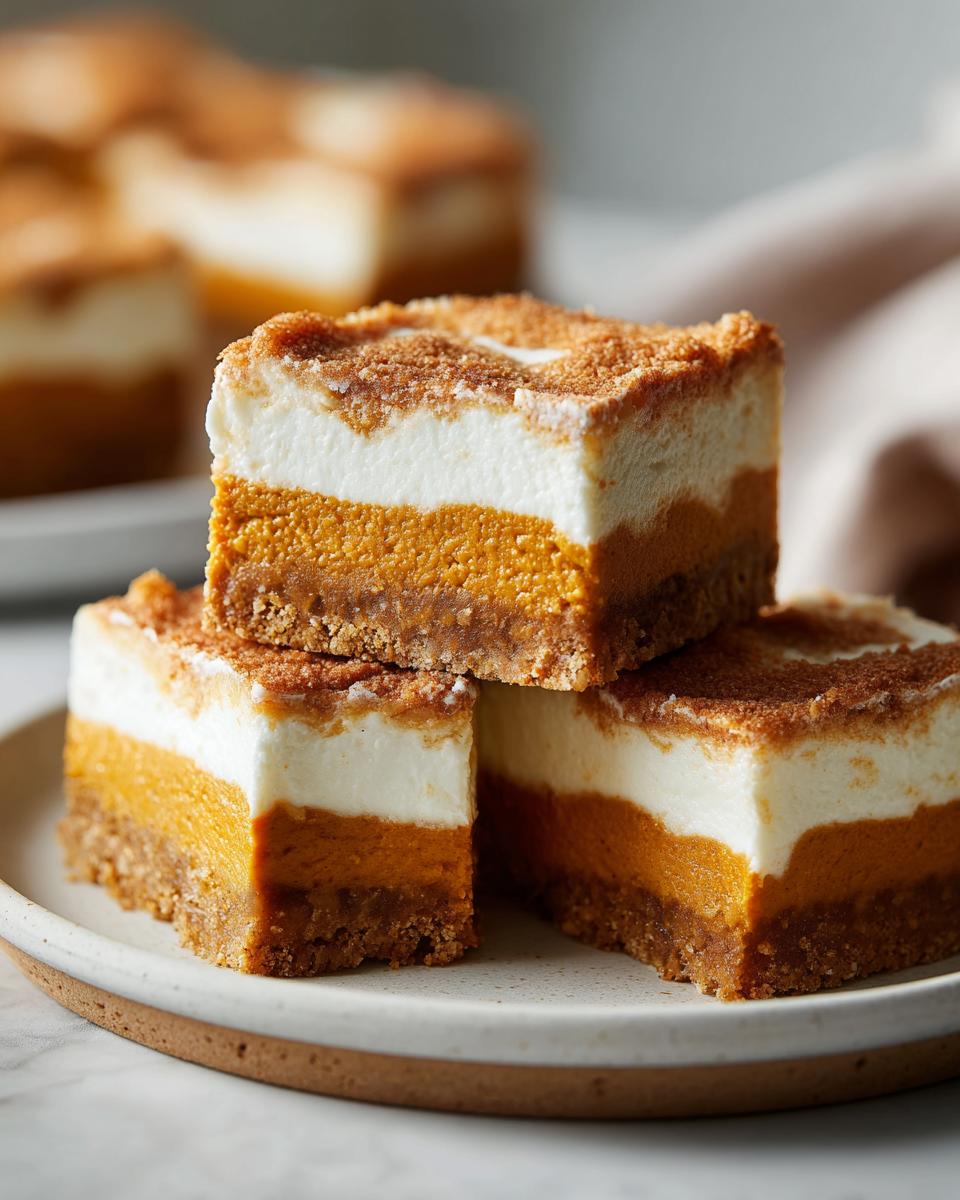
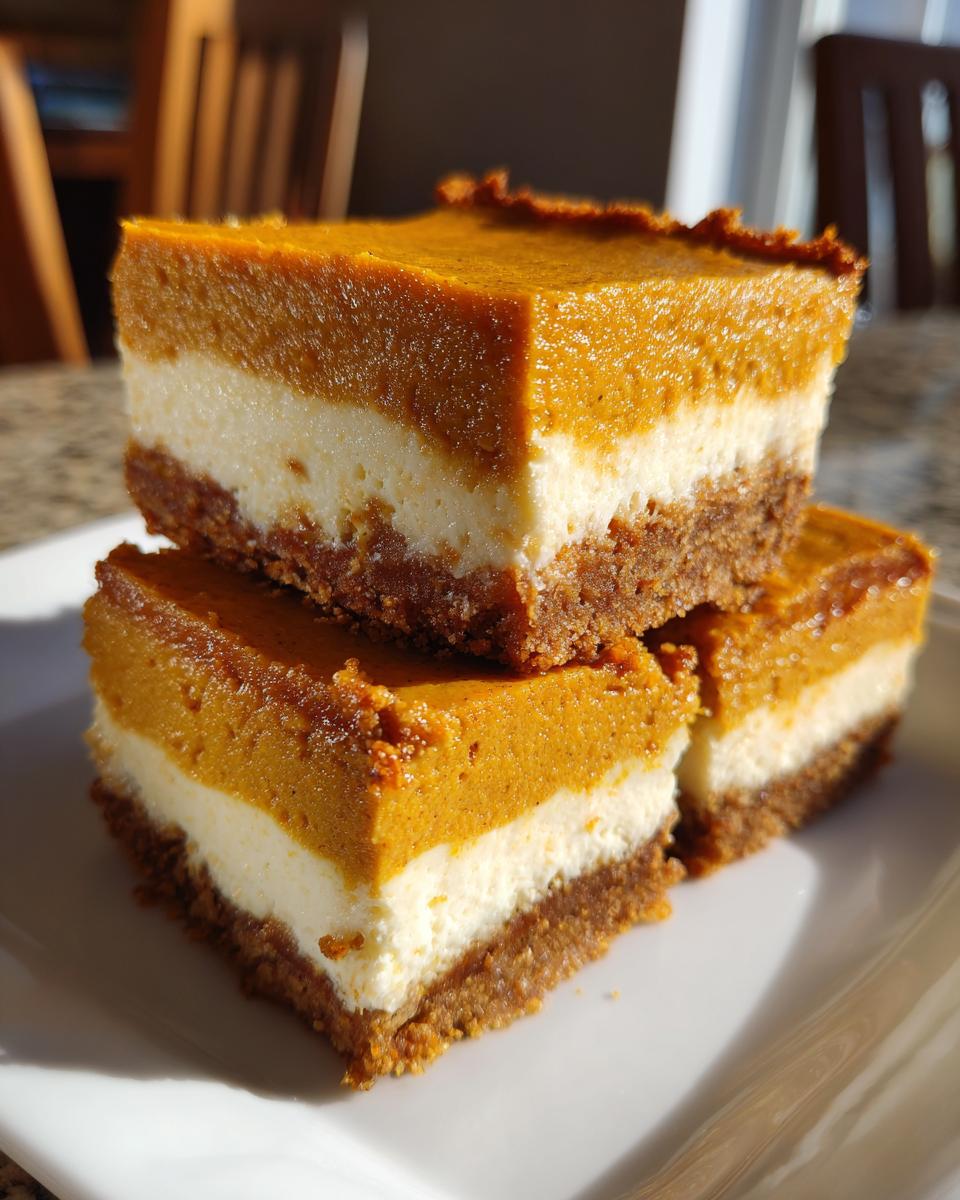
So, you’ve got a couple of yummy choices for the crust, and honestly, both are fantastic. If you go with the classic graham cracker crust, you get that perfect, buttery-sweet base that just melts in your mouth and lets the pumpkin and cheesecake flavors shine through. It’s super easy to whip up: just mix those crumbs with a little sugar and melted butter, then press it down into your pan really, really firmly. This makes sure it holds up beautifully when you slice the bars later.
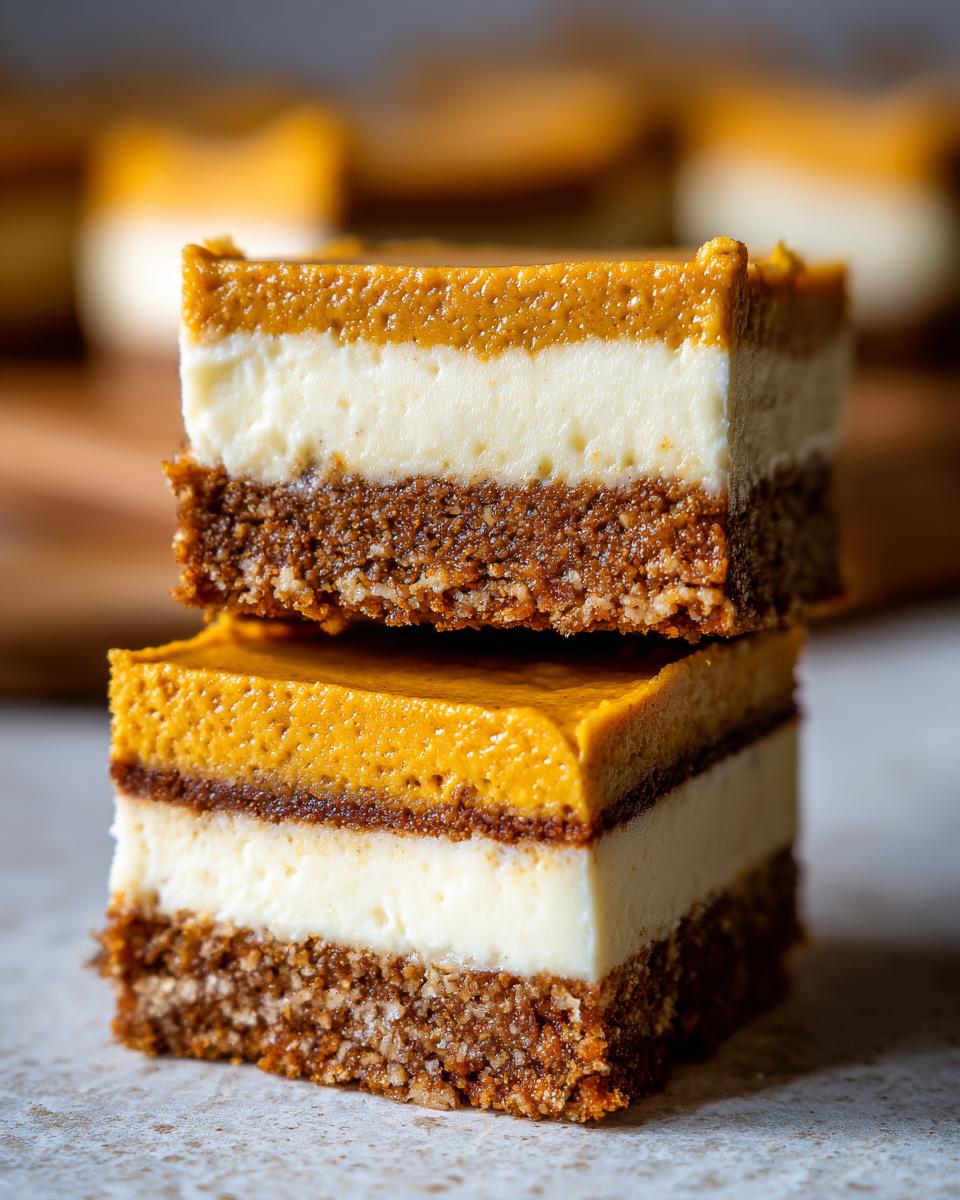
But, if you’re feeling a bit more adventurous or just LOVE that spicy kick, a gingersnap crust is out of this world! Just use about 1 1/2 cups of finely crushed gingersnap cookies instead of graham crackers. The gingersnaps add this wonderful warmth and a little bit of spice that plays SO well with the pumpkin. Whichever you pick, make sure you press it down good and even. It’s the foundation of all that deliciousness!
Step-by-Step Guide to Making Pumpkin Cheesecake Bars
Okay, let’s get down to business and make these gorgeous Pumpkin cheesecake bars! Don’t worry, it’s way easier than it looks, and I’ll walk you through every step. My favorite part is seeing that beautiful swirl form – it looks so fancy, but trust me, it’s totally doable! This whole process is your ticket to some of the best creamy cheesecake bars out there.
- First things first, let’s get that oven preheated to 350°F (175°C). While it’s warming up, grab a 9×13 inch baking pan. To make your life SO much easier later, line it with parchment paper. Make sure you leave some overhang on the sides – that’s your secret weapon for lifting these beauties right out of the pan.
- Now, let’s get that crust ready. In a bowl, mix up your graham cracker crumbs (or gingersnaps, if you went that route!) with the 1/4 cup of sugar. Pour in that melted butter and stir it all around until every crumb looks nicely moistened. Press this mixture down super firmly into the bottom of your prepared pan. I like to use the bottom of a glass to get it really flat and even. Pop this into the oven for about 8 to 10 minutes, just until it’s lightly golden. Then, take it out and let it cool a bit while we move on to the good stuff.
- For the pumpkin layer, grab a big bowl. Beat the softened cream cheese and the 1/2 cup sugar together until it’s all smooth and creamy. Then, beat in the egg, followed by your pumpkin puree (remember, NOT pie filling! This tip is key for that pure pumpkin flavor), the pumpkin pie spice, and that 1/2 teaspoon of vanilla. Mix it all ’til it’s just combined – you don’t want to overmix. Pour this lovely orange mixture evenly over your slightly cooled crust.
- Time for the cheesecake layer! In another bowl, beat the other package of softened cream cheese with the remaining 1/2 cup sugar until it’s nice and smooth. Beat in the egg and the 1 teaspoon of vanilla extract. Now, take spoonfuls of this cheesecake mixture and dollop them all over the pumpkin layer.
Achieving the Perfect Swirl on Your Pumpkin Cheesecake Bars
This is where the magic happens! Once you have those dollops of cheesecake mixture on top of the pumpkin layer, grab a knife or a skewer. Gently swirl the two layers together. You just want to marble them a bit – think elegant swirls, not a muddy mess! Don’t overdo it. A few passes should do it. The goal is to see beautiful ribbons of pumpkin and cheesecake peeking through, not to completely mix them together. It makes these swirled pumpkin bars look so impressive!
The Crucial Chilling Time for Clean Cuts
Okay, resist the urge to slice into these right away! This step is NON-NEGOTIABLE for getting those super clean cuts. After baking (check your bars – the edges should be set and the center mostly firm with just a slight jiggle), let them cool completely in the pan on a wire rack. This could take an hour or two. Then, cover the pan and slide it into the fridge. We need them to chill for at least 4 hours, but I always say overnight is best. This is super important for getting that perfect bar shape, unlike a typical cake that might need a water bath, these bars set up beautifully just from chilling. It’s a key step for these fantastic pumpkin dessert bars.
- Now, pop the pan back into the oven and bake for about 30 to 35 minutes. You’ll know they’re ready when the edges look set and the center is mostly firm, though it might still have a tiny bit of a jiggle. That’s okay! This recipe is a wonderful option for those looking for easy cheesecake bars that don’t require a water bath.
- Let those gorgeous bars cool down completely in the pan on a wire rack. Seriously, let them get all the way to room temp.
- Once they’re totally cooled, cover the pan and slide them into the refrigerator. We need to make sure they chill for at least 4 hours, but I always say overnight is best. This chilling is crucial for getting those really clean cuts later!
- When you’re ready to serve, use those parchment paper overhangs to lift the whole slab out of the pan. Place it on a cutting board and cut it into squares or bars. Enjoy your beautiful, creamy cheesecake bars!
Tips for Success with Your Pumpkin Cheesecake Bars
Alright, so you’re ready to bake up some serious fall deliciousness! Trust me, these pumpkin cheesecake bars are fantastic, but a few little tips from my kitchen to yours can make all the difference. These are the things I’ve learned over the years with my fall baking recipes, and they really help ensure you get perfect results every single time. It’s all about those little secrets that make your autumn baking extra special!
First off, make sure your cream cheese is truly softened. I mean, super soft! If it’s still cold or hard, you’ll end up with lumps, and nobody wants lumpy cheesecake. Leave it on the counter for at least an hour, or even pop it in the microwave for just a few seconds (carefully!). Also, when it says bake until the center is *mostly* firm, believe it! It should have a slight jiggle, like Jell-O. If it’s totally solid, it might bake up a bit dry. And oven temperatures can be wacky, right? So keep an eye on them towards the end of the baking time, especially if it’s your first time making them.
Make-Ahead and Storage for Your Pumpkin Cheesecake Bars
The best thing about these pumpkin cheesecake bars? They are totally made for making ahead! Seriously, they taste even better after chilling overnight. Just make sure they’re completely cooled before you cover them tightly with plastic wrap or foil and pop them in the fridge. They’ll keep beautifully for up to 3 days, making them perfect for prepping before a busy holiday or a weekend potluck. Just slice and serve when you’re ready – easy peasy!
Serving Your Pumpkin Cheesecake Bars for Holidays
These pumpkin cheesecake bars are just perfect for any holiday get-together, really. They look so elegant, don’t they? Especially with that beautiful swirl! I love serving them on a pretty platter, maybe with a dollop of freshly whipped cream or a tiny dusting of cinnamon on top. They pair absolutely wonderfully with a warm mug of coffee or even a spiced cider. Since these are some of the best Thanksgiving desserts you could ask for, they also make a wonderful addition to any holiday dessert ideas list. Honestly, any excuse to make them is a good excuse in my book!
Frequently Asked Questions About Pumpkin Cheesecake Bars
Got questions about these dreamy pumpkin cheesecake bars? I’ve got answers! People always ask me about ingredient swaps or little quirks they might run into, so here’s the scoop on common things you might wonder about.
Can I use a different crust for these bars?
Absolutely! While the graham cracker crust is a classic for a reason, a gingersnap crust is absolutely heavenly here, adding this warm, spicy depth that just sings with pumpkin. You can also try shortbread cookies for a buttery base, or even crushed vanilla wafers if that’s what you have! Just make sure you use about 1.5 cups of crumbs and mix it with sugar and melted butter just like the recipe calls for.
Why did my bars crack?
Oh, cracking! It’s a common cheesecake thing. Usually, it happens if the oven is just too hot, or if your cheesecake mixture was over-beaten, incorporating too much air. Another culprit can be opening the oven door too much during baking. Don’t sweat it too much, though! These are bars, and if they crack a little, they’ll still taste amazing, especially once they’re chilled and sliced. That beautiful pumpkin dessert bar texture is still there!
Can I freeze these pumpkin cheesecake bars?
Yes, you can! Make sure they are completely chilled and already sliced. Then, wrap each bar individually in plastic wrap, and then place them in a freezer-safe bag or container. They’ll keep well in the freezer for about a month. Just let them thaw in the refrigerator overnight before you plan to enjoy them. They hold up pretty well!
What’s the difference between pumpkin puree and pumpkin pie filling?
This is a super important one! When that recipe calls for pumpkin puree, it means 100% pure mashed pumpkin – nothing added. Pumpkin pie filling, on the other hand, already has sugar, spices, and sometimes even thickeners mixed in. If you use pie filling, your bars will likely be too sweet and the flavor will be off. So, always grab the plain pumpkin puree!
Estimated Nutritional Information
Just a heads-up, this is an estimate, because, you know, ovens and ingredients can be a little different every time! But generally, one of these delightful pumpkin cheesecake bars clocks in around 200 calories. You can expect about 12g of fat, with 7g being saturated, and around 22g of carbohydrates, including 20g of sugar. It’s got about 1g of fiber and 3g of protein. Pretty balanced for such a decadent treat, right?
Share Your Pumpkin Cheesecake Bar Creations!
I just LOVE seeing your baking adventures! If you make these amazing Pumpkin cheesecake bars, please leave a comment below and tell me all about it. Did you try the gingersnap crust? How did they turn out for your get-together? And if you snap any photos, I’d be thrilled if you shared them on social media and tagged me – it truly makes my day to see what you’ve been whipping up in your kitchen!
PrintPumpkin Cheesecake Bars
Enjoy these creamy pumpkin cheesecake bars with a crisp crust, perfect for fall gatherings and holidays. They are easy to make ahead and slice cleanly.
- Prep Time: 20 min
- Cook Time: 35 min
- Total Time: 4 hours 55 min
- Yield: 24 bars
- Category: Dessert
- Method: Baking
- Cuisine: American
- Diet: Vegetarian
Ingredients
- For the Crust: 1 1/2 cups graham cracker crumbs (about 10 full crackers), 1/4 cup granulated sugar, 6 tablespoons unsalted butter, melted
- For the Pumpkin Layer: 1 (15 ounce) can pumpkin puree (not pumpkin pie filling), 1 (8 ounce) package cream cheese, softened, 1/2 cup granulated sugar, 1 large egg, 1 teaspoon pumpkin pie spice, 1/2 teaspoon vanilla extract
- For the Cheesecake Layer: 1 (8 ounce) package cream cheese, softened, 1/2 cup granulated sugar, 1 large egg, 1 teaspoon vanilla extract
Instructions
- Preheat your oven to 350°F (175°C). Line a 9×13 inch baking pan with parchment paper, leaving an overhang on the sides for easy removal.
- Prepare the crust: In a medium bowl, combine graham cracker crumbs and 1/4 cup sugar. Pour in the melted butter and stir until the crumbs are evenly moistened. Press the mixture firmly into the bottom of the prepared pan. Bake for 8-10 minutes until lightly golden. Let cool slightly.
- Prepare the pumpkin layer: In a large bowl, beat the softened cream cheese and 1/2 cup sugar until smooth. Beat in the egg, pumpkin puree, pumpkin pie spice, and 1/2 teaspoon vanilla extract until well combined. Pour this mixture evenly over the baked crust.
- Prepare the cheesecake layer: In a separate medium bowl, beat the softened cream cheese and 1/2 cup sugar until smooth. Beat in the egg and 1 teaspoon vanilla extract until combined. Dollop spoonfuls of this cheesecake mixture over the pumpkin layer. Use a knife or skewer to gently swirl the two layers together, creating a marbled effect.
- Bake for 30-35 minutes, or until the edges are set and the center is mostly firm. The center may still have a slight jiggle.
- Let the bars cool completely in the pan on a wire rack. Once cooled, cover the pan and refrigerate for at least 4 hours, or preferably overnight, to allow them to set fully.
- Use the parchment paper overhang to lift the bars out of the pan. Cut into squares or bars.
Notes
- For a gingersnap crust, substitute 1 1/2 cups of finely crushed gingersnap cookies for the graham cracker crumbs.
- Ensure your cream cheese is fully softened for a smooth, lump-free cheesecake layer.
- Chilling is crucial for clean cuts. If the bars are not fully set, they will be difficult to slice neatly.
- These bars are best stored covered in the refrigerator for up to 3 days.
Nutrition
- Serving Size: 1 bar
- Calories: 200
- Sugar: 20g
- Sodium: 100mg
- Fat: 12g
- Saturated Fat: 7g
- Unsaturated Fat: 5g
- Trans Fat: 0g
- Carbohydrates: 22g
- Fiber: 1g
- Protein: 3g
- Cholesterol: 40mg