
Oh, friend, is it even fall if your appetizer spread doesn’t look like it stepped right out of a harvest magazine? I know how it goes; you want that stunning centerpiece for your Halloween party or Thanksgiving table, but who has time for fussy cooking when there are pies to bake and guests to greet? That’s why I spent way too much time perfecting what I truly believe is the blueprint for stress-free holiday hosting: The Ultimate Easy Make-Ahead pumpkin cheese ball.
This isn’t just some ordinary dip rolled in crumbs. We are talking about a visually stunning, creamy, savory snack that screams autumn festivity, yet takes next to no effort. I’ve road-tested this recipe through three different Friendsgiving events just to ensure the shaping holds up in the fridge, and trust me, it’s reliable! If you love simple, show-stopping food, pull up a stool. I promise this pumpkin cheese ball will become your go-to for years.
If you’re feeling ambitious later, you might enjoy my recipe for easy homemade onion dip from scratch, but for now, let’s focus on this gorgeous orange centerpiece!

- Why This Pumpkin Cheese Ball is Your New Favorite Fall Appetizer Recipe
- Gathering Ingredients for Your Savory Pumpkin Recipe
- Step-by-Step Instructions for the Best Cheese Ball Recipe
- Tips for Making Your pumpkin cheese ball a Crowd Pleasing Appetizer
- Serving Suggestions for this Festive Party Food
- Storage and Reheating Instructions for Leftover pumpkin cheese ball
- Frequently Asked Questions about the pumpkin cheese ball
- Estimated Nutritional Data for This Savory Cream Cheese Dip
- Share Your Autumn Party Ideas
Why This Pumpkin Cheese Ball is Your New Favorite Fall Appetizer Recipe
Honestly, presentation matters during the holidays, but I am not here to create extra work for you! This pumpkin cheese ball hits that sweet spot where impressive visuals meet incredible ease. It’s the ultimate Fall Appetizer Recipe because it looks like you spent hours fussing over it, but you didn’t!
The biggest selling point for me, the element that makes it my go-to for Stress Free Entertaining, is how far ahead I can prep it. You mix it, shape it, and tuck it away. When guests arrive, all you have to do is cut those ties. It’s pure magic.
Simple Ingredients for a Delicious Cheddar Cheese Ball
We aren’t messing around with fancy cheeses here, which keeps this recipe fast and budget-friendly. The base is rich, softened cream cheese combined with a generous amount of sharp cheddar. That sharpness is why I insist on using shredded cheddar—it cuts through the richness beautifully, making this a truly memorable Cheddar Cheese Ball.
The Secret to Shaping Your Pumpkin Cheese Ball Perfectly
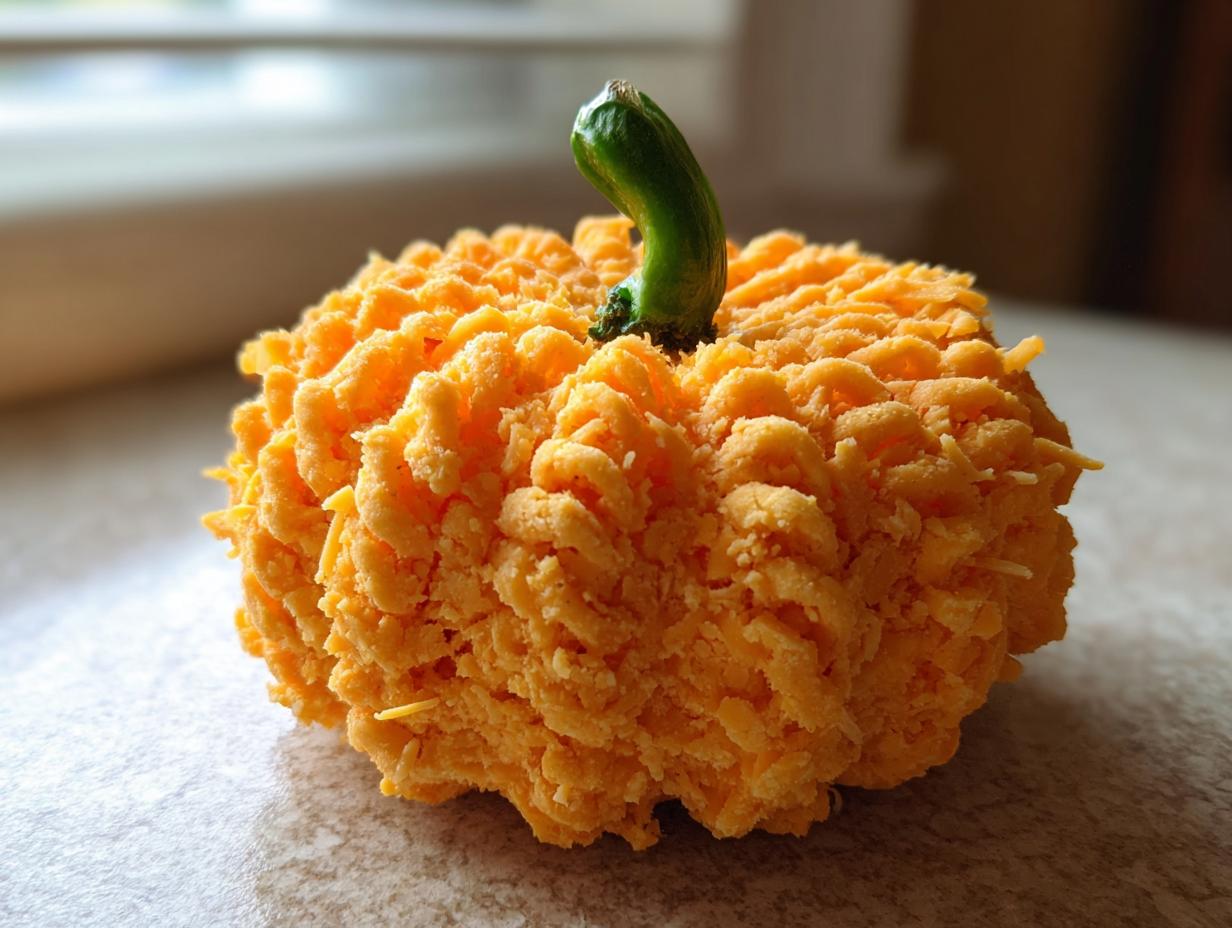
You get the fantastic pumpkin shape not through carving (definitely don’t try that!), but with simple kitchen twine. It sounds funny, but wrapping the ball firmly—but not too firmly—with twine creates those lovely vertical indentations we associate with a miniature gourd. It transforms a simple savory snack into a true Pumpkin Shaped Snack centerpiece!
For the next steps on how to mix and wrap this beauty, pop over to the ingredient list. Oh, and if you need another simple party favorite, check out my easy sausage pinwheels recipe!
Gathering Ingredients for Your Savory Pumpkin Recipe
Alright, time to grab your mixing bowls! Having everything ready before you start is key to keeping this a quick, Easy Cheese Ball experience. Remember, we are making a savory treat here, so don’t look for any pumpkin puree lurking around—the pumpkin shape comes entirely from technique!
Here is what you need to make this fantastic pumpkin cheese ball. It’s important that your cream cheese is fully softened so it mixes like a dream and doesn’t leave you with lumps. Also, make sure your cheddar is finely shredded; that texture makes a huge difference once you roll the coating on.
- 16 ounces cream cheese, softened
- 3 cups sharp cheddar cheese, finely shredded, divided
- 1/2 cup green onion, chopped
- 1 teaspoon ranch seasoning mix
- 1/4 teaspoon garlic powder
- 1/4 teaspoon onion powder
- 1/4 teaspoon smoked paprika (optional, just for a little warmth!)
- Kitchen twine (this is our secret shaping weapon!)
- 1 small green bell pepper (we need this for the stem!)
- Optional coating: extra shredded cheese, chopped pecans, or paprika
If you want to swap out the coating for something extra nutty, feel free! Now, while we make this no-bake snack, if you need something really hearty, make sure you bookmark my easy high-protein Mediterranean bean salad for lunch later this week. But back to the cheese!
Step-by-Step Instructions for the Best Cheese Ball Recipe
Now for the fun part! Turning those lovely ingredients into the showstopper pumpkin cheese ball you’ve been dreaming about. Since this is a No Bake Fall Snack, the tools you need are just a large bowl and your hands. No oven required, which is a huge win when you’re busy!
Follow these steps closely, especially around the shaping part. It’s surprisingly easy, but getting the twine right makes all the difference between a tasty cheese mound and a gorgeous Pumpkin Shaped Snack. If you take care of the mixing, the shaping just falls into place.
Mixing the Creamy Cheese Dip Base
First things first: we mix the heart of the dip! Grab your softened cream cheese (softened is crucial here, otherwise you get lumps we absolutely don’t want), two full cups of that sharp cheddar, your chopped green onions, and all those lovely seasonings—ranch mix, garlic, onion powder, and paprika if you’re using it. Beat everything together until it is genuinely smooth and perfectly combined. I mean it—keep mixing until you don’t see any streaks of cream cheese hiding anywhere. That thorough mixing creates such a creamy texture for our Savory Cream Cheese Dip.
Coating and Shaping the pumpkin cheese ball
Once it’s beautifully combined, it’s time to form the shape. Gently form the mixture into a round ball shape—keep it nice and tight! Next, spread out your coating (that last cup of cheddar, maybe some pecans?) and roll the cheese ball all over until it’s totally covered. Pop it onto plastic wrap. Now, for the shape: take your four pieces of kitchen twine, lay them out like a cross, center your ball on top, and bring the ends up to meet at the very top. Tie them loosely to create those ridges. Remember, darling, don’t tie it too tight, or the twine might stick when we take it off! We want those lovely pumpkin lines on our pumpkin cheese ball.

Chilling and Final Presentation of the pumpkin cheese ball
Wrap that shaped beauty up tightly in the plastic wrap and tuck it into the fridge for at least two hours, but honestly, up to two days ahead is perfect for Stress Free Entertaining! When you’re ready to serve, carefully remove the plastic wrap and gently snip or tear the twine away. You’ll see those gorgeous ridges!

For the final flourish, cut a small stem shape from your green bell pepper and pop it right on top. Boom! You now have the most adorable Pumpkin Centerpiece Food on the block. Feel free to dip into snacks like my famed cowboy butter dipping sauce recipe while you wait for guests!
Tips for Making Your pumpkin cheese ball a Crowd Pleasing Appetizer
Look, I know throwing a party during Holiday Entertaining season can feel like juggling flaming torches, but that’s why we lean on recipes that do the heavy lifting for us. This pumpkin cheese ball is definitely a heavy lifter! Since I’ve tested this so many times, I have a few quick tips to make sure it shines as the truly Crowd Pleasing Appetizer it is.
First, that make-ahead capability is worth repeating. You can confidently wrap this dish up tight and have it chilling in the fridge for up to two full days. Think about that! The day of the party, you just unwrap, snip, and pop in the stem. Total lifesaver!
If you want to spice things up just a touch for the adults, definitely consider the jalapeno trick. I sometimes fold in about a quarter cup of finely chopped pickled jalapenos right along with the cheddar. It gives the rich cheese base a wonderful, subtle kick that cuts through the decadence. The ranch seasoning already gives us a bit of tang, but the jalapeno adds that necessary surprise element that keeps people coming back for more.
Another little thing that helps with that final presentation? Before you put the final coating on the outside, you might want to lightly spray the kitchen twine with cooking spray first. Sometimes, if the cheese is really sticky, the twine can grab, making it a little hard to snip away. A little non-stick spray is a small trick that saves big headaches later. You can find more great recipe ideas over at Savory Orchard too! If soup is more your speed after appetizers, check out my easy creamy pumpkin soup recipe, or maybe try those incredible best breakfast potatoes later in the week!
Serving Suggestions for this Festive Party Food
Now that you have your stunning pumpkin cheese ball ready, the only question left is: what are we dipping with it? Since this is such a rich and savory base, you want items that offer a good crunch or a fresh snap. This makes it such an easy Festive Party Food to serve because the accompaniments are so accessible.
My go-to recommendation, which I mentioned in the steps, is a mix! Definitely set out some sturdy, plain crackers that won’t compete with the cheese flavor. Pretzels are fantastic for that salty crunch, and don’t forget the gorgeous color contrast you get by serving lovely piles of crisp, fresh vegetables like carrot sticks, celery, and maybe some sliced sweet bell peppers!
If you want to elevate things just a bit more, you should bookmark my recipe for crispy homemade cheese crackers recipe—they disappear in minutes when served next to this dip!
Storage and Reheating Instructions for Leftover pumpkin cheese ball
The best thing about making the pumpkin cheese ball ahead of time is that leftovers are practically nonexistent after most parties, but if you do manage to save some, storage is super easy!
Since this is a cold appetizer, you absolutely do not want to try reheating it—that is just asking for a melted mess! Just rewrap any leftover cheese ball tightly in plastic wrap or pop it into an airtight container. It stays delicious and holds its shape safely in the fridge for up to three or maybe four days.
My only real instruction is this: when you pull it out to serve the next day, give it about 15 to 20 minutes on the counter to lose that intense chill. Serving a cheese ball slightly softer than rock-hard makes it taste so much creamier. It’s the perfect little bite for a quick lunch treat alongside some of my graham cracker toffee later in the week!
Frequently Asked Questions about the pumpkin cheese ball
I get so many wonderful questions about this recipe after people try it out for their Thanksgiving Appetizer Idea spreads! It’s fantastic that you all are making this pumpkin cheese ball your star attraction. Here are answers to what I hear most often from readers looking to nail this Festive Party Food.
Can I skip the twine step when making this pumpkin cheese ball?
You definitely *can* skip the twine, but oh my goodness, I really hope you don’t! If you skip it, you just end up with a perfectly delicious, round Easy Cheese Ball, which is fine, but you lose the whole point of the festive centerpiece. The twine is how we press those gorgeous ridges into the surface, transforming it into that beloved Pumpkin Shaped Snack. It’s worth the extra 60 seconds, trust me!
What is the best way to soften cream cheese quickly?
I totally understand needing an emergency softening trick! The absolute best way, if you forgot to take it out ahead of time, is to unwrap the block of cream cheese and microwave it on 20% power—that’s ‘defrost’ on most microwaves—for about 10 to 15 seconds at a time. Check it after each burst. It softens gently without turning sloshy or oily, which is exactly what we need for a beautifully smooth dip base. You can find more great hosting tips over at Dishes by Harry!
Can I use Monterey Jack instead of cheddar in this Easy Cheese Ball?
That is a great question because we all love options for our Easy Cheese Ball! You absolutely *can* substitute Monterey Jack or even Colby Jack for the cheddar. However, I have to tell you, I stick with sharp cheddar because its strong, slightly tangy flavor really stands up better against the ranch and garlic seasonings. A milder cheese might get a little lost. If you try a swap, let me know how it goes; I’m always curious about new flavor combinations for this Savory Pumpkin Recipe!
If you are looking for a hearty main course after all these appetizers, you absolutely must try my easy cheesy meatloaf casserole recipe!
Estimated Nutritional Data for This Savory Cream Cheese Dip
Now, I always want to be totally upfront with you about everything, including the nutrition facts. Please keep in mind that since this amazing Savory Cream Cheese Dip is homemade and you can customize the coatings and amounts, these numbers are just great estimates based on the standard recipe I provided! They are here to help you plan, not to judge your party snacking!
If you are looking for a healthier fall treat, you should absolutely bookmark my recipe for easy pumpkin pie recipe—it’s wonderfully lighter! Now, here is the breakdown you asked for:
- Serving Size: 1/12 of ball
- Calories: 180
- Sugar: 1 g
- Sodium: 350 mg
- Fat: 16 g
- Saturated Fat: 10 g
- Unsaturated Fat: 6 g
- Trans Fat: 0.5 g
- Carbohydrates: 2 g
- Fiber: 0 g
- Protein: 8 g
- Cholesterol: 50 mg
As hard as I try to keep things perfectly accurate, these counts can shift depending on if you use a sharp or extra-sharp cheddar, or how thick you make your coating layer on this fantastic pumpkin cheese ball.

Enjoy every bite!
Share Your Autumn Party Ideas
Now that you have the blueprint for the most impressive, yet simple, pumpkin cheese ball on the block, I truly can’t wait to hear how it goes! When you make this for your next gathering, please come back here and give it a rating. Getting those five stars lets me know I’ve nailed another easy recipe for you all!
I absolutely adore hearing about your Autumn Party Ideas, too. Did you serve it next to a sweet potato dish? Tell me all about your favorite fall menu pairings in the comments below! If you snap a picture of your perfectly shaped pumpkin centerpiece, tag me on social media! Seeing my readers serving happiness is genuinely why I do this.
If you loved this savory adventure, you might really enjoy my recipe for sweet potato cobbler recipe next time you need something sweet for the table. And if you want to see another great take on this classic snack, check out the folks over at Number 2 Pencil!
PrintThe Ultimate Easy Make-Ahead Pumpkin Shaped Cheese Ball (Savory & Festive)

Make this visually impressive pumpkin cheese ball for your next fall gathering. It uses simple ingredients like cream cheese and cheddar, and you can prepare it ahead of time for stress-free entertaining.
- Prep Time: 20 min
- Cook Time: 0 min
- Total Time: 20 min
- Yield: 12 servings 1x
- Category: Appetizer
- Method: No Bake
- Cuisine: American
- Diet: Vegetarian
Ingredients
- 16 ounces cream cheese, softened
- 3 cups sharp cheddar cheese, finely shredded, divided
- 1/2 cup green onion, chopped
- 1 teaspoon ranch seasoning mix
- 1/4 teaspoon garlic powder
- 1/4 teaspoon onion powder
- 1/4 teaspoon smoked paprika (optional, for flavor)
- Kitchen twine
- 1 small green bell pepper
- Optional coating: extra shredded cheese, chopped pecans, or paprika
Instructions
- In a large bowl, combine the softened cream cheese, 2 cups of the shredded cheddar cheese, green onion, ranch seasoning, garlic powder, onion powder, and smoked paprika if using. Mix until completely smooth and well combined.
- Form the cheese mixture into a round ball shape.
- Place the remaining 1 cup of shredded cheese (or your chosen coating) on a large plate or piece of parchment paper. Roll the cheese ball in the coating until it is fully covered.
- Wrap the coated cheese ball tightly in plastic wrap.
- Take four pieces of kitchen twine, each about 12 inches long. Center the ball on the twine, bringing the ends together at the top. Tie the twine around the ball at even intervals to create the vertical ridges of a pumpkin shape. Do not tie too tightly, as the cheese may stick to the twine.
- Refrigerate the cheese ball for at least 2 hours, or up to 2 days ahead of time.
- Before serving, carefully remove the plastic wrap and gently cut the twine away from the cheese ball.
- Cut a small piece from the end of the green bell pepper to create a short stem shape. Insert the pepper piece into the top center of the cheese ball to resemble a pumpkin stem.
- Serve immediately with crackers, pretzels, or fresh vegetables.
Notes
- You can make this cheese ball up to two days in advance. Keep it wrapped tightly in the refrigerator until ready to serve.
- For a spicier kick, add 1/4 cup of finely chopped pickled jalapenos to the cheese mixture.
- If you are worried about the twine sticking, you can lightly spray the twine with cooking spray before wrapping the ball.
- This is a great make ahead appetizer for Thanksgiving.
Nutrition
- Serving Size: 1/12 of ball
- Calories: 180
- Sugar: 1
- Sodium: 350
- Fat: 16
- Saturated Fat: 10
- Unsaturated Fat: 6
- Trans Fat: 0.5
- Carbohydrates: 2
- Fiber: 0
- Protein: 8
- Cholesterol: 50