

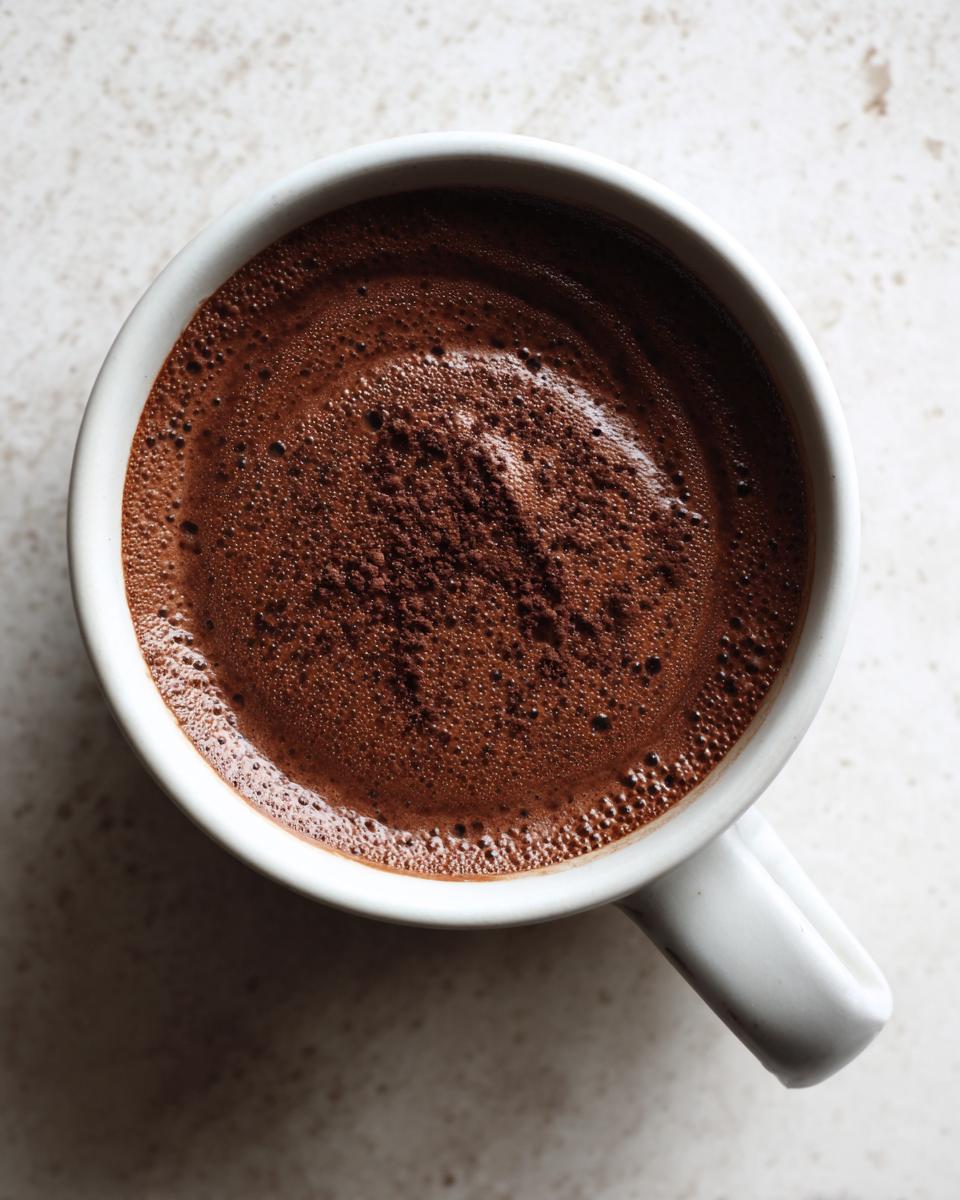
Oh, my friends, do you ever just get that deep, undeniable craving for something comforting, something velvety, something that instantly transports you back to childhood? When those moments hit, forget those weird boxed mixes that taste vaguely like dusty cocoa. I have the answer! I want to introduce you to my go-to chocolate pudding recipe. It’s rich, it’s spectacularly creamy, and the best part? We make it completely from scratch right on the stovetop. Here at Devour Dish, I promise you only the simplest, most trustworthy recipes, and this one is tested time and again to ensure you get that decadent, silky smooth dessert every single time. Get ready to swap out your usual takeout treat for this homemade winner!
- Why This Creamy Homemade Pudding is the Best Chocolate Pudding
- Ingredients for Perfect Chocolate Pudding From Scratch
- How to Make Stovetop Chocolate Pudding
- Tips for Success with Easy Chocolate Pudding
- Serving Suggestions for Your Rich Chocolate Dessert
- Storage and Reheating Instructions for Homemade Chocolate Pudding
- Frequently Asked Questions About Chocolate Pudding
- Nutritional Estimate for This Chocolate Pudding Recipe
- Share Your Creamy Homemade Pudding Experience
Why This Creamy Homemade Pudding is the Best Chocolate Pudding
If you’ve been relying on the powder packets, I’m here to gently tell you that you deserve so much better! This isn’t just another sweet bowl; this is the best chocolate pudding you’ll ever make. The texture is the real star—it’s a consistently silky smooth dessert because we cook it gently on the stove. Instant mixes just can’t replicate that depth or density, no matter how much you whisk them. If you love treats with deep chocolate flavor, this recipe is right up there with the chocolate eclair cake I shared in my archive.
By actually cooking the cornstarch and milk mixture, we unlock a guaranteed thickness that stays perfectly creamy, even after chilling. This simple stovetop chocolate pudding technique ensures you get an intensely rich chocolate dessert without any weird aftertaste. Trust me, once you try this, you won’t dare go back. It’s easy enough for any Tuesday, but special enough for company!
Quick Pudding Recipe Details
- **Prep Time:** 10 minutes
- **Cook Time:** 15 minutes
- **Total Time:** Only 25 minutes before chilling!
- **Yields:** 4 satisfying servings
Ingredients for Perfect Chocolate Pudding From Scratch
To get that incredible, restaurant-quality texture, we have to treat our ingredients right! Everything you need should already be hanging out in your pantry. Using a decent, unsweetened cocoa powder is critical here—it’s what gives us that deep, dark color we all crave in a chocolate pudding from scratch. If you need a quick, amazing drizzle later, check out my silky chocolate sauce recipe, but for this pudding, pure cocoa is the way to go!
Ingredient Notes and Substitutions for your Chocolate Pudding
I always recommend using whole milk because the fat content really helps keep this dessert creamy, but let’s talk upgrades! If you want something truly decadent—like a bordering-on-mousse texture—you can swap out half the milk for heavy cream. Seriously, try it once!
Also, don’t forget the secret weapon listed in the notes: if you happen to have semisweet chocolate on hand, feel free to melt in a quarter cup right at the end when you add the butter. That turns this easy chocolate pudding into a glorious double chocolate dessert. Amazing, right?
How to Make Stovetop Chocolate Pudding
Making this chocolate pudding from scratch is surprisingly straightforward, even though the results taste ultra-gourmet. The secret is staying present while it’s on the heat! First up, you need to whisk all your dry players—the cocoa, sugar, cornstarch, and salt—in a sturdy saucepan. Get those little clumps out now because it’s the key to avoiding lumps later.
Next, slowly pour in the milk while continuing to whisk until everything is beautifully combined. We’re going over medium heat now. As it heats up, you must stir constantly! Keep that whisk moving across the bottom and up the sides until it starts bubbling. Once it bubbles, let it cook for a full minute—we need to cook out that starchy flavor! Then, pull it off the heat for the next crucial step: tempering the egg yolks.
Never dump the hot liquid into raw yolks; they turn into scrambled eggs faster than you can blink! Take about half a cup of that hot pudding mixture and slowly drizzle it into the lightly whisked yolks while whisking the yolks vigorously the entire time. Once that’s incorporated, pour the yolk mixture back into the saucepan. Return it to very low heat and stir for just another minute or two until it thickens even more. Don’t let it boil again! Remove it, stir in the butter and vanilla, and then divide it into your serving dishes. Don’t forget this next part: press plastic wrap right down onto the surface of every single dish. This stops that awful skin from forming.
Achieving Silky Smooth Dessert Texture
The constant whisking throughout the cooking process is non-negotiable if you want that silky smooth dessert top layer. When the mixture first starts to thicken over medium heat, I always drop the heat down to low-medium. Why? Because if it gets too hot, the cornstarch grabs onto the bottom of the pan and scorches, and then you’ve got tiny burnt bits ruining your creamy homemade pudding!
My personal trick? I always use a flat-bottomed whisk and literally scrape the bottom of the pan every two or three seconds. You’ll feel the mixture go from thin liquid to something coat-the-back-of-a-spoon thick. That change in resistance tells you the magic is happening! If you see any steam rising too aggressively, just pull the pan off the heat for 30 seconds and keep whisking off the burner until it settles down.
Once everything is mixed and tempered, remember that final low heat cook after adding the yolks? It only takes a minute or so for the pudding to set up beautifully, signaling it’s done. If you’re looking for a truly indulgent dip recipe later, I have a great easy chocolate fondue recipe that uses similar base techniques!
Tips for Success with Easy Chocolate Pudding
We want this to remain the easiest, most reliable easy chocolate pudding you’ve ever made, so let’s talk about those crucial finishing steps. The biggest failure point after cooking is cooling it down. You absolutely must press plastic wrap directly onto the surface of the pudding in each dish. I mean, touch the surface! If you leave any air gap, you are inviting that rubbery skin to form, and nobody wants that grainy texture ruining their silky treat.
Also, be patient with the chilling time. While you are eager to dig in, leaving it for at least two hours is vital. If you try to rush it, it will be lukewarm and runny, not thick and scoopable. Constant stirring on the stove prevents scorching, and covering the surface in the fridge keeps it perfect. Follow those two rules, and you’ll see why I call this the best version ever!
Serving Suggestions for Your Rich Chocolate Dessert
Okay, now that we have this gorgeously rich chocolate pudding chilling perfectly, we have to talk about presentation! While digging directly into the bowl with a giant spoon is always my first move, this dessert looks amazing dressed up slightly. Since we made a purely homemade, velvety chocolate treat, let’s show it off!
The classic topping is, of course, a big dollop of fresh whipped cream. If you’re feeling ambitious, try making my light vanilla buttercream and swirl a little small bit on top—it’s unexpectedly delicious with the dark cocoa!
For something brighter, fresh raspberries or sliced strawberries really cut through that chocolate richness. And remember that note about layering? Try making a simple parfait! Alternate layers of this creamy homemade pudding with crushed Oreos or some crunchy granola for amazing texture contrast. It instantly turns into a visually stunning, yet still easy, treat!
Storage and Reheating Instructions for Homemade Chocolate Pudding
Honestly, the best way to enjoy this chocolate pudding is cold, right out of the fridge! Since we used eggs and didn’t use any weird stabilizers, it keeps beautifully for about four to five days when stored properly. And remember what I stressed earlier? You have to keep that plastic wrap pressed directly onto the surface of the pudding so that skin doesn’t creep in and ruin that silky texture.
If you find any leftovers after five days, that’s okay—it will still taste fine, but the texture might start getting a little more firm than perfectly velvety. I almost never reheat pudding because I love it cold, but if you absolutely must serve it warm, just scoop a portion into a microwave-safe dish and heat it gently for about 15 to 20 seconds, stirring halfway through until it loses its chill. It really is best enjoyed straight from the chill!
Frequently Asked Questions About Chocolate Pudding
Can I make this truly creamy homemade pudding vegan?
That’s a great question, since a lot of us explore different diets! You absolutely can adapt this recipe to be vegan, though it will change the texture slightly since we rely on egg yolks for richness. For a vegan version, skip the egg yolks entirely. To compensate for the lost richness and thinning from removing the yolks, I highly recommend going for the heavy cream substitution I mentioned, but use full-fat canned coconut milk instead of dairy cream. Also, make sure the butter is swapped for a quality vegan butter stick. Keep the cooking times the same, and you’ll have a lovely, rich, dairy-free treat!
What is the easiest way to prevent lumps in my stovetop chocolate pudding?
Lumps are the enemy of a silky smooth dessert! The number one tip to prevent them is how you mix the dry ingredients with the milk initially. Whisk your cocoa, sugar, cornstarch, and salt together until it looks like fine powder—no big clumps allowed! Then, pour in the milk *very slowly* (a half cup at a time) while you whisk constantly. This gets the cornstarch hydrated before it hits the heat, which prevents clumps!
Can I substitute the whole milk with something else?
Sure thing! If you aren’t using whole milk, you’ll want something with a decent fat content for the best texture. Skim milk works, but the results won’t be quite as decadent or thick, so you might need to add an extra teaspoon of cornstarch. Almond or oat milk are fine substitutes too, though they add a hint of their own flavor. If you want a deeper, richer taste that stands up to the cocoa, check out my recipe for Mexican Hot Chocolate for flavor inspiration!
How long should the pudding chill for the best texture?
This is where patience pays off for that perfect scoop! While you could eat it after an hour, it really won’t have set up properly. For the absolute best chocolate pudding consistency—thick, firm, and velvety—you need at least two hours in the fridge. I always aim for four if I can manage it, especially if I’m making it ahead of time for guests!
Nutritional Estimate for This Chocolate Pudding Recipe
I know many of you are balancing cravings with healthy choices, so I always like to give a little rundown of what goes into one serving of this homemade goodness. Remember, this is just an estimate based on the whole milk and standard ingredient amounts—baking is always a little variable, so treat these numbers as a great guideline, not gospel!
If you’re diving into this rich chocolate dessert, here’s what one serving (1/4 of the total batch) generally looks like:
- **Calories:** About 310
- **Sugar:** Around 35 grams (Yep, it’s a treat!)
- **Total Fat:** About 12 grams
- **Protein:** Around 7 grams
- **Carbohydrates:** Roughly 45 grams
This recipe also provides around 2 grams of fiber and about 85 mg of cholesterol, as we are using egg yolks, which give us that fantastic richness we love in a creamy homemade pudding.
A quick note from me: Because this is a truly homemade recipe, your actual numbers will shift slightly depending on the brand of milk or the type of butter you use. If you load it up with cream or extra chocolate, those numbers go up! But for an easy, weeknight fix, these are fantastic figures for something this satisfying.
Share Your Creamy Homemade Pudding Experience
That’s it! You’ve mastered the art of making truly decadent, silky smooth dessert right on your own stovetop. I really hope this recipe becomes your instant go-to for satisfying those serious chocolate cravings. It’s honestly my favorite easy weeknight dessert because it feels so luxurious for how little effort it takes to whip up this chocolate pudding from scratch.
Now, I need to hear from you! Did you try it? Was it as easy as I promised? I genuinely want to know what you thought. If you took a snap of your bowl—maybe you added homemade whipped cream or tried layering it in a tall glass—please tag me on social media! Seeing your successes is the best part of running Devour Dish.
If you loved this recipe and you’re ready for another incredible chocolate fix, you absolutely have to try my chocolate pudding cake next. It uses similar flavors but in a totally different, comforting baked form!
If you have a quick second, hit that star rating right here on the page—it really helps other folks find this fantastic easy chocolate pudding recipe. And please, leave a comment below telling me your favorite topping. Head over to check out Marisol’s take on a creamy version too, she has a great recipe over here! Happy scooping, everyone!
PrintEasy, Creamy Homemade Chocolate Pudding From Scratch

You can make rich, silky chocolate pudding on the stovetop using simple pantry ingredients. This easy recipe delivers a comforting dessert that tastes much better than store-bought mixes.
- Prep Time: 10 min
- Cook Time: 15 min
- Total Time: 25 min
- Yield: 4 servings 1x
- Category: Dessert
- Method: Stovetop Cooking
- Cuisine: American
- Diet: Vegetarian
Ingredients
- 1/4 cup unsweetened cocoa powder
- 1/2 cup granulated sugar
- 1/4 cup cornstarch
- 1/4 teaspoon salt
- 2 cups whole milk
- 2 large egg yolks
- 2 tablespoons unsalted butter
- 1 teaspoon vanilla extract
Instructions
- In a medium saucepan, whisk together the cocoa powder, sugar, cornstarch, and salt.
- Gradually whisk in the milk until the mixture is smooth and no lumps remain.
- Place the saucepan over medium heat. Cook, stirring constantly with a whisk, until the mixture thickens and begins to bubble. This takes about 5 to 8 minutes.
- Once boiling, continue to cook and whisk for 1 minute to cook out the cornstarch flavor. Remove the pan from the heat.
- In a small bowl, whisk the egg yolks lightly. Temper the yolks by slowly whisking about 1/2 cup of the hot pudding mixture into the yolks.
- Pour the tempered yolk mixture back into the saucepan with the remaining pudding. Return the pan to low heat. Cook, stirring constantly, for 1 to 2 minutes until the pudding is thick. Do not let it boil after adding the yolks.
- Remove the pudding from the heat. Stir in the butter and vanilla extract until smooth.
- Pour the pudding into individual serving dishes or a single bowl. Press plastic wrap directly onto the surface of the pudding to prevent a skin from forming.
- Chill in the refrigerator for at least 2 hours, or until completely cold and set. Serve this velvety chocolate treat cold.
Notes
- For an extra rich flavor, substitute 1/2 cup of the milk with heavy cream.
- If you want a double chocolate dessert, stir in 1/4 cup of finely chopped semisweet chocolate after removing the pudding from the heat.
- This stovetop chocolate pudding is a fantastic base for layering in parfaits.
Nutrition
- Serving Size: 1 serving
- Calories: 310
- Sugar: 35
- Sodium: 150
- Fat: 12
- Saturated Fat: 7
- Unsaturated Fat: 5
- Trans Fat: 0
- Carbohydrates: 45
- Fiber: 2
- Protein: 7
- Cholesterol: 85