

When the air gets that familiar crisp snap and the leaves start turning those unbelievable shades of red and gold, you know it’s time for seriously comforting fall treats, right? For me, nothing says autumn perfection like a warm, gloriously messy apple fritter. Forget those sad, dense bakery versions; I’ve spent years testing batters—frying, baking, you name it—to nail down the absolute best Easy Homemade Apple Fritters. This recipe delivers that signature combination: a perfectly crispy, golden exterior that shatters just a little, hiding a wonderfully tender, spice-flecked interior. Trust me, keeping it simple is the secret to making these feel like an everyday indulgence instead of a huge project. Speaking of simple, if you ever need a quick crowd-pleaser for your next gathering, you have to check out how easy it is to make homemade onion dip from scratch!
- Why This is the Best Apple Fritter Recipe You Will Make
- Gathering Ingredients for Your Homemade Apple Fritters
- Step-by-Step Instructions for Classic Apple Fritters
- Tips for Achieving the Ultimate Apple Fritter
- Popular Variations: Baked Apple Fritters and Apple Fritter Bites
- Serving Suggestions for Your Warm Apple Treats
- Storage and Reheating Instructions for Apple Fritters
- Frequently Asked Questions About Making Apple Fritters
- Nutritional Snapshot of This Apple Fritter Recipe
Why This is the Best Apple Fritter Recipe You Will Make
I know you’ve seen a thousand recipes promising the world, but this one is different. We took the classic approach—the one that gives you that doughnut shop feel—and tightened up the process so you aren’t stuck in the kitchen all morning. We tested this method over and over to ensure maximum flavor payoff for minimum effort. If you love crispy potatoes as much as you love fritters, you should definitely check out my method for crispy oven-roasted potatoes!

Perfect Texture: Crispy Apple Fritters Every Time
The main goal here is texture, right? We want that satisfying crunch on the outside, immediately followed by a soft, fluffy interior studded with tender apple chunks. Achieving those incredible Crispy Apple Fritters is all about temperature control when frying. Keep that oil steady around 365°F, and those little pockets of batter will puff up beautifully golden instead of getting soggy.
Quick Prep for Easy Apple Fritters
This is what Devour Dish is all about—real-life cooking! We’re looking at about 15 minutes of prep and 15 minutes of cooking time. That means you can serve up these incredible Easy Apple Fritters as a weekend breakfast treat with less than 30 minutes from start to finish. And don’t even get me started on the apples; I insist on using firm, slightly tart varieties like Honeycrisp or Granny Smith because they hold up to the heat without turning to mush.
Gathering Ingredients for Your Homemade Apple Fritters
Alright, now for the fun part! Gathering everything up for these Homemade Apple Fritters is super straightforward. I highly recommend laying everything out (my mom called this ‘mise en place,’ but I just call it keeping things sane during frying). The quality of your apples really matters here, so grab something firm that holds its shape. If you need a quick, simple dip for later, remember my recipe for easy homemade onion dip!
For the Apple Fritter Batter
This is the core of the treat, just a few pantry staples mixed up to create that perfect fluffy shell:
- 2 large apples (we love using Honeycrisp or Granny Smith), peeled, cored, and diced small—make sure those pieces are uniform so they cook evenly!
- 1 3/4 cups all-purpose flour
- 2 teaspoons baking powder
- 1/2 teaspoon salt
- 1/2 teaspoon ground cinnamon
- 1/4 teaspoon ground nutmeg
- 1/4 cup granulated sugar
- 1 large egg, lightly beaten (just give it a quick whisk before adding it!)
- 3/4 cup milk
- 1 teaspoon vanilla extract
- Vegetable oil, for frying (you need about 2 inches deep in your pot)
For the Cinnamon-Vanilla Glaze Ideas
This glaze sets up perfectly shiny and sweet, giving us those professional-looking Apple Fritter Glaze Ideas. You want this smooth, but thick enough to cling to the fritter—aim for a consistency slightly thicker than heavy cream.
- 1 cup powdered sugar
- 2 tablespoons milk or cream (add slowly!)
- 1/2 teaspoon vanilla extract
- 1/4 teaspoon ground cinnamon
Step-by-Step Instructions for Classic Apple Fritters
Putting these fritters together is straightforward, but there are a couple of tiny moments where you need to pay attention—especially when dealing with the batter. Don’t worry if you don’t have a deep-fryer; a heavy-bottomed pot works perfectly fine if you have a reliable thermometer. Because we want amazing flavor without greasy results, monitoring the oil temperature is non-negotiable. If you’re looking for another great sauce recipe for dipping later, my cowboy butter dipping sauce is fantastic anytime!
Mixing the Batter and Preparing the Apples
First things first, get those beauties prepped! Peel, core, and dice your apples into nice, small, even pieces like we talked about earlier. Now, for the dry ingredients—whisk the flour, leavening, spices, and sugar together well in a big bowl. In a separate spot, just mix the milk, egg, and vanilla. When you combine them, please listen to me: stir gently! You pour the wet into the dry and fold until everything is *just* incorporated. I mean it—a few streaks of dry flour are totally fine! Overmixing develops gluten, and we absolutely do not want tough fritters. Fold those prepared apples in last, gently, making sure they get coated.
Frying Your Apple Fritter to Golden Perfection
This is where the magic happens! Pour your oil deep into your pot—about two inches worth. We are tracking for a solid 365 degrees Fahrenheit. You absolutely need a thermometer here; if the oil is too cool, your Glazed Apple Fritters soak up oil and get heavy. Once it hits that temp, carefully drop tablespoonfuls of batter in. Don’t overcrowd the pot! If you cram too many in, the oil temperature plummets instantly. Let them bubble away for about two to three minutes on the first side until they look deeply golden, then flip and repeat. Scoop them right out onto paper-towel-lined racks!
Applying the Glazed Apple Fritters Finish
While those golden beauties are cooling just a touch on the rack, whip up that glaze. It’s just powdered sugar, milk, vanilla, and cinnamon whisked until smooth. If it seems too stiff and won’t drizzle easily, just add milk, one tiny teaspoon at a time until it flows nicely but still clings to the back of a spoon. Dip your warm, but not sizzling hot, fritters right into the glaze, or just use a fork to drizzle it all over them. Let them sit for a minute so that beautiful cinnamon-vanilla coating sets up, and you are done!
Tips for Achieving the Ultimate Apple Fritter
We’ve got the perfect recipe, but sometimes tiny details make the difference between a good treat and the absolute *best* one. Think of these tips as the little secrets I discovered after way too many batches that didn’t turn out quite right! Mastering these few points guarantees you get those gorgeous, perfectly Glazed Apple Fritters every single time you make them.

First, remember my firm rule: oil temperature is everything. If the oil is running cool (below 360°F), the fritters will start drinking it up instead of crisping, which is how you get a greasy mess. You want that happy, steady 365°F.
Also, if you’re using a recipe that calls for things like raisins or nuts (mine skips them for simplicity!), always soak them first in warm water or even a little rum if you’re feeling fancy! This stops them from stealing moisture from your lovely batter while they bake.
And finally, if you want to try something decadent sometime, these fritters are amazing when chased with a slice of easy salted caramel cheesecake!
Popular Variations: Baked Apple Fritters and Apple Fritter Bites
I know we are focusing on the classic deep-fried version because, let’s be honest, that’s where the texture crunch lives. But because I want everyone to enjoy these cozy treats—even if you’re trying to avoid frying right now—I’ve tested out some popular alternatives! Sometimes you just need a faster, slightly cleaner option, which is why so many people look for Baked Apple Fritters.
If you want to bake them, it’s a super simple switch. Take that same batter you mixed up, drop spoonfuls onto a baking sheet lined with good parchment paper (don’t skip the paper!), and pop them into a 375°F oven. They usually take about 15 to 18 minutes. They won’t get quite as aggressively crispy as the fried ones, but they are wonderfully tender and still soak up that glaze beautifully!
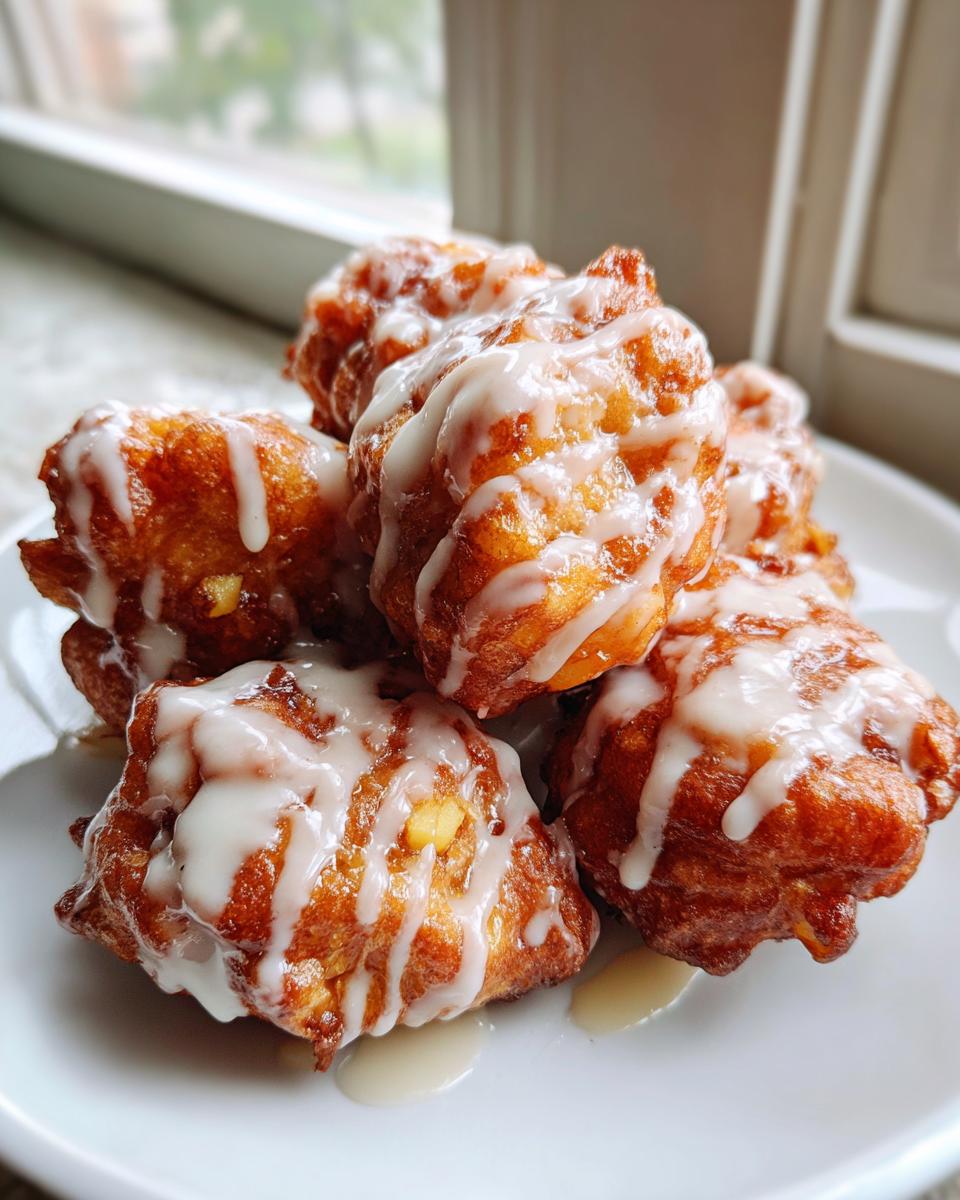
Then there are the legendary Apple Fritter Bites. Oh my gosh, these little guys are dangerously easy to snack on. To make them, you just use a small spoon or a mini ice cream scoop to drop the batter into the oil—which will make them cook even faster! Because they are half the size of a regular fritter, they only need about a minute and a half per side to get golden. I warn you though: they are absolutely addictive, especially when drizzled with that cinnamon-vanilla glaze. They pair perfectly with a warm slice of apple bread pudding if you’re feeling ambitious!
Serving Suggestions for Your Warm Apple Treats
Once these gorgeous, sweet pockets of apple goodness are glazed and ready, the hardest part is waiting for them to cool down just enough to eat! I really believe that the experience surrounding these Warm Apple Treats is half the fun. Nothing beats pulling one of these hot, gooey fritters right off the rack with your morning coffee or tea. Seriously, a piping hot cup of strong coffee cuts through the sweetness perfectly, balancing everything out.

If you’re serving these for dessert, you simply must grab a scoop of vanilla bean ice cream. The contrast between the warm, spicy apple and the cold, creamy vanilla is just heavenly. And when the ice cream melts into that extra cinnamon glaze pooling underneath? Forget about it! For something lighter, try a big glass of my favorite easy homemade lemonade for a bright, tart contrast.
Storage and Reheating Instructions for Apple Fritters
So, you made too many (which, let’s be real, is my usual goal anyway!). You absolutely should try to eat these the day you make them because that initial frying crispness is unmatched. But if you have leftovers, don’t stress! We can save these delights for another day. When it comes to storing these Glazed Apple Fritters, I have a major warning:
Try your best not to store them in an airtight container right away, especially if you used a thick glaze. That moisture gets trapped underneath, and you lose all the lovely crunch we worked so hard to achieve. If you have to store them, place a paper towel in the bottom of a container, layer the fritters loosely, and cover them mostly loosely.
They usually stay perfectly soft and tasty at room temperature for a good 2 days. If you’re worried about them lasting longer, they actually freeze really well—just make sure they are completely cooled first! When you’re ready to eat the batch you saved, you’ve got to bring back that crunch. Forget the microwave; it tries to turn everything soft and chewy!
Instead, spread the leftover fritters out on a wire rack or a baking sheet. Pop them into a 350°F oven for about five to seven minutes. This little blast of dry, hot air warms them up beautifully and helps crisp up that exterior again. Then, of course, you can drizzle them with a quick, fresh batch of that moist strawberry bread glaze if they lost too much shine!
Frequently Asked Questions About Making Apple Fritters
I always get a few questions about the tricky bits when folks try their first batch of apple fritters! Don’t worry about a thing; these are common growing pains in the kitchen. I cover the most popular queries right here so your results are always amazing.
Which apples are truly the best for these fritters?
If you want amazing texture, stick to apples that hold their shape when cooked. My absolute go-to combination for the absolute Best Apple Fritter Recipe involves one tart apple and one sweet one. Granny Smith is fantastic because it maintains a nice bite, and Honeycrisp adds that perfect sweetness without breaking down entirely. Avoid soft, mealy apples, or you’ll end up with apple mush instead of lovely chunks!
Can I use applesauce instead of dicing fresh apples?
Oh, that’s a tempting shortcut! But no, you really can’t substitute applesauce for the diced fresh apples in this recipe. The whole point of this recipe is having those distinct, tender apple pockets throughout the fritter. Applesauce just adds moisture to the batter—it doesn’t give you that essential structure or chewiness. If you happen to have leftover cooked apples, you could fold those in, but for the best Homemade Apple Fritters, dice them fresh. For a different type of apple flavor, check out my recipe for easy homemade applesauce!
My last batch of fritters came out greasy. What went wrong?
This is usually the number one complaint about frying, and it almost always comes back to one thing: your oil temperature! If the oil isn’t hot enough—and I mean a steady 365°F—the batter sits there too long, soaking up the fat instead of instantly sealing up and puffing up. If the oil starts sputtering a lot when you first drop the batter, it’s too hot. But if the bubbling seems lazy, it’s too cool. Keep that thermometer handy; it’s your best friend for non-greasy, Crispy Apple Fritters.
I saw ‘Amish Apple Fritter Bread’ online. Can I adapt this?
That’s a popular one! Yes, you absolutely can adapt this recipe to bake an Apple Fritter Bread, though it won’t have the same deep-fried crunch. If you want to try that route, I recommend using the baking instructions from my notes section—pour the batter into a greased loaf pan and bake it at 375°F until a toothpick comes out clean (usually 45-55 minutes, depending on the depth of your pan). Just like the baked fritters, it will be incredibly tender and great with a glaze!
Nutritional Snapshot of This Apple Fritter Recipe
I always get asked about the numbers, and while I focus most on flavor and feel because we’re eating these for joy, not for a science project, I want to give you a good baseline! Remember, since we are frying these treats, the values are going to be higher than if you chose the baked alternative. These numbers are estimates, calculated based on the specific ingredients listed above, yielding about 18 fritters.
Think of this as a helpful guide for enjoying your sweet snack responsibly! If you’re comparing this to store-bought versions, you’ll be happy to know our Homemade Apple Fritters use whole ingredients, which is always a win in my book.
- Serving Size: 1 fritter
- Calories: 250
- Sugar: 18g
- Fat: 14g (Mostly from the frying oil)
- Carbohydrates: 30g
- Protein: 3g
- Sodium: 180mg
This is definitely more of a treat than an everyday breakfast item, but boy, is it worth it when you’re craving something truly special! Eat one—you deserve it!
PrintEasy Homemade Apple Fritters with Cinnamon-Vanilla Glaze

You can make these easy homemade apple fritters quickly. They are crispy on the outside, tender inside, and covered in a sweet cinnamon-vanilla glaze. This recipe is perfect for breakfast, a snack, or a simple fall dessert.
- Prep Time: 15 min
- Cook Time: 15 min
- Total Time: 30 min
- Yield: About 18 fritters 1x
- Category: Dessert
- Method: Frying
- Cuisine: American
- Diet: Vegetarian
Ingredients
- 2 large apples (like Honeycrisp or Granny Smith), peeled, cored, and diced small
- 1 3/4 cups all-purpose flour
- 2 teaspoons baking powder
- 1/2 teaspoon salt
- 1/2 teaspoon ground cinnamon
- 1/4 teaspoon ground nutmeg
- 1/4 cup granulated sugar
- 1 large egg, lightly beaten
- 3/4 cup milk
- 1 teaspoon vanilla extract
- Vegetable oil, for frying
- Cinnamon-Vanilla Glaze:
- 1 cup powdered sugar
- 2 tablespoons milk or cream
- 1/2 teaspoon vanilla extract
- 1/4 teaspoon ground cinnamon
Instructions
- Prepare the apples: Peel, core, and dice your apples into small, uniform pieces. Set aside.
- Mix dry ingredients: In a large bowl, whisk together the flour, baking powder, salt, cinnamon, nutmeg, and granulated sugar.
- Combine wet ingredients: In a separate medium bowl, whisk the egg, milk, and vanilla extract until combined.
- Make the batter: Pour the wet ingredients into the dry ingredients. Stir gently until just combined. Do not overmix; a few lumps are fine.
- Fold in apples: Gently fold the diced apples into the batter.
- Heat the oil: Pour vegetable oil into a deep, heavy-bottomed pot or Dutch oven to a depth of about 2 inches. Heat the oil to 365 degrees Fahrenheit (185 degrees Celsius). Use a thermometer to check the temperature.
- Fry the fritters: Carefully drop rounded tablespoons of batter into the hot oil, working in small batches to avoid crowding the pot. Fry for 2 to 3 minutes per side, turning once, until they are golden brown and cooked through.
- Drain: Use a slotted spoon to remove the fritters from the oil. Place them on a wire rack lined with paper towels to drain excess oil.
- Make the glaze: While the fritters cool slightly, whisk together the powdered sugar, milk, vanilla extract, and cinnamon in a small bowl until smooth. Add more milk, one teaspoon at a time, if the glaze is too thick.
- Glaze the fritters: Dip or drizzle the warm fritters generously with the cinnamon-vanilla glaze. Let the glaze set before serving.
Notes
- For crispier fritters, ensure your oil temperature stays steady at 365 degrees Fahrenheit. If the oil is too cool, the fritters will absorb too much oil and become greasy.
- If you prefer baked apple fritters, you can mix the batter, fold in the apples, and drop spoonfuls onto a parchment-lined baking sheet. Bake at 375 degrees Fahrenheit for 15-18 minutes, then glaze.
- You can substitute the vanilla glaze with a simple apple cider glaze by using 1/4 cup of apple cider instead of milk in the glaze mixture.
Nutrition
- Serving Size: 1 fritter
- Calories: 250
- Sugar: 18
- Sodium: 180
- Fat: 14
- Saturated Fat: 3
- Unsaturated Fat: 11
- Trans Fat: 0
- Carbohydrates: 30
- Fiber: 1
- Protein: 3
- Cholesterol: 25