
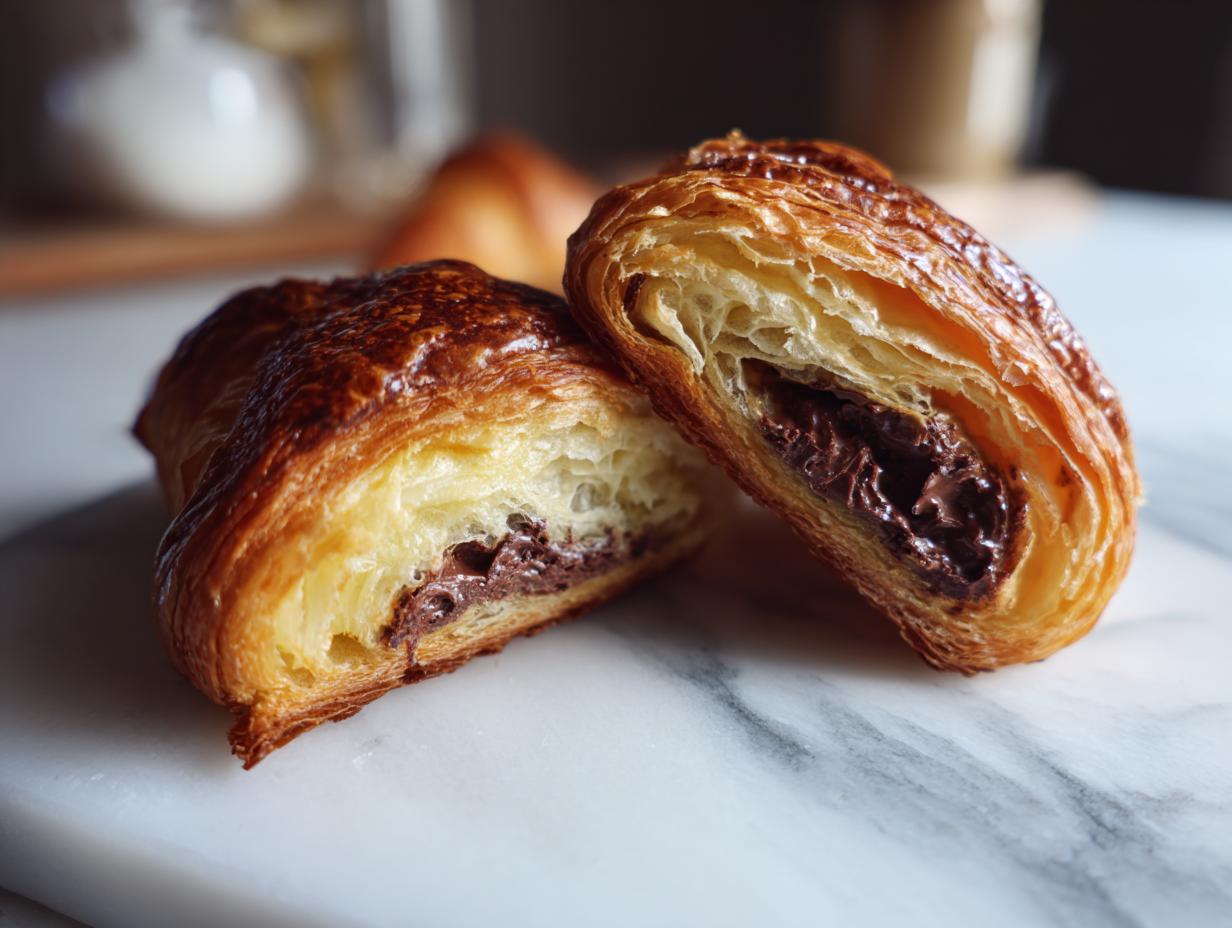
Doesn’t the thought of stepping out your door and smelling freshly baked, buttery pastries just fill you with happiness? I hear you! For the longest time, I thought achieving those perfectly flaky chocolate croissant layers meant spending an entire weekend folding butter into dough. Nope! Here at Devour Dish, we believe that truly delicious food—the kind that makes you smile—should be simple and accessible for your modern American kitchen. That’s why this recipe skips all the fuss by using high-quality store-bought puff pastry to deliver that indulgent, bakery-quality chocolate croissant right when you need it. Trust me, as Avery Collins, I test every recipe (just like we detail on our About page!) to ensure it’s reliable every single time.
- Why This Easy Chocolate Croissant Recipe Works (Our Tested Approach)
- Ingredients for Perfect Puff Pastry Chocolate Croissants
- Step-by-Step Instructions for Homemade Pain au Chocolat
- Expert Tips for the Best Chocolate Croissant Texture
- Variations on the Classic Chocolate Croissant
- Serving Suggestions for Your Easy Chocolate Croissants Recipe
- Storage and Reheating for Maximum Freshness
- Frequently Asked Questions About Chocolate Croissant Baking
- Nutritional Estimates for Your Pastry
- Share Your Flaky Creations
Why This Easy Chocolate Croissant Recipe Works (Our Tested Approach)
I get it; you want those beautiful, shatteringly **flaky chocolate croissants**, but life is busy! That’s the main reason I love this method so much. By using excellent store-bought puff pastry, we completely skip the intimidating, multi-day process of traditional lamination. We’re talking about getting **bakery quality croissants at home** without the commitment. This recipe is reliable, folks, which is the heart of what we do here at Devour Dish.
Achieving Flaky Layers with Store-Bought Puff Pastry
When I say skip the lamination, I mean truly skip it! The secret weapon here is grabbing a package of high-quality, all-butter puff pastry. Since the butter layers are already perfectly incorporated, you get all the gorgeous, flaky success when it bakes. It keeps the process simple while still letting you create those truly **indulgent breakfast pastries** we all crave. Honestly, it streamlines the whole French pastry adventure!
Timesaving Tips for Quick Chocolate Croissants
If you need an impressive **sweet morning treat** fast, this recipe is your hero. The total hands-on time is tiny. You’re looking at just about 15 minutes of prep time, and then 20 minutes tucked away in the oven. That means these **quick chocolate croissants** are ready fast! It’s truly a nearly **30 minute chocolate croissants** magic trick, perfect for weekend brunch surprises.
Ingredients for Perfect Puff Pastry Chocolate Croissants
Okay, let’s talk what you need, because having everything ready to go is half the battle! I stick to the exact measurements because when you’re leaning on store-bought dough, precision in the filling and wash really matters. This list is short, which I adore. You won’t need some weird specialty item that ends up sitting in your pantry for two years!
- One package (14.1 ounces) of all-butter puff pastry. Make sure it’s fully thawed, not partially frozen, when you get started.
- Four ounces of really good bittersweet or semi-sweet chocolate. You need to cut this into sticks, or grab those handy chocolate batons if you see them!
- One large egg, which we will use to make the egg wash.
- Just one tablespoon of water; this gets mixed right in with that egg.
- One teaspoon of regular granulated sugar—this is optional, but I like to sprinkle it on top for that extra little crunch.
Step-by-Step Instructions for Homemade Pain au Chocolat
Alright, get ready to channel your inner baker because putting these **homemade pain au chocolat** together is genuinely fun, not frustrating! We’re moving fast, so make sure your oven is ready to go. This is where the magic happens, turning that cold, flat pastry into gorgeous, puffed-up treats brimming with melted chocolate. Have your baking sheets lined with parchment paper before you even touch the dough; cleanup is so much easier that way!
Preparing the Pastry and Oven Setup
First things first: thaw that pastry! Follow the package directions—usually, I pull mine out the night before, but if you forget, 40 minutes on the counter usually does the trick. While that’s softening up, preheat your oven to 400°F (200°C). Get those baking sheets ready with parchment paper right away. This keeps the pastry from sticking, and trust me, you won’t want any beautiful, flaky bits getting left behind!
Assembling Your Chocolate Filled Pastry
Once the pastry is ready, unfold it gently onto a lightly floured surface. If it feels bulky, just roll it out a tiny bit more so it’s easier to handle. Now, slice each sheet lengthwise into three even rectangles so you should end up with six pieces total. Take one of your chocolate sticks and lay it near the short end of a rectangle. Roll it over that chocolate once, then place your second stick right where the edge lands, and finish rolling tight. Keep rolling until the entire piece is shaped like a little crescent. Repeat!

Egg Wash and Baking for Golden Finish
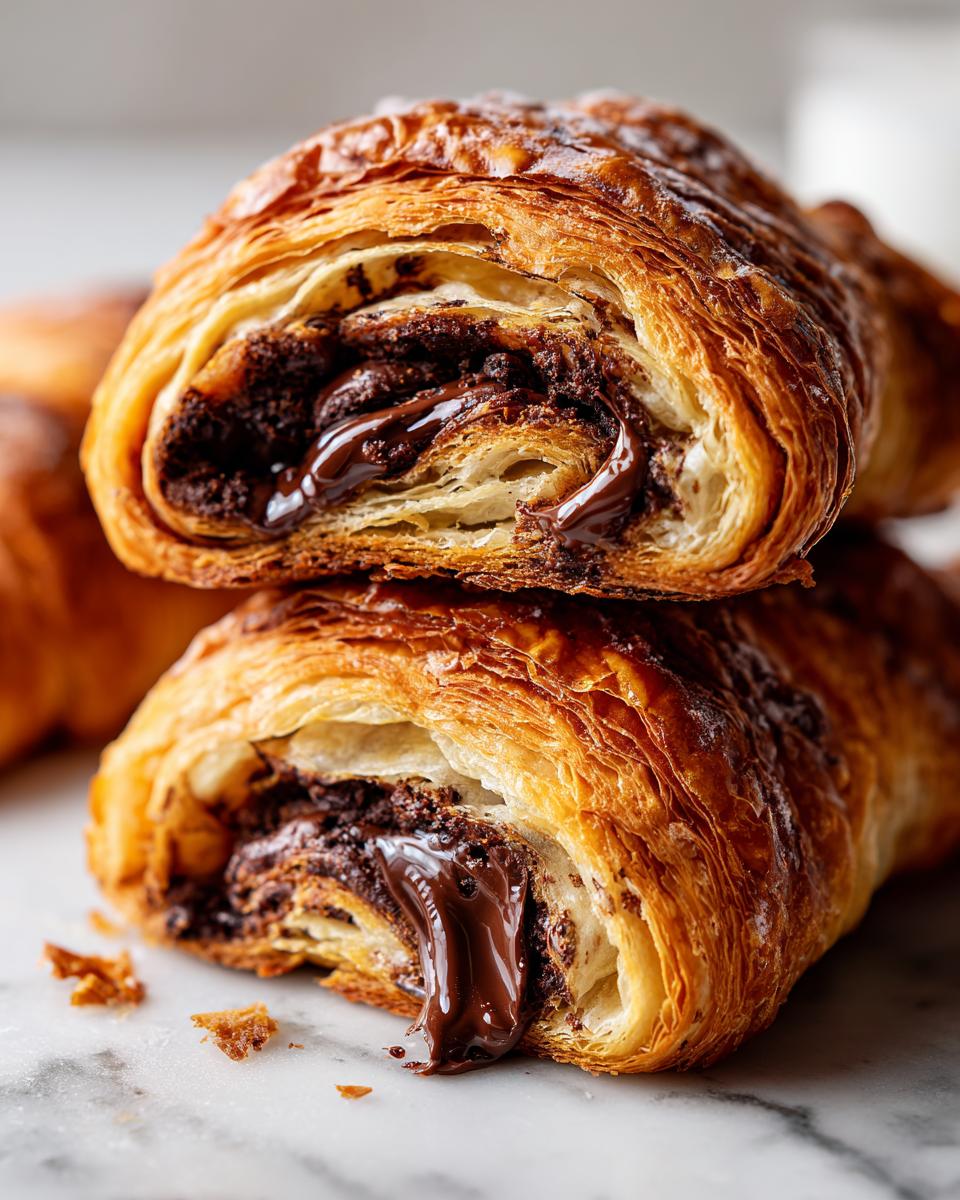
Once all your little pastries are rolled, place them seam-side down on that prepared baking sheet, leaving a few inches between each one because they puff up! For that incredible golden sheen, you need an egg wash. Just whisk that one egg with the tablespoon of water until totally combined, and brush *every* surface generously. If you like that little spark of crunch, sprinkle on a teensy bit of sugar. Pop them into the 400°F oven and bake them for 15 to 20 minutes until they look perfectly golden brown and super flaky. Remember to check out this French Toast Casserole Recipe for more indulgent breakfast ideas!
Expert Tips for the Best Chocolate Croissant Texture
Okay, we’ve got the easy part down, but if you want that *real* bakery satisfaction, you need these little secrets that push these pastries over the edge. Building that beautiful, **buttery chocolate pastry** is all about respecting the cold in puff pastry. I promise, following this small extra step makes the difference between good and truly amazing.
The Importance of Chilling Before Baking
This is a tip I learned trying to rush things way too fast! Right after you roll up your **chocolate filled pastry** and place it on the sheet, pop the whole tray into the fridge for about 15 minutes. Seriously, don’t skip this! Chilling sets the butter in the puff pastry layers right before it hits the hot oven. When the cold butter hits the heat, it creates steam rapidly, resulting in those gorgeous, high, flaky layers we are hunting for. It helps keep their shape too!
Choosing the Right Chocolate for Your Buttery Chocolate Pastry
While the recipe calls for sticks, you absolutely can use chocolate chips if that’s what you have on hand. But here’s a little something extra I’ve noticed: chocolate batons or high-quality chopped bars melt so much cleaner and stay more centered. If you use chips, try lining them up in a row instead of dumping them. Also, go for bittersweet chocolate; the slight edge of darkness really balances out the sweetness of the buttery pastry dough. For more deep-dive baking knowledge, check out my thoughts on my artisan bread process—it’s all about respecting the dough!
If you want more insight into achieving that perfect flaky texture, I always reference wonderful bakers like Hannah when I’m optimizing my own techniques. You can see her approach for inspiration here. Happy baking!
Variations on the Classic Chocolate Croissant
I know the base recipe is fantastic, but that doesn’t mean we can’t play around a little bit! Since we are using **puff pastry chocolate croissants**, we don’t have to worry about messing up real lamination, so feel free to experiment with easy twists. These adjustments are perfect for when you want to serve something slightly different but still need that quick turnaround time. We keep things simple here; no need to suddenly learn whole new baking techniques!
Adding Flavor to Your Sweet Morning Treats
Want to elevate your **indulgent breakfast pastries** just a touch? Try adding a tiny pinch of ground cinnamon to your egg wash when you brush the tops. It gives the pastry a wonderfully warm background note that goes perfectly with the chocolate. Another super simple trick? After brushing on the wash but before baking, sprinkle a tiny bit of flaky sea salt right over the top. That little salty crunch cuts through the richness beautifully and makes them taste even more fancy!

If you’re looking for other easy ways to make breakfast shine without a huge time commitment, you absolutely have to check out my recipe for Bakery-Style Flaky Blueberry Scones. They hit that same flavor jackpot!
Serving Suggestions for Your Easy Chocolate Croissants Recipe
These **easy chocolate croissants recipe** creations are honestly perfect all on their own—warm, buttery, and dripping with chocolate! But if you’re making these **indulgent breakfast pastries** for brunch, you’ve got to pair them up right. My go-to is a strong, rich cup of coffee; the bitterness plays so nicely against the sweetness. If you’re feeling extra cozy, try making up a batch of my Rich, Creamy Homemade Hot Chocolate for dipping! A side of fresh raspberries or sliced oranges adds a lovely, bright contrast to all that richness, too.
Storage and Reheating for Maximum Freshness
Now, let’s be real, the hardest part about making these **puff pastry chocolate croissants** is trying not to eat all six immediately! If, by some miracle, you have any leftovers, you need to treat them right so they taste almost freshly baked the next day. You can store them totally fine at room temperature, but you have to keep them airtight. A simple zip-top bag works perfectly. Just make sure they are completely cool before you seal them up; trapping moisture in when they are warm is how you lose that beautiful flakiness!
If you need to keep them for longer—say, up to a month—freezing is the way to go. Just make sure they are wrapped up super tightly in plastic wrap first, and then tuck them into a freezer-safe bag. Don’t worry about the egg wash; they freeze beautifully un-washed, too!
The reheating trick is the most important part! You absolutely cannot microwave these; that just turns them straight into soggy disappointment. To bring back that buttery chocolate pastry glory, you need dry heat. Pop them directly onto a baking sheet (no need to thaw if wrapped well) and put them in a 325°F oven for about 5 to 7 minutes. This gentle heat re-crisps the outside layers and melts that chocolate center perfectly. When they come out, they seriously taste like they just came out of the oven this morning!
Frequently Asked Questions About Chocolate Croissant Baking
I know you might still have a couple of burning questions, especially when you’re trying out a new pastry recipe! That’s what FAQs are for. We want you to feel 100% confident when you pull these out of the oven, so let’s clear up the last few things about getting those perfect **flaky chocolate croissants**.
Can I make these chocolate croissants completely from scratch?
That is a huge question! Yes, you absolutely *can* make them completely from scratch, and those **French pastry recipes** are stunning when done right. However, making traditional, laminated dough takes serious time—often two days of chilling and folding. The whole point of this guide is to give you that amazing **buttery chocolate pastry** flavor and texture in under 40 minutes using pre-made shortcuts. If you’re looking for a weekend project, go for scratch! But for a weeknight win or a quick brunch saver, stick with the puff pastry method—it’s our little secret for getting speedy results without sacrificing flavor.
What is the best way to freeze uncooked chocolate croissant dough?
This is such a smart idea for future **sweet morning treats**! You can absolutely freeze these before they get their final golden finish. Assemble every single step right up to the egg wash. Roll them up, place them seam-side down on a baking sheet lined with parchment paper, and pop that whole tray into the freezer until they are rock hard—about an hour. Once they are fully frozen or solid, transfer them to a heavy-duty zip-top freezer bag. You can store them like this for a month or more! When you’re ready to bake, just pull them out, let them thaw on the counter for maybe 30 minutes, brush with the egg wash, and bake them slightly longer since they start out colder than room temperature.
If you want to learn more about baking in general on the weekends, I always share my favorite brunch ideas over on my Brunch page!
If you’re curious about different methods for achieving flakiness, this guide on making flaky perfection at home might inspire your next baking attempt!
Nutritional Estimates for Your Pastry
I always like to include a little estimation of what you’re putting into your body when you dive into these **indulgent breakfast pastries**. Just remember, these numbers are based on the standard ingredients listed—things like the exact fat content in your puff pastry or the percentage of cacao in your chocolate can swing these numbers a bit. This is the Devour Dish promise: we test, we taste, and we give you the best snapshot we can! This is just for reference, so don’t let it stop you from grabbing that second **buttery chocolate pastry**!
- Serving Size: One glorious croissant
- Calories: About 350
- Sugar: Approximately 10g
- Total Fat: Around 22g (Where all that buttery flavor comes from!)
- Carbohydrates: Roughly 30g
- Protein: About 5g
- Sodium: Around 250mg
Remember, these are just estimates based on using standard, good-quality ingredients. If you use a super high-fat puff pastry or load up on extra sugar, your numbers will shift. Bake with joy, and don’t sweat the small stuff!
Share Your Flaky Creations
Now that your kitchen smells incredible and you have a tray of perfect, golden **chocolate croissants** cooling down, I absolutely—and I mean absolutely—need to see what you made! That’s the fun part of sharing these **easy chocolate croissants recipe** secrets with you. When you nail that flakiness, you have to brag a little, right? It helps me, Avery, know that the recipe works just as reliably in your kitchen as it does in mine.
When you finish, please take a quick second to leave a star rating right here on the recipe card—it helps other bakers know they can trust this quick method for **indulgent breakfast pastries**. Don’t hesitate to snap a picture! Tag me on social media so I can cheer you on. Seeing your gorgeous **puff pastry chocolate croissants** makes my week!
If you had any specific questions while baking, or if you want to share your experience outside of the comments section, feel free to reach out directly through my Contact Page. I love hearing from you all and learning about your successes in creating these **sweet morning treats**!
PrintEasy Chocolate Croissants Using Store-Bought Puff Pastry

Make flaky, buttery chocolate croissants quickly at home using pre-made puff pastry. This simple recipe delivers bakery-quality results for a delightful breakfast or snack.
- Prep Time: 15 min
- Cook Time: 20 min
- Total Time: 35 min
- Yield: 6 servings 1x
- Category: Breakfast
- Method: Baking
- Cuisine: French
- Diet: Vegetarian
Ingredients
- 1 package (14.1 ounces) all-butter puff pastry, thawed
- 4 ounces bittersweet or semi-sweet chocolate, cut into sticks (or use chocolate batons)
- 1 large egg
- 1 tablespoon water
- 1 teaspoon granulated sugar (optional, for sprinkling)
Instructions
- Thaw the puff pastry according to package directions, usually in the refrigerator overnight or on the counter for about 40 minutes. Preheat your oven to 400°F (200°C). Line two baking sheets with parchment paper.
- Unfold the thawed pastry sheets onto a lightly floured surface. If the pastry is thick, gently roll it out slightly to make it easier to work with.
- Cut each sheet of pastry lengthwise into three equal rectangles. You should have six rectangles total.
- Place one piece of chocolate near one short edge of a rectangle. Roll the pastry over the chocolate once. Place a second piece of chocolate near the new edge and roll the pastry up completely to form a croissant shape. Repeat this process for all rectangles.
- Place the rolled croissants seam-side down on the prepared baking sheets, spacing them a few inches apart.
- In a small bowl, whisk together the egg and water to create an egg wash. Brush the tops and sides of each croissant generously with the egg wash. If desired, sprinkle lightly with granulated sugar for extra shine and crunch.
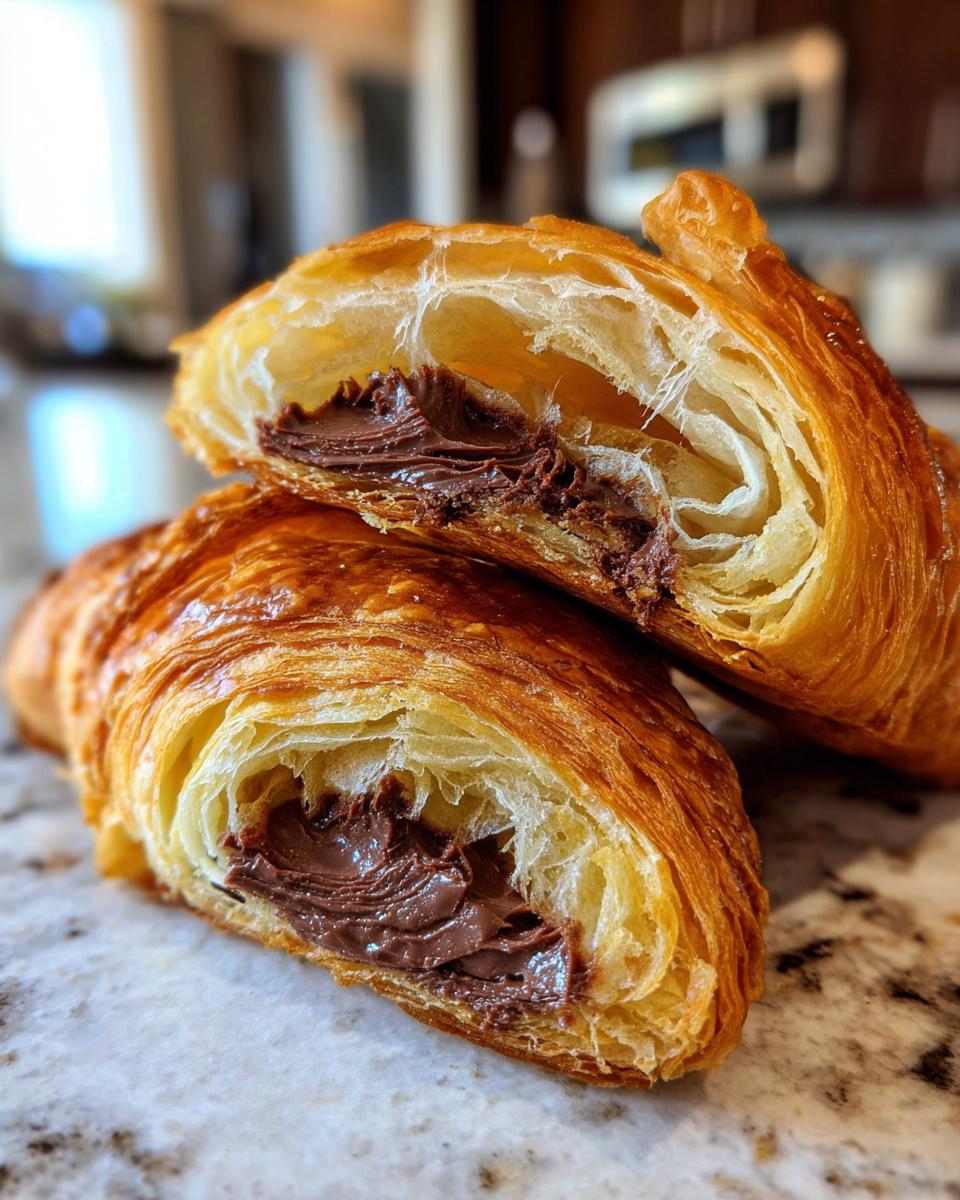
- Bake for 15 to 20 minutes, or until the croissants are puffed, golden brown, and flaky.
- Remove from the oven and let cool on the baking sheet for 5 minutes before transferring to a wire rack to cool slightly. Serve warm.
Notes
- If you do not have chocolate sticks, you can use chocolate chips, but place a line of them across the pastry instead of a single stick.
- For extra flaky layers, chill the shaped croissants for 15 minutes before brushing with egg wash and baking.
- This recipe is a quick way to achieve that bakery quality chocolate croissant texture.
Nutrition
- Serving Size: 1 croissant
- Calories: 350
- Sugar: 10g
- Sodium: 250mg
- Fat: 22g
- Saturated Fat: 12g
- Unsaturated Fat: 10g
- Trans Fat: 0.5g
- Carbohydrates: 30g
- Fiber: 1g
- Protein: 5g
- Cholesterol: 50mg