
Oh, the holidays! There’s just something about that nostalgic, sweet scent in the air, isn’t there? For me, it always brings back memories of helping my mom whip up batches of old-fashioned candy, decorating them after dinner, and then handing them out to neighbors. If you’re dreaming of those delicious, melt-in-your-mouth treats, then get ready, because we’re diving into one of my absolute favorites: soft Christmas peppermints! These little gems are so incredibly easy, totally no-bake, and just perfect for tucking into gift tins or arranging on a fancy holiday treat board. Trust me, making homemade candy doesn’t get simpler, or more festive, than this!
- Why You'll Love These Soft Christmas Peppermints
- Gather Your Ingredients for Soft Christmas Peppermints
- Crafting Your Old Fashioned Butter Mints
- Tips for Making the Best Soft Christmas Peppermints
- Packaging Your Holiday Candy Gifts
- Storage and Make-Ahead for Your Festive Candy
- Frequently Asked Questions about Soft Christmas Peppermints
- Estimated Nutritional Information
Why You’ll Love These Soft Christmas Peppermints
Seriously, these little candies are a holiday miracle! Here’s why they’ll become your go-to no bake Christmas treat:
- Super Simple: We’re talking just a handful of ingredients that you probably already have in your pantry. No fancy equipment, no complicated steps – just pure, simple joy.
- No Oven Needed! That’s right, zero baking required. This makes them perfect for when your oven is already stuffed full of pies and roasts.
- Classic, Comforting Flavor: That unmistakable cool, minty taste with a hint of creamy butter? It’s like a sweet hug from holidays past.
- Perfect for Gifting: Package these up in cute tins or little cellophane bags, and you’ve got instant, heartfelt holiday candy gifts that everyone will adore.
- So Pretty! Whether you keep them classic white, add a pop of festive red or green, or twist them into swirls, they look absolutely gorgeous on any holiday platter.
Gather Your Ingredients for Soft Christmas Peppermints
The beauty of these soft Christmas peppermints is how few ingredients they call for, and how simple they are! It’s proof that magic can happen with just a few good things. You’ll need:
For the best tasting and textured mints, always go for good quality ingredients. It really does make a difference in the end!
1 cup of butter, make sure it’s softened. This is key for creaming everything together nicely. Unsalted is best, so you can control the saltiness yourself, but feel free to use salted if that’s what you have on hand. Just be aware it might add a tiny bit more flavor.
3 cups of powdered sugar (sometimes called confectioners’ sugar or icing sugar). Sift it if it’s lumpy, then you’re good to go! This is what gives our mints that lovely, soft, melt-in-your-mouth texture.
1/4 cup of light corn syrup. This is our secret weapon for smooth, pliable candies that don’t get too hard. It keeps them perfectly soft!
1 teaspoon of peppermint extract. This is where that classic, refreshing flavor comes from. You can add a tiny bit more if you really love a strong peppermint kick, just taste as you go!
Red food coloring (optional) and Green food coloring (optional). This is totally up to you! If you want those classic red and green swirls, grab some gel or liquid food coloring. Gel gives you a more vibrant color without adding too much extra liquid, which can mess with the candy’s texture.
Crafting Your Old Fashioned Butter Mints
Alright, let’s get our hands delightfully sticky and make some magic! Creating these old fashioned butter mints, or soft Christmas peppermints as we love to call them, is honestly such a fun process. It reminds me of those easy holiday crafts we used to do. You’ll be whipping up a batch of homemade peppermint candies in no time!
First things first, grab your big mixing bowl. We need to cream together that softened butter and the powdered sugar. The best way to do this is on low speed at first, so you don’t end up with a sugar cloud in your kitchen! Gradually increase the speed until it’s all nicely combined and looks like crumbles. Then, add in your light corn syrup and that wonderful peppermint extract. Keep mixing until it all comes together into a nice, stiff dough. It should feel pretty solid, like a thick cookie dough. If you’re looking for other simple treat ideas, my blueberry scones recipe is also super straightforward and always a hit!
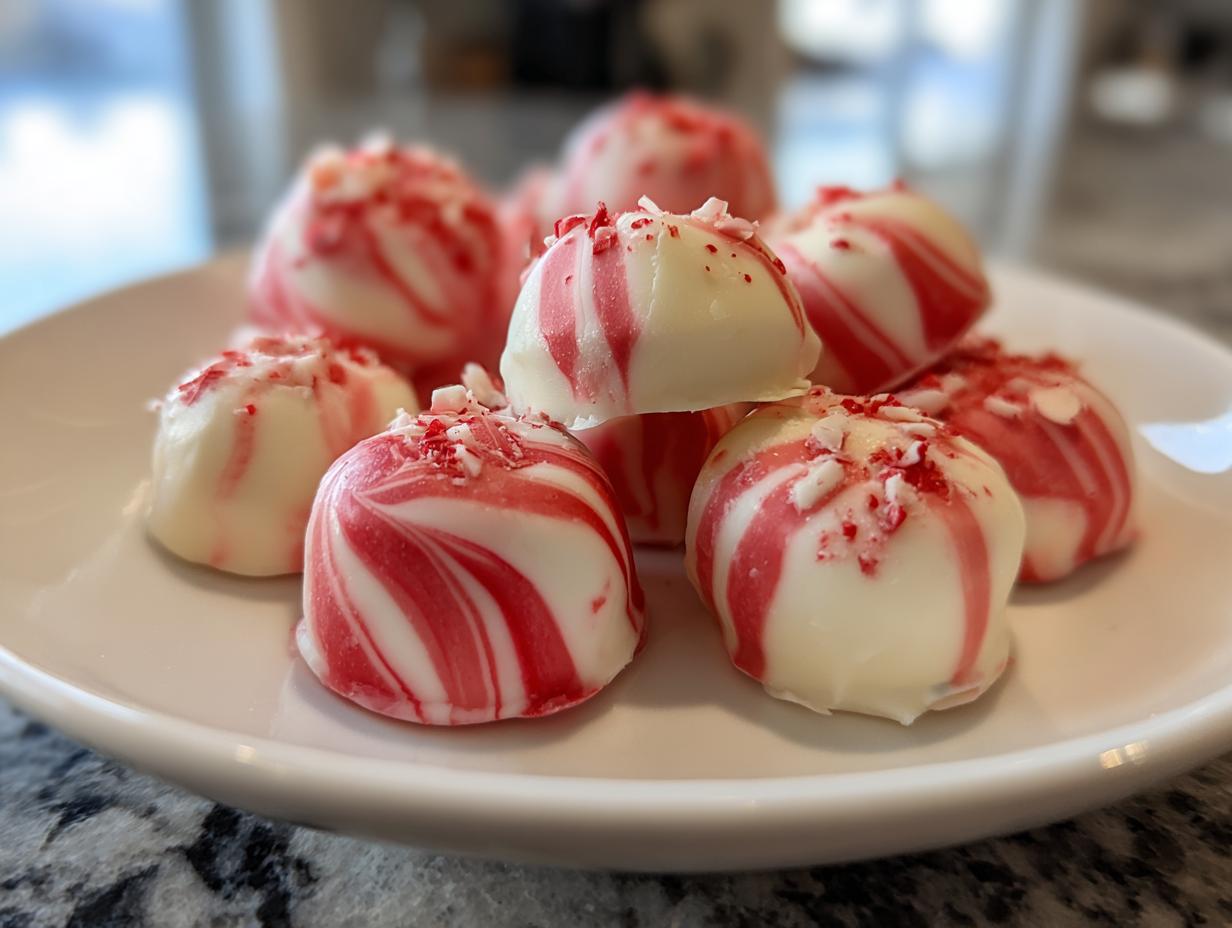
Now, if you’re feeling fancy, this is where the fun really begins! If you want those gorgeous red and green swirls that scream “holidays!”, you’ll need to divide your dough. I usually split mine into three portions – one large white piece, and then two smaller ones for coloring. If you’re making red and green, just pop a few drops of food coloring into those smaller portions and gently knead it in until the color is uniform. Be careful not to overmix, especially if you’re aiming for swirls!
Once your dough is colored (or not, plain white is lovely too!), it’s time to shape them. You can roll small pieces into little balls, or shape them into cute logs. If you’re doing swirls, take a piece of each color and gently twist them together before rolling them into a log or ball. It looks so professional! Place your shaped mints onto a baking sheet that you’ve lined with parchment paper. Don’t overcrowd them; give them a little breathing room.

Achieving the Perfect Swirl Effect
Getting those pretty swirls is easier than you think! It’s all about gentle manipulation. Once your dough is colored, take your portions and simply press them together, then gently roll and twist. Don’t overwork them, or the colors will get muddy. Think of it like braiding a little bit. This quick little step adds such a festive touch to your festive candy recipe!

Drying and Setting Your Soft Christmas Peppermints
Here’s the crucial part for that perfect soft texture: patience! You need to let these make ahead candies air dry. Just leave them on the parchment-lined baking sheet at room temperature. They need at least 24 hours, but sometimes a little longer if your kitchen is humid. You’ll know they’re ready when they feel firm to the touch but still have that slightly yielding texture – not hard like a rock candy, but definitely not gooey.
Tips for Making the Best Soft Christmas Peppermints
Okay, let’s talk about getting these soft Christmas peppermints absolutely perfect every single time. While they’re super easy, a few little tricks can really make them shine! For example, if you’re ever making granola and want it to be extra crisp, my homemade granola recipe has some great tips on getting that perfect texture, and that same principle of patience applies here.
First off, make sure your butter is truly softened, not melted. If it’s too melty, your dough will be too soft and sticky, and you’ll have a tough time shaping them, plus they might take forever to dry! On the flip side, if you want a stronger mint flavor, don’t be afraid to add a tiny bit more peppermint extract. Just dab a little on a spare bit of dough or an extra drop on your finger and taste; you don’t want it to be overpowering, of course!

If your dough seems a little too soft to manage, pop it in the fridge for about 10-15 minutes. It’ll firm up just enough to make rolling and shaping a breeze. And remember, the drying time is super important! Don’t rush it. Those 24 hours (or more!) are what give these candies their signature soft, melt-in-your-mouth quality. Patience, my friends!
Packaging Your Holiday Candy Gifts
Once your soft Christmas peppermints are perfectly firm and ready to go, it’s time for the fun part: making them look as good as they taste! These little beauties are just begging to be shared, and packaging them up makes them the perfect holiday candy gifts. Imagine a beautifully arranged platter of these and my apple crisp bars for a ‘Holiday Treats’ board – absolutely stunning! For individual gifts, I love using small, festive tins or clear cellophane bags tied with a pretty ribbon. You can even add a cute little tag from Avery!

For treat boards, arrange them in little clusters or lines, mixing the colors. They add such a pop of festive color and a delightful little bite that everyone will be reaching for. These also make fantastic peppermint party mints when you’re entertaining!
Storage and Make-Ahead for Your Festive Candy
These delightful soft Christmas peppermints are total superstars when it comes to making ahead! Since they’re make ahead candies, you can totally knock them out way before the holiday rush hits. Once they’re all dried and firm, just pop them into an airtight container. Make sure they’re completely dry first, though, or you might end up with unwanted moisture. They’ll stay perfectly fresh and yummy at room temperature for about two weeks. This makes them one of my favorite truly easy Christmas desserts because you can just forget about them until you need them!
Frequently Asked Questions about Soft Christmas Peppermints
Got questions about these delicious soft Christmas peppermints? I’ve got answers! It’s always good to know the little ins and outs when making candy, especially when aiming for that perfect old-fashioned taste and texture.
Can I use different extracts besides peppermint?
Absolutely! While peppermint is the classic for these particular old fashioned butter mints, you can totally get creative. A little spearmint extract works wonderfully, or even some wintergreen for a slightly different cool flavor. Some folks even like a touch of vanilla extract for a milder, creamier taste, though that veers away from the traditional peppermint punch. Just remember to start with about a teaspoon and taste as you go, as extracts can be potent!
How long do they really take to dry?
This is where patience really pays off for your homemade peppermint candies! They need *at least* 24 hours to air dry to that perfect firm-yet-soft texture. If your kitchen is extra humid, or if you made them a bit thicker, they might need even longer, so just give them a gentle poke. They’re ready when they feel solid to the touch but still have that slight softness – no gooeyness allowed!
Can I make these vegan?
Making these soft Christmas peppermints vegan is a little tricky because of the butter and corn syrup. You’d need to swap the butter for a good quality vegan butter substitute that’s firm and not too oily. For the corn syrup substitute, you might try something like golden syrup or an all-natural vegan sugar syrup, but I haven’t personally tested this specific recipe for a vegan version and can’t guarantee the texture will be exactly the same. For other wonderfully simple vegan treats, check out my pumpkin cheesecake truffles, they’re a hit!
Why are my mints not firming up?
Oh no! Usually, if your make ahead candies aren’t firming up, it’s one of two things: too the butter was too soft to begin with, or there’s extra moisture in the air. Try giving them another day or so to dry out. If they’re still stubbornly soft, it’s likely the butter consistency. Next time, ensure your butter is just softened, not melted, and that your mixture is a nice, stiff dough before shaping.
Estimated Nutritional Information
Just a heads-up, this is an estimate for about 3 mints per serving. The exact numbers can wiggle a bit depending on your specific butter, how big you roll your mints, and if you add any extras. But generally, you’re looking at around:
Calories: 75
Fat: 2g (Saturated Fat: 1g, Unsaturated Fat: 1g, Trans Fat: 0g)
Sodium: 10mg
Carbohydrates: 14g (Sugar: 15g, Fiber: 0g)
Protein: 0g
Cholesterol: 5mg
Soft Christmas Peppermints

Create old-fashioned, no-bake butter mints perfect for holiday gifting and festive treat boards.
- Prep Time: 20 min
- Cook Time: 0 min
- Total Time: 24 hr 20 min
- Yield: Approximately 4 dozen 1x
- Category: Desserts
- Method: No-Bake
- Cuisine: American
- Diet: Vegetarian
Ingredients
- 1 cup butter, softened
- 3 cups powdered sugar
- 1/4 cup light corn syrup
- 1 teaspoon peppermint extract
- Red food coloring (optional)
- Green food coloring (optional)
Instructions
- In a large bowl, cream together the softened butter and powdered sugar until well combined.
- Add the light corn syrup and peppermint extract. Mix until a stiff dough forms.
- If desired, divide the dough into portions and tint with red and green food coloring.
- Roll the dough into small balls or logs.
- For a swirl effect, twist together different colored dough portions before rolling.
- Place the mints on a parchment-lined baking sheet.
- Allow the mints to air dry for at least 24 hours, or until firm.
- Store in an airtight container at room temperature.
Notes
- For best results, use unsalted butter.
- Adjust peppermint extract to your preference.
- These mints can be made ahead and stored for up to two weeks.
- Package in festive tins or cellophane bags for easy holiday gifts.
- Consider adding a touch of sparkle with edible glitter.
Nutrition
- Serving Size: 3 mints
- Calories: 75
- Sugar: 15g
- Sodium: 10mg
- Fat: 2g
- Saturated Fat: 1g
- Unsaturated Fat: 1g
- Trans Fat: 0g
- Carbohydrates: 14g
- Fiber: 0g
- Protein: 0g
- Cholesterol: 5mg