
Oh, friends, let’s talk about candy. Not just any old store-bought sweetness, but the kind of nostalgic, velvety confection that takes you right back to your grandmother’s kitchen. If you’re like me, you love the richness of caramel but sometimes you just don’t want chocolate messing up the pure, comforting flavor profile. That’s where this spectacular treat comes in: the ultimate penuche fudge.
Penuche, for the uninitiated, is basically the king of brown sugar fudge. It’s intensely creamy, based on butter and molasses-rich brown sugar, and it has that unbelievable melt-in-your-mouth texture we all dream about when making candy at home. I know candy making can sound scary—all that boiling and precision—but trust me, this recipe is wildly straightforward once you respect the temperature.
I’ve tried fudge recipes that ended up gritty or too hard, but I cracked the code on this classic, ensuring every batch of this beautiful penuche fudge comes out smooth and luxurious. We are simplifying the old ways while keeping all the magic!
- Why This Old Fashioned Penuche Fudge Recipe Works (Simple Dessert Candy)
- Ingredients for Classic Brown Sugar Penuche Fudge
- Step-by-Step Instructions for Making Penuche Fudge
- Tips for Success with Your Penuche Fudge Recipe
- Storage and Serving Suggestions for Penuche Fudge
- Variations on Classic Brown Sugar Candy
- Frequently Asked Questions About Penuche Fudge
- Nutritional Estimates for Penuche Fudge
- Share Your Homemade Penuche Fudge Success
Why This Old Fashioned Penuche Fudge Recipe Works (Simple Dessert Candy)
When you’re looking for a true classic, you can’t beat this sweet confection. We’re making beautiful, Old Fashioned Fudge that relies on just a handful of pantry staples, but delivers a flavor that tastes like you spent all day coaxing rich caramel from the stove. Seriously, it’s magic!
- It delivers that incredible, buttery, caramel-like flavor without needing a drop of chocolate.
- It uses just a few simple ingredients, making it a perfect starter candy if you’re nervous about making homemade treats.
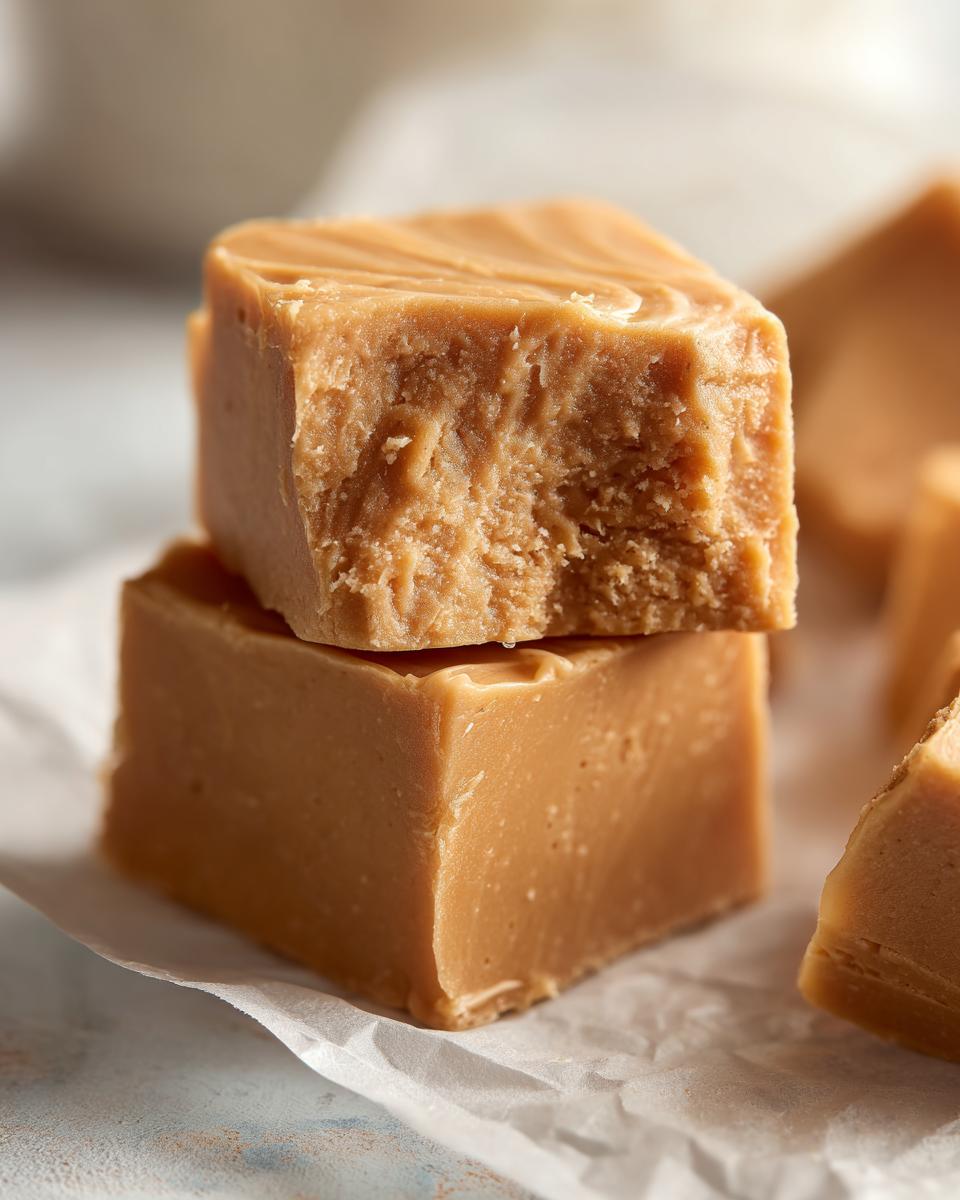
- The texture is absolutely dreamy—think rich, dense, and unbelievably smooth.
Achieving that Perfect Creamy Fudge Texture
Listen, fudge can be so tricky! The difference between good fudge and the Best Penuche Recipe comes down to temperature control. We aren’t just hoping for the best here; we are aiming for that precise soft-ball stage (234°F) and then letting it cool perfectly to 110°F before stirring. This careful dance prevents sugar crystals from forming, locking in that luxurious, melt-in-your-mouth candy texture every single time. It’s the science talking, folks!
Ingredients for Classic Brown Sugar Penuche Fudge
When you pull out your ingredients for this Classic Brown Sugar Candy, you’ll feel like you’re standing in a very old-fashioned pantry. The list is short, which is why having the right forms of each ingredient is so important for this particular Penuche Fudge Recipe. Get everything measured out before you start heating things up!
- 2 cups granulated sugar
- 1 cup packed light brown sugar
- 1 cup heavy cream (Please use heavy cream, not milk! We need that fat content.)
- 2 tablespoons unsalted butter
- 1 teaspoon vanilla extract (Make sure it’s good quality!)
- 1 pinch salt
Ingredient Notes and Substitutions for Penuche Fudge
I learned the hard way that you can’t swap things out willy-nilly when making candy. For the brown sugar, use light brown sugar and make sure it’s nicely packed into the measuring cup—that subtle molasses is key to that caramel flavor.
And about the cream? You absolutely need heavy cream here. Milk won’t give that rich, stable base needed during the soft-ball stage. Stick to the recipe, and you’ll have the smoothest Homemade Vanilla Fudge you’ve ever made!
Step-by-Step Instructions for Making Penuche Fudge
Okay, now for the fun (and slightly nerve-wracking) part! This is where we turn simple sugar and cream into rich, creamy fudge. Don’t rush the heat, and whatever you do, don’t stir when you shouldn’t. This is how we avoid that grainy texture that ruins otherwise perfect penuche fudge.
- First thing’s first: get your 8×8 inch pan ready! Line it with parchment paper, making sure you leave a little overhang on the sides. I usually grease that parchment lightly with whatever butter I chopped off the main stick—it just helps everything release perfectly later so you don’t stick.
- In your heavy-bottomed saucepan (you need one that distributes heat well!), combine your granulated sugar, brown sugar, and the heavy cream. Set the heat to medium.
- Stir constantly—and I mean *constantly*—until those sugars are totally dissolved and the whole mixture starts to roll a proper boil.
- The second it boils, put the candy thermometer in! Stop stirring completely. We just let the mixture go until it hits exactly 234 degrees Fahrenheit. This usually takes me about 12 minutes.
- As soon as it hits 234°F, yank that pot right off the burner! Drop in your butter and salt. Now, we wait. Do NOT stir! You need the temperature to fall all the way down to 110 degrees Fahrenheit. This cooling process is the *secret* to that wonderful melt in your mouth candy texture later on.
- Once it hits 110°F, add your vanilla extract. Now, it’s time to stir! You need to stir firmly and consistently until the fudge loses that shiny gloss and starts looking dull. It thickens fast, so move deliberately!
- Quickly scrape the thickened fudge into your waiting pan. Seriously, don’t pause or try to get every last bit off the spoon—scraping the sides can sometimes introduce graininess.
- Let it sit absolutely undisturbed at room temperature for at least two hours until it’s totally set up firm. Then, lift it out with the parchment sling, slice it up, and celebrate making the best penuche fudge ever! If you want more smooth, creamy goodness, check out my recipe for peanut butter fudge next!

The Crucial Temperature Check for Creamy Fudge
If you take away only one thing from this whole recipe, let it be this: master the temperatures! Those two numbers—234°F and 110°F—are non-negotiable for a smooth result. Hitting 234°F gets us into the soft-ball stage, which means the sugar concentration is perfect to suspend the fats without crystallizing as it cools.
That second cooling step down to 110°F is just as vital. If you start stirring when it’s too hot, you introduce nuclei for sugar crystals to form, and BAM! You’ve got grainy fudge instead of that glorious melt in your mouth candy texture. My personal tip? I always check my thermometer against boiling water every few months just to make sure it’s still calibrated correctly. A little accuracy goes a long way!
Stirring Technique for Perfect Penuche Fudge
Okay, the cooling is done, and the vanilla is in. Now we go to work! You need a sturdy wooden spoon for this part. Start stirring slowly at first, keeping the movement consistent. As the mass gets stiffer, you might need to increase your speed a little, but it should always feel firm rather than frantic.
You’re looking for a visual cue—the color will change from shiny and glossy to more matte or dull. When you pull the spoon up and the mixture ribbons on itself rather than dripping smoothly back in, you’re done stirring! If you keep going once it looks dull, you risk overworking the sugar structure, and that’s how you get hard, crumbly fudge instead of our desired penuche fudge.
Tips for Success with Your Penuche Fudge Recipe
Making perfect candy can feel like walking a tightrope, but I promise you, once you know these few tricks, you’ll be whipping out perfect blocks of Old Fashioned Fudge every single time. Success in candy making isn’t luck; it’s just knowing where to be careful and where you can relax a little!
The most important thing, as we talked about, is temperature, but the handling right before and right after that boil also separates the pros from the beginners. I want you to feel completely confident pulling this beautiful confection out of the pan.
Here are the little things that always make sure my batch of brown sugar fudge is smooth as silk:
- Pan Prep is Non-Negotiable: Don’t skip lining that 8×8 pan with parchment paper *with an overhang*. That overhang is your handle! It lets you lift the whole block out when it’s firm, avoiding potential cracks or messy edges. If you struggle with things sticking, you might love my recipe for simple cookie icing—the technique for getting a clean release is similar.
- Thermometer Trust: If you’re nervous about relying on just one number, use the ice water test too, especially if your thermometer is older. Dipping a tiny bit of syrup into ice water proves if it forms that soft, shapeable ball. Better safe than spending time stirring grainy fudge!
- Leave the Sides Alone: When the fudge is ready to pour in Instruction #7, do NOT scrape the sides of the saucepan. Those microscopic sugar crystals sometimes cling to the edges during the boil, and bringing them down into the main batch will absolutely invite graininess. Pour the luscious middle part and leave the residue behind. That’s a key piece of advice I picked up early on!
- Patience During Cooling: This is the hardest part, I know! You’ve done the cooking, and now you just want to stir it, but you must wait until that thermometer hits 110°F. If I can wait, you can wait! Trust the process that yields that gorgeous, yielding texture. For more tried-and-true candy tips, you can check out how The Delicious Spoon handles their classic recipes right here.
Follow these small steps, and you are guaranteed a batch of the most beautiful, melt-in-your-mouth penuche fudge.
Storage and Serving Suggestions for Penuche Fudge
Once your beautiful batch of Penuche Fudge has firmed up, the next question is always: how do I keep it perfect?
The good news is this Caramel Flavor Candy stores really well! You don’t need the fridge, which is great because cold temperatures can sometimes make fudge a little too hard. Just wrap those squares tightly in plastic wrap and tuck them into an airtight container. They keep happily at room temperature for a good week, though they rarely last that long in my house!
When it comes to serving, these rich squares are perfect alongside a hot mug of strong coffee or a cup of black tea. The vanilla and brown sugar profile is just heavenly with that slight bitterness from the brew. They’re definitely my go-to simple dessert candy for holiday cookie platters, too!
Variations on Classic Brown Sugar Candy
While this penuche fudge recipe stands perfectly on its own—pure, unadulterated brown sugar goodness—I love swapping things up slightly, especially when I’m making a big batch for gifting. Since the method is so straightforward, these little additions don’t complicate the process at all, but they really elevate the flavor profile of this Classic Brown Sugar Candy.
Remember, we aren’t changing the cooking process, we are just introducing flavor late in the game, usually right when we add the vanilla or just before we pour it into the pan. It keeps everything easy and reliable!
Nutty Crunch Additions
If you want a little texture to break up the smooth creaminess, nuts are your friend! My favorite thing to do is toast about half a cup of pecans. Toasting brings out such a wonderful, earthy flavor that complements the caramel tone.
Simply fold those cooled, roughly chopped pecans in right at the end, along with the vanilla. Be careful not to overmix; we only want them gently incorporated. You get that satisfying crunch without compromising the smooth set of the fudge.
A Hint of Maple or Spice
Want to lean even harder into that caramel vibe? Swap out half of your pure vanilla extract for a really high-quality maple extract. You only need a tiny bit—maybe a quarter of a teaspoon—because maple flavor is strong! It gives this Homemade Vanilla Fudge an added depth that always surprises people.
Another fun swap is adding a tiny pinch of ground cayenne pepper or even a tiny bit of ground mace when you add the salt. It doesn’t make it spicy, but it just wakes up the brown sugar flavor beautifully. It’s a totally unexpected little kick in this easy fudge recipe!
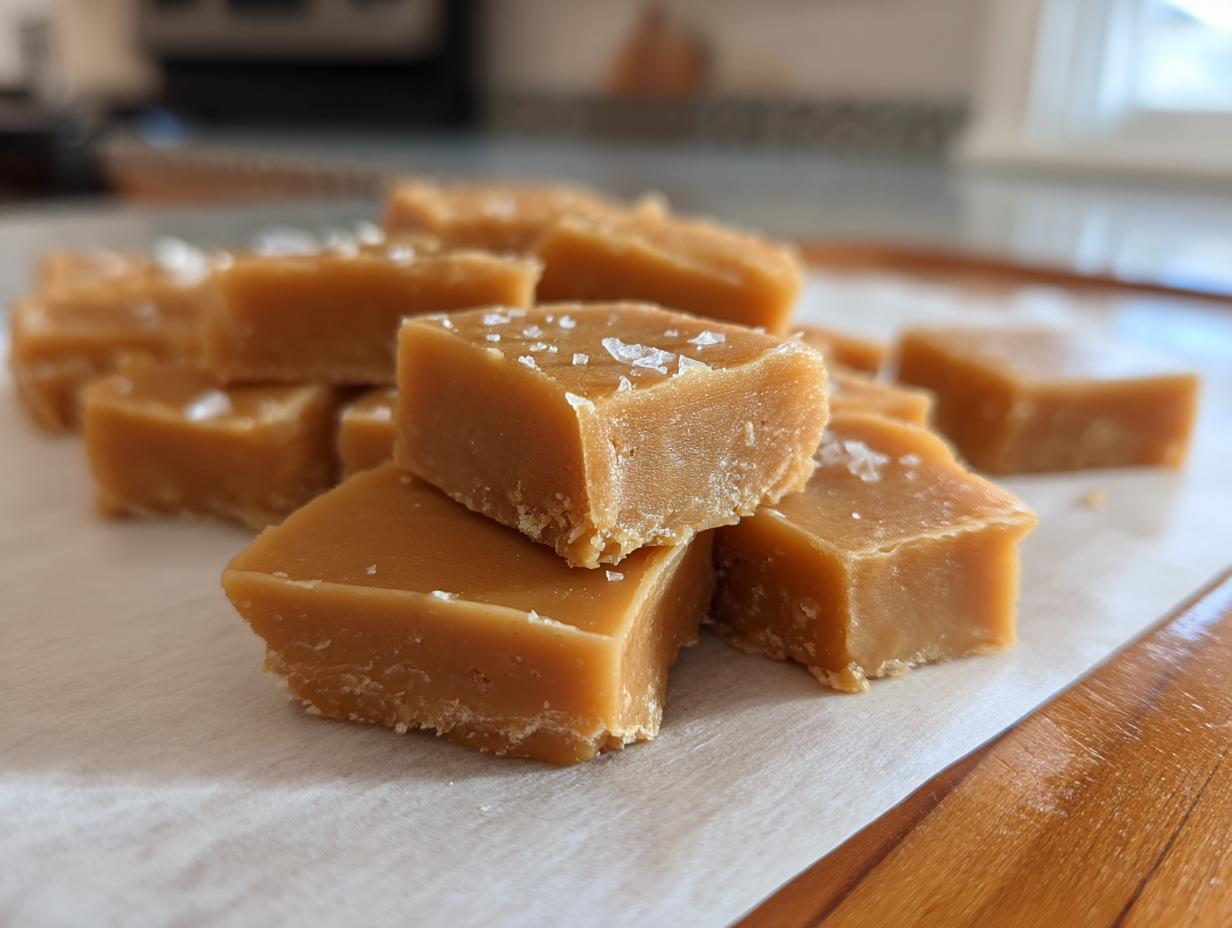
The Finishing Touch: Sea Salt Sprinkle
This is probably my most popular addition, especially for neighbor gifts. Once you’ve poured the fudge (Instruction #7), just before you let it sit to cool, grab some flaky sea salt—Maldon is my preferred brand—and sprinkle it lightly and evenly over the top.
The salt cuts through the richness just enough to make you want another piece immediately. It looks gorgeous too! That topping of crystals makes the surface look professionally finished, and it complements this otherwise simple butter and sugar confection perfectly.
Frequently Asked Questions About Penuche Fudge
I always get tons of questions when I post this recipe because it’s an old-timer, and sometimes the old ways need a little clarification! Don’t worry if you’ve never made this before; the biggest hurdle is usually just getting comfortable with the thermometer. Here are the questions I hear most often about making this Homemade Vanilla Fudge.
Why did my Penuche fudge turn out grainy instead of creamy?
Oh, this is the saddest thing in candy making, isn’t it? Grainy fudge usually comes down to two things: either you were impatient and started stirring before the mixture cooled down to 110°F, or you over-stirred once you did start mixing it. Remember, once it cools, you stir just until it loses its gloss—no more! If you stir too long, those sugar crystals form their own structure, ruining that beautiful smooth set we aim for. It takes practice, but you’ll nail that creamy fudge texture next time!
Can I substitute other sugars for the combination of granulated and brown sugar?
Honestly, I wouldn’t recommend it for this specific Penuche Fudge Recipe. The mix of white sugar and brown sugar is crucial for two reasons: the granulated sugar helps bring the mixture up to the correct temperature quickly, and the brown sugar provides the essential molasses flavor and richness. Changing that balance throws off the entire texture and taste profile, leading you away from that classic caramel flavor.
How long does this Penuche fudge last, and does it need to be refrigerated?
Nope, no fridge necessary! Since this recipe relies on high sugar content for preservation, this Old Fashioned Fudge keeps beautifully at cool room temperature. Wrap the squares tightly in plastic wrap or foil, then place them in an airtight container. They are best enjoyed within a week, though they tend to vanish much faster than that around here. If you want to make a huge batch for the holidays, you can freeze them for up to three months!
What is the difference between Penuche and traditional fudge?
That’s a great question that gets right to the heart of this delightful confection! Traditional fudge in the States is usually chocolate-based, relying on cocoa powder or melted chocolate for its main flavor profile. Our Penuche is entirely different because it’s built solely around brown sugar, butter, and vanilla. This gives it that beautiful, deep, caramel-like flavor inherent in brown sugar. So, think of Penuche as the ultimate No Chocolate Fudge—pure, sweet, buttery heaven!
I don’t have a candy thermometer. Can I still make this?
It’s tough! While I truly encourage getting a basic candy thermometer—they are inexpensive and available everywhere—you *can* try the old-fashioned method. When the syrup is boiling, drop a small spoonful into a cup of ice-cold water. If it forms a soft, pliable ball that you can easily squish in your fingers, it’s ready. If it dissolves, it needs more cooking time. If it turns hard immediately, you missed the window! For the best results, grab that peanut brittle recipe, but for fudge precision, the thermometer is your best friend.
Nutritional Estimates for Penuche Fudge
Now, let’s talk turkey about the numbers. While I focus most of my energy on making sure this penuche fudge tastes absolutely amazing, I know some of you are keeping track of macros and details. Since this is a very simple, classic candy recipe, the ingredients are straightforward: mostly sugar and butter, which means it’s definitely a treat!
Keep in mind that these figures below are just estimates based on the recipe yield of 36 small squares. Your actual values might shift a little depending on your brand of cream or the exact sugar density, but this gives you a good baseline for this rich, caramel flavor candy.
- Serving Size: 1 square
- Calories: 145
- Sugar: 25g
- Fat: 4g
- Saturated Fat: 2.5g
- Sodium: 25mg
- Carbohydrates: 27g
- Protein: 0.5g
I always suggest viewing homemade candy like this as an occasional indulgence rather than an everyday snack. It’s pure comfort, and that’s what matters most! Enjoying homemade goodness responsibly is part of the fun of baking in real life, right?
Share Your Homemade Penuche Fudge Success
Well, we made it! You went from being a candy-making skeptic to the proud owner of a pan full of the creamiest, most delicious penuche fudge. That smell of caramelized brown sugar filling your kitchen? That’s the smell of success, my friend!

Seriously, I would absolutely love to hear how your batch turned out. Did you nail that 110°F cooldown point perfectly? Did you go with the salty topping or keep it totally classic? Dropping a star rating below helps other folks who might be nervous about making their first batch of this easy fudge recipe feel more confident diving in!
And please, if you snapped a picture—and I bet you did, because this stuff photographs beautifully—share it with me on social media! Tag me so I can celebrate your smooth, melt-in-your-mouth confectionery victory. Seeing your successes is genuinely the best part of running Devour Dish.
If you enjoyed this deep dive into old-fashioned candy and want more simple, reliable sweet treats that ditch the fuss, you should definitely check out my recipe for creamy kani salad—wait, kidding! That’s savory! How about my recipe for the easiest butter cookies instead? Just kidding again! Just leave me a comment below and let me know how this brown sugar fudge tasted!
PrintOld-Fashioned Creamy Brown Sugar Penuche Fudge

Make classic Penuche fudge, a rich, no-chocolate candy with a smooth, melt-in-your-mouth texture, using simple brown sugar and butter.
- Prep Time: 10 min
- Cook Time: 15 min
- Total Time: 135 min
- Yield: 36 small squares 1x
- Category: Candy
- Method: Stovetop Cooking
- Cuisine: American
- Diet: Vegetarian
Ingredients
- 2 cups granulated sugar
- 1 cup packed light brown sugar
- 1 cup heavy cream
- 2 tablespoons unsalted butter
- 1 teaspoon vanilla extract
- 1 pinch salt
Instructions
- Line an 8×8 inch baking pan with parchment paper, leaving an overhang on the sides for easy removal. Lightly grease the paper.
- Combine the granulated sugar, brown sugar, and heavy cream in a medium, heavy-bottomed saucepan.
- Stir the mixture constantly over medium heat until the sugars dissolve and the mixture begins to boil.
- Stop stirring once the mixture boils. Insert a candy thermometer. Cook the mixture without stirring until it reaches 234 degrees Fahrenheit (Soft-Ball Stage). This usually takes about 10 to 15 minutes.
- Immediately remove the saucepan from the heat. Add the butter and salt. Do not stir yet. Let the mixture cool undisturbed until the temperature drops to 110 degrees Fahrenheit. This cooling step is crucial for creamy fudge.
- Once cooled to 110 degrees Fahrenheit, add the vanilla extract. Begin stirring slowly with a wooden spoon or heatproof spatula.
- Stir consistently and firmly until the mixture thickens, loses its gloss, and becomes dull. This process takes several minutes. The fudge will start to set up quickly.
- Quickly pour the fudge into the prepared pan. Do not scrape the sides of the pan.
- Let the Penuche fudge cool completely at room temperature for at least 2 hours, or until firm.
- Lift the fudge from the pan using the parchment overhang. Cut into small squares. Store in an airtight container.
Notes
- For the best melt-in-your-mouth candy texture, monitor your candy thermometer closely. Hitting 234°F is key.
- If you do not have a candy thermometer, you can test the soft-ball stage by dropping a small amount of syrup into a glass of ice water; it should form a soft, pliable ball.
- Do not over-stir after the mixture cools; stirring too long or too fast can cause the fudge to become grainy.
Nutrition
- Serving Size: 1 square
- Calories: 145
- Sugar: 25g
- Sodium: 25mg
- Fat: 4g
- Saturated Fat: 2.5g
- Unsaturated Fat: 1.5g
- Trans Fat: 0g
- Carbohydrates: 27g
- Fiber: 0g
- Protein: 0.5g
- Cholesterol: 15mg