
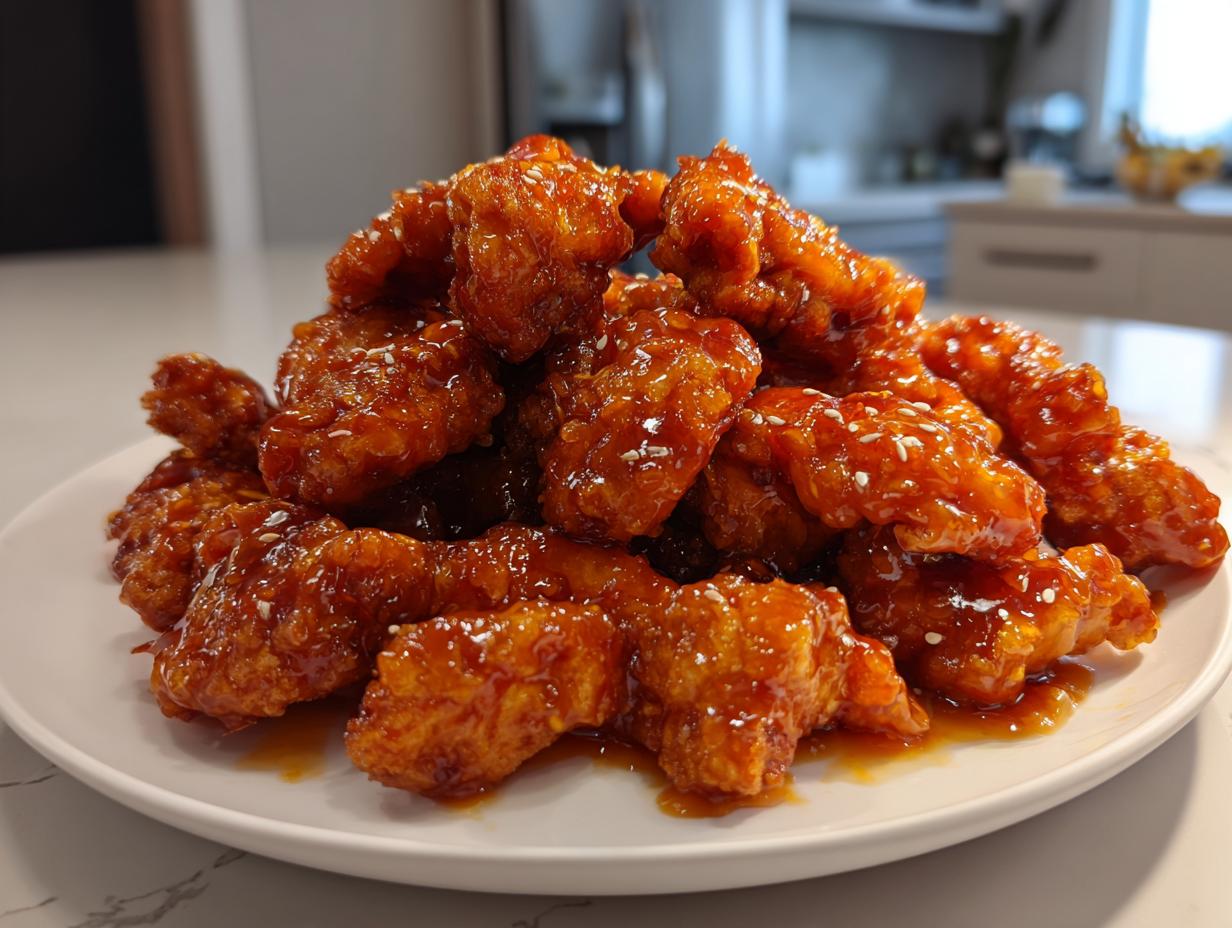
Oh my gosh, you know those nights? When you are absolutely craving that sticky, tangy burst of flavor from your favorite counter at the Chinese takeout spot, but you just don’t want to wait for delivery? I know that feeling so well! Well, friends, I’ve cracked the code. Today, we are making what I genuinely believe is the ultimate orange chicken recipe. Seriously, homemade is so much better because you control the sugar, and we get incredible crispiness!
Here at Devour Dish, my mission—and you can read more about my food philosophy here at the about page—is making sure restaurant-quality flavor doesn’t require a culinary degree or a trip to an obscure specialty market. This crispy, better-than-takeout chicken proves true comfort food can absolutely be an easy weeknight dinner. Trust me on this one; you’re going to love it!
- Why This Orange Chicken Recipe Beats Takeout
- Ingredients for Your Homemade Orange Chicken
- Step-by-Step Instructions for the Best Orange Chicken Recipe
- Tips for the Ultimate Crispy Chicken Recipe Success
- Variations on the Orange Chicken Recipe: Healthier Takeout Alternative
- Storage and Reheating Instructions for Homemade Orange Chicken
- Frequently Asked Questions About This Orange Chicken Recipe
- Estimated Nutritional Information for This Orange Chicken Recipe
- Share Your Best Ever Orange Chicken Creations
Why This Orange Chicken Recipe Beats Takeout
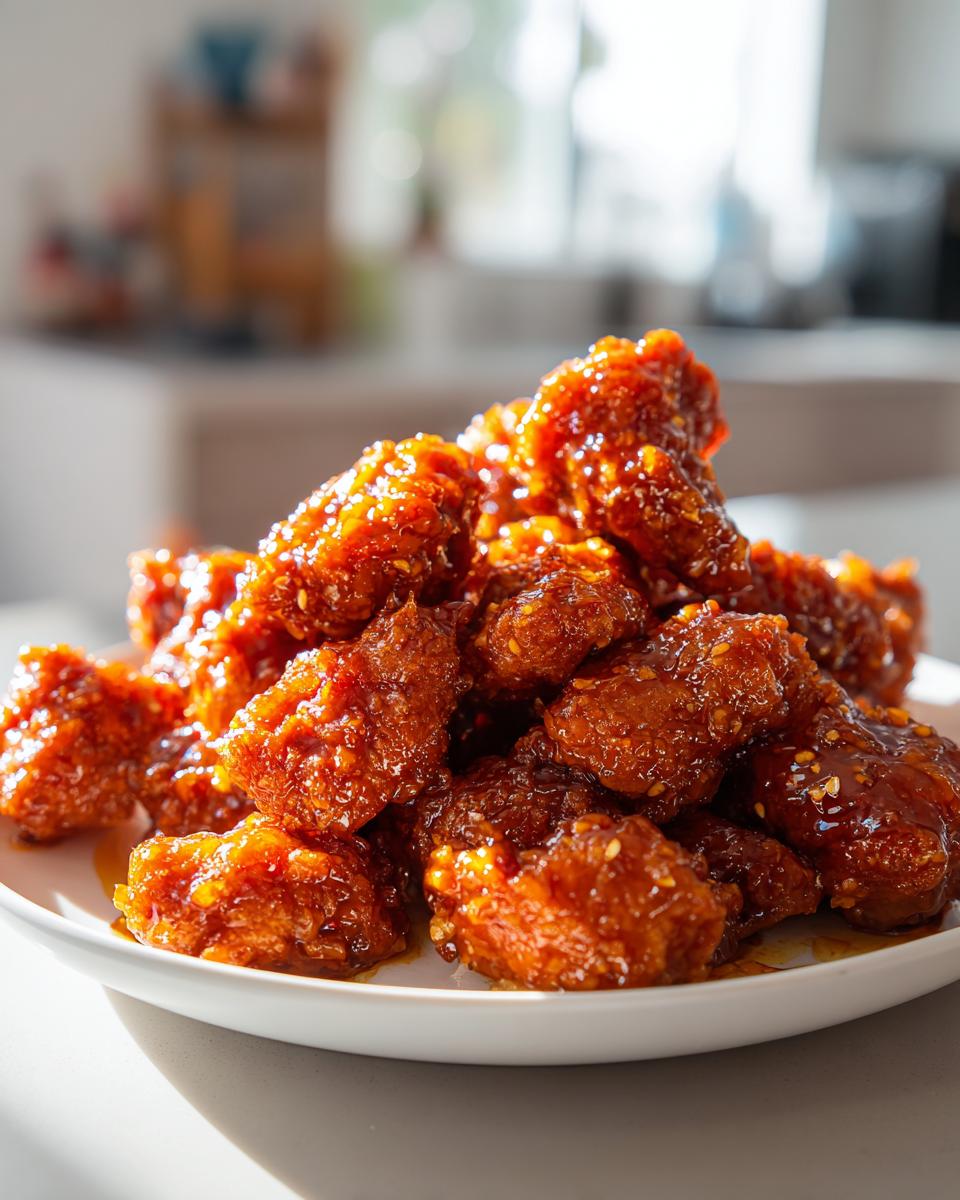
Why bother calling the delivery place when you can whip up this amazingness in about 35 minutes flat? This Better Than Takeout Chicken is a true family favorite chicken because it hits all the right notes: it’s unbelievably crispy, it’s drenched in a sauce that perfectly balances sweet and tart, and honestly, it tastes fresher than anything you get in those little folded boxes.
We want maximum texture here, and we want that vibrant orange flavor shining through. I’ve tweaked this recipe over and over to make sure it’s reliable for a busy Tuesday night but still spectacular enough for company. If you love a great crispy texture, you might also check out my creamy soup recipe—it shows how much I love texture!
Achieving Restaurant-Style Crispy Chicken Recipe
The secret to that amazing, crunchy crust that doesn’t get soggy instantly is the dredge. We aren’t doing a heavy batter here. We use a mix of flour and that crucial cornstarch step—cornstarch is what gives you that light, shatteringly crisp coating when it hits the hot oil. Shake off the excess flour mixture really well after dredging; that prevents the crust from getting too thick or cakey when you fry it.
The Perfect Sweet and Tangy Orange Sauce
Okay, the sauce is where the magic happens. Forget concentrated junk from a jar! We are relying on fresh orange juice and that bright, aromatic fresh orange zest. The balance between the citrus tang, the savory soy sauce, and just the right amount of sugar—both granulated and brown for depth—makes this sauce pop. It clings beautifully without being overly heavy.
Ingredients for Your Homemade Orange Chicken
Getting the ingredients ready is half the battle, trust me. Once all your little piles are set up—what we call *mise en place*—this whole Homemade Orange Chicken comes together so fast you’ll barely have time to boil the rice! I’ve broken down the list here so you can organize your bowls—we have the chicken prep stuff, the sauce components, and what we use at the very end for that beautiful presentation.
Remember, I always tell you to measure twice and chop once! Having everything ready means that when the oil is hot, you can move straight from dredging to frying without scrambling for the zip on the soy sauce.
For the Crispy Chicken Coating
This is the crucial part for that wonderful crust. You’ll need:
- One and a half pounds of boneless, skinless chicken breasts or thighs, cut into nice, manageable 1-inch pieces.
- One cup of all-purpose flour, ready for dredging.
- Half a cup of cornstarch—don’t skip this, it’s a huge player in the crisp department!
- One teaspoon of salt and half a teaspoon of black pepper to season the coating itself.
- One large egg, just beaten lightly—enough to make the dredge stick.
- And finally, half a cup of water to thin the coating just slightly.
For the Sweet and Tangy Orange Sauce
This is where the vibrant flavor comes in! Make sure your juice is fresh:
- One cup of fresh orange juice—please use real juice!
- A quarter cup of that lovely rice vinegar for necessary sharpness.
- A quarter cup of soy sauce for that savory, salty foundation.
- Half a cup of granulated sugar and two tablespoons of brown sugar for gorgeous color and depth.
- The star: one tablespoon of fresh **fresh orange zest recipes** (that bright orange stuff off the top!).
- One teaspoon of grated fresh ginger—zing!
- Two cloves of garlic, minced super fine.
- One teaspoon of sesame oil added right at the end for aroma.
- And finally, one tablespoon of cornstarch mixed with two tablespoons of cold water—that’s our slurry to thicken everything up.
Step-by-Step Instructions for the Best Orange Chicken Recipe
Now for the fun part! Making this orange chicken recipe come together is surprisingly fast once everything is prepped. We need to focus on getting that chicken perfectly golden and then nailing the sauce so it clings just right. If you are looking for a fantastic 30 Minute Chicken Dinner option, this methodical approach is what gets us there without stress!
Preparing and Frying the Chicken
First, let’s handle the chicken pieces. Make sure they are totally dried off—wet chicken steam-cooks instead of frying beautifully. Dip each piece first into that prepared egg mixture, letting the excess drip off. Then, dredge it thoroughly through the flour/cornstarch blend. Shake off any heavy clumps! We want a nice light coat. If you want to see how I prep other fried goodies, check out how I make crispy homemade corn dogs!
Now, heat your oil. Getting the temperature right is key for that crispy coating; aim for 350°F (175°C). We fry these in batches so the oil temperature doesn’t drop too much. Let them cook for about 4 to 6 minutes until they are golden brown and fully cooked through. Pull them out and drain them quickly on a wire rack.
Expert Tip for Extra Crunch: If you want that true takeaway crunch that lasts, try the double-fry method! Fry them for just 3 minutes the first time, pull them out to drain for a minute, and then drop them back into the hot oil for another 2 minutes right before you toss them in sauce. That second fry seals the deal!
Making the Simple Orange Chicken Sauce
While the chicken rests or is on its second fry, jump straight to the sauce. In a small saucepan, whisk together your fresh orange juice, the vinegar, soy sauce, both sugars, the zest, ginger, garlic, and sesame oil. Pop that over medium heat and stir gently until it all starts simmering and the sugar melts completely. It should smell amazing!
Next, we thicken it up! Take your cornstarch slurry (that’s the cornstarch mixed with cold water) and slowly pour it in while stirring the sauce constantly. Keep stirring until it thickens up and starts looking glossy and beautiful. Once it’s thick enough to coat the back of a spoon—about 30 seconds after it starts bubbling—take it right off the heat.
Tossing and Serving Your Quick Asian Dinner
This is the grand finale! Put all your crispy chicken into one large, clean bowl. Pour that warm, sweet and tangy orange sauce right over the top. Now, toss it gently! We want every piece coated, but we don’t want to smash the hard-earned crispy crust we just worked for. Toss lightly until everything looks glossy and sticky.
Serve this right away over a big bed of fluffy white rice. Don’t forget to garnish with some thinly sliced green onions for a pop of color and freshness. This is your new favorite quick Asian dinner!
Tips for the Ultimate Crispy Chicken Recipe Success
I feel like if you’re taking the time to fry chicken, you might as well make it the crispiest it can possibly be, right? That’s just my philosophy! Beyond the double-fry trick I mentioned earlier, a big game-changer for juiciness is the cut of meat you pick. Chicken breasts are classic, but if you really want that melt-in-your-mouth quality, use boneless, skinless chicken thighs instead. Thighs stay wonderfully moist even when they are coated and fried hard.
Also, when you are oil frying, temperature matters more than almost anything else. If the oil isn’t hot enough, the coating soaks up grease and gets heavy before it ever turns crisp. If it’s screaming hot, the outside burns before the inside cooks. Use a thermometer if you have one, but if you don’t, drop a tiny pinch of flour in—it should sizzle immediately but not turn dark right away. For more ideas on getting textures perfect, you should peek at my roasted potatoes recipe; mastering crispiness applies everywhere!
Variations on the Orange Chicken Recipe: Healthier Takeout Alternative
I totally get it. Fried chicken is amazing, but sometimes you just want that amazing flavor without busting out the big pot of oil. Maybe you’re doing Whole30 this month, or maybe you just don’t want to deal with deep frying on a Tuesday night. Good news! This Better Than Takeout Chicken adapts beautifully into a Healthier Takeout Alternative.
We keep the incredible sauce, of course, because that’s the heart of this dish. But we switch up how we cook the chicken itself. My first recommendation for a lighter take is baking, but I also have a few tips if you want to use that air fryer!
First, for either baking or air frying, you need to prep the chicken coating slightly differently. Skip the water in the egg wash, as we want the coating to stick without getting mushy. A light spray of oil on the coated chicken before it hits the heat is super important to help it crisp.
If you’re going with the oven, preheat it to 400°F (200°C). Lay your coated chicken pieces on a wire rack set inside a baking sheet—this allows air to circulate underneath, which is the key to avoiding a soggy bottom! You’ll then bake for about 15 to 20 minutes, flipping halfway through until they are golden brown and cooked through.
For those of you who love quick gadgets, the air fryer chicken parmesan recipe can give you clues on using that machine! For this version, air fry at 380°F (190°C) for about 12 minutes, shaking the basket halfway. These methods all result in a lighter, yet still satisfying, Baked Orange Chicken Recipe that’s perfect when you’re craving that tangy glaze!
Storage and Reheating Instructions for Homemade Orange Chicken
You know how it goes—sometimes you make enough to feed a small army, or maybe you just had too much incredible orange chicken last night! Storing leftovers is important so you can enjoy this recipe again later. The biggest challenge with any crispy, sauced item, though, is moisture retention. That beautiful, shatteringly crisp coating we worked so hard for tends to soften up when it sits in the fridge, even when coated in sauce.
For storage, always let the chicken cool down completely before you seal it up, or you’ll end up with a steamy mess, which equals zero crispiness! Store the sauced chicken in an airtight container in the refrigerator. It usually stays perfectly fine for about three days, no problem.
Now, for reheating—this is where we save the texture! Do not, I repeat, do not default to the microwave. The microwave is the enemy of crispiness; it just turns everything soggy and weird.
Instead, I have two favorite ways to bring this back to life:
- The Skillet Refresh: This is my go-to. Heat a large non-stick skillet over medium-high heat. Add just a tiny splash of neutral oil or even a tablespoon of fresh orange juice if you don’t want extra fat. Toss the cold chicken in the hot pan! You want to constantly move the pieces around for just 3 to 5 minutes until they are piping hot and the sauce looks glossy again. This quick toss shocks the coating back into a slightly crisper texture.
- The Oven Trick: If you have a bigger batch, spread the chicken out in a single layer on a baking sheet lined with parchment paper. Pop it into a 350°F (175°C) oven for about 8 to 10 minutes. This warms it through evenly and dries out some of that absorbed moisture, making the exterior much firmer again.
Seriously, taking an extra five minutes to refresh it properly makes all the difference in enjoying this orange chicken recipe the second time around!
Frequently Asked Questions About This Orange Chicken Recipe
I always love hearing what questions pop up when you guys start cooking! It shows you’re really diving in and thinking about how to make this the Best Ever Orange Chicken for your household. I tried to anticipate what you need to know to nail this classic dish. If you’re looking for more quick meals, my simple chicken stir fry is another winner!
Can I make the Sweet and Tangy Orange Sauce ahead of time?
Absolutely, yes! This is a fantastic time-saver, especially if you’re planning on making this for a busy weeknight. The sauce itself is very stable. You can mix up the entire Simple Orange Chicken Sauce exactly as written—juice, sugars, ginger, everything—and keep it sealed tight in the fridge for up to four days. When you’re ready to eat, just pour it into a small saucepan and bring it to a simmer. You’ll need to add the cornstarch slurry right at the end, just before you plan to toss the hot chicken in it, so whisk that slurry in until it thickens. It makes dinner prep literally five minutes once the chicken is done!
What is the best oil to use for frying in this Orange Chicken Recipe?
When we’re deep-frying, we want an oil that can handle the heat without breaking down or smoking everywhere. For this sort of work, you want a neutral-flavored oil with a high smoke point. I generally reach for regular vegetable oil because it’s affordable and works perfectly every time. Canola oil is another excellent choice for the same reasons. Just make sure you have at least two inches of oil in your pot and that you’ve checked the temperature—remember, 350°F is the sweet spot for that perfect crust!
How can I make this Panda Express Style Orange Chicken spicier?
Oh, I love that you want to kick up the heat! This recipe is definitely geared towards that classic sweet-and-tangy profile people expect from a Panda Express Style Orange Chicken, but it’s super easy to adjust. If you want noticeable but balanced heat, stir in about a teaspoon of Sriracha sauce right when you add the cornstarch slurry to your simmering sauce. For an extra layer of background warmth, add half a teaspoon of red pepper flakes when you add the ginger and garlic. Start small, taste, and then add more! You want the heat to complement the orange, not totally mask it!
Estimated Nutritional Information for This Orange Chicken Recipe
I always want to give you the full picture, even if cooking is more about enjoyment than counting every single thing! Please keep in mind that these numbers are just estimates, the way I calculate it here based on using standard pantry staples and the ingredient amounts listed in the main recipe. If you use chicken thighs instead of breasts, or if you double the sugar in your sauce, those numbers are going to shift!
This information is based on dividing the recipe into four nice-sized servings, which is usually a generous portion for a Family Favorite Chicken night.
Here’s the rough breakdown for one serving:
- Calories: About 550 kcal
- Protein: Roughly 35 grams—that’s a great boost!
- Total Fat: Around 25 grams (remember, this includes the oil used for frying)
- Carbohydrates: About 50 grams
- Sugar: This runs about 35 grams for the whole dish, much of that coming from the sauce, balancing that sweetness you crave!
- Sodium: Approximately 650 mg, influenced heavily by the soy sauce, so adjust that ingredient if you are watching sodium intake!
So, while it’s satisfying and feels like total indulgence, it’s also providing plenty of great protein to keep you full long after dinner is over. Happy cooking—and don’t stress too much about the exact number!
Share Your Best Ever Orange Chicken Creations
Okay, now it’s your turn! I put all my best tips and tricks into sharing this orange chicken recipe with you, and honestly, the best part of this whole process is seeing how it turns out in your kitchen. Did you manage that perfect crisp? Did you find yourself doing the double-fry trick? Don’t keep the secrets to yourself!
I really want to know your thoughts! Drop a star rating down below—be honest, but I’m hoping it’s five stars! Did this feel like the Best Ever Orange Chicken you’ve made at home? If you had any issues or figured out a cool substitution I should try next time, please leave a comment. I read every single one. In fact, if you have pictures, absolutely share them! You can always tag me on social media or reach out directly through my contact page. I love seeing happy faces and sticky, saucy chicken plates!
It means the world to me when you try these recipes that I poured my heart into developing. Happy cooking, and enjoy that sweet, tangy flavor explosion!
PrintCrispy Restaurant-Style Orange Chicken Recipe

Make crispy, tangy, and sweet orange chicken at home that tastes better than takeout. This recipe is quick enough for a weeknight dinner.
- Prep Time: 15 min
- Cook Time: 20 min
- Total Time: 35 min
- Yield: 4 servings 1x
- Category: Dinner
- Method: Frying
- Cuisine: Chinese-American
- Diet: Non-Vegetarian
Ingredients
- 1.5 lbs boneless, skinless chicken breasts or thighs, cut into 1-inch pieces
- 1 cup all-purpose flour
- 1/2 cup cornstarch
- 1 teaspoon salt
- 1/2 teaspoon black pepper
- 1 large egg, lightly beaten
- 1/2 cup water
- Vegetable oil, for frying
- 1 cup fresh orange juice
- 1/4 cup rice vinegar
- 1/4 cup soy sauce
- 1/2 cup granulated sugar
- 2 tablespoons brown sugar
- 1 tablespoon fresh orange zest
- 1 teaspoon grated fresh ginger
- 2 cloves garlic, minced
- 1 teaspoon sesame oil
- 1 tablespoon cornstarch mixed with 2 tablespoons cold water (slurry)
- Cooked white rice and sliced green onions, for serving
Instructions
- In a medium bowl, combine the flour, 1/2 cup cornstarch, salt, and pepper.
- Dip the chicken pieces first in the egg, then dredge thoroughly in the flour mixture, shaking off excess.
- In a large skillet or Dutch oven, heat 2 inches of vegetable oil to 350°F (175°C).
- Fry the chicken in batches until golden brown and cooked through, about 4-6 minutes. Remove with a slotted spoon and drain on a wire rack.
- For the sauce, whisk together the orange juice, rice vinegar, soy sauce, granulated sugar, brown sugar, orange zest, ginger, garlic, and sesame oil in a small saucepan.
- Bring the sauce mixture to a simmer over medium heat, stirring until the sugar dissolves.
- Whisk the cornstarch slurry and slowly pour it into the simmering sauce, stirring constantly until the sauce thickens and becomes glossy. Remove from heat.
- Place the crispy chicken in a large bowl. Pour the warm orange sauce over the chicken and toss gently until all pieces are evenly coated.
- Serve immediately over white rice, garnished with sliced green onions.
Notes
- For extra crispiness, you can double-fry the chicken: fry once for 3 minutes, drain, then fry again for 2 minutes just before saucing.
- Use fresh orange juice and zest for the best flavor in your sweet and tangy orange sauce.
- This recipe is a great alternative to takeout when you want a family favorite dinner quickly.
Nutrition
- Serving Size: 1 serving (approx. 1/4 of recipe)
- Calories: 550
- Sugar: 35
- Sodium: 650
- Fat: 25
- Saturated Fat: 5
- Unsaturated Fat: 20
- Trans Fat: 0
- Carbohydrates: 50
- Fiber: 2
- Protein: 35
- Cholesterol: 100