

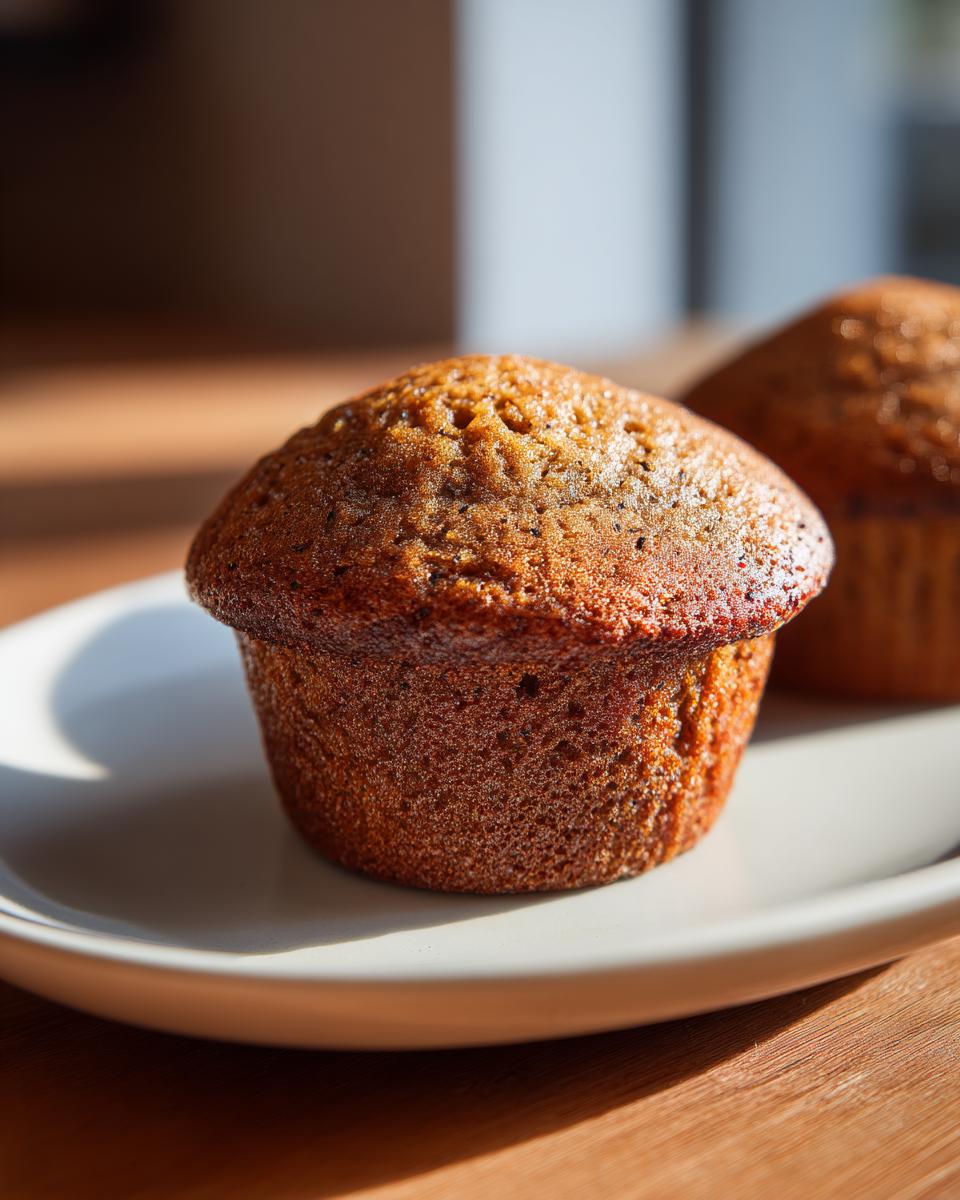
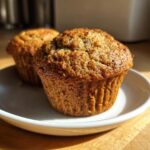
Oh, do I have something for you today! If your mornings feel rushed but you still crave something genuinely nutritious and delicious, stop what you’re doing. We all need quick breakfast ideas that skip the sugar crash, right? That’s why I am so excited to share what I think are the absolute best bran muffins you’ll ever make. These aren’t those dry, crumbly hockey pucks you sometimes find; these bran muffins are incredibly moist, packed with that good fiber we can all use more of, and they come together faster than you can brew your coffee. As someone who studied nutrition science—and as Avery Collins—I focused on making sure these Honey Bran Muffins are simple, trusted, and built for real life, just like everything else here at Devour Dish!
- Why These Honey Bran Muffins Are Your New Favorite Healthy Muffins
- Gathering Ingredients for Moist Bran Muffins
- Simple Muffin Recipe: How to Prepare Your Bran Muffins
- Tips for Success When Making Classic Bran Muffins
- Storage and Reheating Instructions for Freezer Friendly Muffins
- Serving Suggestions for Your Honey Bran Muffins
- Frequently Asked Questions About Bran Muffins Recipe
- Nutritional Snapshot of These Wholesome Muffins
- Share Your Best Bran Muffins Experience
Why These Honey Bran Muffins Are Your New Favorite Healthy Muffins
I’m being totally honest when I say these are the Healthy Muffins you’ll want to keep stocked in your freezer. If you’re pushing toward that High Fiber Breakfast goal, these hit the mark without tasting like cardboard. They are genuinely delicious, and I developed them specifically because I wanted something that tasted great but was also super reliable.
Unbeatable Moist Texture
The combination of honey and vegetable oil is just magical here. It keeps them incredibly tender long after they cool down—no dry edges, trust me! They hold moisture so well that they feel more like a decadent treat than a strictly healthy bake.

Perfect for Make Ahead Breakfast and Freezer Friendly Muffins
This is where they shine for busy people like us! You can whip up a double batch on Sunday, and you’re set for the week. They are absolutely fantastic Freezer Friendly Muffins. Pop them in a freezer bag, and when you need a Make Ahead Breakfast? Just grab one and go!
Gathering Ingredients for Moist Bran Muffins
Okay, let’s look at what you need to pull together these incredibly Moist Bran Muffins. I keep all these staples stocked because you never know when a baking craving is going to hit! I’ve written out the full list below so you can grab everything at once. We aren’t using any fancy, hard-to-find items here; just good, honest baking components.
- 1 1/2 cups all-purpose flour
- 1 cup wheat bran (this is our star fiber!)
- 1 teaspoon baking soda
- 1/2 teaspoon salt
- 1 teaspoon ground cinnamon
- 1/2 cup honey (for that natural sweetness)
- 1 large egg (don’t forget to let it come to room temperature!)
- 1 cup milk
- 1/4 cup vegetable oil
- 1 teaspoon vanilla extract
Ingredient Notes and Substitutions for Bran Muffins Recipe
I always get questions about switching things up, and that’s what I love about baking—it’s also science! You absolutely have flexibility, but stick close to amounts for best results. If you happen to grab oat bran instead of the wheat bran listed above, don’t panic! Oat bran works beautifully and yields a slightly softer texture. Just use a direct 1-to-1 swap, and you’re golden. You can also swap the vegetable oil for canola oil if that’s what you have on hand.
Simple Muffin Recipe: How to Prepare Your Bran Muffins
You are going to love how fast this whole process is! Seriously, these bran muffins come together in about ten minutes of mixing time. We’re keeping it super straightforward here, following the classic method to make sure we don’t accidentally create tough muffins. I always pull out my favorite whisk and mixing bowls first, get everything organized, and then we move fast. Before you even start mixing, make sure that oven of yours is hot—we need it at 400°F (200°C) right away so they start setting perfectly. For more great ideas for starting your day, check out all my go-to breakfast ideas!
Mixing the Dry and Wet Components for Easy Muffin Recipe
First things first: get all your dry stuff—flour, bran, baking soda, salt, and cinnamon—whisked together really well in a big bowl. You want that leavening agent to be evenly distributed so they rise nice and even. In a separate, smaller bowl, whisk your honey, that single egg, milk, oil, and vanilla until they swirl together. Here’s the absolute secret to getting the Moist Bran Muffins everyone raves about: when you pour the wet into the dry, mix it *just* until the streaks of flour disappear. I mean it! If you beat this batter around trying to make it smooth, you’ll deflate the air we just created, and suddenly you’re making small hockey pucks instead of tender muffins. Lumps are your friend here!
Baking and Cooling Your Homemade Bran Muffins
Once the batter is together, divide it up quickly among your 12 lined cups—aim for about two-thirds full. Pop those babies into the hot oven and set your timer for 15 minutes. You’re looking for them to be deep golden brown. The toothpick test is crucial: stick one right into the middle of a muffin. If it comes out clean, they’re done! If it has wet batter, give them two more minutes and check again. Don’t skip this step, or they won’t hold up well later. Once they pass the test, let these Homemade Bran Muffins rest in the pan for just 5 minutes. This little bit of resting time helps them firm up before you move them onto the rack to cool completely. Patience pays off!

Tips for Success When Making Classic Bran Muffins
I’ve made so many batches of these bran muffins over the years that I have a few tricks up my sleeve to guarantee they’re perfect every single time. These little tips separate the just-okay experience from the truly fantastic one, especially if you want that melt-in-your-mouth texture.
First, make sure your milk is actually room temperature! I know we mix the wet ingredients quickly, but if the milk is ice cold, it shocks the honey and oil a bit, and you won’t get the best emulsion. Warm it for about 20 seconds in the microwave before whisking it in.
Second, don’t worry if your batter looks thin—it should! This is why they end up moist. If you try to dump in extra flour to thicken it up, you’ll undo all the hard work we did avoiding overmixing. These bran muffins bake up beautifully from a thinner batter. Remember, if you want to see other great ways to keep things moist in your baking, check out my oatmeal muffin recipe!

Finally, if you’re adding anything extra, like seeds or dried apple bits (though this honey batch keeps it simple), give them a quick toss in a tablespoon of the dry flour mix first. This stops them from sinking right to the bottom of the muffin cups. This little step is a game-changer for evenly distributed flavors in all your bran muffins. Some folks love adding seeds, and you can find inspiration for great seeded variations if you want to try that next time!
Storage and Reheating Instructions for Freezer Friendly Muffins
One of the biggest reasons I love this recipe is that it’s just so practical for busy weeks. As I mentioned, these are fantastic Freezer Friendly Muffins, and you want to handle them right so they taste fresh when you pull them out weeks later.
To store them on the counter, just keep them in an airtight container. Because we used oil and honey, they should stay perfectly fresh for three to four days at room temperature—great for grabbing a quick snack before running out the door. If you need them to last longer, go right to the fridge. Wrap them tightly first, and they’ll easily last up to a week in there.
But for real meal prep power, freezing is the way to go! Cool the muffins completely—this is important so they don’t get soggy or stick together in the bag. Then, pop them into a heavy-duty, freezer-safe zip-top bag. Squeeze out as much air as you can, and they are good to go for up to three months. Seriously, three months of easy breakfasts waiting for you!
When you need one, you have options. If you remember the night before, just pull one out and let it thaw on the counter while you get ready. If you need it *now*, nuke it in the microwave for about 15 to 20 seconds depending on your microwave’s power. It comes out warm, soft, and tasting just like it came out of the oven. You can find more tips on making recipes last longer at Tastes Better From Scratch!
Serving Suggestions for Your Honey Bran Muffins
Now that you have these amazing, sturdy bran muffins, how should you eat them? Honestly, they are perfect just warm out of the oven with nothing at all, but sometimes a little something extra makes breakfast feel special. Since they are naturally sweet from the honey, you don’t need much!
I love serving mine with a smear of salted butter—it melts right into that moist crumb. They are also fantastic dunked into a warm mug of coffee or chai tea. If you’re packing them for a lunchbox snack, a little smear of almond butter across the top adds a nice protein punch! For a more decadent treat, try heating them up next to one of my easy dinner recipes for a quick contrast in your afternoon!
Frequently Asked Questions About Bran Muffins Recipe
I always get the same few questions when I post this bran muffins recipe, so I gathered the answers right here! It’s so important to feel confident when you bake, especially when you’re relying on something for a High Fiber Breakfast!
Can I use whole wheat flour instead of all-purpose flour?
Yes, you absolutely can, and this is a great way to increase the fiber even more! If you swap the all-purpose flour for whole wheat, you might notice the final texture is a tiny bit denser. That’s totally normal for Whole Grain Baking. To keep them as soft as possible, maybe add one extra teaspoon of milk to the wet mix if the batter seems too thick before baking.
Are these muffins good if I use oat bran instead of wheat bran?
They are fantastic! Like I mentioned earlier, many folks prefer Oat Bran Muffins, and the swap is easy. Oat bran tends to absorb liquid a little differently, so I stand by the tip to let the batter sit for about five minutes before portioning it out. This gives those little oats time to plump up properly before they hit the oven!
What’s the best sweetener if I don’t have honey?
If honey isn’t your thing or you’re out, maple syrup is the next best thing for these Healthy Muffins. Use the exact same measurement. Maple syrup gives a different flavor profile—a little warmer—but it plays so well with the bran. Avoid using refined white sugar here, though; you really need that liquid sweetness for the texture to work out right for these Bran Muffins.
How long do these stay fresh without freezing them?
Since these are such Moist Bran Muffins, they stay fresh on the counter for about four days in an airtight container. If you want to see other recipes that are great for meal prepping, take a look at my thoughts on other types of cookies here! If you want them to last longer, freezing is absolutely the way to go, just like Chocolate Covered Katie suggests for her batches!
Nutritional Snapshot of These Wholesome Muffins
Okay, for those of you who are tracking things for health goals—and I totally get that, especially since I studied nutrition science—here is the estimate for what goes into one of these Wholesome Muffins. Remember, these are just ballpark figures based on standard ingredient sourcing; your exact numbers might shift a little bit depending on the brand of honey or oil you use. But this gives you a great idea of how great these turn out for just having a small impact on your day!
We want food to fuel us, and these really do the job! Here is a simple breakdown per muffin serving:
- Serving Size: 1 muffin
- Calories: 190
- Sugar: 12g
- Sodium: 180mg
- Fat: 7g
- Carbohydrates: 30g
- Fiber: 4g (That’s the good stuff!)
- Protein: 5g
I always say you can feel really good grabbing one of these for your Fiber Rich Snacks or that mid-morning boost. They offer a solid 4 grams of fiber, which is nothing to sneeze at for a small baked good! Just keep in mind, these estimates don’t account for any fancy toppings you might want to add later on.
Share Your Best Bran Muffins Experience
That’s it! You’re officially set up for a week of incredibly easy, healthy breakfasts. I really hope you love making these bran muffins as much as I do.
When you try them out, make sure you come back and leave a rating. Did they turn out perfectly moist? Hit me up in the comments below or reach out through my contact page. I absolutely adore seeing photos of what you’ve baked!
PrintMoist, Healthy Honey Bran Muffins
Bake these easy, moist bran muffins sweetened with honey. They are high in fiber, perfect for a quick breakfast, and freeze well for meal prep.
- Prep Time: 10 min
- Cook Time: 18 min
- Total Time: 28 min
- Yield: 12 muffins 1x
- Category: Breakfast
- Method: Baking
- Cuisine: American
- Diet: Vegetarian
Ingredients
- 1 1/2 cups all-purpose flour
- 1 cup wheat bran
- 1 teaspoon baking soda
- 1/2 teaspoon salt
- 1 teaspoon ground cinnamon
- 1/2 cup honey
- 1 large egg
- 1 cup milk
- 1/4 cup vegetable oil
- 1 teaspoon vanilla extract
Instructions
- Preheat your oven to 400°F (200°C). Line a 12-cup muffin tin with paper liners or grease it well.
- In a large bowl, whisk together the flour, wheat bran, baking soda, salt, and cinnamon.
- In a separate medium bowl, whisk together the honey, egg, milk, oil, and vanilla extract until combined.
- Pour the wet ingredients into the dry ingredients. Mix gently with a spatula until just combined. Do not overmix; a few lumps are fine.
- Divide the batter evenly among the 12 muffin cups, filling each about two-thirds full.
- Bake for 15 to 18 minutes, or until a toothpick inserted into the center comes out clean.
- Let the muffins cool in the pan for 5 minutes before transferring them to a wire rack to cool completely.
Notes
- For best results and maximum moistness, do not overmix the batter after combining wet and dry ingredients.
- These muffins freeze well. Cool completely, then place them in a freezer-safe bag for up to three months. Thaw on the counter or briefly microwave before serving.
- You can substitute oat bran for wheat bran if you prefer.
Nutrition
- Serving Size: 1 muffin
- Calories: 190
- Sugar: 12
- Sodium: 180
- Fat: 7
- Saturated Fat: 1
- Unsaturated Fat: 6
- Trans Fat: 0
- Carbohydrates: 30
- Fiber: 4
- Protein: 5
- Cholesterol: 25