
The holidays are here, and you know what that means – it’s time for all the cozy vibes and decadent treats! If you’re anything like me, you love a dessert that feels special but doesn’t stress you out, especially when you’re juggling guests and gift-wrapping. That’s where this absolutely dreamy christmas chocolate pie comes in! Imagine a slice of pure bliss: a silky-smooth, deeply chocolatey filling nestled in a perfectly crisp crust, all ready to go hours before anyone even arrives. It’s the kind of simple joy Avery Collins talks about on Devour Dish – good food made with love, right from your own kitchen. This pie is that perfect blend of elegant and easy, making it a total showstopper for any holiday gathering.
- Why This Christmas Chocolate Pie is a Holiday Must-Have
- Choosing Your Perfect christmas chocolate pieCrust
- Ingredients for Your Festive christmas chocolate pie
- Mastering the Silky Chocolate Filling: Step-by-Step
- Assembling and Chilling Your Make-Ahead Holiday Chocolate Pie
- Festive Toppings for Your christmas chocolate pie
- Frequently Asked Questions about christmas chocolate pie
- Estimated Nutritional Information
- Share Your Holiday Chocolate Pie Creations!
Why This Christmas Chocolate Pie is a Holiday Must-Have
Okay, so why should this pie be the star of your holiday dessert table? It’s really simple, but oh-so-good:
- Make-Ahead Magic: Seriously, you can whip this baby up the day before! That takes SO much pressure off when you’ve got a million other things to do on the actual holiday.
- Super Silky Filling: The texture is just dreamy. It’s rich, it’s smooth, it’s pure chocolate decadence without being heavy.
- Crust Choice Galore: Whether you love a flaky, buttery pastry or a super easy, crunchy Oreo crust, this pie works beautifully with both. So you can pick your fave!
- Dessert Board Ready: It looks absolutely stunning sliced up on a festive dessert board. That deep chocolate color with a dollop of cream? Chef’s kiss!
It’s just one of those recipes that feels fancy but is secretly super straightforward. Totally Avery-Collins-approved, if you ask me!
Choosing Your Perfect christmas chocolate pieCrust
Okay, you’ve got to pick a crust for this amazing christmas chocolate pie! It’s like choosing the frame for a masterpiece. You’ve got two awesome choices, and honestly, you can’t go wrong. Both give you that perfect base for our silky chocolate filling, but they bring totally different vibes to the party. Think about what you’re craving – something buttery and flaky, or something easy-peasy and extra chocolatey? Let’s break ’em down!
Classic Pastry Crust
A good old-fashioned pastry crust is just divine here. It bakes up golden and flaky, with those beautiful layers that just melt in your mouth. It’s got a subtle, buttery flavor that really lets the rich chocolate filling shine. It feels a bit more traditional and elegant, you know?
Easy Oreo Chocolate Pie Crust
Now, if you want to keep things super simple and amp up the chocolate factor, an oreo chocolate pie crust is your best friend. You just crush up some Oreos, mix them with a little melted butter, press it into the pan, and bake (or even just chill it!). Boom! Instant, delicious, chocolatey goodness that everyone always raves about.
Ingredients for Your Festive christmas chocolate pie
Alright, let’s get down to business with what you’ll need for this incredible christmas chocolate pie. Having everything ready makes the whole process a breeze. You’ll want to grab your favorite pre-baked pie crust – either that lovely flaky pastry or the super-easy Oreo one we talked about. Make sure it’s totally cooled before we start!
For that luscious, silky filling, keep these babies handy:
- 1 recipe for pastry pie crust, baked, OR 1 recipe for Oreo pie crust
- 1 ½ cups granulated sugar (for sweetness!)
- ⅓ cup cornstarch (this is our thickener!)
- ¼ teaspoon salt (just a pinch to make the flavors pop)
- 3 cups whole milk (full fat gives the best richness)
- 4 large egg yolks (these make it super custardy)
- 4 ounces unsweetened chocolate, chopped (use a good quality one!)
- 2 tablespoons unsalted butter (for that smooth finish)
- 1 teaspoon vanilla extract (because vanilla makes everything better)
- 1 cup heavy cream, whipped (for topping, obviously!)
- Chocolate shavings or curls, OR crushed peppermint candy, for garnish (time to get festive!)
Mastering the Silky Chocolate Filling: Step-by-Step
Alright, this is where the magic *really* happens! Making that super smooth, rich chocolate filling for our pie is easier than you think, and I’m going to walk you through it step-by-step. You wanna get everything ready *before* you start heating things up, trust me on this. Have your cooled crust waiting patiently, and all your filling ingredients measured out nearby.
- First up, grab a medium saucepan. Whisk together your sugar, cornstarch, and that little pinch of salt. Make sure there are no clumps!
- Now, slowly start pouring in the whole milk, whisking as you go until everything is nice and smooth. No lumps allowed!
- In a separate bowl, whisk those egg yolks really well. We need them ready to go.
- Here comes the tempering part – it sounds fancy, but it’s just about slowly warming up those yolks so they don’t scramble. Take about a cup of your warm milk mixture from the saucepan and *gradually* whisk it into the egg yolks. Do it slowly, a little at a time, whisking constantly!
- Once the yolks are nice and warm, pour that mixture *back* into the saucepan with the rest of the milk. Give it another good whisk.
- Now, put that saucepan over medium heat. This is key: you need to stir. CONSTANTLY. Keep it moving, scraping the bottom and sides gently. You’ll see it start to thicken up. It’ll get to a gentle boil, and when it does, let it boil for just 1 minute, still stirring like crazy!
- Take that pot off the heat right away. Stir in your chopped unsweetened chocolate and the butter. Keep stirring until it’s all melted and smooth and gorgeous.
- Finally, stir in that teaspoon of vanilla extract. Yum!
- Pour this beautiful, rich chocolate custard into your prepared pie crust. It’s going to look amazing already!
Stovetop Custard Tips for the Perfect christmas chocolate pie
Making stovetop custard can feel a little daunting, but it’s seriously doable and so rewarding! The absolute biggest tip is to *keep stirring*. Use a good whisk or a heatproof spatula and don’t walk away. Medium heat is your friend here – too high and you’ll scorch it, too low and it’ll take forever. When it starts to thicken, watch it closely! If you see a few bubbles, that’s it coming to a boil, and you’re almost there for your perfect christmas chocolate pie filling.
Assembling and Chilling Your Make-Ahead Holiday Chocolate Pie
Okay, done with that gorgeous chocolate filling? Awesome! Now comes the easy part: getting it into the crust and letting time do its thing. Gently pour all that silky goodness into your cooled pie shell. Trust me, it’s going to look divine already! Now, here’s a little trick to keep that filling perfectly smooth: press a piece of plastic wrap *directly* onto the surface of the chocolate. This stops that annoying skin from forming while it chills. Pop that into the fridge for at least 4 hours, though honestly, making this one of your make ahead holiday desserts and letting it chill overnight is even better! That long chill time is super important; it lets the pie firm up beautifully so you get those clean, perfect slices every time.
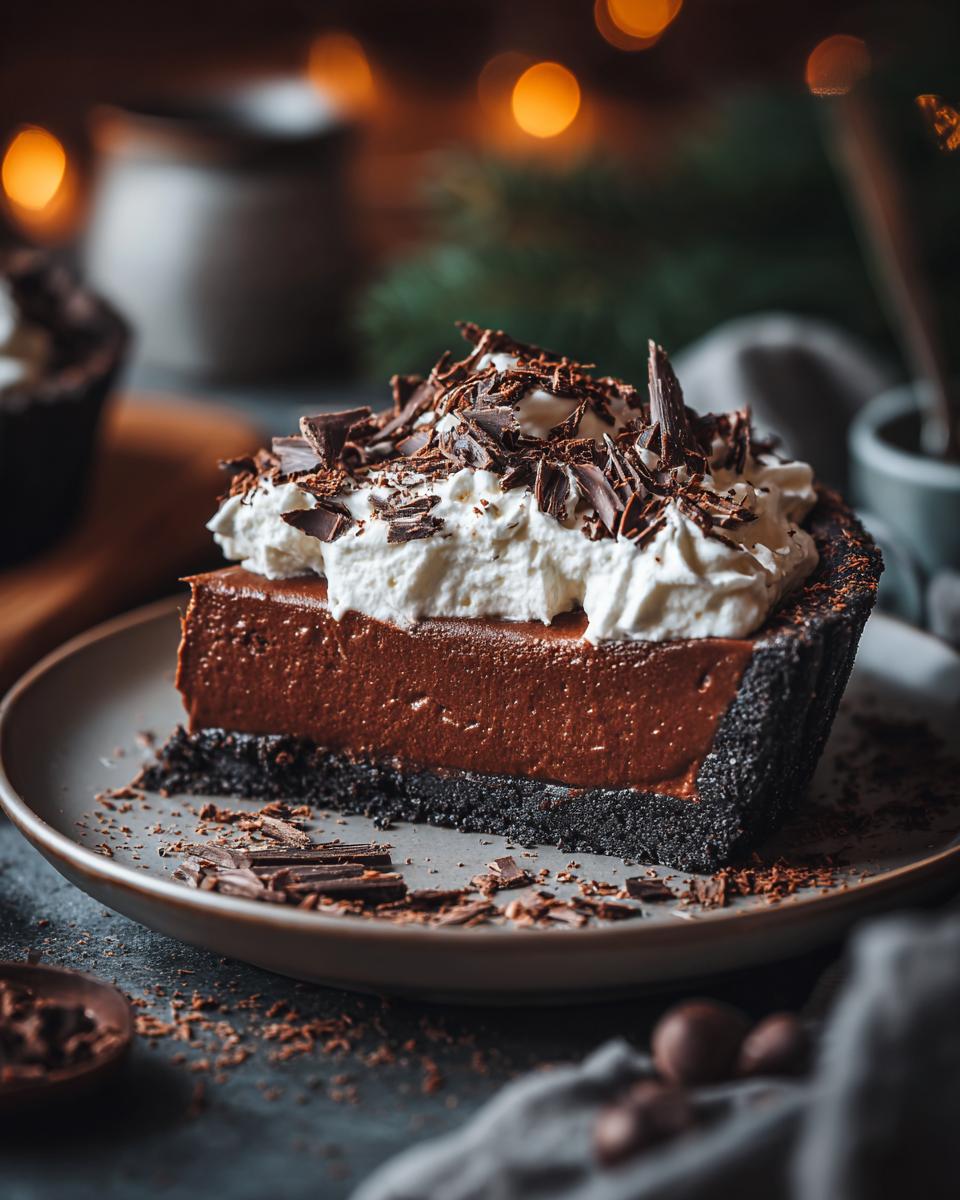
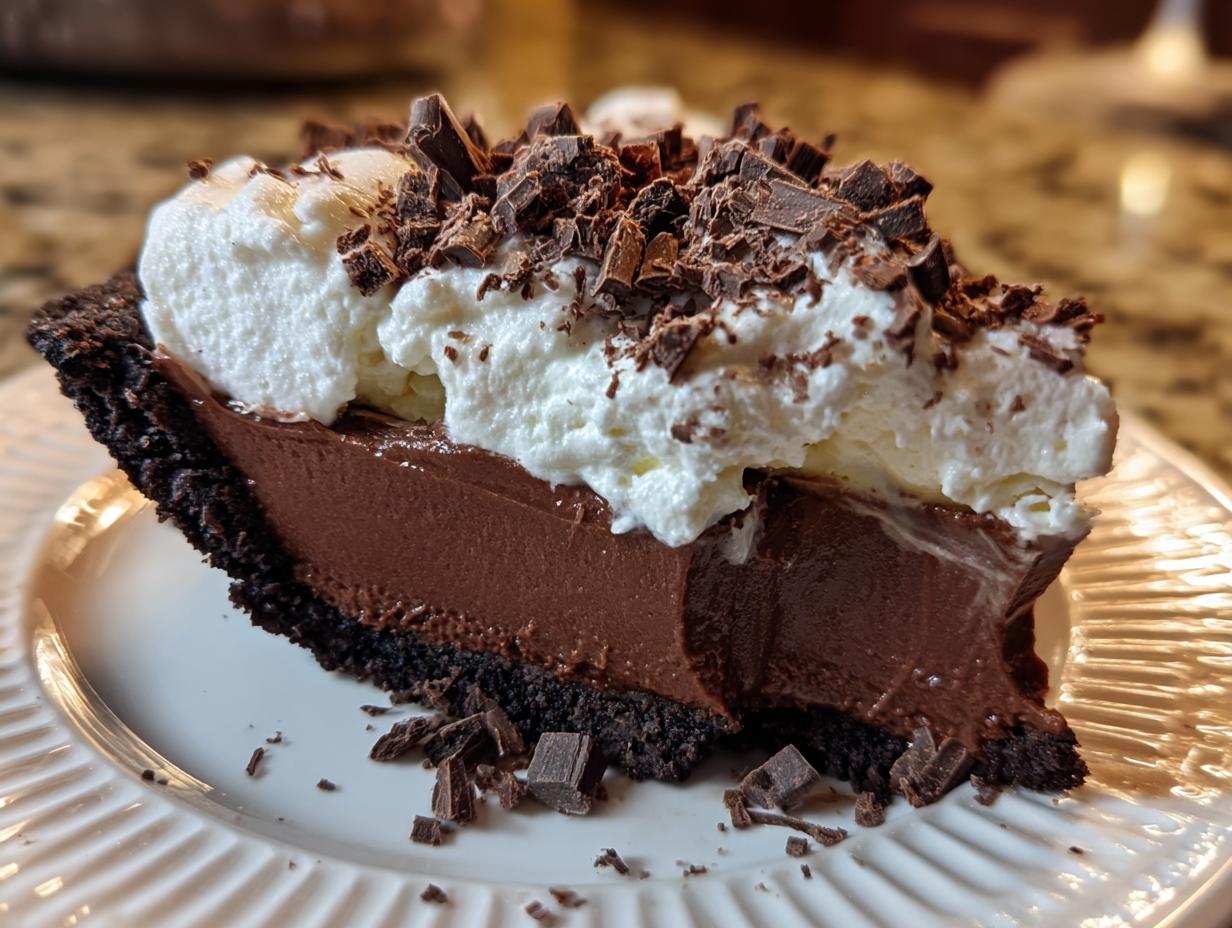
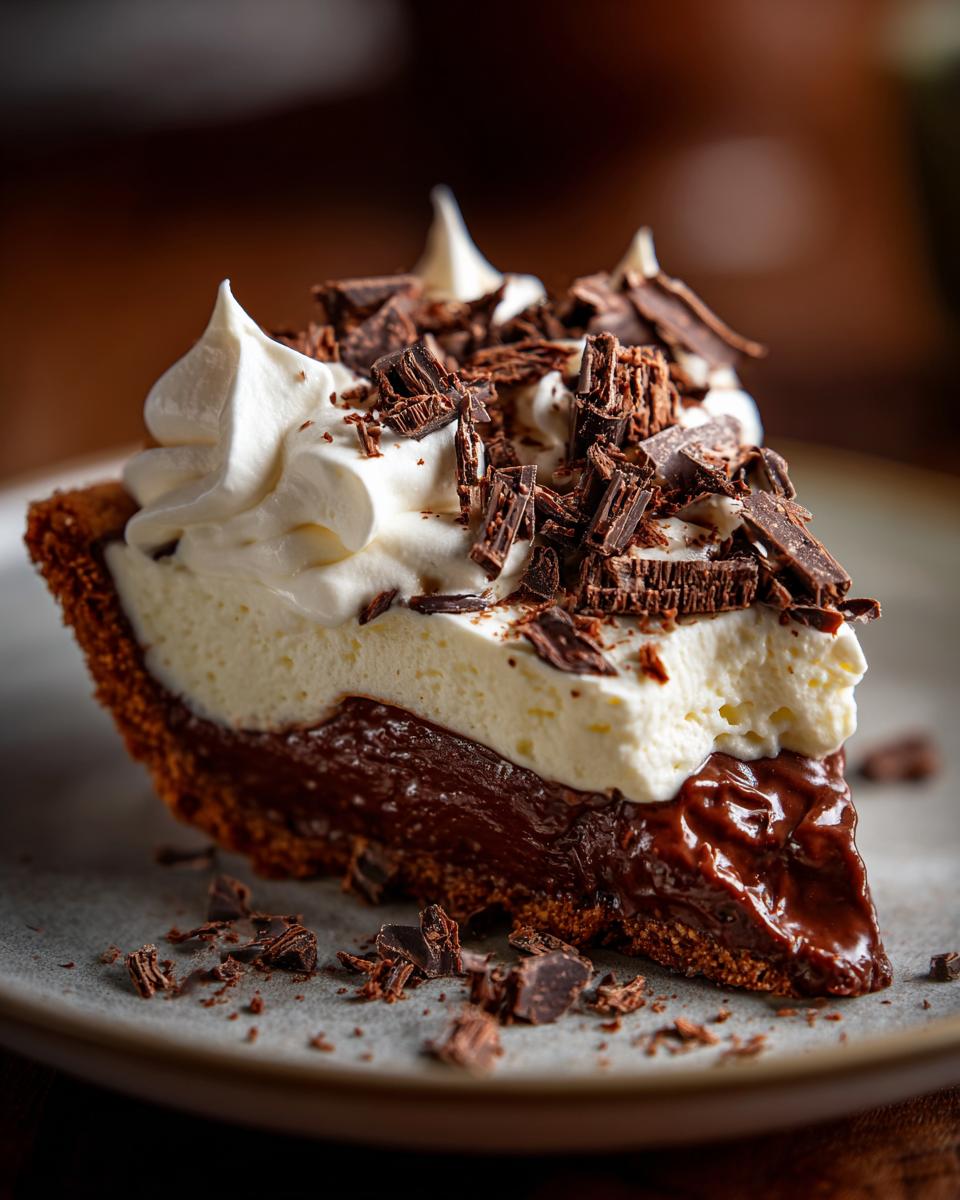
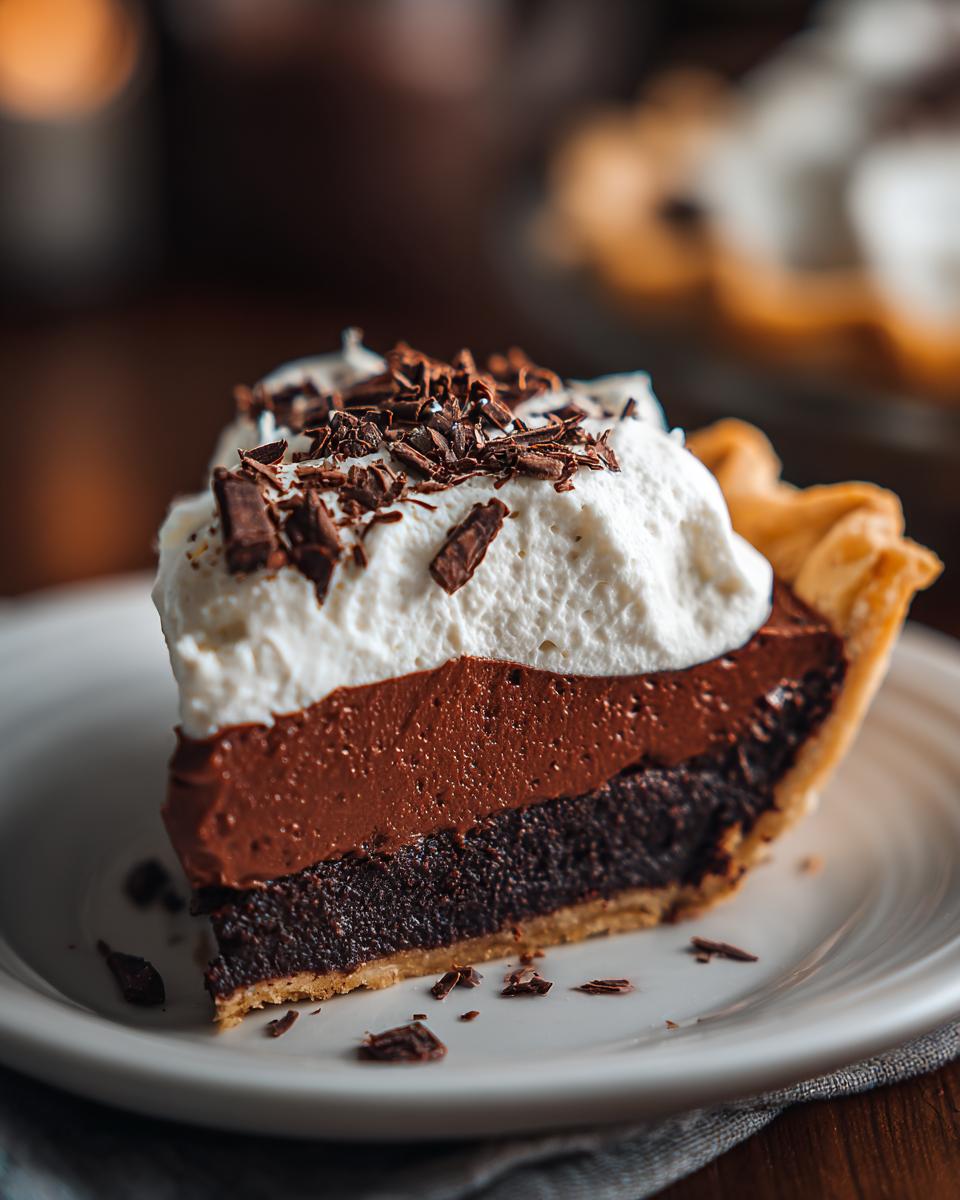
Festive Toppings for Your christmas chocolate pie
Now for the fun part – decorating this gorgeous christmas chocolate pie! We’ve done all the hard work, and now it’s time to make it look as fabulous as it tastes. The recipe calls for fluffy whipped cream, a scattering of chocolate shavings or curls, and maybe even some crushed peppermint candy if you’re feeling extra festive. It’s like the cherry on top, or, you know, the chocolate curl on the pie!
Whipped Cream Chocolate Pie Perfection
You just can’t beat a dollop of luscious whipped cream on top of a rich chocolate pie. It adds this amazing lightness and a subtle sweetness that cuts through the deep chocolate flavor perfectly. Make sure it’s nicely whipped – not too stiff, not too runny – so it looks just beautiful piped or swooshed on top. It’s what makes our whipped cream chocolate pie feel so complete!
Creative Garnishes for Festive Chocolate Desserts
Want to take those toppings to the next level for your festive chocolate desserts? Go for it! Those chocolate shavings are lovely, but you could also use a chocolate drizzle – maybe a little dark chocolate ganache that’s just slightly cooled so it’s pourable? And how about a sprinkle of crushed peppermint candy for that perfect holiday crunch and flavor? Or maybe a few whipped shortbread cookies crumbled around the edge? Don’t be afraid to play around and make it your own!

Frequently Asked Questions about christmas chocolate pie
Got questions about this amazing chocolate pie? I get it! Here are a few things people often ask, and I’m happy to help clear them up so your christmas chocolate pie turns out perfectly:
Can I use sweetened chocolate instead of unsweetened chocolate?
You totally can, but you’ll need to adjust the sugar! If you use, say, semi-sweet chocolate, I’d suggest cutting back the granulated sugar in the filling by about half a cup. Sweetened chocolate has sugar mixed in already, so you don’t want to make your pie *too* sweet. Always taste as you go!
How long does this christmas chocolate pie keep in the fridge?
This pie is a champion make-ahead dessert! Stored tightly covered in the refrigerator, it’ll stay delicious for about 3 to 4 days. The pastry crust might soften up a bit after the first day, but it’s still so yummy. The Oreo crust tends to hold up a bit better against moisture.
My chocolate filling has lumps! What did I do wrong?
Oops! Lumps usually happen if the custard isn’t stirred constantly while cooking, or if the eggs weren’t tempered quite right. Don’t panic! Sometimes, you can *carefully* push the lumpy filling through a fine-mesh sieve back into the saucepan (or a clean bowl) before pouring it into the crust. It might take a little patience, but it can often save your christmas chocolate pie!
Is it okay to bake the Oreo crust?
Yep, you absolutely can! While you can often get away with just chilling an Oreo crust, baking it for about 8-10 minutes at 350°F (175°C) really helps set it up and makes it a bit sturdier, especially for a rich filling like this. Just let it cool completely before filling!
Estimated Nutritional Information
Just a little heads-up, the nutritional info for this pie is an estimate, okay? It can change a bit depending on the exact brands you use and how you whip up your cream. But generally, you’re looking at around 450 calories per slice, with about 25g of fat and 55g of sugar. It’s definitely a treat, but totally worth it for the holidays!
Share Your Holiday Chocolate Pie Creations!
I just LOVE seeing your kitchen creations! If you whipped up this gorgeous christmas chocolate pie, please tell me all about it! Leave a comment below with your thoughts, rate the recipe, or even share a photo of your masterpiece on social media. Seeing your amazing pies makes my day!
PrintChristmas Chocolate Pie

A festive, make-ahead chocolate pie with a silky filling, perfect for holiday dessert boards. Choose between a classic pastry crust or an easy Oreo crust.
- Prep Time: 20 min
- Cook Time: 15 min
- Total Time: 4 hr 35 min
- Yield: 8 servings 1x
- Category: Dessert
- Method: Baking (for crust)
- Cuisine: American
- Diet: Vegetarian
Ingredients
- 1 recipe for pastry pie crust, baked, or 1 recipe for Oreo pie crust
- 1 ½ cups granulated sugar
- ⅓ cup cornstarch
- ¼ teaspoon salt
- 3 cups whole milk
- 4 large egg yolks
- 4 ounces unsweetened chocolate, chopped
- 2 tablespoons unsalted butter
- 1 teaspoon vanilla extract
- 1 cup heavy cream, whipped
- Chocolate shavings or curls, for garnish
- Crushed peppermint candy, for garnish (optional)
Instructions
- Prepare your chosen pie crust (pastry or Oreo) and let it cool completely.
- In a medium saucepan, whisk together the granulated sugar, cornstarch, and salt.
- Gradually whisk in the whole milk until smooth.
- In a separate bowl, whisk the egg yolks.
- Slowly temper the egg yolks by gradually whisking about 1 cup of the warm milk mixture into the yolks.
- Pour the tempered egg yolk mixture back into the saucepan with the remaining milk mixture.
- Cook over medium heat, stirring constantly, until the mixture thickens and comes to a gentle boil. Boil for 1 minute, stirring constantly.
- Remove the saucepan from the heat. Stir in the chopped unsweetened chocolate and butter until melted and smooth.
- Stir in the vanilla extract.
- Pour the chocolate custard filling into the prepared pie crust.
- Press plastic wrap directly onto the surface of the filling to prevent a skin from forming.
- Chill the pie in the refrigerator for at least 4 hours, or until firm.
- Before serving, remove the plastic wrap and top the pie with whipped cream.
- Garnish with chocolate shavings or curls, and crushed peppermint candy if desired.
Notes
- For a stovetop custard, ensure you stir constantly to prevent scorching and lumps.
- Make this pie a day ahead for easy holiday entertaining.
- Experiment with different toppings like chocolate ganache or a sprinkle of sea salt.
Nutrition
- Serving Size: 1 slice
- Calories: 450
- Sugar: 55g
- Sodium: 150mg
- Fat: 25g
- Saturated Fat: 15g
- Unsaturated Fat: 10g
- Trans Fat: 0g
- Carbohydrates: 50g
- Fiber: 3g
- Protein: 7g
- Cholesterol: 90mg