

Oh, Chicken Pad Thai! Just saying the name makes me want to grab my wok, doesn’t it? Forget those nights where you’re stuck staring into the fridge, wondering what magic you can whip up. Today, we’re diving into a recipe that’s going to make you feel like a total kitchen rockstar: my Chicken Pad Thai. It’s got that amazing sweet, sour, and savory punch you crave, with tender chicken and those perfectly chewy rice noodles, all coming together in your own kitchen. As Avery, I grew up believing that truly delicious food doesn’t have to be complicated. My background in nutrition science just solidified that; simple, wholesome ingredients can create something truly spectacular. This Chicken Pad Thai recipe is exactly that – a testament to making memorable meals accessible for every weeknight, just like we talk about over on my About page.
- Why You'll Love This Chicken Pad Thai
- Gather Your Ingredients for Chicken Pad Thai
- Essential Equipment for Making Chicken Pad Thai
- Step-by-Step Guide to Your Chicken Pad Thai
- Tips for Perfect Chicken Pad Thai Every Time
- Frequently Asked Questions About Chicken Pad Thai
- Storing and Reheating Your Chicken Pad Thai
- Estimated Nutritional Information for Chicken Pad Thai
- Share Your Chicken Pad Thai Masterpiece
Why You’ll Love This Chicken Pad Thai
Seriously, who needs to wait ages for takeout when you can have this amazing dish on your table in about 30 minutes? It’s got that perfect zingy, sweet, and savory flavor that’s totally addictive. Plus, it’s so easy to get everyone at the table happy with this one, even the little ones. You get that authentic taste without the fuss, using ingredients that are probably already in your pantry. It’s honestly one of my favorite ways to make a weeknight dinner feel special and still be super healthy!
Gather Your Ingredients for Chicken Pad Thai
Alright, let’s get our ducks in a row for this amazing Chicken Pad Thai! I’ve tested this recipe loads of times because I just love knowing you’ll get fantastic results every single time. You’ll want to have these handy:
You’ll need 8 ounces of dried flat rice noodles – these are key for that authentic texture, trust me. For our stir-fry base, we’ve got 3 tablespoons of vegetable oil, split into two uses. Then, 1 pound of boneless, skinless chicken thighs, cut up into bite-sized pieces so they cook quickly and evenly. We’ll also have 2 cloves of garlic, minced super fine, and 1 shallot, thinly sliced, for that aromatic depth. Don’t forget 2 large eggs, lightly beaten, ready to scramble in! And for the fresh crunch, a cup of bean sprouts, 1/4 cup of chopped roasted peanuts (for topping and mixing in!), and 1/4 cup of fresh cilantro, chopped. Oh, and a lime, cut into wedges, for that final squeeze of brightness!
For the Sauce:
- 3 tablespoons fish sauce (the backbone of that savory flavor!)
- 3 tablespoons tamarind paste (this gives it that signature tang)
- 2 tablespoons brown sugar (just enough sweetness to balance everything)
- 1 tablespoon soy sauce (for an extra umami kick)
- 1 teaspoon sriracha (optional, if you like a little heat!)
Essential Equipment for Making Chicken Pad Thai
Okay, so you truly want to nail this Chicken Pad Thai? You don’t need a whole professional kitchen, just a few key players. You’ll definitely want a large skillet or, even better, a wok. That’s where all the magic happens when you’re stir-frying! Grab yourself a small bowl for whisking up that dreamy sauce, and a cutting board and knife for all that chopping. A whisk for the eggs and sauce, and some tongs for tossing everything together will also be super helpful. That’s really it – simple tools for a stunning dish!
Step-by-Step Guide to Your Chicken Pad Thai
Alright, let’s get cooking! I’ve walked through this recipe a million times, and trust me, it’s quite straightforward once you see it laid out. It’s the kind of dish that makes you feel like you’ve got this whole home cooking thing down pat!
Preparing the Noodles and Sauce
First things first, grab those dried flat rice noodles. We want them to be pliable but NOT mushy – nobody likes sad, overcooked noodles! So, follow the package directions using hot water until they’re just right. Drain them really well and set them aside. Now for that magic potion: in a little bowl, whisk together your fish sauce, that essential tamarind paste, brown sugar for a touch of sweetness, and soy sauce. If you’re feeling a bit daring, toss in the sriracha now for a little kick. Give it a good whisk until it’s all combined and smooth. This sauce is the heart of our Chicken Pad Thai!
Cooking the Chicken and Aromatics
Grab your large skillet or wok and get it nice and hot over medium-high heat. Add about 1 tablespoon of that vegetable oil. Toss in your bite-sized chicken pieces and let them do their thing until they’re beautifully browned and cooked all the way through – usually about 5 to 7 minutes. Once they’re done, scoop ’em out and set them on a plate for a moment. Don’t wipe out the skillet! Add the rest of the oil, then throw in your minced garlic and thinly sliced shallots. Stir-fry them for just about 30 seconds until they smell amazing – be careful not to burn them!

Scrambling the Eggs and Combining Ingredients
Now, make a little space in your skillet, pushing those yummy aromatics to one side. Pour your lightly beaten eggs onto the cleared side. Let them set up just a bit, then scramble them until they’re cooked through but still tender. Go ahead and break them up a bit and mix them in with the garlic and shallots. Next, add those drained rice noodles right into the skillet, followed by all that gorgeous sauce we made. Get everything tossed together really well. You want those noodles to soak up all that flavor. Cook and stir for about 2 to 3 minutes until the noodles are tender and the sauce has thickened just a little, coating everything perfectly.
Finishing and Serving Your Chicken Pad Thai
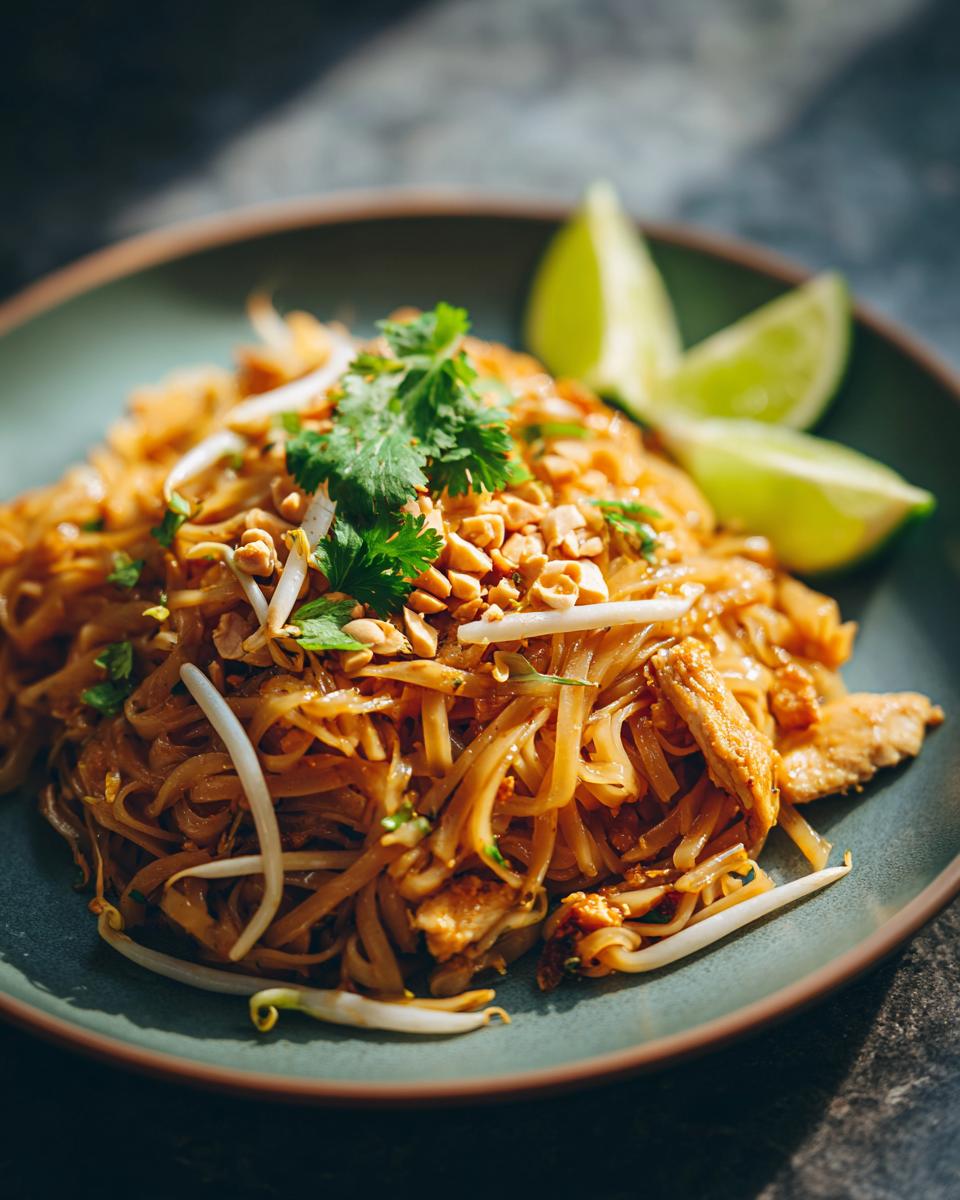
Time for the grand finale! Bring that cooked chicken back into the skillet. Now, toss in the fresh bean sprouts and about half of your chopped peanuts. Give everything a final, enthusiastic toss to make sure it’s all combined and heated through – just another minute or two is all it needs. And there you have it! Your absolute best Chicken Pad Thai, better than takeout. Serve it up immediately in bowls, making sure everyone gets a good mix of noodles, chicken, and sprouts. Top it off with the rest of those crunchy peanuts, a generous sprinkle of fresh cilantro, and of course, those essential lime wedges on the side for squeezing. Enjoy!

Tips for Perfect Chicken Pad Thai Every Time
Okay, so you’ve made the Chicken Pad Thai, and maybe it’s already amazing, but let’s talk about making it *absolutely* perfect every single time. I’ve learned a few things after making this dish more times than I can count, and honestly, it’s all about the little details. Using a wok is super helpful for that high-heat stir-fry action, but don’t worry if you only have a large skillet – just make sure not to overcrowd the pan! Work in batches if you have to, so everything gets nicely seared instead of steaming. Trust me, getting that sauce consistency just right means tasting and adjusting it as you go, and always, always using the freshest ingredients you can find makes a world of difference!
Ingredient Substitutions and Additions
You know, sometimes you’re mid-recipe and realize you’re missing something vital, or you just want to jazz things up a bit! If you can’t find tamarind paste (it’s a game-changer, but I get it!), you can totally fake it with an equal amount of lime juice mixed with a little extra brown sugar for that tang and sweetness. It won’t be *exactly* the same, but it’ll still be delicious! And don’t be shy about adding extra veggies; sliced bell peppers, shredded carrots, or even some tender broccoli florets are fantastic additions. Just toss them in with the garlic and shallots so they have time to soften up a bit before you add the noodles.
Achieving Authentic Flavor in Your Chicken Pad Thai
For that real deal, “wow, I can’t believe I made this” flavor in your Chicken Pad Thai, it all comes down to balance. That sauce we made? It’s designed to hit all the right notes: sweet from the brown sugar, sour from the tamarind, and salty-savory from the fish sauce and soy sauce. Taste it before you add it to the noodles and adjust if you need more tang or a touch more sweetness. And don’t skimp on the fresh stuff at the end! The bright cilantro and that zesty lime wedge you squeeze over everything? They just bring all those amazing flavors to life and make it taste like it came straight from a bustling Bangkok market!

Frequently Asked Questions About Chicken Pad Thai
Got questions about whipping up this amazing Chicken Pad Thai? I’ve got answers! It’s pretty straightforward, but a few little tips can make all the difference. If you ever have a question that isn’t here, feel free to reach out through my Contact page!
Can I use different noodles for this Chicken Pad Thai?
While the recipe calls for dried flat rice noodles – and trust me, they are PERFECT for Pad Thai! – you can definitely get creative. If you can’t find those specific ones, other flat rice noodles will work. Just be super careful with the soaking time; you want them pliable, not mushy. Avoid spaghetti or egg noodles, though; they just don’t give you that authentic texture we’re going for in this weeknight noodle dish.
How do I make my Chicken Pad Thai less spicy?
Easy peasy! The sriracha in the sauce is totally optional, so if you’re sensitive to heat or cooking for little ones, just leave it out! If you’ve already added it and it’s a little too zingy, you can try stirring in a bit more brown sugar or even a splash of milk or coconut milk to mellow it out a touch. Remember, you can always serve hot sauce on the side for those who like things extra spicy!
Is this Chicken Pad Thai recipe healthy?
This Chicken Pad Thai recipe is designed to be a delicious and balanced meal that you can feel good about. We’re using lean chicken, good-for-you rice noodles, and plenty of fresh veggies. The sauce uses tamarind and fish sauce for flavor, which are naturally lower in calories than heavy cream-based sauces you might find in some takeout. Plus, making it yourself means you control the sodium and sugar! It’s a fantastic option for a healthy, Thai-inspired dinner that beats unhealthy takeout any day.
Can I add tofu or shrimp instead of chicken for my Pad Thai?
Absolutely! This recipe is super adaptable. If you’re vegetarian or just want to switch things up, extra-firm tofu pressed and cubed works beautifully. Pan-fry it until golden before adding it in with the noodles. Shrimp is also a fantastic choice; it cooks much faster, so add it towards the end with the bean sprouts and peanuts. It’s all about making this rice noodle stir fry your own!
Storing and Reheating Your Chicken Pad Thai
So, you managed to resist eating all of your incredible Chicken Pad Thai in one sitting? Awesome! To keep those leftovers tasting just as good, let them cool down a bit before tucking them into an airtight container. Pop them in the fridge and they should be delicious for about 2 to 3 days. When you’re ready to reheat, a quick trip to the microwave works fine – just stir it halfway through to heat evenly. If you’re feeling fancy, you can also gently reheat it in a skillet over medium-low heat with a tiny splash of water or chicken broth to loosen those noodles right back up. Avoid getting it too hot, or the noodles can get a bit mushy!
Estimated Nutritional Information for Chicken Pad Thai
Okay, so while every kitchen is a little different, here are some good estimates for what you’re getting in each serving of this amazing Chicken Pad Thai. We’re looking at about 550 calories, with around 25g of fat (about 5g of that is saturated), 30g of protein to keep you full, and 55g of carbohydrates. You’ll also find about 3g of fiber and roughly 1200mg of sodium. Keep in mind that the exact numbers can totally change depending on the specific brands you use and how much of everything you pack in!
Share Your Chicken Pad Thai Masterpiece
Okay, wow! You did it! You made your very own Chicken Pad Thai, and I bet it looks absolutely incredible. Now, here’s the fun part: I just *love* seeing what you all create in your kitchens. So, if you’re proud of your wok skills, tell me all about it in the comments below! Did you try any fun variations? How did it turn out? And please, pretty please, if you share a photo on social media, tag me so I can see your amazing creation! It truly makes my day! For more info on sharing and using recipes, check out our Terms of Use and Privacy Policy. Happy cooking!
PrintChicken Pad Thai

A simple and delicious chicken pad thai recipe that you can make at home, perfect for a weeknight dinner.
- Prep Time: 15 min
- Cook Time: 15 min
- Total Time: 30 min
- Yield: 4 servings 1x
- Category: Dinner
- Method: Stir-fry
- Cuisine: Thai
- Diet: Vegetarian
Ingredients
- 8 ounces dried flat rice noodles
- 3 tablespoons vegetable oil, divided
- 1 pound boneless, skinless chicken thighs, cut into bite-sized pieces
- 2 cloves garlic, minced
- 1 shallot, thinly sliced
- 2 large eggs, lightly beaten
- 1 cup bean sprouts
- 1/4 cup chopped roasted peanuts
- 1/4 cup chopped fresh cilantro
- 1 lime, cut into wedges
- For the Sauce:
- 3 tablespoons fish sauce
- 3 tablespoons tamarind paste
- 2 tablespoons brown sugar
- 1 tablespoon soy sauce
- 1 teaspoon sriracha (optional)
Instructions
- Soak rice noodles in hot water according to package directions until pliable but not mushy. Drain well.
- In a small bowl, whisk together the sauce ingredients: fish sauce, tamarind paste, brown sugar, soy sauce, and sriracha (if using). Set aside.
- Heat 1 tablespoon of vegetable oil in a large skillet or wok over medium-high heat. Add chicken and cook until browned and cooked through, about 5-7 minutes. Remove chicken from skillet and set aside.
- Add the remaining 2 tablespoons of oil to the skillet. Add garlic and shallots and stir-fry until fragrant, about 30 seconds.
- Push the garlic and shallots to one side of the skillet. Pour the beaten eggs onto the other side and scramble until just cooked. Break up the eggs and mix them with the garlic and shallots.
- Add the drained rice noodles and the prepared sauce to the skillet. Toss well to coat the noodles evenly. Cook for 2-3 minutes, stirring frequently, until the noodles are tender and the sauce has thickened slightly.
- Return the cooked chicken to the skillet. Add the bean sprouts and half of the chopped peanuts. Toss everything together until well combined and heated through, about 1-2 minutes.
- Serve immediately, garnished with the remaining chopped peanuts, fresh cilantro, and lime wedges.
Notes
- For a spicier pad thai, add more sriracha or a pinch of red pepper flakes to the sauce.
- You can add other vegetables like sliced bell peppers or broccoli florets along with the bean sprouts.
- If you don’t have tamarind paste, you can substitute with an equal amount of lime juice and a little extra brown sugar, but the flavor will be slightly different.
- This recipe is a great option for a quick weeknight dinner, similar to what you might get from meal planning services.
Nutrition
- Serving Size: 1 serving
- Calories: 550
- Sugar: 15g
- Sodium: 1200mg
- Fat: 25g
- Saturated Fat: 5g
- Unsaturated Fat: 20g
- Trans Fat: 0g
- Carbohydrates: 55g
- Fiber: 3g
- Protein: 30g
- Cholesterol: 150mg