
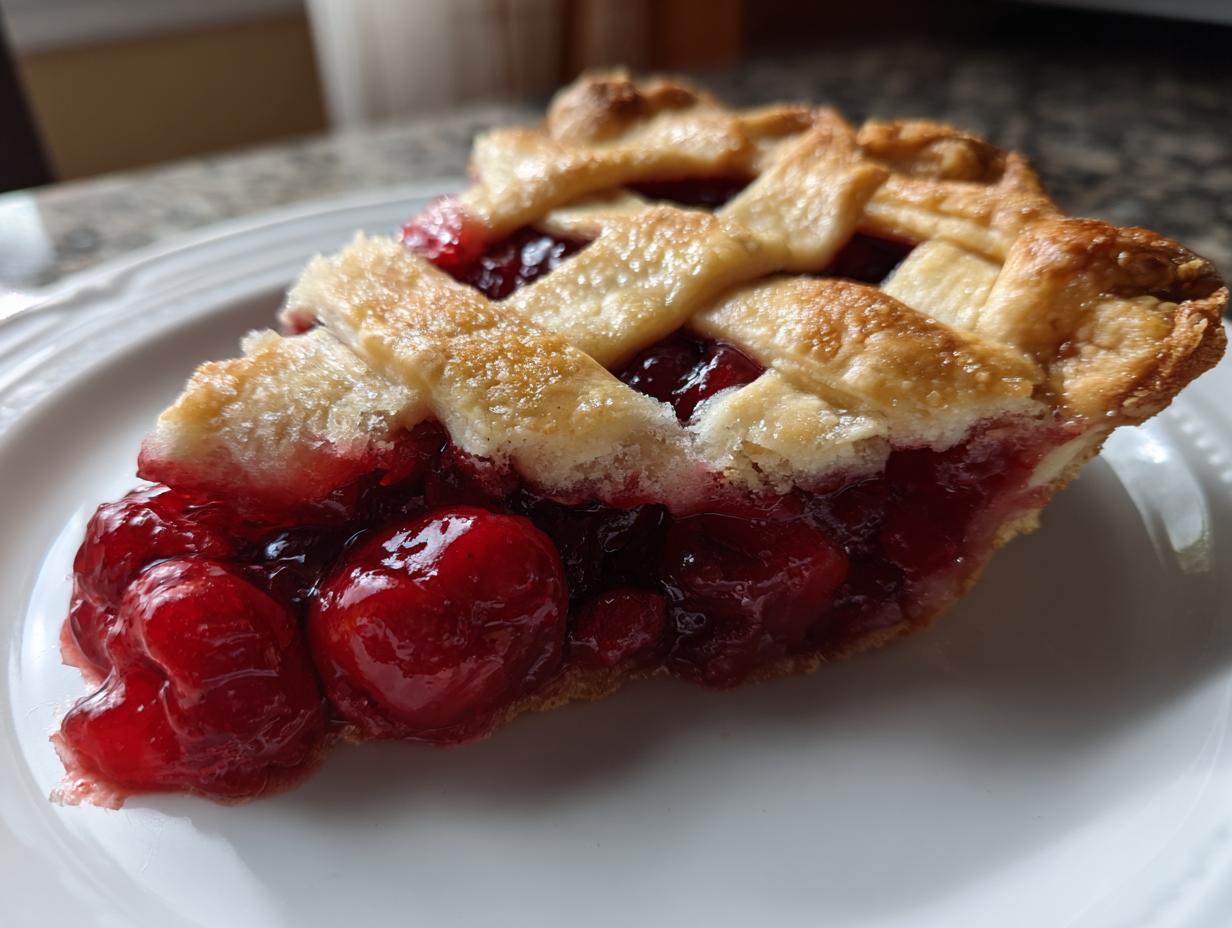
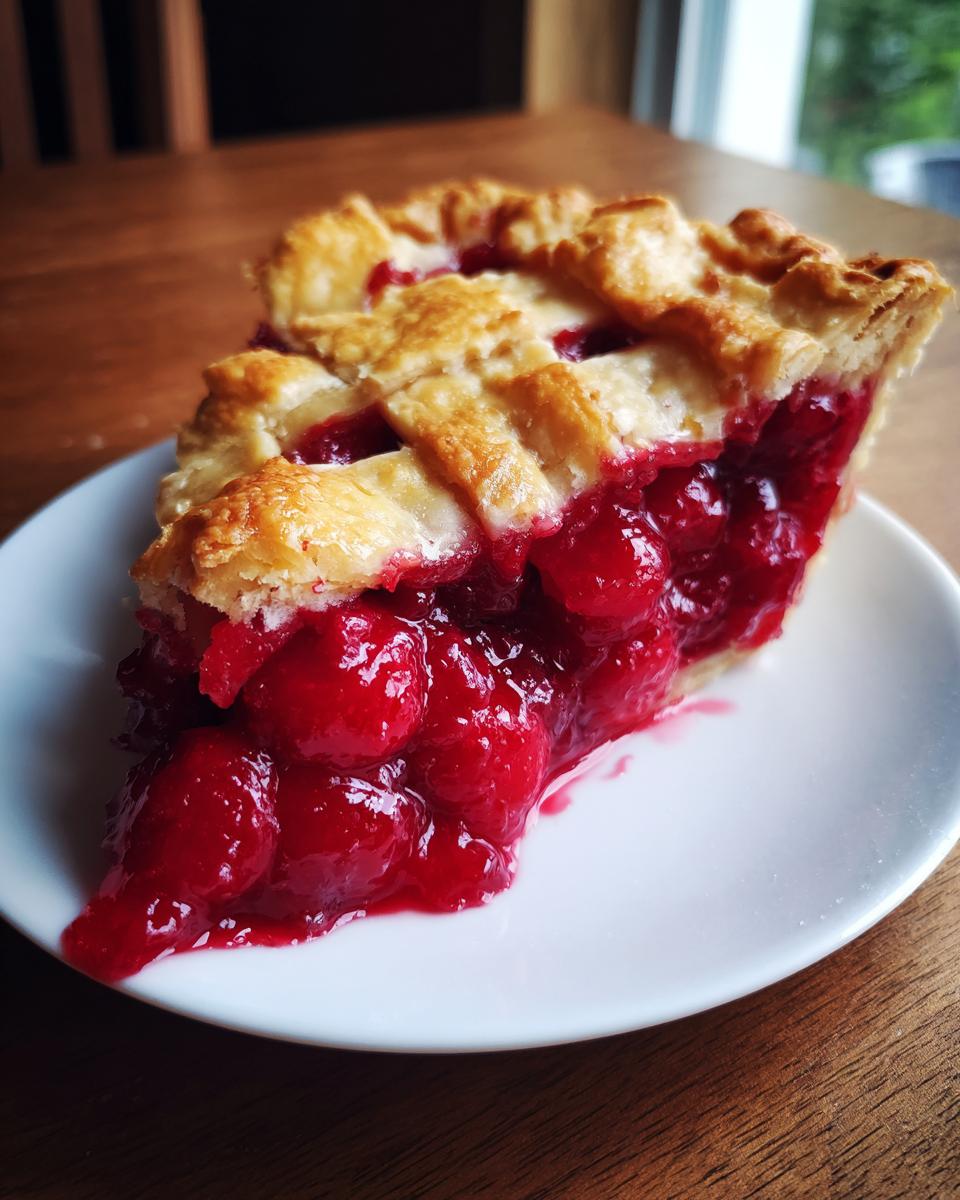
Oh, the magic of a perfect cherry pie! Imagine that first warm slice, the glossy, thick ruby-red filling barely holding its shape, peeking out from beneath a golden, impossibly flaky lattice crust. It’s the kind of dessert that just screams “celebration” or maybe just a really good Tuesday night, right? Making a truly show-stopping cherry pie from scratch used to feel a little intimidating to me, but honestly, it’s all about a few simple tricks. My philosophy here at Devour Dish, as you can see from my story, is that the most comforting, memorable food is achievable for everyone, and this classic cherry pie, with its decadent filling and buttery crust, is proof of that. Trust me, this recipe is going to become your go-to!
- Why You'll Love This Classic Cherry Pie Recipe
- Ingredients for a Perfect Cherry Pie
- Mastering the Lattice Cherry Pie: Step-by-Step Instructions
- Tips for the Best Fresh Cherry Pie
- Serving and Storing Your Delicious Cherry Pie
- Frequently Asked Questions About Cherry Pie
- Nutritional Information for Classic Cherry Pie
- Share Your Homemade Cherry Pie Creations!
Why You’ll Love This Classic Cherry Pie Recipe
This isn’t just any cherry pie; it’s the one that will have everyone asking for the recipe! Here’s why it’s a keeper:
- Thick, Jammy Filling: Say goodbye to watery pies! This recipe guarantees a luscious, thick cherry filling that won’t drip everywhere.
- Buttery, Flaky Crust: The lattice crust isn’t just pretty; it’s wonderfully tender and buttery.
- Simple to Master: Even if you’re new to pie-making, the clear steps make it totally doable.
- Versatile for Any Occasion: Perfect for holidays, birthdays, or frankly, just because you deserve a treat.
- Uses Fresh or Frozen Cherries: Flexibility is key in my kitchen, and this recipe works with either!
Ingredients for a Perfect Cherry Pie
Alright, let’s talk about what makes this cherry pie so darn good! It really comes down to using good ingredients and treating them right. I’ve broken everything down for you, so grabbing what you need is a breeze. Remember, for the best flavor, always go for good quality butter!
For the Crust:
- 2 1/2 cups all-purpose flour
- 1 teaspoon salt
- 1 cup (2 sticks) COLD unsalted butter, cut into cubes (Seriously, keep it cold!)
- 1/2 cup ice water (More if needed, but start here)
For the Filling:
- 6 cups fresh or frozen pitted cherries. Oh, and a quick tip: if you use frozen ones, don’t thaw them! Just toss ’em in frozen, it helps keep the filling from getting watery.
- 1 cup granulated sugar (you can adjust this a smidge depending on your cherries)
- 1/4 cup cornstarch (This is our secret weapon for that nice, thick filling!)
- 1 tablespoon lemon juice (Just a touch to brighten things up)
- 1 teaspoon almond extract (This is the little something-something that makes it taste extra special!)
- 1/4 teaspoon salt
- 2 tablespoons unsalted butter, cut into small pieces (These little gems go on top of the filling before you bake!)
For the Egg Wash:
- 1 large egg, beaten
- 1 tablespoon milk or water
- 1 teaspoon granulated sugar (for that extra golden sparkle!)
Mastering the Lattice Cherry Pie: Step-by-Step Instructions
Alright, ready to make some pie magic? Assembling this classic cherry pie is where the real fun begins! Don’t worry if it’s not perfect the first time; practice makes perfect, and even a slightly wonky lattice tastes amazing. We’re aiming for that beautiful, golden-brown masterpiece you see in bakeries, and trust me, it’s totally doable!
Crafting the Buttery Pie Crust
First things first, let’s get this dough ready. Grab your flour and salt and give them a little whisk in a big bowl. Now, cut in that super cold butter. I like to use my fingertips because I can really feel when it’s the right texture – you want it to look like coarse crumbs with some little pea-sized butter bits still showing. Those bits are your ticket to flakiness! Gradually add the ice water, just a tablespoon at a time, mixing until the dough *just* starts to come together. Don’t overmix! Split it in half, flatten each part into a disk, wrap ’em up tight, and let them chill in the fridge for at least an hour. This step is SO important!
Creating the Thick Cherry Filling
While the dough is chilling, let’s whip up our glorious cherry filling. In a bowl, gently toss together your cherries (remember, frozen are fine and actually great here!), sugar, cornstarch – our thickening superhero! – lemon juice, that lovely almond extract for a special touch, and a pinch of salt. Let this mixture hang out for about 15 minutes. You’ll see it start to release its juices, which is exactly what we want. This little rest helps the cornstarch start doing its magic before it even hits the oven.
Assembling and Baking Your Homemade Cherry Pie
Okay, time to build this beauty! Preheat your oven to 400°F (200°C). On a lightly floured surface, roll out one disk of dough into about a 12-inch circle. Carefully drape it into your 9-inch pie plate, letting any extra hang over the edge a bit. Pour in all that gorgeous cherry filling, spreading it out evenly. Now, dot the top with those little butter pieces – pure heaven! Roll out your second dough disk and cut it into strips for a lattice top. Weave them over and under, trim the ends, and crimp the edges with your fingers to seal everything up. Brush the whole lattice with your egg wash mixture (egg, milk, and sugar) for that irresistible golden shine. Pop it into the hot oven for 20 minutes, then turn the heat down to 375°F (190°C) and bake for another 30-40 minutes until the crust is golden and the filling looks bubbly. If the edges start getting too dark, just tent ’em loosely with foil!
The Crucial Cooling Period for Perfect Slicing
This is the hardest part, I know! But you absolutely HAVE to let your cherry pie cool completely on a wire rack. I’m talking at least 3-4 hours, maybe even more. This lets that glorious filling set up properly. If you cut into it too soon, you’ll have a delicious, soupy mess, and we want those clean, beautiful slices, right?
Tips for the Best Fresh Cherry Pie
Making a truly spectacular cherry pie is all about a few little secrets I’ve picked up along the way. Don’t fret if your first attempt isn’t absolutely flawless; every pie I make teaches me something new! The goal is always that perfect balance of sweet-tart filling and flaky crust, and these tips are here to help you nail it, whether you’re using fresh-off-the-tree cherries or those trusty ones from the freezer. We’re talking seriously delicious results here!
Ingredient Notes and Substitutions
That little bit of almond extract in the filling? Oh, it’s a game-changer! It really amplifies the cherry flavor without making it taste like marzipan, I promise. If you’re not a fan, a touch of vanilla extract works too, but almond is my secret weapon. And for thickening, cornstarch is our best friend for that luscious, jelly-like consistency. If you happen to be out, tapioca starch or even a little bit of flour can work in a pinch, but cornstarch gives the cleanest, glossiest finish for our thick cherry filling.
Making Ahead and Freezing Your Holiday Cherry Pie
The best thing about pie? You can totally get ahead of the game! The dough can be made up to two days in advance and kept chilled, or even frozen for up to three months – just pop it in the fridge overnight to thaw. You can also assemble the *entire* pie (lattice and all!) ahead of time and freeze it. Then, when you’re ready to bake your holiday cherry pie, just bake it from frozen, adding about 10-15 extra minutes to the cooking time. Easy peasy!
Serving and Storing Your Delicious Cherry Pie
Once your masterpiece has had its well-deserved rest, it’s time to enjoy! This cherry pie is absolutely divine served slightly warm or at room temperature. A scoop of vanilla bean ice cream or a dollop of freshly whipped cream takes it over the top!
If you happen to have any leftovers (which is rare in my house!), just cover the pie loosely and keep it at room temperature for a day or two. For longer storage, pop it in the fridge. Gently reheating a slice in a low oven (around 300°F) for about 10-15 minutes makes it taste almost as good as fresh!
Frequently Asked Questions About Cherry Pie
Got pie questions? I’ve got answers! Making a homemade cherry pie can bring up a few head-scratchers, but don’t worry, we’ll sort them out. Here are some of the most common things folks ask about getting that perfect slice of classic cherry pie.
Can I use canned cherries for my cherry pie?
While fresh or frozen cherries are absolutely my top recommendation for the best flavor and texture, you *can* use canned cherries in a pinch for your cherry pie. Just be sure to drain them really, really well! You might also need to adjust the sugar since canned cherries are often packed in syrup. For that truly jammy, thick cherry filling we love, fresh or frozen is the way to go, though!
Why is my pie filling runny even after baking?
Oh, the dreaded runny pie – it’s the worst! Usually, this happens for one of two reasons: not enough thickener (we’re using cornstarch here, which is great for a thick cherry filling!) or the cherries were too watery to begin with. If you use frozen cherries, make absolutely sure you don’t thaw them first. Also, make sure you’re letting the pie cool completely, like for hours, before slicing. That resting period is crucial for the filling to set up!
How do I prevent the lattice crust from burning?
This is a common worry with lattice cherry pie! If you notice your beautiful lattice crust browning too quickly before the rest of the pie is ready, just loosely tent the top with a piece of aluminum foil. This shields the crust from direct heat. Sometimes, using a pie shield on the edges only works wonders too, especially if the edges are getting too dark while the center needs more time. Make sure your oven temperature and baking times are accurate!
Can I make the cherry pie dough ahead of time?
Yes, absolutely! The pie dough can be made up to 2 days in advance and kept chilled in the fridge, or you can wrap it well and freeze it for up to 3 months. Just remember to let it thaw in the refrigerator overnight before you plan to use it. This is a lifesaver for busy holiday baking schedules!
Nutritional Information for Classic Cherry Pie
Just a heads-up, folks! The numbers below are estimates for a single slice of this divine classic cherry pie. Actual values can tweak a bit depending on the exact ingredients you use, like the sweetness of your cherries or the type of butter. But they give you a pretty good idea. As Avery always says, it’s about enjoying the deliciousness!
- Serving Size: 1 slice
- Calories: 450
- Fat: 25g
- Saturated Fat: 15g
- Sugar: 35g
- Carbohydrates: 55g
- Protein: 5g
- Sodium: 200mg
Share Your Homemade Cherry Pie Creations!
Okay, now it’s your turn to shine! I would absolutely LOVE to see your beautiful lattice cherry pies. Did you try the almond extract? How did it turn out slicing? Drop your thoughts, rate this recipe, or share your pie pics in the comments below! You can also send me a message through my contact page – I can’t wait to hear all about it!
PrintClassic Cherry Pie with Lattice Crust

A classic homemade cherry pie recipe featuring a thick, non-runny filling and a buttery lattice crust, perfect for holidays or any occasion.
- Prep Time: 45 min
- Cook Time: 50 min
- Total Time: 1 hr 35 min
- Yield: 8 servings
- Category: Dessert
- Method: Baking
- Cuisine: American
- Diet: Vegetarian
Ingredients
- For the Crust: 2 1/2 cups all-purpose flour, 1 teaspoon salt, 1 cup (2 sticks) cold unsalted butter, cut into cubes, 1/2 cup ice water
- For the Filling: 6 cups fresh or frozen pitted cherries (if frozen, do not thaw), 1 cup granulated sugar, 1/4 cup cornstarch, 1 tablespoon lemon juice, 1 teaspoon almond extract, 1/4 teaspoon salt, 2 tablespoons unsalted butter, cut into small pieces
- For the Egg Wash: 1 large egg, beaten, 1 tablespoon milk or water, 1 teaspoon granulated sugar
Instructions
- Prepare the Crust: In a large bowl, whisk together flour and salt. Cut in the cold butter using a pastry blender or your fingertips until the mixture resembles coarse crumbs with some pea-sized pieces of butter. Gradually add ice water, 1 tablespoon at a time, mixing until the dough just comes together. Divide the dough in half, flatten each half into a disk, wrap in plastic wrap, and refrigerate for at least 1 hour.
- Prepare the Filling: In a large bowl, combine cherries, sugar, cornstarch, lemon juice, almond extract, and salt. Toss gently to coat. Let stand for 15 minutes.
- Assemble the Pie: Preheat your oven to 400°F (200°C). On a lightly floured surface, roll out one disk of dough into a 12-inch circle. Carefully transfer it to a 9-inch pie plate. Trim the edges, leaving about a 1-inch overhang.
- Pour the cherry filling into the crust-lined pie plate. Dot the top of the filling with the small pieces of butter.
- Roll out the second disk of dough. Cut it into strips for a lattice top or cut out decorative shapes. Arrange the lattice strips over the filling, weaving them over and under. Trim the ends of the strips and crimp the edges of the top and bottom crusts together to seal.
- Prepare the Egg Wash: In a small bowl, whisk together the egg, milk or water, and sugar. Brush this mixture evenly over the lattice crust.
- Bake the pie for 20 minutes at 400°F (200°C). Then, reduce the oven temperature to 375°F (190°C) and continue baking for another 30-40 minutes, or until the crust is golden brown and the filling is bubbly. If the crust starts to brown too quickly, loosely tent the pie with aluminum foil.
- Let the pie cool completely on a wire rack for at least 3-4 hours before slicing. This allows the filling to set properly.
Notes
- For a thicker filling, you can increase the cornstarch to 1/3 cup.
- If using frozen cherries, do not thaw them before using. This helps prevent a watery filling.
- Make ahead: The pie dough can be made up to 2 days in advance and refrigerated, or frozen for up to 3 months. The assembled, unbaked pie can also be frozen for up to 1 month. Bake from frozen, adding an additional 10-15 minutes to the baking time.
- For a café-style crust, ensure your butter and water are very cold when making the dough.
Nutrition
- Serving Size: 1 slice
- Calories: 450
- Sugar: 35g
- Sodium: 200mg
- Fat: 25g
- Saturated Fat: 15g
- Unsaturated Fat: 10g
- Trans Fat: 0g
- Carbohydrates: 55g
- Fiber: 4g
- Protein: 5g
- Cholesterol: 60mg