

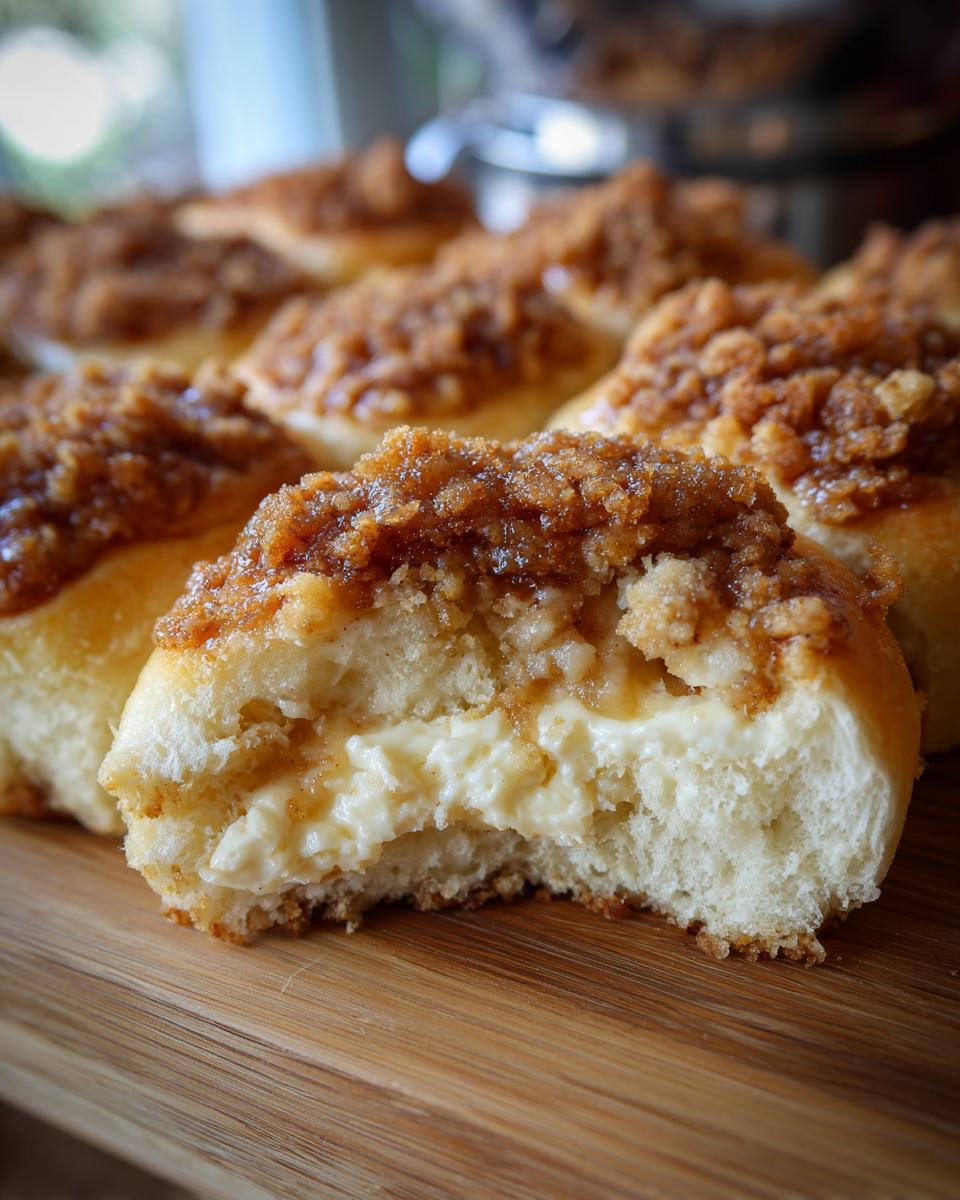
Oh, when that first chill hits the air and the leaves start to turn those gorgeous shades of red and gold, my absolute favorite thing to bake is something that just screams cozy comfort. And let me tell you, these Apple crumble cheesecake buns are IT! Imagine sinking your teeth into the softest, most pillowy brioche bun you’ve ever had, but then you hit this luscious, creamy cheesecake filling, followed by chunks of tender, spiced apples, all topped off with a perfectly buttery, crunchy crumble. It’s like a dream, right? I’m Avery Collins, and here at Devour Dish, my whole mission is to help you create those moments of pure joy in the kitchen – the kind that come from simple, delicious, and totally trustworthy homemade food. We test everything until it’s just perfect, so you can feel super confident making these for brunch or dessert!

- Why You'll Love These Apple Crumble Cheesecake Buns
- Gather Your Ingredients for Apple Crumble Cheesecake Buns
- Crafting Your Perfect Apple Crumble Cheesecake Buns
- Tips for Perfectly Baked Apple Crumble Cheesecake Buns
- Make-Ahead and Freezing Your Apple Cheesecake Buns
- Frequently Asked Questions About Apple Crumble Buns
- Serving Suggestions for Cozy Autumn Desserts
- Nutritional Information Estimate
Why You’ll Love These Apple Crumble Cheesecake Buns
Seriously, what’s not to adore about these buns? If you’re looking for a recipe that’s:
- Incredibly easy to whip up, even if you’re not a seasoned baker!
- Packed with all the cozy flavors of fall – sweet apples, creamy cheesecake, and a buttery crumble.
- Super versatile – perfect for a fancy brunch or a delightful afternoon treat.
- That amazing bakery-style texture that just melts in your mouth.
These apple crumble buns are guaranteed to become a new favorite. Trust me!
Gather Your Ingredients for Apple Crumble Cheesecake Buns
Alright, let’s get our goodies together! To make these delightful apple crumble cheesecake buns, you’ll need a few things. It might seem like a list, but I promise it’s worth it!
For the Dough:
- 1 cup warm milk (you know, that cozy 105-115°F sweet spot)
- 2 ¼ teaspoons active dry yeast
- ½ cup granulated sugar
- 1 teaspoon salt
- 2 large eggs, at room temperature is best!
- ½ cup unsalted butter, softened – like, really soft, not melted!
- 4 ½ cups all-purpose flour, plus a little extra for dusting
For the Apple Filling:
- 2 cups diced peeled apples – I really love Honeycrisp or Fuji for this, they’re just perfect
- ¼ cup granulated sugar
- 1 teaspoon ground cinnamon
- ½ teaspoon ground nutmeg
- 1 tablespoon lemon juice
For the Cheesecake Filling:
- 8 ounces cream cheese, softened (this is key for smoothness!)
- ¼ cup granulated sugar
- 1 large egg
- 1 teaspoon vanilla extract
For the Crumble Topping:
- ½ cup all-purpose flour
- ¼ cup packed light brown sugar
- ¼ cup unsalted butter, cold and cut into small cubes
For the Glaze (if you’re feeling fancy!):
- 1 cup powdered sugar
- 2-3 tablespoons milk
- ½ teaspoon vanilla extract
Crafting Your Perfect Apple Crumble Cheesecake Buns
Okay, now for the fun part – bringing all these amazing components together! It’s like a little baking adventure, but trust me, the result is SO worth it. These apple-crisp bars are amazing, but these buns? They’re a whole other level of cozy deliciousness!
Making the Brioche Dough Base
First things first, let’s get that dough rising! Grab a big bowl, pour in your warm milk, and sprinkle the yeast over the top. Give it a gentle stir and let it sit for about 5 to 10 minutes. You want to see it get all foamy and bubbly – that’s how you know your yeast is happy and ready to work its magic! Then, stir in the sugar, salt, those room-temp eggs, and the super-softened butter. Gradually add in the flour, mixing until you have a soft dough. It might feel a little sticky, but that’s okay! Turn it out onto a lightly floured surface and knead it for about 8 to 10 minutes until it’s smooth and stretchy. Pop it into a greased bowl, cover it up with a clean towel, and let it rise in a warm spot for about 1 to 1.5 hours. You’re looking for it to double in size – this is the secret to those light and fluffy brioche cheesecake buns!
Preparing the Sweet Apple Filling
While your dough is doing its thing and getting all plump, let’s whip up that delicious apple filling. Toss your diced, peeled apples into a saucepan with the sugar, cinnamon, nutmeg, and that little squeeze of lemon juice. Cook it over medium heat for about 5 to 7 minutes. You don’t want the apples to get mushy, just tender enough to be glorious. Make sure to let it cool completely before it meets the dough!
Check out my homemade applesauce recipe for more apple-cooked goodness!
Whipping Up the Creamy Cheesecake Filling
Now for the creamy goodness! In a medium bowl, beat your softened cream cheese with the sugar until it’s perfectly smooth and lump-free – seriously, no lumps allowed here! Then, beat in the egg and vanilla until everything is just nicely combined. Easy peasy, right? This smooth mixture is going to be such a delightful surprise inside your buns.
Speaking of cheesecake, you HAVE to try these pumpkin cheesecake truffles sometime – they are divine!
Assembling Your Apple Crumble Buns
Once your dough has had its glorious rise, gently punch it down. Divide it into 12 equal pieces. Take each piece and flatten it into a little disc. Now, here comes the fun assembly! Spoon a bit of that creamy cheesecake filling onto the center of half of your dough discs, then top that with a spoonful of your cooled apple filling. Grab another dough disc and place it right on top, then pinch the edges really well to seal everything up tight. My grandma always said a good seal prevents any filling escapees! Alternatively, you can roll out the dough into a large rectangle, spread both fillings evenly (leaving a little border), then cut it into squares. Place your beautiful apple crumble buns on a baking sheet lined with parchment paper, giving them a little space to grow.

Creating the Buttery Crumble Topping
For that irresistible topping, grab a small bowl and mix together the flour and light brown sugar. Then, cut in the cold, cubed butter. You can use a pastry blender or just your fingertips! Keep working it until you get nice, coarse crumbs. This is what gives our buns that satisfying crunchy contrast!
The Second Rise and Baking Your Buns
Once all your buns are assembled and looking good, cover them up again with that clean towel and let them have another little rest for about 30 to 45 minutes. This second rise is super important for that super-soft, bakery style buns texture. While they’re puffing up, go ahead and preheat your oven to 375°F (190°C). Once they’ve had their second nap, sprinkle that yummy crumble topping generously over each bun. Now, into the preheated oven they go for about 18 to 22 minutes, or until they’re a beautiful golden brown and smell absolutely irresistible.

Optional Glaze for Extra Sweetness
If you want to take these buns to the next level, a simple glaze is the way to go! Just whisk together the powdered sugar, a splash of milk (start with 2 tablespoons and add more if needed), and the vanilla extract until it’s smooth and pourable. Once the buns have cooled a bit, drizzle this glorious glaze over the top. So pretty!
Tips for Perfectly Baked Apple Crumble Cheesecake Buns
Alright, let’s make sure these beauties turn out absolutely perfect every single time! I’ve learned a few tricks along the way that really make a difference. First off, always make sure your butter and cream cheese are truly softened – not melted, but soft enough to easily leave an indentation with your finger. This is the secret to super smooth fillings and a dough that’s a dream to work with. When you’re kneading the dough, don’t be tempted to add too much extra flour; a slightly sticky dough will give you the lightest, fluffiest buns. And for knowing when they’re done? Look for that gorgeous golden brown color all over, and give one a gentle tap – it should sound lightly hollow. If you’ve got blueberry scones in your life, you know that golden touch means they’re ready to rock!
Make-Ahead and Freezing Your Apple Cheesecake Buns
One of my favorite things about these apple cheesecake buns is how perfectly they fit into a busy schedule. You can totally get a head start! If you want to assemble them the day before, just follow all the steps for assembly, then cover the unbaked buns tightly with plastic wrap and pop them in the fridge. Let them sit out on the counter for about 30 minutes before you plan to bake them – this just lets them warm up a little so they rise nicely. They’re seriously the best for effortless make ahead brunch bakes!
And guess what? You can totally freeze the baked and cooled buns too! Just make sure they’re completely cool, then wrap them well. To reheat, pop them in a 300°F oven for about 5 to 10 minutes. It’s like magic – they’ll taste almost as good as fresh!
Frequently Asked Questions About Apple Crumble Buns
Got questions about these delightful apple crumble buns? I’ve got answers! It’s totally normal to wonder about a few things when trying out a new recipe, especially one as special as these apple cream cheese buns.
Can I use different types of apples?
Absolutely! While Honeycrisp and Fuji are my go-to for their perfect balance of sweet and tart, you can definitely use others. Just aim for apples that hold their shape well when cooked, like Gala or Braeburn. Avoid super soft apples like Red Delicious, as they can turn a bit mushy. Granny Smith works too if you like a tangier filling! For more apple inspiration, check out my apple samoas recipe – they’re a fun twist on a classic.
Can I make the dough ahead of time?
Oh yes! This is a lifesaver for busy mornings. After you first knead the dough, you can pop the greased, covered bowl into the refrigerator overnight. It will rise slowly in the fridge. Just let it sit at room temperature for about 30 minutes before you punch it down and start assembling the buns. It’s a wonderful way to prep for make ahead brunch bakes!
What if my dough doesn’t rise?
Don’t panic! Usually, this means the yeast wasn’t happy. Check that your milk was the right temperature – not too hot, not too cold. Also, make sure your yeast wasn’t expired. If it didn’t look foamy after the initial 5-10 minutes, you might need to start over with fresh yeast. Sometimes, a drafty kitchen can slow things down, so pop it in a slightly warmer spot, maybe near a turned-off oven with the light on!
How should I store leftovers?
These yeast buns dessert wonders are best stored at room temperature in an airtight container for up to 2 days. If you live somewhere super warm or humid, popping them in the fridge might extend their life a little longer, but be aware the buns might firm up slightly. When you’re ready to enjoy them again, a quick warm-up in the oven or microwave usually does the trick!
Serving Suggestions for Cozy Autumn Desserts
These apple crumble cheesecake buns are just begging to be enjoyed with something warm and comforting! They are absolutely divine with a steaming mug of coffee or a fragrant cup of spiced tea. Imagine this: you’re curled up on the couch, a good book in hand, and one of these incredible buns beside you – pure bliss! They also make the most wonderful addition to any fall gathering. Pair them with other cozy autumn desserts like a slice of pumpkin pie bars or a simple scoop of vanilla ice cream. They’re a little bit of heaven in every single bite!
Nutritional Information Estimate
Just a heads-up, the nutritional info for these yummy buns is an estimate, you know, since everyone’s ingredients might be a *tiny* bit different! But as a general idea, one delicious apple crumble cheesecake bun typically packs around 350 calories. You’re looking at about 18g of fat, 45g of carbs with 25g of that being sugar, and roughly 5g of protein. It’s a pretty satisfying treat!
PrintApple Crumble Cheesecake Buns

Soft, bakery-style buns filled with a creamy cheesecake mixture and sweet apple filling, topped with a buttery crumble. Perfect for brunch or dessert.
- Prep Time: 45 min
- Cook Time: 25 min
- Total Time: 1 hr 10 min
- Yield: 12 buns
- Category: Dessert
- Method: Baking
- Cuisine: American
- Diet: Vegetarian
Ingredients
- For the Dough: 1 cup warm milk (105-115°F), 2 ¼ teaspoons active dry yeast, ½ cup granulated sugar, 1 teaspoon salt, 2 large eggs, ½ cup unsalted butter, softened, 4 ½ cups all-purpose flour, plus more for dusting
- For the Apple Filling: 2 cups diced peeled apples (Honeycrisp or Fuji recommended), ¼ cup granulated sugar, 1 teaspoon ground cinnamon, ½ teaspoon ground nutmeg, 1 tablespoon lemon juice
- For the Cheesecake Filling: 8 ounces cream cheese, softened, ¼ cup granulated sugar, 1 large egg, 1 teaspoon vanilla extract
- For the Crumble Topping: ½ cup all-purpose flour, ¼ cup packed light brown sugar, ¼ cup unsalted butter, cold and cubed
- For the Glaze (Optional): 1 cup powdered sugar, 2-3 tablespoons milk, ½ teaspoon vanilla extract
Instructions
- Make the Dough: In a large bowl, combine warm milk and yeast. Let stand for 5-10 minutes until foamy. Stir in sugar, salt, eggs, and softened butter. Gradually add flour, mixing until a soft dough forms. Knead on a floured surface for 8-10 minutes until smooth and elastic. Place in a greased bowl, cover, and let rise in a warm place for 1-1.5 hours, or until doubled in size.
- Prepare the Apple Filling: While the dough rises, combine diced apples, sugar, cinnamon, nutmeg, and lemon juice in a saucepan. Cook over medium heat for 5-7 minutes, until apples are slightly softened. Let cool completely.
- Prepare the Cheesecake Filling: In a medium bowl, beat cream cheese and sugar until smooth. Beat in egg and vanilla extract until combined.
- Assemble the Buns: Punch down the risen dough. Divide into 12 equal portions. Flatten each portion into a disc. Place a spoonful of cheesecake filling in the center of half the discs, then top with a spoonful of apple filling. Cover with the remaining dough discs, pinching the edges to seal. Alternatively, roll out dough, spread fillings, and cut into squares. Place buns on a parchment-lined baking sheet.
- Prepare the Crumble Topping: In a small bowl, combine flour and brown sugar. Cut in cold butter with a pastry blender or your fingers until coarse crumbs form.
- Second Rise: Cover the assembled buns and let them rise for another 30-45 minutes. Preheat oven to 375°F (190°C).
- Bake: Sprinkle the crumble topping over the buns. Bake for 18-22 minutes, or until golden brown.
- Glaze (Optional): Whisk together powdered sugar, milk, and vanilla extract until smooth. Drizzle over cooled buns.
Notes
- For make-ahead: Assemble the buns, cover, and refrigerate overnight. Let them sit at room temperature for 30 minutes before baking.
- You can freeze baked and cooled buns. Reheat in a 300°F oven for 5-10 minutes.
- Ensure your cream cheese and butter are truly softened for the smoothest fillings.
Nutrition
- Serving Size: 1 bun
- Calories: 350
- Sugar: 25g
- Sodium: 200mg
- Fat: 18g
- Saturated Fat: 10g
- Unsaturated Fat: 8g
- Trans Fat: 0g
- Carbohydrates: 45g
- Fiber: 2g
- Protein: 5g
- Cholesterol: 60mg